2013 CHEVROLET SILVERADO oil
[x] Cancel search: oilPage 218 of 542

Black plate (18,1)Chevrolet Silverado Owner Manual - 2013 - crc2 - 8/13/12
7-18 Infotainment System
If the surface of a CD is soiled,
clean it with a soft, lint‐free cloth or
dampen a clean, soft cloth in a mild,
neutral detergent solution mixed
with water. Make sure the wiping
process starts from the center to
the edge.
Inserting a CD (Single CD
Player)
Insert a CD partway into the slot,
label side up. The player pulls it in
and the CD should begin playing.
Inserting a CD(s) (Six-Disc CD
Player)
LOAD^:Press to load CDs into
the CD player. This CD player holds
up to six CDs.
To insert one CD:
1. Press and release the LOAD button.
2. Wait for the message to insert the disc. 3. Load a CD. Insert the CD
partway into the slot, label side
up. The player pulls the CD in.
To insert multiple CDs:
1. Press and hold the LOAD button for two seconds. A beep sounds
and Load All Discs displays.
2. Wait for the message on when to insert the discs. The CD player
takes up to six CDs.
3. Press the LOAD button again to cancel loading more CDs.
Ejecting a CD (Single CD
Player)
ZEJECT: Press and release to
eject the disc. Remove the CD
when Remove Disc displays. If the
disc is not removed, after several
seconds the disc is automatically
pulled back into the player.
Ejecting a CD (Six-Disc CD
Player)
ZEJECT: Press and release to
eject the disc that is currently
playing. Remove the CD when
Remove Disc displays. If the disc is
not removed, after several seconds
the disc is automatically pulled back
into the player.
To eject all CDs, press and hold the
ZEJECT button for two seconds.
Playing a CD
If the ignition or radio is turned off
with a CD in the player, it stays in
the player. When the ignition or
radio is turned on, the CD starts
playing where it stopped, if it was
the last selected audio source. The
CD is controlled by the buttons on
the radio faceplate or by the RSA
unit. See Rear Seat Audio (RSA)
System on page 7‑48 for more
information.
Page 224 of 542
Black plate (24,1)Chevrolet Silverado Owner Manual - 2013 - crc2 - 8/13/12
7-24 Infotainment System
load one CD at a time, and keep
the CD player and the loading slot
free of foreign materials, liquids,
and debris.
If an error displays, see“CD
Messages” later in this section.
Care of CDs and DVDs
If playing a CD-R or CD-RW, the
sound quality can be reduced due to
CD-R or CD-RW quality, the method
of recording, the quality of the music
that has been recorded, and the
way the CD-R or CD-RW has been
handled. Handle them carefully.
Store CD-Rs or CD-RWs in their
original cases or other protective
cases and away from direct sunlight
and dust. The CD or DVD player
scans the bottom surface of the
disc. If the surface of a disc is
damaged, such as cracked, broken,
or scratched, the disc does not play
properly or not at all. Do not touch
the bottom side of a disc while
handling it; this could damage the surface. Pick up discs by grasping
the outer edges or the edge of the
hole and the outer edge.
If the surface of a disc is soiled,
clean it with a soft, lint‐free cloth or
dampen a clean, soft cloth in a mild,
neutral detergent solution mixed
with water. Make sure the wiping
process starts from the center to
the edge.
Audio Output
Only one audio source can be heard
through the speakers at one time.
An audio source is defined as DVD
slot, CD slot, XM, FM‐AM, front
auxiliary jack, USB port, or rear
auxiliary jack.
Press the
Obutton to turn the radio
on. The radio can be heard through
all of the vehicle speakers.
Front seat passengers can listen to
the radio (AM, FM, or XM if
equipped) by pressing the BAND
button or the DVD/CD AUX button to select CD slot, DVD slot, front
auxiliary input, USB port, or rear
auxiliary input (if available).
If a playback device is plugged into
the radio’s front auxiliary input jack,
USB port, or the rear auxiliary jack,
the front seat passengers are able
to listen to playback from this
source through the vehicle
speakers. See
“Using the Auxiliary
Input Jack” inAuxiliary Devices on
page 7‑34, or “Audio/Video (A/V)
Jacks” underRear Seat
Entertainment (RSE) System on
page 7‑38 for more information.
In some vehicles, depending on
audio options, the rear speakers
can be muted when the RSA power
is turned on. See Rear Seat Audio
(RSA) System on page 7‑48 for
more information.
Page 295 of 542
Black plate (27,1)Chevrolet Silverado Owner Manual - 2013 - crc2 - 8/13/12
Driving and Operating 9-27
Starting Procedure
1. With your foot off the acceleratorpedal, turn the ignition key to
START. When the engine starts,
let go of the key. The idle speed
will go down as your engine gets
warm. Do not race the engine
immediately after starting it.
Operate the engine and
transmission gently to allow the
oil to warm up and lubricate all
moving parts.
The vehicle has a
Computer-Controlled Cranking
System. This feature assists in
starting the engine and protects
components. If the ignition key is
turned to the START position,
and then released when the
engine begins cranking, the
engine will continue cranking for
a few seconds or until the
vehicle starts. If the engine does
not start and the key is held in
START for many seconds,
cranking will be stopped after
15 seconds to prevent cranking
motor damage. To prevent gear damage, this system also
prevents cranking if the engine
is already running. Engine
cranking can be stopped by
turning the ignition switch to the
ACC/ACCESSORY or LOCK/
OFF position.
When the Low Fuel warning
lamp is on and the FUEL LEVEL
LOW message is displayed in
the Driver Information Center
(DIC), the Computer-Controlled
Cranking System is disabled to
prevent possible vehicle
component damage. When this
happens, hold the ignition switch
in the START position to
continue engine cranking.
Notice: Cranking the engine for
long periods of time, by returning
the key to the START position
immediately after cranking has
ended, can overheat and damage
the cranking motor, and drain the
battery. Wait at least 15 seconds
between each try, to let the
cranking motor cool down. 2. If the engine does not start after
5-10 seconds, especially in very
cold weather (below −18°C or
0°F), it could be flooded with too
much gasoline. Try pushing the
accelerator pedal all the way to
the floor and holding it there as
you hold the key in START for
up to 15 seconds. Wait at least
15 seconds between each try, to
allow the cranking motor to cool
down. When the engine starts,
let go of the key and accelerator.
If the vehicle starts briefly but
then stops again, do the same
thing. This clears the extra
gasoline from the engine. Do not
race the engine immediately
after starting it. Operate the
engine and transmission gently
until the oil warms up and
lubricates all moving parts.
Page 338 of 542
Black plate (70,1)Chevrolet Silverado Owner Manual - 2013 - crc2 - 8/13/12
9-70 Driving and Operating
label. If this fuel is not available in
states adopting California Emissions
Standards, the vehicle will operate
satisfactorily on fuels meeting
federal specifications, but emission
control system performance might
be affected. The malfunction
indicator lamp could turn on and the
vehicle might fail a smog‐check test.
SeeMalfunction Indicator Lamp on
page 5‑21. If this occurs, return to
your authorized dealer for diagnosis.
If it is determined that the condition
is caused by the type of fuel used,
repairs might not be covered by the
vehicle warranty.
Fuels in Foreign
Countries
Never use leaded gasoline or any
other fuel not recommended in the
previous text on fuel. Costly repairs
caused by use of improper fuel
would not be covered by the vehicle
warranty. To check the fuel availability, ask an
auto club, or contact a major oil
company that does business in the
country where you will be driving.
Fuel Additives
To provide cleaner air, all gasolines
in the United States are now
required to contain additives that
help prevent engine and fuel system
deposits from forming, allowing the
emission control system to work
properly. In most cases, nothing
should have to be added to the fuel.
However, some gasolines contain
only the minimum amount of
additive required to meet U.S.
Environmental Protection Agency
regulations. To help keep fuel
injectors and intake valves clean
and avoid problems due to dirty
injectors or valves, look for gasoline
that is advertised as TOP TIER
Detergent Gasoline. Look for the
TOP TIER label on the fuel pump to
ensure gasoline meets enhanced
detergency standards developed by
the auto companies. A list ofmarketers providing TOP TIER
Detergent Gasoline can be found at
www.toptiergas.com.
For customers who do not use TOP
TIER Detergent Gasoline regularly,
one bottle of GM Fuel System
Treatment PLUS, added to the fuel
tank at every engine oil change, can
help clean deposits from fuel
injectors and intake valves. GM Fuel
System Treatment PLUS is the only
gasoline additive recommended by
General Motors. It is available at
your dealer.
Gasolines containing oxygenates,
such as ethers and ethanol, and
reformulated gasolines might be
available in your area. We
recommend that you use these
gasolines, if they comply with the
specifications described earlier.
However, E85 (85% ethanol) and
other fuels containing more than
15% ethanol must not be used in
vehicles that were not designed for
those fuels.
Page 344 of 542
Black plate (76,1)Chevrolet Silverado Owner Manual - 2013 - crc2 - 8/13/12
9-76 Driving and Operating
Passing
More passing distance is needed
when towing a trailer. The
combination will not accelerate as
quickly and is longer so it is
necessary to go much farther
beyond the passed vehicle before
returning to the lane.
Backing Up
Hold the bottom of the steering
wheel with one hand. To move the
trailer to the left, move that hand to
the left. To move the trailer to the
right, move your hand to the right.
Always back up slowly and,
if possible, have someone
guide you.
Making Turns
Notice:Making very sharp turns
while trailering could cause the
trailer to come in contact with the
vehicle. The vehicle could be
damaged. Avoid making very
sharp turns while trailering. When turning with a trailer, make
wider turns than normal. Do this so
the trailer will not strike soft
shoulders, curbs, road signs, trees,
or other objects. Avoid jerky or
sudden maneuvers. Signal well in
advance.
If the trailer turn signal bulbs burn
out, the arrows on the instrument
cluster will still flash for turns. It is
important to check occasionally to
be sure the trailer bulbs are still
working.
Driving on Grades
Reduce speed and shift to a lower
gear
before starting down a long or
steep downgrade. If the
transmission is not shifted down, the
brakes might get hot and no longer
work well.
Vehicles can tow in D (Drive). Shift
the transmission to a lower gear if
the transmission shifts too often
under heavy loads and/or hilly
conditions. The Tow/Haul Mode may be used if
the transmission shifts too often.
See
Tow/Haul Mode on page 9‑38.
When towing at high altitude on
steep uphill grades, consider the
following: Engine coolant will boil at
a lower temperature than at normal
altitudes. If the engine is turned off
immediately after towing at high
altitude on steep uphill grades, the
vehicle may show signs similar to
engine overheating. To avoid this,
let the engine run while parked,
preferably on level ground, with the
automatic transmission in P (Park)
for a few minutes before turning the
engine off. If the overheat warning
comes on, see Engine Overheating
on page 10‑21.
Parking on Hills
{WARNING
Parking the vehicle on a hill with
the trailer attached can be
dangerous. If something goes
(Continued)
Page 345 of 542
Black plate (77,1)Chevrolet Silverado Owner Manual - 2013 - crc2 - 8/13/12
Driving and Operating 9-77
WARNING (Continued)
wrong, the rig could start to move.
People can be injured, and both
the vehicle and the trailer can be
damaged. When possible, always
park the rig on a flat surface.
If parking the rig on a hill:
1. Press the brake pedal, but do not shift into P (Park) yet. Turn
the wheels into the curb if facing
downhill or into traffic if facing
uphill.
2. Have someone place chocks under the trailer wheels.
3. When the wheel chocks are in place, release the regular brakes
until the chocks absorb the load.
4. Reapply the brake pedal. Then apply the parking brake and shift
into P (Park).
5. Release the brake pedal.
Leaving After Parking on a Hill
1. Apply and hold the brake pedal.
2. Start the engine.
3. Shift into a gear.
4. Release the parking brake.
5. Let up on the brake pedal.
6. Drive slowly until the trailer is clear of the chocks.
7. Stop and have someone pick up and store the chocks.
Maintenance when Trailer
Towing
The vehicle needs service more
often when pulling a trailer. See
Maintenance Schedule on
page 11‑3. Things that are
especially important in trailer
operation are automatic
transmission fluid, engine oil, axle
lubricant, belts, cooling system, and
brake system. It is a good idea to
inspect these before and during
the trip. Check periodically to see that all
hitch nuts and bolts are tight.
Trailer Towing
If the vehicle has a diesel engine,
see the Duramax diesel supplement
for more information.
If the vehicle is a hybrid, see the
hybrid supplement for more
information.
If the vehicle is bi-fuel, see the
bi-fuel supplement for more
information.
Do not tow a trailer during break-in.
See
New Vehicle Break-In on
page 9‑23 for more information.
{WARNING
The driver can lose control when
pulling a trailer if the correct
equipment is not used or the
vehicle is not driven properly. For
example, if the trailer is too
heavy, the brakes may not work
(Continued)
Page 377 of 542
Black plate (1,1)Chevrolet Silverado Owner Manual - 2013 - crc2 - 8/13/12
Vehicle Care 10-1
Vehicle Care
General Information
General Information . . . . . . . . . . 10-2
California Proposition65 Warning . . . . . . . . . . . . . . . . . 10-2
California Perchlorate Materials Requirements . . . . 10-3
Accessories and Modifications . . . . . . . . . . . . . . . 10-3
Vehicle Checks
Doing Your OwnService Work . . . . . . . . . . . . . . . 10-3
Hood . . . . . . . . . . . . . . . . . . . . . . . . 10-4
Engine Compartment Overview . . . . . . . . . . . . . . . . . . . 10-5
Engine Oil . . . . . . . . . . . . . . . . . . . 10-6
Engine Oil Life System . . . . . . 10-9
Automatic Transmission Fluid (4-Speed
Transmission) . . . . . . . . . . . . . 10-10
Automatic Transmission Fluid (6-Speed
Transmission) . . . . . . . . . . . . . 10-12
Manual Transmission Fluid . . . . . . . . . . . . . . . . . . . . . . 10-15
Hydraulic Clutch . . . . . . . . . . . . 10-15 Engine Air Cleaner/Filter . . . . 10-16
Cooling System . . . . . . . . . . . . 10-17
Engine Coolant . . . . . . . . . . . . . 10-18
Engine Overheating . . . . . . . . 10-21
Overheated Engine
Protection
Operating Mode . . . . . . . . . . . 10-23
Engine Fan . . . . . . . . . . . . . . . . . 10-23
Power Steering Fluid . . . . . . . 10-24
Washer Fluid . . . . . . . . . . . . . . . 10-24
Brakes . . . . . . . . . . . . . . . . . . . . . 10-25
Brake Fluid . . . . . . . . . . . . . . . . . 10-26
Battery . . . . . . . . . . . . . . . . . . . . . 10-28
Four-Wheel Drive . . . . . . . . . . . 10-29
Front Axle . . . . . . . . . . . . . . . . . . 10-30
Rear Axle . . . . . . . . . . . . . . . . . . 10-31
Noise Control System . . . . . . 10-32
Starter Switch Check . . . . . . . 10-33
Automatic Transmission Shift Lock Control Function
Check . . . . . . . . . . . . . . . . . . . . . 10-33
Ignition Transmission Lock Check . . . . . . . . . . . . . . . . . . . . . 10-34
Park Brake and P (Park) Mechanism Check . . . . . . . . 10-34
Wiper Blade Replacement . . . . . . . . . . . . . . 10-35
Glass Replacement . . . . . . . . 10-35
Headlamp Aiming
Headlamp Aiming . . . . . . . . . . 10-35
Bulb Replacement
Bulb Replacement . . . . . . . . . . 10-36
Halogen Bulbs . . . . . . . . . . . . . . 10-36
Headlamps, Front Turn Signal, Sidemarker, and
Parking Lamps . . . . . . . . . . . . 10-36
Pick-Up Box Identification and Fender Marker
Lamps . . . . . . . . . . . . . . . . . . . . 10-37
Taillamps (Chassis Cab Models) . . . . . . . . . . . . . . . . . . . 10-37
Taillamps, Turn Signal, Stoplamps, and Back-Up
Lamps . . . . . . . . . . . . . . . . . . . . 10-37
Center High-Mounted
Stoplamp (CHMSL) and
Cargo Lamp . . . . . . . . . . . . . . 10-38
License Plate Lamp . . . . . . . . 10-39
Replacement Bulbs . . . . . . . . . 10-39
Page 382 of 542
Black plate (6,1)Chevrolet Silverado Owner Manual - 2013 - crc2 - 8/13/12
10-6 Vehicle Care
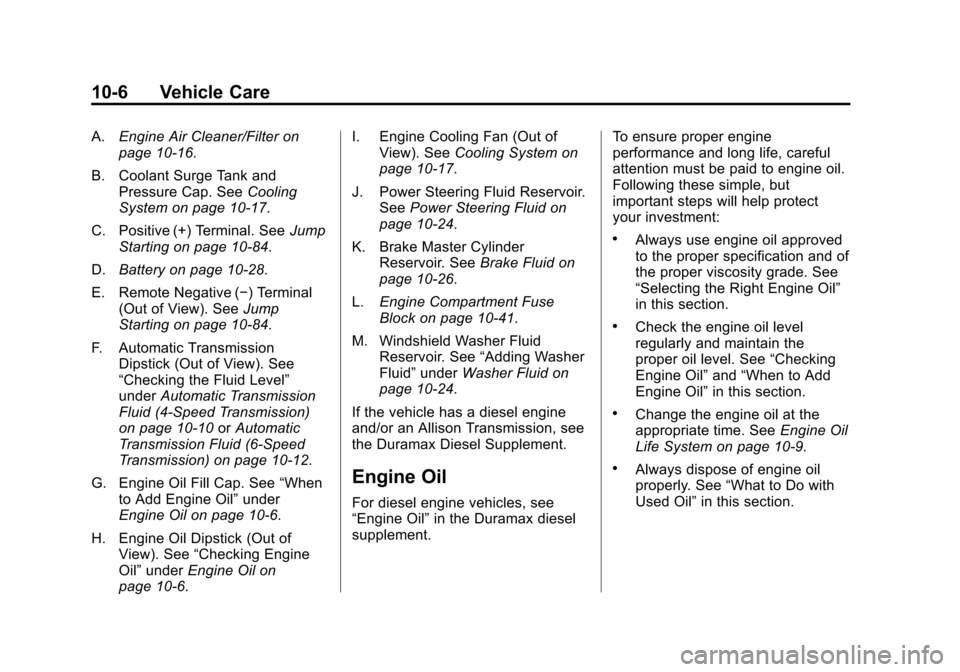
A.Engine Air Cleaner/Filter on
page 10‑16.
B. Coolant Surge Tank and Pressure Cap. See Cooling
System on page 10‑17.
C. Positive (+) Terminal. See Jump
Starting on page 10‑84.
D. Battery on page 10‑28.
E. Remote Negative (−) Terminal (Out of View). See Jump
Starting on page 10‑84.
F. Automatic Transmission Dipstick (Out of View). See
“Checking the Fluid Level”
under Automatic Transmission
Fluid (4-Speed Transmission)
on page 10‑10 orAutomatic
Transmission Fluid (6-Speed
Transmission) on page 10‑12.
G. Engine Oil Fill Cap. See “When
to Add Engine Oil” under
Engine Oil on page 10‑6.
H. Engine Oil Dipstick (Out of View). See “Checking Engine
Oil” under Engine Oil on
page 10‑6. I. Engine Cooling Fan (Out of
View). See Cooling System on
page 10‑17.
J. Power Steering Fluid Reservoir. See Power Steering Fluid on
page 10‑24.
K. Brake Master Cylinder Reservoir. See Brake Fluid on
page 10‑26.
L. Engine Compartment Fuse
Block on page 10‑41.
M. Windshield Washer Fluid Reservoir. See “Adding Washer
Fluid” under Washer Fluid on
page 10‑24.
If the vehicle has a diesel engine
and/or an Allison Transmission, see
the Duramax Diesel Supplement.
Engine Oil
For diesel engine vehicles, see
“Engine Oil” in the Duramax diesel
supplement. To ensure proper engine
performance and long life, careful
attention must be paid to engine oil.
Following these simple, but
important steps will help protect
your investment:
.Always use engine oil approved
to the proper specification and of
the proper viscosity grade. See
“Selecting the Right Engine Oil”
in this section.
.Check the engine oil level
regularly and maintain the
proper oil level. See
“Checking
Engine Oil” and“When to Add
Engine Oil” in this section.
.Change the engine oil at the
appropriate time. See Engine Oil
Life System on page 10‑9.
.Always dispose of engine oil
properly. See “What to Do with
Used Oil” in this section.