2013 CHEVROLET SILVERADO warning
[x] Cancel search: warningPage 409 of 542
Black plate (33,1)Chevrolet Silverado Owner Manual - 2013 - crc2 - 8/13/12
Vehicle Care 10-33
Air Intake:
.Removal of the air cleaner
silencer.
.Modification of the air cleaner.
Exhaust:
.Removal of the muffler and/or
resonator.
.Removal of the exhaust pipes
and exhaust pipe clamps.
Starter Switch Check
{WARNING
When you are doing this
inspection, the vehicle could
move suddenly. If the vehicle
moves, you or others could be
injured.
1. Before starting this check, be sure there is enough room
around the vehicle. 2. Firmly apply both the parking
brake and the regular brake.
See Parking Brake on
page 9‑54.
Do not use the accelerator
pedal, and be ready to turn off
the engine immediately if it
starts.
3. For automatic transmission vehicles, try to start the engine
in each gear. The vehicle should
start only in P (Park) or
N (Neutral). If the vehicle starts
in any other position, contact
your dealer for service.
For manual transmission
vehicles, put the shift lever in
Neutral, push the clutch pedal
down halfway, and try to start
the engine. The vehicle should
start only when the clutch pedal
is pushed down all the way to
the floor. If the vehicle starts
when the clutch pedal is not
pushed all the way down,
contact your dealer for service.
Automatic Transmission
Shift Lock Control
Function Check
{WARNING
When you are doing this
inspection, the vehicle could
move suddenly. If the vehicle
moves, you or others could be
injured.
1. Before starting this check, be sure there is enough room
around the vehicle. It should be
parked on a level surface.
2. Firmly apply the parking brake. See Parking Brake on
page 9‑54.
Be ready to apply the regular
brake immediately if the vehicle
begins to move.
Page 410 of 542
Black plate (34,1)Chevrolet Silverado Owner Manual - 2013 - crc2 - 8/13/12
10-34 Vehicle Care
3. With the engine off, turn theignition on, but do not start the
engine. Without applying the
regular brake, try to move the
shift lever out of P (Park) with
normal effort. If the shift lever
moves out of P (Park), contact
your dealer for service.
Ignition Transmission
Lock Check
While parked, and with the parking
brake set, try to turn the ignition to
LOCK/OFF in each shift lever
position.
.For automatic transmission
vehicles, the ignition should turn
to LOCK/OFF only when the
shift lever is in P (Park).
.For manual transmission
vehicles, the ignition should turn
to LOCK/OFF only when you
press the key release button. On all vehicles, the ignition key
should come out only in LOCK/OFF.
Contact your dealer if service is
required.
Park Brake and P (Park)
Mechanism Check
{WARNING
When you are doing this check,
the vehicle could begin to move.
You or others could be injured
and property could be damaged.
Make sure there is room in front
of the vehicle in case it begins to
roll. Be ready to apply the regular
brake at once should the vehicle
begin to move.
Park on a fairly steep hill, with the
vehicle facing downhill. Keeping
your foot on the regular brake, set
the parking brake.
.To check the parking brake's
holding ability: With the engine
running and the transmission in
N (Neutral), slowly remove foot
pressure from the regular brake
pedal. Do this until the vehicle is
held by the parking brake only.
.To check the P (Park)
mechanism's holding ability:
With the engine running, shift to
P (Park). Then release the
parking brake followed by the
regular brake.
Contact your dealer if service is
required.
Page 412 of 542

Black plate (36,1)Chevrolet Silverado Owner Manual - 2013 - crc2 - 8/13/12
10-36 Vehicle Care
Bulb Replacement
For the proper type of replacement
bulbs, seeReplacement Bulbs on
page 10‑39.
For any bulb‐changing procedure
not listed in this section, contact
your dealer.
Halogen Bulbs
{WARNING
Halogen bulbs have pressurized
gas inside and can burst if you
drop or scratch the bulb. You or
others could be injured. Be sure
to read and follow the instructions
on the bulb package.
Headlamps, Front Turn
Signal, Sidemarker, and
Parking Lamps
A. Park/Turn Signal/
Sidemarker Lamp
B. Low‐Beam Headlamp
C. High‐Beam Headlamp
1. Open the hood. See Hood on
page 10‑4 2. If you are replacing the bulb on
the passenger side, remove the
Engine Air Cleaner cover. See
Engine Air Cleaner/Filter on
page 10‑16 for more information.
3. Reach in and access the bulb sockets from inside the engine
compartment.
4. Turn the bulb socket counterclockwise to remove it
from the headlamp assembly
and pull it straight out.
5. Unplug the electrical connector from the old bulb by releasing
the clips on the bulb socket.
6. Replace it with a new bulb.
7. Plug in the electrical connector.
8. Reinstall the new bulb socket into the headlamp assembly and
turn it clockwise to secure.
Page 423 of 542
Black plate (47,1)Chevrolet Silverado Owner Manual - 2013 - crc2 - 8/13/12
Vehicle Care 10-47
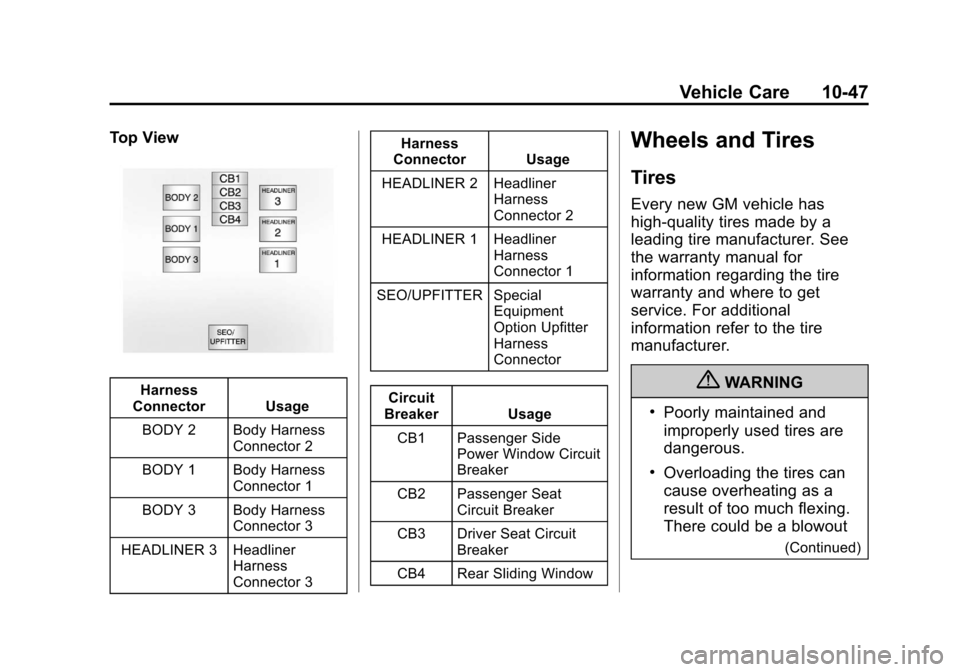
Top View
Harness
Connector Usage
BODY 2 Body Harness Connector 2
BODY 1 Body Harness Connector 1
BODY 3 Body Harness Connector 3
HEADLINER 3 Headliner Harness
Connector 3 Harness
Connector Usage
HEADLINER 2 Headliner Harness
Connector 2
HEADLINER 1 Headliner Harness
Connector 1
SEO/UPFITTER Special Equipment
Option Upfitter
Harness
Connector
Circuit
Breaker Usage
CB1 Passenger Side Power Window Circuit
Breaker
CB2 Passenger Seat Circuit Breaker
CB3 Driver Seat Circuit Breaker
CB4 Rear Sliding Window
Wheels and Tires
Tires
Every new GM vehicle has
high-quality tires made by a
leading tire manufacturer. See
the warranty manual for
information regarding the tire
warranty and where to get
service. For additional
information refer to the tire
manufacturer.
{WARNING
.Poorly maintained and
improperly used tires are
dangerous.
.Overloading the tires can
cause overheating as a
result of too much flexing.
There could be a blowout
(Continued)
Page 424 of 542

Black plate (48,1)Chevrolet Silverado Owner Manual - 2013 - crc2 - 8/13/12
10-48 Vehicle Care
WARNING (Continued)and a serious crash. See
Vehicle Load Limits on
page 9‑15.
.Underinflated tires pose
the same danger as
overloaded tires. The
resulting crash could
cause serious injury.
Check all tires frequently
to maintain the
recommended pressure.
Tire pressure should be
checked when the tires
are cold.
.Overinflated tires are more
likely to be cut, punctured,
or broken by a sudden
impact— such as when
hitting a pothole. Keep
tires at the recommended
pressure.
(Continued)
WARNING (Continued)
.Worn or old tires can
cause a crash. If the tread
is badly worn,
replace them.
.Replace any tires that
have been damaged by
impacts with potholes,
curbs, etc.
.Improperly repaired tires
can cause a crash. Only
the dealer or an
authorized tire service
center should repair,
replace, dismount, and
mount the tires.
.Do not spin the tires in
excess of 56 km/h
(35 mph) on slippery
surfaces such as snow,
mud, ice, etc. Excessive
spinning may cause the
tires to explode. See
Tire Pressure for
High-Speed Operation on
page 10‑58 for inflation pressure
adjustment for high speed
driving.
20‐Inch Tires
If the vehicle has 20‐inch P275/
55R20 size tires, they are
classified as touring tires and
are designed for on road use.
The low‐profile, wide tread
design is not recommended for
“off‐road” driving or commercial
uses such as snow plowing. See
Off-Road Driving on page 9‑5
and Adding a Snow Plow or
Similar Equipment on
page 9‑105 for additional
information.
Notice: Low‐profile tires are
more susceptible to damage
from road hazards or curb
impact than standard profile
tires. Tire and/or wheel
assembly damage can occur
Page 434 of 542
Black plate (58,1)Chevrolet Silverado Owner Manual - 2013 - crc2 - 8/13/12
10-58 Vehicle Care
Tire Pressure for
High-Speed Operation
{WARNING
Driving at high speeds, 160 km/h
(100 mph) or higher, puts an
additional strain on tires.
Sustained high-speed driving
causes excessive heat buildup
and can cause sudden tire failure.
You could have a crash and you
or others could be killed. Some
high-speed rated tires require
inflation pressure adjustment for
high-speed operation. When
speed limits and road conditions
are such that a vehicle can be
driven at high speeds, make sure
the tires are rated for high-speed
operation, in excellent condition,
and set to the correct cold tire
inflation pressure for the
vehicle load.Vehicles with P265/70R17 or P275/
55R20 size tires require inflation
pressure adjustment when driving
the vehicle at speeds of 160 km/h
(100 mph) or higher. Set the cold tire
inflation pressure to 20 kPa (3 psi)
above the recommended cold tire
pressure shown on the Tire and
Loading Information label.
Return the tires to the
recommended cold tire inflation
pressure when high-speed driving
has ended. See
Vehicle Load Limits
on page 9‑15 andTire Pressure on
page 10‑56.
Tire Pressure Monitor
System
The Tire Pressure Monitor System
(TPMS) uses radio and sensor
technology to check tire pressure
levels. The TPMS sensors monitor
the air pressure in your tires and
transmit tire pressure readings to a
receiver located in the vehicle. Each tire, including the spare (if
provided), should be checked
monthly when cold and inflated to
the inflation pressure recommended
by the vehicle manufacturer on the
vehicle placard or tire inflation
pressure label. (If your vehicle has
tires of a different size than the size
indicated on the vehicle placard or
tire inflation pressure label, you
should determine the proper tire
inflation pressure for those tires.)
As an added safety feature, your
vehicle has been equipped with a
tire pressure monitoring system
(TPMS) that illuminates a low tire
pressure telltale when one or more
of your tires is significantly
under-inflated.
Accordingly, when the low tire
pressure telltale illuminates, you
should stop and check your tires as
soon as possible, and inflate them
to the proper pressure. Driving on a
significantly under-inflated tire
causes the tire to overheat and can
lead to tire failure. Under-inflation
also reduces fuel efficiency and tire
Page 435 of 542
Black plate (59,1)Chevrolet Silverado Owner Manual - 2013 - crc2 - 8/13/12
Vehicle Care 10-59
tread life, and may affect the
vehicle's handling and stopping
ability.
Please note that the TPMS is not a
substitute for proper tire
maintenance, and it is the driver's
responsibility to maintain correct tire
pressure, even if under-inflation has
not reached the level to trigger
illumination of the TPMS low tire
pressure telltale.
Your vehicle has also been
equipped with a TPMS malfunction
indicator to indicate when the
system is not operating properly.
The TPMS malfunction indicator is
combined with the low tire pressure
telltale. When the system detects a
malfunction, the telltale will flash for
approximately one minute and then
remain continuously illuminated.
This sequence will continue upon
subsequent vehicle start-ups as
long as the malfunction exists.
When the malfunction indicator is
illuminated, the system may not be
able to detect or signal low tirepressure as intended. TPMS
malfunctions may occur for a variety
of reasons, including the installation
of replacement or alternate tires or
wheels on the vehicle that prevent
the TPMS from functioning properly.
Always check the TPMS malfunction
telltale after replacing one or more
tires or wheels on your vehicle to
ensure that the replacement or
alternate tires and wheels allow the
TPMS to continue to function
properly.
See
Tire Pressure Monitor
Operation on page 10‑59.
Federal Communications
Commission (FCC) Rules and
with Industry Canada
Standards
See Radio Frequency Statement on
page 13‑20 for information
regarding Part 15 of the Federal
Communications Commission (FCC)
Rules and with Industry Canada
Standards RSS-GEN/210/220/310.
Tire Pressure Monitor
Operation
This vehicle may have a Tire
Pressure Monitor System (TPMS).
The TPMS is designed to warn the
driver when a low tire pressure
condition exists. TPMS sensors are
mounted onto each tire and wheel
assembly, excluding the spare tire
and wheel assembly. The TPMS
sensors monitor the air pressure in
the tires and transmit the tire
pressure readings to a receiver
located in the vehicle.
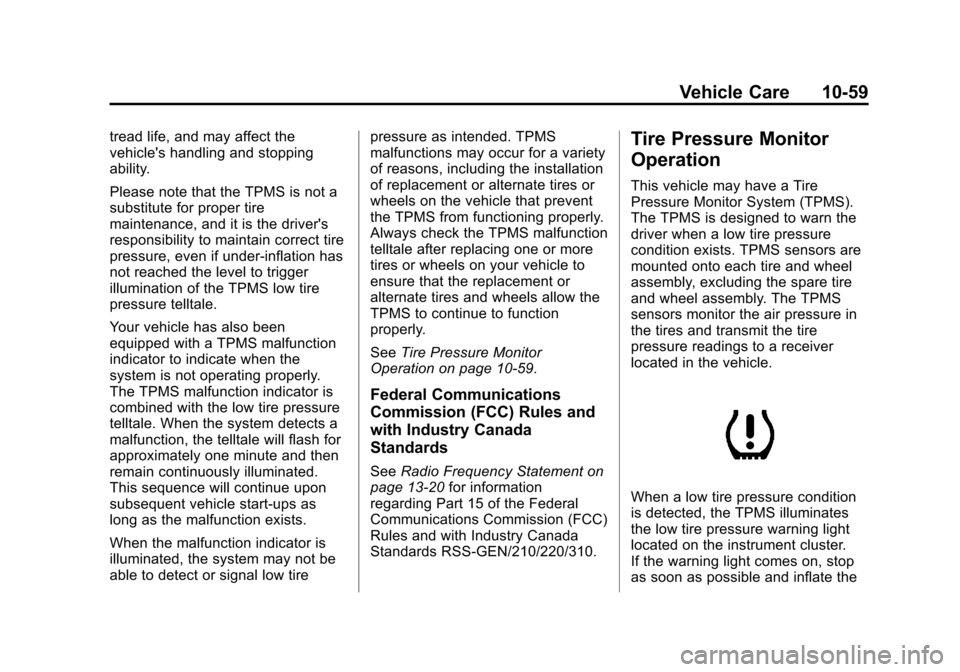
When a low tire pressure condition
is detected, the TPMS illuminates
the low tire pressure warning light
located on the instrument cluster.
If the warning light comes on, stop
as soon as possible and inflate the
Page 436 of 542
Black plate (60,1)Chevrolet Silverado Owner Manual - 2013 - crc2 - 8/13/12
10-60 Vehicle Care
tires to the recommended pressure
shown on the Tire and Loading
Information label. SeeVehicle Load
Limits on page 9‑15.
A message to check the pressure in
a specific tire displays in the Driver
Information Center (DIC). The low
tire pressure warning light and the
DIC warning message come on at
each ignition cycle until the tires are
inflated to the correct inflation
pressure. If the vehicle has DIC
buttons, tire pressure levels can be
viewed. For additional information
and details about the DIC operation
and displays, see Driver Information
Center (DIC) on page 5‑29 andTire
Messages on page 5‑44.
The low tire pressure warning light
may come on in cool weather when
the vehicle is first started, and then
turn off as the vehicle is driven. This
could be an early indicator that the
air pressure is getting low and
needs to be inflated to the proper
pressure. A Tire and Loading Information label
shows the size of the original
equipment tires and the correct
inflation pressure for the tires when
they are cold. See
Vehicle Load
Limits on page 9‑15, for an example
of the Tire and Loading Information
label and its location. Also see Tire
Pressure on page 10‑56.
The TPMS can warn about a low
tire pressure condition but it does
not replace normal tire
maintenance. See Tire Inspection
on page 10‑62, Tire Rotation on
page 10‑63 andTires on
page 10‑47.
Notice: Tire sealant materials are
not all the same. A non-approved
tire sealant could damage the
TPMS sensors. TPMS sensor
damage caused by using an
incorrect tire sealant is not
covered by the vehicle warranty.
Always use only the
GM-approved tire sealant
available through your dealer or
included in the vehicle.TPMS Malfunction Light and
Message
The TPMS will not function properly
if one or more of the TPMS sensors
are missing or inoperable. When the
system detects a malfunction, the
low tire pressure warning light
flashes for about one minute and
then stays on for the remainder of
the ignition cycle. A DIC warning
message also displays. The
malfunction light and DIC warning
message come on at each ignition
cycle until the problem is corrected.
Some of the conditions that can
cause these to come on are:
.One of the road tires has been
replaced with the spare tire. The
spare tire does not have a
TPMS sensor. The malfunction
light and the DIC message
should go off after the road tire
is replaced and the sensor
matching process is performed
successfully. See "TPMS Sensor
Matching Process" later in this
section.