2013 CHEVROLET SILVERADO light
[x] Cancel search: lightPage 402 of 542
Black plate (26,1)Chevrolet Silverado Owner Manual - 2013 - crc2 - 8/13/12
10-26 Vehicle Care
Some driving conditions or climates
can cause a brake squeal when the
brakes are first applied or lightly
applied. This does not mean
something is wrong with the brakes.
Properly torqued wheel nuts are
necessary to help prevent brake
pulsation. When tires are rotated,
inspect brake pads for wear and
evenly tighten wheel nuts in the
proper sequence to torque
specifications inCapacities and
Specifications on page 12‑2.
If the vehicle has rear drum brakes,
they do not have wear indicators,
but if a rear brake rubbing noise is
heard, have the rear brake linings
inspected immediately. Rear brake
drums should be removed and
inspected each time the tires are
removed for rotation or changing.
Drum brakes have an inspection
hole to inspect lining wear during
scheduled maintenance. When the
front brake pads are replaced, have
the rear brakes inspected, too. Brake linings should always be
replaced as complete axle sets.
Brake Pedal Travel
See your dealer if the brake pedal
does not return to normal height,
or if there is a rapid increase in
pedal travel. This could be a sign
that brake service might be
required.
Brake Adjustment
Every time the brakes are applied,
with or without the vehicle moving,
the brakes adjust for wear.
Replacing Brake System Parts
The braking system on a vehicle is
complex. Its many parts have to be
of top quality and work well together
if the vehicle is to have really good
braking. The vehicle was designed
and tested with top-quality brake
parts. When parts of the braking
system are replaced, be sure to get
new, approved replacement parts.
If this is not done, the brakes might
not work properly. For example,installing disc brake pads that are
wrong for the vehicle, can change
the balance between the front and
rear brakes
—for the worse. The
braking performance expected can
change in many other ways if the
wrong replacement brake parts are
installed.
Brake Fluid
The brake master cylinder reservoir
is filled with DOT 3 brake fluid. See
Engine Compartment Overview on
page 10‑5 for the location of the
reservoir.
Page 403 of 542

Black plate (27,1)Chevrolet Silverado Owner Manual - 2013 - crc2 - 8/13/12
Vehicle Care 10-27
There are only two reasons why the
brake fluid level in the reservoir
might go down:
.The brake fluid level goes down
because of normal brake lining
wear. When new linings are
installed, the fluid level goes
back up.
.A fluid leak in the brake
hydraulic system can also cause
a low fluid level. Have the brake
hydraulic system fixed, since a
leak means that sooner or later
the brakes will not work well.
Do not top off the brake fluid.
Adding fluid does not correct a leak.
If fluid is added when the linings are
worn, there will be too much fluid
when new brake linings are
installed. Add or remove brake fluid,
as necessary, only when work is
done on the brake hydraulic system.
{WARNING
If too much brake fluid is added, it
can spill on the engine and burn,
if the engine is hot enough. You
or others could be burned, and
the vehicle could be damaged.
Add brake fluid only when work is
done on the brake hydraulic
system. See “Checking Brake
Fluid” in this section.
When the brake fluid falls to a low
level, the brake warning light comes
on. See Brake System Warning
Light on page 5‑24.
Refer to the Maintenance Schedule
to determine when to check the
brake fluid. See Maintenance
Schedule on page 11‑3.
Checking Brake Fluid
Check brake fluid by looking at the
brake fluid reservoir. See Engine
Compartment Overview on
page 10‑5.
The fluid level should be above
MIN. If it is not, have the brake
hydraulic system checked to see if
there is a leak.
After work is done on the brake
hydraulic system, make sure the
level is above the MIN but not over
the MAX mark.
What to Add
Use only new DOT 3 brake fluid
from a sealed container. See
Recommended Fluids and
Lubricants on page 11‑12.
Page 413 of 542
Black plate (37,1)Chevrolet Silverado Owner Manual - 2013 - crc2 - 8/13/12
Vehicle Care 10-37
Pick-Up Box Identification
and Fender Marker
Lamps
The pick-up box identification lamps
are LEDs. For replacement of the
LED lighting assembly contact your
dealer.
To replace a pickup box fender
marker lamp bulb:
1. Press the tab from the back toremove the lamp.
2. Turn the bulb socket counterclockwise to remove from
the lamp assembly.
3. Gently pry the bulb from the socket.
4. Install the new bulb in socket.
5. Reinstall socket into lamp assembly.
6. Reinstall the lamp assembly.
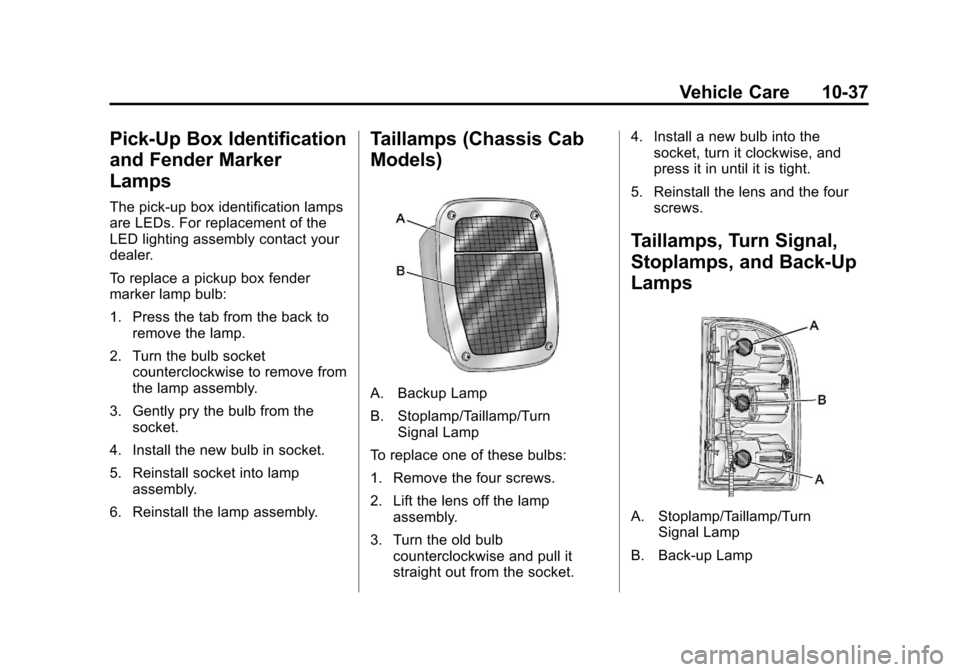
Taillamps (Chassis Cab
Models)
A. Backup Lamp
B. Stoplamp/Taillamp/Turn Signal Lamp
To replace one of these bulbs:
1. Remove the four screws.
2. Lift the lens off the lamp assembly.
3. Turn the old bulb counterclockwise and pull it
straight out from the socket. 4. Install a new bulb into the
socket, turn it clockwise, and
press it in until it is tight.
5. Reinstall the lens and the four screws.
Taillamps, Turn Signal,
Stoplamps, and Back-Up
Lamps
A. Stoplamp/Taillamp/Turn Signal Lamp
B. Back-up Lamp
Page 421 of 542
Black plate (45,1)Chevrolet Silverado Owner Manual - 2013 - crc2 - 8/13/12
Vehicle Care 10-45
RelaysUsage
REAR
DEFOG Rear Defogger
RUN/CRNK Switched Power
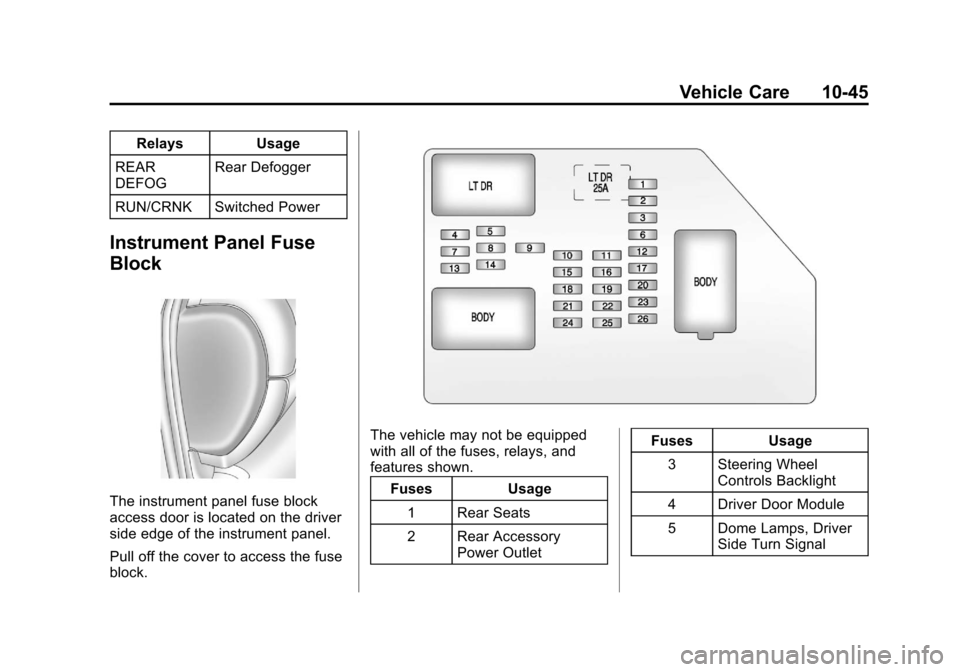
Instrument Panel Fuse
Block
The instrument panel fuse block
access door is located on the driver
side edge of the instrument panel.
Pull off the cover to access the fuse
block.
The vehicle may not be equipped
with all of the fuses, relays, and
features shown. Fuses Usage
1 Rear Seats
2 Rear Accessory Power Outlet Fuses Usage
3 Steering Wheel Controls Backlight
4 Driver Door Module
5 Dome Lamps, Driver Side Turn Signal
Page 422 of 542
Black plate (46,1)Chevrolet Silverado Owner Manual - 2013 - crc2 - 8/13/12
10-46 Vehicle Care
FusesUsage
6 Driver Side Turn Signal, Stoplamp
7 Instrument Panel Back Lighting
8 Passenger Side Turn Signal, Stoplamp
9 Passenger Door Module, Driver Unlock
10 Power Door Lock 2 (Unlock Feature)
11 Power Door Lock 2 (Lock Feature)
12 Stoplamps, Center High‐Mounted
Stoplamp
13 Rear Climate Controls
14 Power Mirror
15 Body Control Module (BCM)
16 Accessory Power Outlets Fuses
Usage
17 Interior Lamps
18 Power Door Lock 1 (Unlock Feature)
19 Rear Seat Entertainment
20 Ultrasonic Rear Parking Assist, Power
Liftgate
21 Power Door Lock 1 (Lock Feature)
22 Driver Information Center (DIC)
23 Rear Wiper
24 Cooled Seats
25 Driver Seat Module, Remote Keyless Entry
System
26 Driver Power Door Lock (Unlock Feature) Circuit
Breaker Usage
LT DR Driver Side Power Window Circuit
Breaker
Harness
Connector Usage
LT DR Driver Door
Harness
Connection
BODY Harness Connector
BODY Harness Connector
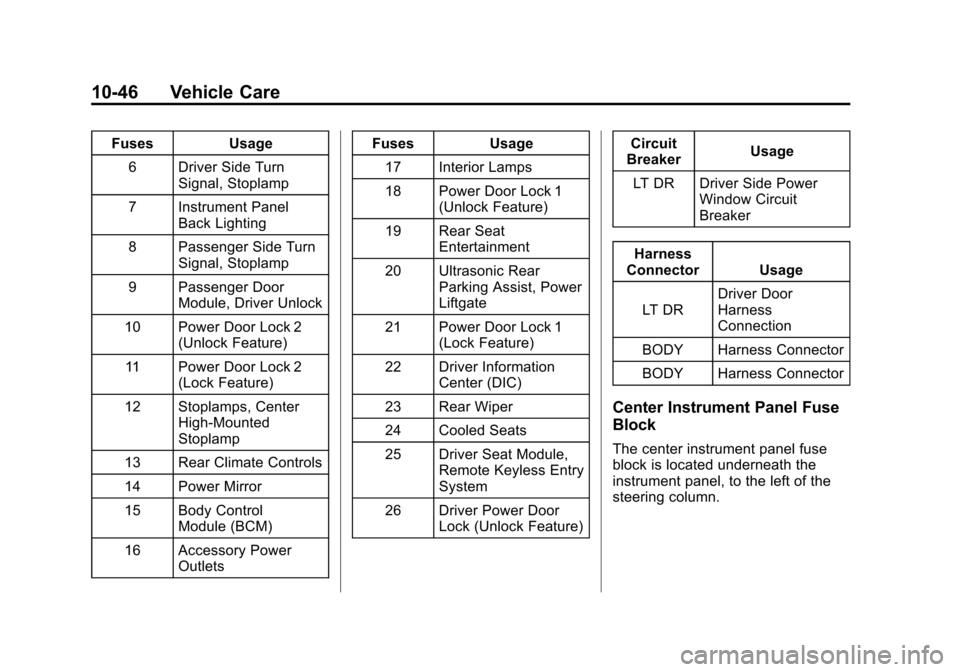
Center Instrument Panel Fuse
Block
The center instrument panel fuse
block is located underneath the
instrument panel, to the left of the
steering column.
Page 426 of 542

Black plate (50,1)Chevrolet Silverado Owner Manual - 2013 - crc2 - 8/13/12
10-50 Vehicle Care
Summer Tires
This vehicle may come with high
performance summer tires. These
tires have a special tread and
compound that are optimized for
maximum dry and wet road
performance. This special tread and
compound will decrease
performance in cold climates, and
on ice and snow. We recommend
installing winter tires on the vehicle
if frequent driving in cold
temperatures or on snow or ice
covered roads is expected. See
Winter Tires on page 10‑49.
Tire Sidewall Labeling
Useful information about a tire is
molded into the sidewall. The
examples show a typical
passenger and light truck tire
sidewall.
Passenger (P-Metric) Tire
(A) Tire Size:The tire size
code is a combination of letters
and numbers used to define a
particular tire's width, height,
aspect ratio, construction type,
and service description. See the
“Tire Size” illustration later in this
section for more detail.
(B) TPC Spec (Tire
Performance Criteria
Specification)
:Original
equipment tires designed to
GM's specific tire performance criteria have a TPC specification
code molded onto the sidewall.
GM's TPC specifications meet or
exceed all federal safety
guidelines.
(C) DOT (Department of
Transportation)
:The
Department of Transportation
(DOT) code indicates that the
tire is in compliance with the
U.S. Department of
Transportation Motor Vehicle
Safety Standards.
DOT Tire Date of
Manufacture
:The last four
digits of the TIN indicate the tire
manufactured date. The first two
digits represent the week
(01-52) and the last two digits,
the year. For example, the third
week of the year 2010 would
have a four-digit DOT date
of 0310.
Page 427 of 542
Black plate (51,1)Chevrolet Silverado Owner Manual - 2013 - crc2 - 8/13/12
Vehicle Care 10-51
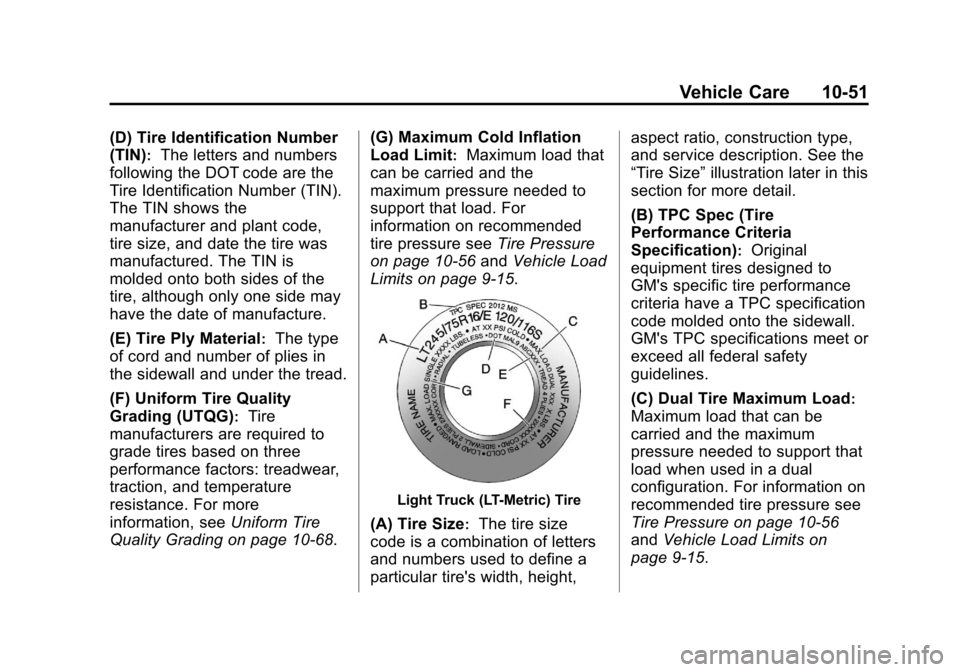
(D) Tire Identification Number
(TIN)
:The letters and numbers
following the DOT code are the
Tire Identification Number (TIN).
The TIN shows the
manufacturer and plant code,
tire size, and date the tire was
manufactured. The TIN is
molded onto both sides of the
tire, although only one side may
have the date of manufacture.
(E) Tire Ply Material
:The type
of cord and number of plies in
the sidewall and under the tread.
(F) Uniform Tire Quality
Grading (UTQG)
:Tire
manufacturers are required to
grade tires based on three
performance factors: treadwear,
traction, and temperature
resistance. For more
information, see Uniform Tire
Quality Grading on page 10‑68. (G) Maximum Cold Inflation
Load Limit
:Maximum load that
can be carried and the
maximum pressure needed to
support that load. For
information on recommended
tire pressure see Tire Pressure
on page 10‑56 andVehicle Load
Limits on page 9‑15.
Light Truck (LT-Metric) Tire
(A) Tire Size:The tire size
code is a combination of letters
and numbers used to define a
particular tire's width, height, aspect ratio, construction type,
and service description. See the
“Tire Size”
illustration later in this
section for more detail.
(B) TPC Spec (Tire
Performance Criteria
Specification)
:Original
equipment tires designed to
GM's specific tire performance
criteria have a TPC specification
code molded onto the sidewall.
GM's TPC specifications meet or
exceed all federal safety
guidelines.
(C) Dual Tire Maximum Load
:
Maximum load that can be
carried and the maximum
pressure needed to support that
load when used in a dual
configuration. For information on
recommended tire pressure see
Tire Pressure on page 10‑56
and Vehicle Load Limits on
page 9‑15.
Page 428 of 542
Black plate (52,1)Chevrolet Silverado Owner Manual - 2013 - crc2 - 8/13/12
10-52 Vehicle Care
(D) DOT (Department of
Transportation)
:The
Department of Transportation
(DOT) code indicates that the
tire is in compliance with the
U.S. Department of
Transportation Motor Vehicle
Safety Standards.
DOT Tire Date of
Manufacture
:The last four
digits of the TIN indicate the tire
manufactured date. The first two
digits represent the week
(01-52) and the last two digits,
the year. For example, the third
week of the year 2010 would
have a four-digit DOT date
of 0310.
(E) Tire Identification Number
(TIN)
:The letters and numbers
following the DOT code are the
Tire Identification Number (TIN).
The TIN shows the
manufacturer and plant code,
tire size, and date the tire was manufactured. The TIN is
molded onto both sides of the
tire, although only one side may
have the date of manufacture.
(F) Tire Ply Material
:The type
of cord and number of plies in
the sidewall and under the tread.
(G) Single Tire Maximum
Load
:Maximum load that can
be carried and the maximum
pressure needed to support that
load when used as a single. For
information on recommended
tire pressure see Tire Pressure
on page 10‑56 andVehicle Load
Limits on page 9‑15.
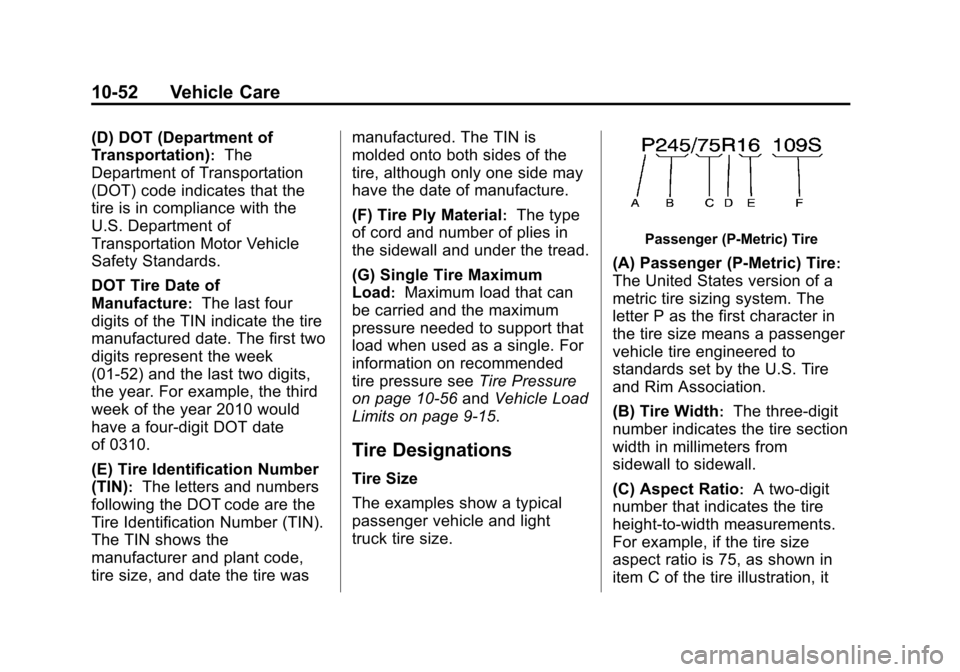
Tire Designations
Tire Size
The examples show a typical
passenger vehicle and light
truck tire size.
Passenger (P‐Metric) Tire
(A) Passenger (P‐Metric) Tire:
The United States version of a
metric tire sizing system. The
letter P as the first character in
the tire size means a passenger
vehicle tire engineered to
standards set by the U.S. Tire
and Rim Association.
(B) Tire Width
:The three‐digit
number indicates the tire section
width in millimeters from
sidewall to sidewall.
(C) Aspect Ratio
:A two‐digit
number that indicates the tire
height‐to‐width measurements.
For example, if the tire size
aspect ratio is 75, as shown in
item C of the tire illustration, it