2013 CHEVROLET SILVERADO 1500 AUX
[x] Cancel search: AUXPage 248 of 542
Black plate (48,1)Chevrolet Silverado Owner Manual - 2013 - crc2 - 8/13/12
7-48 Infotainment System
Cleaning the Video Screen
When cleaning the video screen,
use only a clean cloth dampened
with clean water. Use care when
directly touching or cleaning the
screen, as damage could result.
Rear Seat Audio (RSA)
System
Vehicles with this feature allow the
rear seat passengers to listen to
and control any of the music
sources: radio, CDs, DVDs, or other
auxiliary sources. However, the rear
seat passengers can only control
the music sources the front seat
passengers are not listening to
(except on some radios where dual
control is allowed). For example,
rear seat passengers can control
and listen to a CD through the
headphones, while the driver listens
to the radio through the front
speakers. The rear seat passengers
have control of the volume for each
set of headphones.The radio functionality is controlled
by both the RSA and the front radio.
Only one band can be tuned to at
one time. Changing the band on the
RSA or the front radio will change
the band on the other system,
if they are both sourced to the radio.
The RSA functions can be used
even while the main radio is off. The
front audio system will display the
headphone icon when the RSA is
on, and it will disappear from the
display when the RSA is off.
Audio can be heard through wired
headphones (not included) plugged
into the jacks on the RSA. If the
vehicle has this feature, audio can
also be heard on Channel 2 of the
wireless headphones.
Depending on the audio system, the
rear speakers may continue to play
when the RSA audio is active
through the headphones.
To listen to an iPod or portable
audio device through the RSA,
attach the iPod or portable audio
device to the front auxiliary input (if
available), located on the front audio
system. Turn the iPod on, then
choose the front auxiliary input with
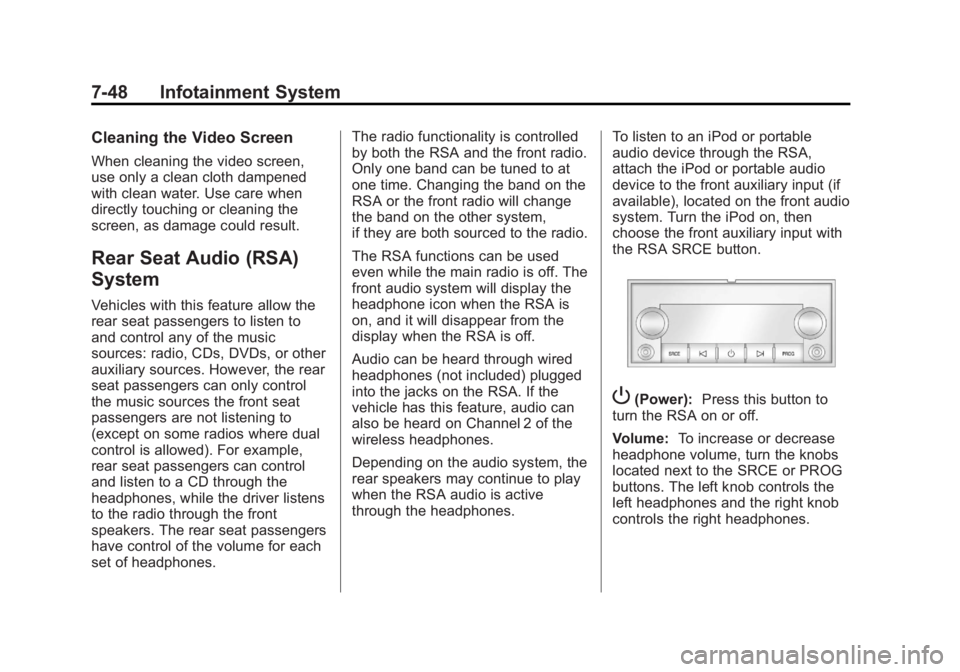
the RSA SRCE button.
P(Power):
Press this button to
turn the RSA on or off.
Volume: To increase or decrease
headphone volume, turn the knobs
located next to the SRCE or PROG
buttons. The left knob controls the
left headphones and the right knob
controls the right headphones.
Page 249 of 542
Black plate (49,1)Chevrolet Silverado Owner Manual - 2013 - crc2 - 8/13/12
Infotainment System 7-49
SRCE (Source):Press this button
to switch between the radio (AM‐
FM), XM™ (if equipped), CD, and if
the vehicle has these features,
DVD, front auxiliary, and rear
auxiliary.
© ¨(Seek): When listening to FM,
AM, or XM™ (if equipped), press
the seek arrows to go to the
previous or to the next station or
channels and stay there. This
function is inactive, with some
radios, if the front seat passengers
are listening to the radio.
Press and hold either seek arrow
until the display flashes, to tune to
an individual station. The display
stops flashing after the buttons have
not been pushed for more than
two seconds. This function is
inactive, with some radios, if the
front seat passengers are listening
to the radio. While listening to a disc, press the
left seek arrow to go back to the
start of the current track or chapter
(if more than 10 seconds have
played). Press the right seek arrow
to go the next track or chapter on
the disc. This function is inactive,
with some radios, if the front seat
passengers are listening to the disc.
While a DVD video menu is being
displayed, press either seek arrow
to perform a cursor up or down on
the menu. Hold either seek arrow to
perform a cursor left or right on
the menu.
PROG (Program):
Press this
button to go to the next preset radio
station or channel set on the main
radio. This function is inactive, with
some radios, if the front seat
passengers are listening to the
radio. While a CD or DVD‐A disc is
playing, press this button to go to
the beginning of the CD or DVD‐A.
This function is inactive, with some
radios, if the front seat passengers
are listening to the CD or DVD‐A.
While a disc is playing in the CD or
DVD changer, press this button to
select the next disc, if multiple discs
are loaded. This function is inactive,
with some radios, if the front seat
passengers are listening to the disc.
While a DVD video menu is being
displayed, press the PROG button
to perform the menu function, Enter.
Page 363 of 542
Black plate (95,1)Chevrolet Silverado Owner Manual - 2013 - crc2 - 8/13/12
Driving and Operating 9-95
Fifth-wheel or gooseneck kingpin
weight should be 15 to 25 percent of
the trailer weight up to the maximum
amount specified in the trailering
chart for the vehicle. See“Weight of
the Trailer” underTrailer Towing on
page 9‑77 for more information.
The hitch should be located in the
pickup bed so that its centerline is
over or slightly in front of the rear
axle. Take care that it is not so far
forward that it will contact the back
of the cab in sharp turns. This is
especially important for short box
pickups. Trailer pin box extensions
and sliding fifth-wheel hitch
assemblies can help this condition.
There should be at least six inches
of clearance between the top of the
pickup box and the bottom of the
trailer shelf that extends over
the box.
Make sure the hitch is attached to
the tow vehicle frame rails. Do not
use the pickup box for support.Safety Chains
Always attach chains between the
vehicle and the trailer. Cross the
safety chains under the tongue of
the trailer to help prevent the tongue
from contacting the road if it
becomes separated from the hitch.
Instructions about safety chains
may be provided by the hitch
manufacturer or by the trailer
manufacturer. If the trailer being
towed weighs up to 2 271 kg
(5,000 lbs) with a factory-installed
step bumper, safety chains may be
attached to the attaching points on
the bumper; otherwise, safety
chains should be attached to holes
on the trailer hitch platform. Always
leave just enough slack so the
combination can turn. Never allow
safety chains to drag on the ground.
Trailer Brakes
A loaded trailer that weighs more
than 900 kg (2,000 lbs) needs to
have its own brake system that is
adequate for the weight of the
trailer. Be sure to read and follow the instructions for the trailer brakes
so they are installed, adjusted, and
maintained properly.
Do not tap into the vehicle's
hydraulic brake system.
Auxiliary Battery
The auxiliary battery provision can
be used to supply electrical power
to additional equipment that may be
added, such as a slide-in camper.
If the vehicle has this provision, this
relay will be located on the driver
side of the vehicle, next to the
underhood electrical center.
Be sure to follow the proper
installation instructions included with
any electrical equipment that is
installed.
Notice:
Leaving electrical
equipment on for extended
periods will drain the battery.
Always turn off electrical
equipment when not in use and
do not use equipment that
Page 364 of 542
Black plate (96,1)Chevrolet Silverado Owner Manual - 2013 - crc2 - 8/13/12
9-96 Driving and Operating
exceeds the maximum amperage
rating of 40 amperes for the
auxiliary battery provision.
Trailer Wiring Harness
The vehicle is equipped with one of
the following wiring harnesses for
towing a trailer or hauling a slide-in
camper.
Basic Trailer Wiring
All regular, extended cab and crew
cab pickups have a seven-wire
trailer towing harness.
For vehicles not equipped with
heavy duty trailering, the harness is
secured to the vehicle's frame
behind the spare tire mount. The
harness requires the installation of a
trailer connector, which is available
through your dealer.
If towing a light-duty trailer with a
standard four-way round pin
connector, an adapter is available
from your dealer.Heavy-DutyTrailer Wiring Harness
Package
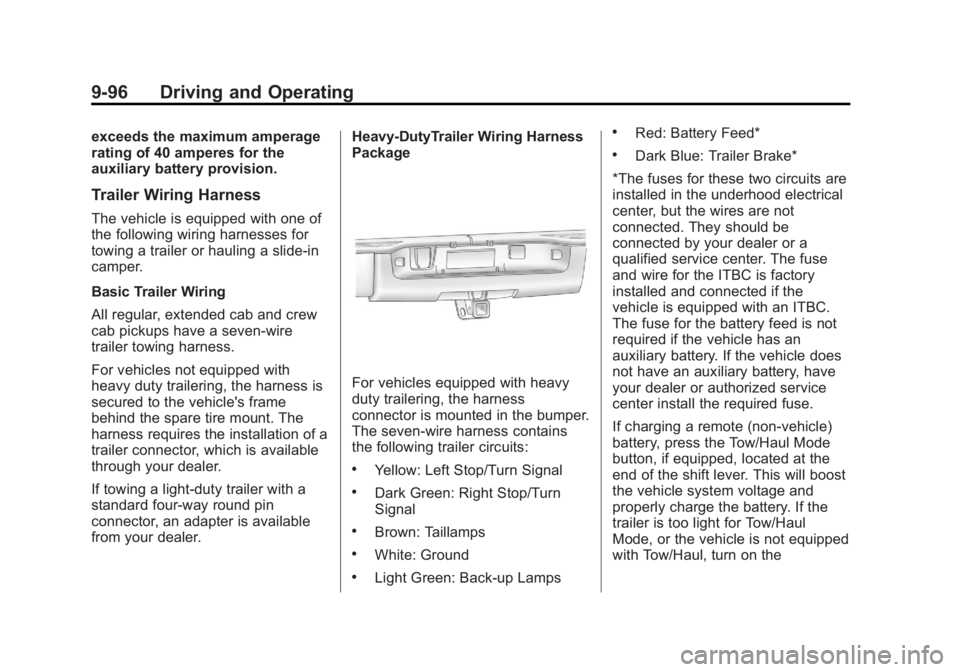
For vehicles equipped with heavy
duty trailering, the harness
connector is mounted in the bumper.
The seven-wire harness contains
the following trailer circuits:
.Yellow: Left Stop/Turn Signal
.Dark Green: Right Stop/Turn
Signal
.Brown: Taillamps
.White: Ground
.Light Green: Back-up Lamps
.Red: Battery Feed*
.Dark Blue: Trailer Brake*
*The fuses for these two circuits are
installed in the underhood electrical
center, but the wires are not
connected. They should be
connected by your dealer or a
qualified service center. The fuse
and wire for the ITBC is factory
installed and connected if the
vehicle is equipped with an ITBC.
The fuse for the battery feed is not
required if the vehicle has an
auxiliary battery. If the vehicle does
not have an auxiliary battery, have
your dealer or authorized service
center install the required fuse.
If charging a remote (non-vehicle)
battery, press the Tow/Haul Mode
button, if equipped, located at the
end of the shift lever. This will boost
the vehicle system voltage and
properly charge the battery. If the
trailer is too light for Tow/Haul
Mode, or the vehicle is not equipped
with Tow/Haul, turn on the
Page 376 of 542
Black plate (108,1)Chevrolet Silverado Owner Manual - 2013 - crc2 - 8/13/12
9-108 Driving and Operating
WARNING (Continued)
rear weight distribution ratio is
necessary to provide proper
braking performance.
Total vehicle reserve capacity is the
difference between the GVWR and
the weight of the truck with full fuel
and passengers. It is the amount of
weight that can be added to the
vehicle before reaching the GVWR.
Keep in mind that reserve capacity
numbers are intended as a guide
when selecting the amount of
equipment or cargo the truck can
carry. If unsure of the vehicle's front,
rear, or total weight, go to a weigh
station and weigh the vehicle. Your
dealer can also help with this. The total vehicle reserve capacity
for the vehicle can be found in the
lower right corner of the
Certification/Tire label as shown
previously.
See your dealer for additional
advice and information about using
a snow plow on the vehicle. Also,
see
Vehicle Load Limits on
page 9‑15.
Emergency Roof Lamp
Provisions
Vehicles with the RPO VYU snow
plow prep package also have an
emergency roof lamp provision
package, RPO TRW. Wiring for the
emergency roof lamp is provided
above the overhead console. See
Auxiliary Roof-Mounted Lamp on
page 6‑6 for switch location.
Pickup Conversion to
Chassis Cab
We are aware that some vehicle
owners might consider having the
pickup box removed and a
commercial or recreational body
installed. Owners should be aware
that, as manufactured, there are
differences between a chassis cab
and a pickup with the box removed
which could affect vehicle safety.
The components necessary to adapt
a pickup to permit its safe use with
a specialized body should be
installed by the body builder.
Page 419 of 542
Black plate (43,1)Chevrolet Silverado Owner Manual - 2013 - crc2 - 8/13/12
Vehicle Care 10-43
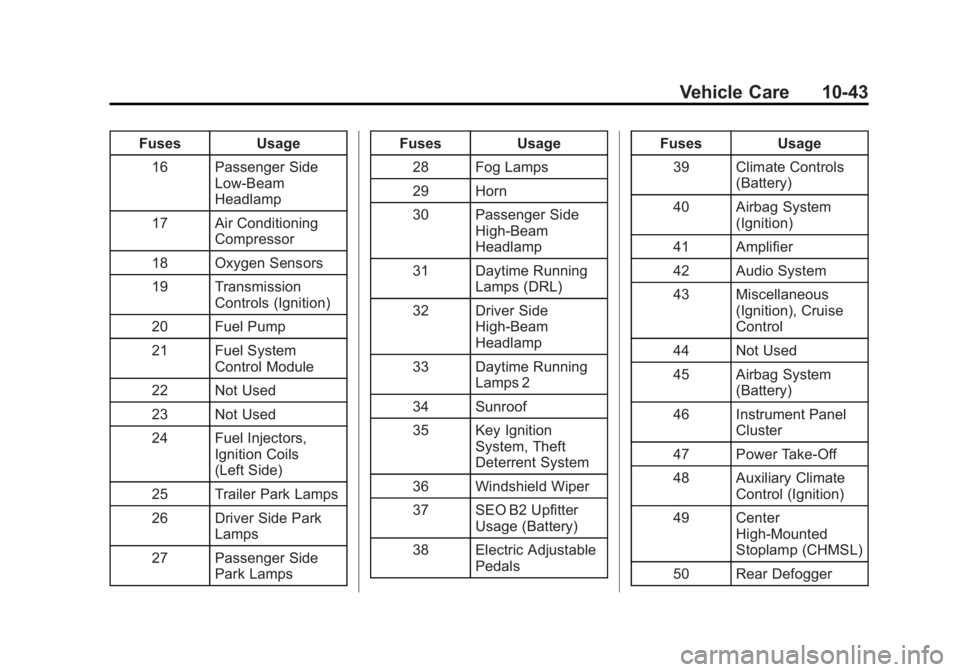
FusesUsage
16 Passenger Side Low-Beam
Headlamp
17 Air Conditioning Compressor
18 Oxygen Sensors
19 Transmission Controls (Ignition)
20 Fuel Pump
21 Fuel System Control Module
22 Not Used
23 Not Used
24 Fuel Injectors, Ignition Coils
(Left Side)
25 Trailer Park Lamps
26 Driver Side Park Lamps
27 Passenger Side Park Lamps Fuses
Usage
28 Fog Lamps
29 Horn
30 Passenger Side High-Beam
Headlamp
31 Daytime Running Lamps (DRL)
32 Driver Side High-Beam
Headlamp
33 Daytime Running Lamps 2
34 Sunroof
35 Key Ignition System, Theft
Deterrent System
36 Windshield Wiper
37 SEO B2 Upfitter Usage (Battery)
38 Electric Adjustable Pedals Fuses
Usage
39 Climate Controls (Battery)
40 Airbag System (Ignition)
41 Amplifier
42 Audio System
43 Miscellaneous (Ignition), Cruise
Control
44 Not Used
45 Airbag System (Battery)
46 Instrument Panel Cluster
47 Power Take-Off
48 Auxiliary Climate Control (Ignition)
49 Center High-Mounted
Stoplamp (CHMSL)
50 Rear Defogger
Page 462 of 542
Black plate (86,1)Chevrolet Silverado Owner Manual - 2013 - crc2 - 8/13/12
10-86 Vehicle Care
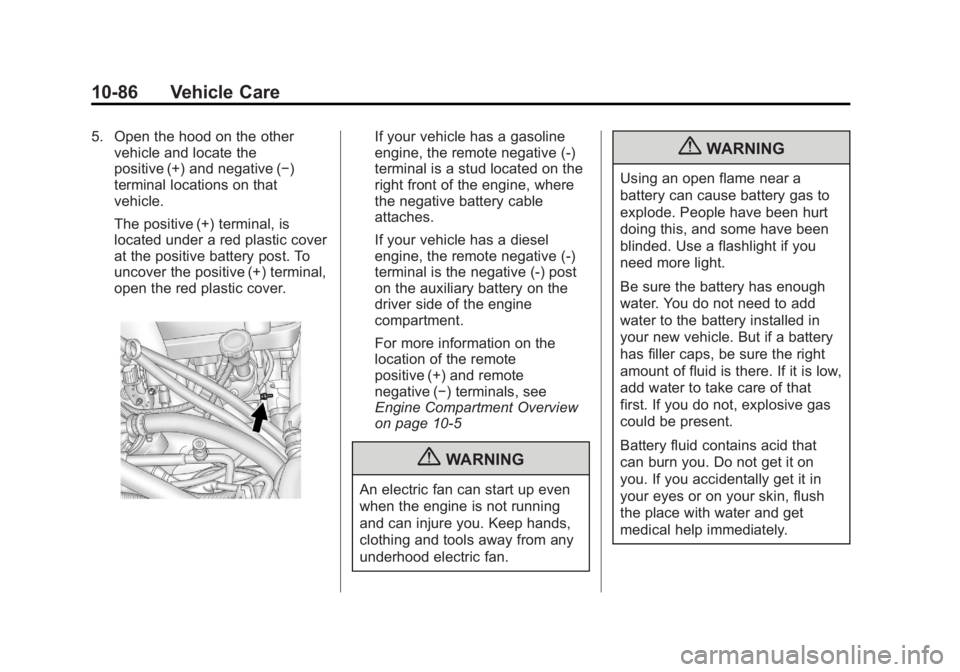
5. Open the hood on the othervehicle and locate the
positive (+) and negative (−)
terminal locations on that
vehicle.
The positive (+) terminal, is
located under a red plastic cover
at the positive battery post. To
uncover the positive (+) terminal,
open the red plastic cover.If your vehicle has a gasoline
engine, the remote negative (-)
terminal is a stud located on the
right front of the engine, where
the negative battery cable
attaches.
If your vehicle has a diesel
engine, the remote negative (-)
terminal is the negative (-) post
on the auxiliary battery on the
driver side of the engine
compartment.
For more information on the
location of the remote
positive (+) and remote
negative (−) terminals, see
Engine Compartment Overview
on page 10‑5
{WARNING
An electric fan can start up even
when the engine is not running
and can injure you. Keep hands,
clothing and tools away from any
underhood electric fan.
{WARNING
Using an open flame near a
battery can cause battery gas to
explode. People have been hurt
doing this, and some have been
blinded. Use a flashlight if you
need more light.
Be sure the battery has enough
water. You do not need to add
water to the battery installed in
your new vehicle. But if a battery
has filler caps, be sure the right
amount of fluid is there. If it is low,
add water to take care of that
first. If you do not, explosive gas
could be present.
Battery fluid contains acid that
can burn you. Do not get it on
you. If you accidentally get it in
your eyes or on your skin, flush
the place with water and get
medical help immediately.
Page 530 of 542
Black plate (2,1)Chevrolet Silverado Owner Manual - 2013 - crc2 - 8/13/12
i-2 INDEX
AuxiliaryDevices . . . . . . . . . . . . . . . . . . . . . . . 7-34
Roof Mounted Lamp . . . . . . . . . . . 6-6
Axle, Front . . . . . . . . . . . . . . . . . . . . 10-30
Axle, Rear . . . . . . . . . . . . . . . . . . . . 10-31
B
Battery . . . . . . . . . . . . . . . . . . . . . . . 10-28 Jump Starting . . . . . . . . . . . . . . . 10-84
Load Management . . . . . . . . . . . . . 6-9
Power Protection . . . . . . . . . . . . . . 6-9
Voltage and ChargingMessages . . . . . . . . . . . . . . . . . . . 5-38
Blade Replacement, Wiper . . . 10-35
Bluetooth . . . . . . . . . . . . . . . . . . . . . . 7-50
Brake Pedal and AdjustableThrottle . . . . . . . . . . . . . . . . . . . . . . 9-24
System Warning Light . . . . . . . . 5-24
Brakes . . . . . . . . . . . . . . . . . . . . . . . . 10-25 Antilock . . . . . . . . . . . . . . . . . . . . . . . 9-53
Assist . . . . . . . . . . . . . . . . . . . . . . . . . 9-55
Fluid . . . . . . . . . . . . . . . . . . . . . . . . 10-26
Parking . . . . . . . . . . . . . . . . . . . . . . . 9-54
System Messages . . . . . . . . . . . . 5-38
Braking . . . . . . . . . . . . . . . . . . . . . . . . . 9-3 Break-In, New Vehicle . . . . . . . . . 9-23
Bulb Replacement . . . . . . . . . . . . 10-39
Center High-MountedStoplamp (CHMSL) and
Cargo Lamp . . . . . . . . . . . . . . . 10-38
Fog Lamps . . . . . . . . . . . . . . . . . . . . 6-6
Halogen Bulbs . . . . . . . . . . . . . . 10-36
Headlamp Aiming . . . . . . . . . . . 10-35
Headlamps . . . . . . . . . . . . . . . . . 10-36
Headlamps, Front Turn Signal, Sidemarker, and
Parking Lamps . . . . . . . . . . . . 10-36
License Plate Lamps . . . . . . . 10-39
Pick-up Box Identification and Fender Marker
Lamps . . . . . . . . . . . . . . . . . . . . 10-37
Taillamps . . . . . . . . . . . . . . . . . . . 10-37
Taillamps, Turn Signal, Stoplamps, and
Back-up Lamps . . . . . . . . . . . 10-37
Buying New Tires . . . . . . . . . . . . . 10-66
C
Calibration . . . . . . . . . . . . . . . . . . . . . . 5-5
California
Fuel Requirements . . . . . . . . . . . 9-69
Perchlorate MaterialsRequirements . . . . . . . . . . . . . . . 10-3
Warning . . . . . . . . . . . . . . . . . . . . . . 10-2
Camera, Rear Vision . . . . . . . . . . 9-64
Canadian Vehicle Owners . . . . . . . . iii
Capacities and Specifications . . . . . . . . . . . . . . . . 12-2
Carbon Monoxide Engine Exhaust . . . . . . . . . . . . . . . 9-32
Tailgate . . . . . . . . . . . . . . . . . . . . . . . . 2-9
Winter Driving . . . . . . . . . . . . . . . . 9-12
Cargo Lamp . . . . . . . . . . . . . . . . . . . . 6-7
Cautions, Danger, and
Warnings . . . . . . . . . . . . . . . . . . . . . . . . iv
CD Player . . . . . . . . . . . . . . . . . . . . . 7-17
CD/DVD Player . . . . . . . . . . . . . . . . 7-23
Center Console Storage . . . . . . . . 4-2
Center High-Mounted Stoplamp (CHMSL) and
Cargo Lamp . . . . . . . . . . . . . . . . . 10-38
Center Seat . . . . . . . . . . . . . . . . . . . . 3-5
Chains, Tire . . . . . . . . . . . . . . . . . . 10-71