2013 CHEVROLET SILVERADO 1500 brake
[x] Cancel search: brakePage 448 of 542
Black plate (72,1)Chevrolet Silverado Owner Manual - 2013 - crc2 - 8/13/12
10-72 Vehicle Care
fastened. Drive slowly and follow
the chain manufacturer's
instructions. If you can hear the
chains contacting the vehicle,
stop and retighten them. If the
contact continues, slow down
until it stops. Driving too fast or
spinning the wheels with chains
on will damage the vehicle.
If a Tire Goes Flat
It is unusual for a tire to blowout
while driving, especially if the tires
are maintained properly. If air goes
out of a tire, it is much more likely to
leak out slowly. But if there ever is a
blowout, here are a few tips about
what to expect and what to do:
If a front tire fails, the flat tire
creates a drag that pulls the vehicle
toward that side. Take your foot off
the accelerator pedal and grip the
steering wheel firmly. Steer to
maintain lane position, and then
gently brake to a stop, well off the
road, if possible.A rear blowout, particularly on a
curve, acts much like a skid and
may require the same correction as
used in a skid. Stop pressing the
accelerator pedal and steer to
straighten the vehicle. It may be
very bumpy and noisy. Gently brake
to a stop, well off the road,
if possible.
{WARNING
Driving on a flat tire will cause
permanent damage to the tire.
Re-inflating a tire after it has been
driven on while severely
underinflated or flat may cause a
blowout and a serious crash.
Never attempt to re-inflate a tire
that has been driven on while
severely underinflated or flat.
Have your dealer or an authorized
tire service center repair or
replace the flat tire as soon as
possible.
{WARNING
Lifting a vehicle and getting under
it to do maintenance or repairs is
dangerous without the
appropriate safety equipment and
training. If a jack is provided with
the vehicle, it is designed only for
changing a flat tire. If it is used for
anything else, you or others could
be badly injured or killed if the
vehicle slips off the jack. If a jack
is provided with the vehicle, only
use it for changing a flat tire.
If a tire goes flat, avoid further tire
and wheel damage by driving slowly
to a level place, well off the road,
if possible. Turn on the hazard
warning flashers. See Hazard
Warning Flashers on page 6‑5.
Page 449 of 542
Black plate (73,1)Chevrolet Silverado Owner Manual - 2013 - crc2 - 8/13/12
Vehicle Care 10-73
{WARNING
Changing a tire can be
dangerous. The vehicle can slip
off the jack and roll over or fall
causing injury or death. Find a
level place to change the tire. To
help prevent the vehicle from
moving:1. Set the parking brake firmly.
2. Put an automatic transmission in P (Park) or a
manual transmission in
1 (First) or R (Reverse).
3. For four-wheel-drive vehicles, be sure the
transfer case is in a drive
gear– not in N (Neutral).
4. Turn off the engine and do not restart while the vehicle
is raised.
5. Do not allow passengers to remain in the vehicle.
(Continued)
WARNING (Continued)
6. Place wheel blocks on bothsides of the tire at the
opposite corner of the tire
being changed.
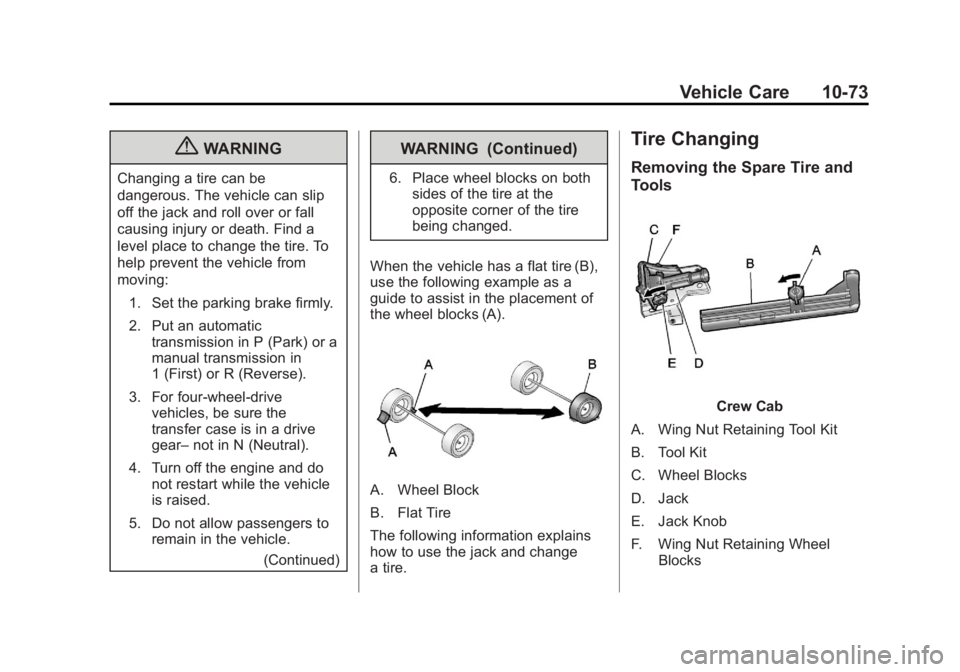
When the vehicle has a flat tire (B),
use the following example as a
guide to assist in the placement of
the wheel blocks (A).
A. Wheel Block
B. Flat Tire
The following information explains
how to use the jack and change
a tire.
Tire Changing
Removing the Spare Tire and
Tools
Crew Cab
A. Wing Nut Retaining Tool Kit
B. Tool Kit
C. Wheel Blocks
D. Jack
E. Jack Knob
F. Wing Nut Retaining Wheel Blocks
Page 456 of 542
Black plate (80,1)Chevrolet Silverado Owner Manual - 2013 - crc2 - 8/13/12
10-80 Vehicle Care
{WARNING
Never use oil or grease on bolts
or nuts because the nuts might
come loose. The vehicle's wheel
could fall off, causing a crash.
10. Put the wheel nuts back on with the rounded end of the
nuts toward the wheel.
11. Tighten each wheel nut by hand. Then use the wheel
wrench to tighten the nuts until
the wheel is held against
the hub.
12. Turn the wheel wrench counterclockwise to lower the
vehicle. Lower the jack
completely.
{WARNING
If wheel studs are damaged, they
can break. If all the studs on a
wheel broke, the wheel could
come off and cause a crash.
If any stud is damaged because
of a loose-running wheel, it could
be that all of the studs are
damaged. To be sure, replace all
studs on the wheel. If the stud
holes in a wheel have become
larger, the wheel could collapse in
operation. Replace any wheel if
its stud holes have become larger
or distorted in any way. Inspect
hubs and hub‐piloted wheels for
damage. Because of loose
running wheels, piloting pad
damage may occur and require
replacement of the entire hub, for
proper centering of the wheels.
When replacing studs, hubs,
wheel nuts or wheels, be sure to
use GM original equipment parts.
{WARNING
Wheel nuts that are improperly or
incorrectly tightened can cause
the wheels to become loose or
come off. The wheel nuts should
be tightened with a torque wrench
to the proper torque specification
after replacing. Follow the torque
specification supplied by the
aftermarket manufacturer when
using accessory locking wheel
nuts. See Capacities and
Specifications on page 12‑2 for
original equipment wheel nut
torque specifications.
Notice: Improperly tightened
wheel nuts can lead to brake
pulsation and rotor damage. To
avoid expensive brake repairs,
evenly tighten the wheel nuts in
the proper sequence and to the
proper torque specification. See
Capacities and Specifications on
page 12‑2 for the wheel nut
torque specification.
Page 461 of 542
Black plate (85,1)Chevrolet Silverado Owner Manual - 2013 - crc2 - 8/13/12
Vehicle Care 10-85
WARNING (Continued)
If you do not follow these steps
exactly, some or all of these
things can hurt you.
Notice: Ignoring these steps
could result in costly damage to
the vehicle that would not be
covered by the warranty.
Trying to start the vehicle by
pushing or pulling it will not
work, and it could damage the
vehicle.
1. Check the other vehicle. It must have a 12-volt battery with a
negative ground system.
Notice: Only use a vehicle that
has a 12-volt system with a
negative ground for jump
starting. If the other vehicle does
not have a 12-volt system with a
negative ground, both vehicles
can be damaged. 2. If you have a vehicle with a
diesel engine with two batteries,
you should know before you
begin that, especially in cold
weather, you may not be able to
get enough power from a single
battery in another vehicle to start
your diesel engine. If your
vehicle has more than one
battery, using the battery that is
closer to the starter will reduce
electrical resistance. This is
located on the passenger side,
in the rear of the engine
compartment.
3. Get the vehicles close enough so the jumper cables can reach,
but be sure the vehicles are not
touching each other. If they are,
it could cause an unwanted
ground connection. You would
not be able to start your vehicle,
and the bad grounding could
damage the electrical systems.
To avoid the possibility of the
vehicles rolling, set the parking
brake firmly on both vehicles
involved in the jump start procedure. Put the automatic
transmission in P (Park) or a
manual transmission in Neutral
before setting the parking brake.
If you have a four-wheel-drive
vehicle, be sure the transfer
case is in a drive gear, not in
Neutral.
Notice: If any accessories are left
on or plugged in during the jump
starting procedure, they could be
damaged. The repairs would not
be covered by the vehicle
warranty. Whenever possible,
turn off or unplug all accessories
on either vehicle when jump
starting the vehicle.
4. Turn off the ignition on both vehicles. Unplug unnecessary
accessories plugged into the
accessory power outlets. Turn
off the radio and all the lamps
that are not needed. This will
avoid sparks and help save both
batteries. And it could save the
radio!
Page 466 of 542
Black plate (90,1)Chevrolet Silverado Owner Manual - 2013 - crc2 - 8/13/12
10-90 Vehicle Care
Notice:If the vehicle is towed
with all four wheels on the
ground, the drivetrain
components could be damaged.
The repairs would not be covered
by the vehicle warranty. Do not
tow the vehicle with all four
wheels on the ground.
Two-wheel-drive vehicles should not
be towed with all four wheels on the
ground. Two-wheel-drive
transmissions have no provisions
for internal lubrication while being
towed. Four-Wheel-Drive Vehicles
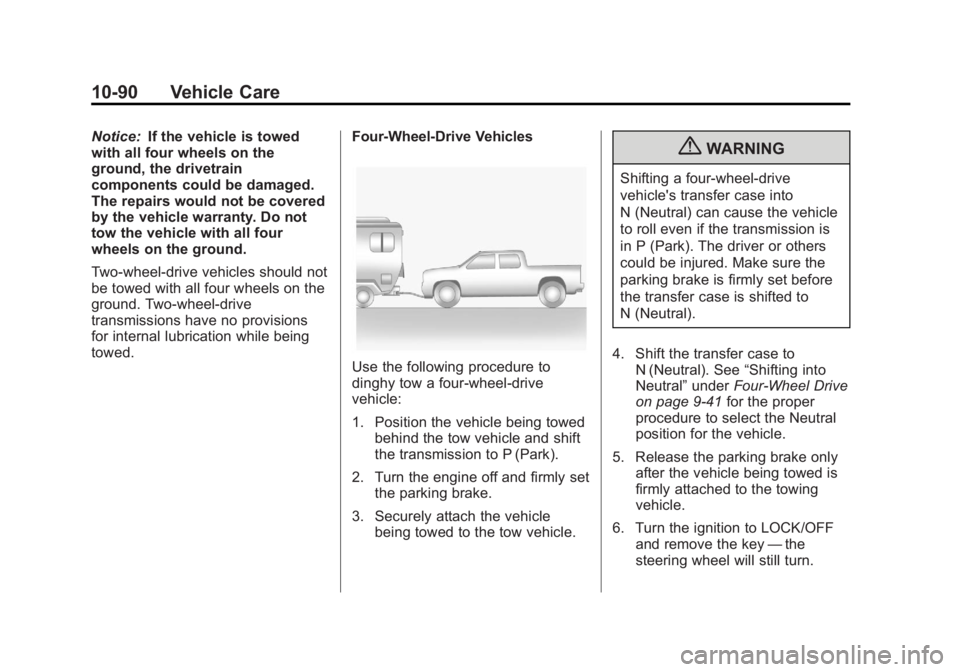
Use the following procedure to
dinghy tow a four-wheel-drive
vehicle:
1. Position the vehicle being towed
behind the tow vehicle and shift
the transmission to P (Park).
2. Turn the engine off and firmly set the parking brake.
3. Securely attach the vehicle being towed to the tow vehicle.
{WARNING
Shifting a four-wheel-drive
vehicle's transfer case into
N (Neutral) can cause the vehicle
to roll even if the transmission is
in P (Park). The driver or others
could be injured. Make sure the
parking brake is firmly set before
the transfer case is shifted to
N (Neutral).
4. Shift the transfer case to N (Neutral). See “Shifting into
Neutral” underFour-Wheel Drive
on page 9‑41 for the proper
procedure to select the Neutral
position for the vehicle.
5. Release the parking brake only after the vehicle being towed is
firmly attached to the towing
vehicle.
6. Turn the ignition to LOCK/OFF and remove the key —the
steering wheel will still turn.
Page 467 of 542
Black plate (91,1)Chevrolet Silverado Owner Manual - 2013 - crc2 - 8/13/12
Vehicle Care 10-91
After towing, see“Shifting Out of
Neutral” underFour-Wheel Drive on
page 9‑41 for the proper procedure
to take the vehicle out of the Neutral
position.
Dolly Towing
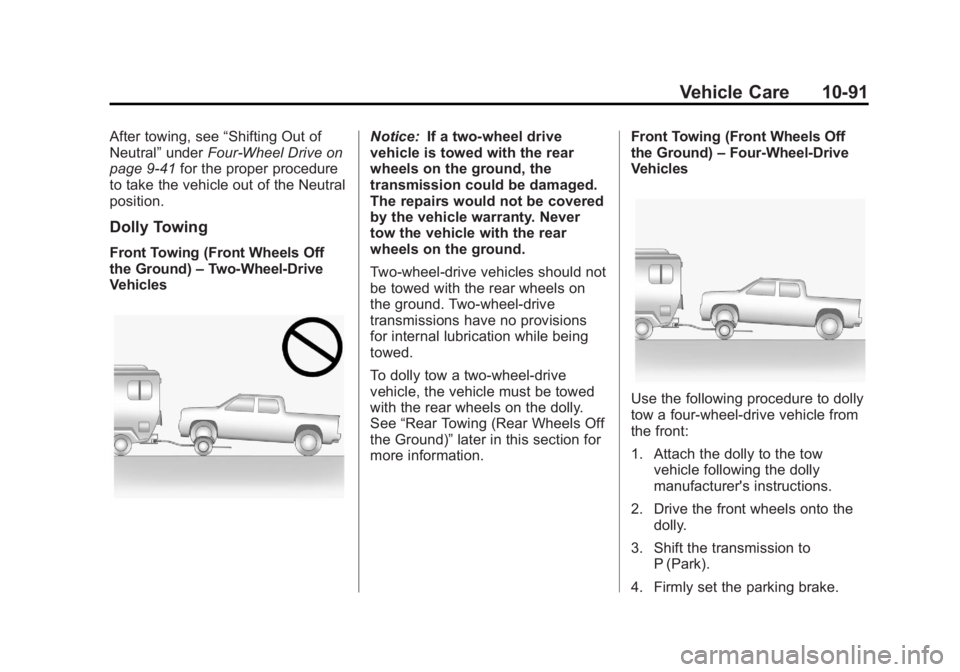
Front Towing (Front Wheels Off
the Ground) –Two-Wheel-Drive
Vehicles
Notice: If a two-wheel drive
vehicle is towed with the rear
wheels on the ground, the
transmission could be damaged.
The repairs would not be covered
by the vehicle warranty. Never
tow the vehicle with the rear
wheels on the ground.
Two-wheel-drive vehicles should not
be towed with the rear wheels on
the ground. Two-wheel-drive
transmissions have no provisions
for internal lubrication while being
towed.
To dolly tow a two‐wheel‐drive
vehicle, the vehicle must be towed
with the rear wheels on the dolly.
See “Rear Towing (Rear Wheels Off
the Ground)” later in this section for
more information. Front Towing (Front Wheels Off
the Ground)
–Four-Wheel-Drive
Vehicles
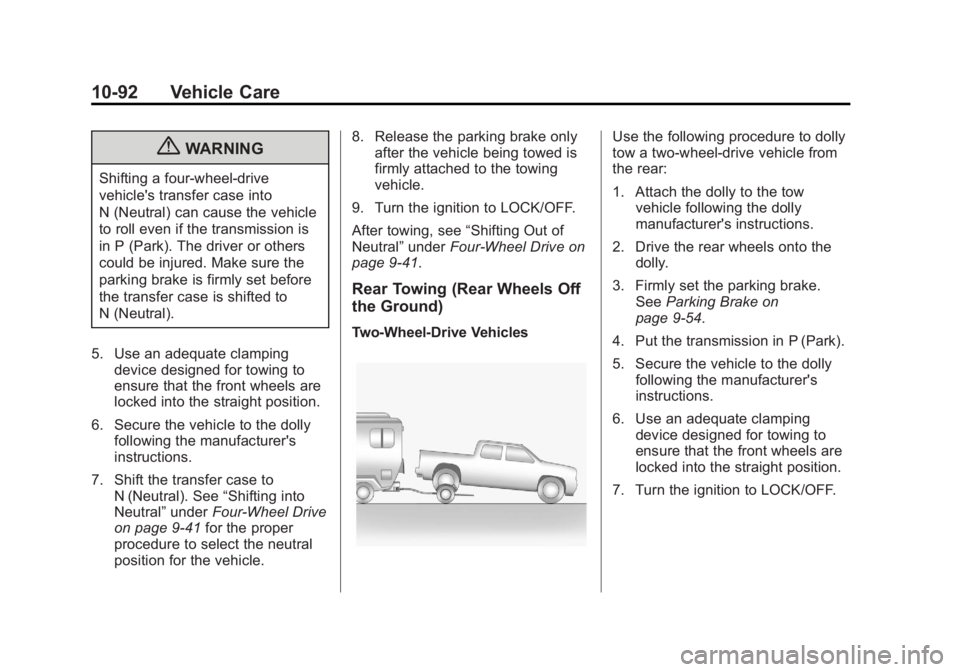
Use the following procedure to dolly
tow a four-wheel-drive vehicle from
the front:
1. Attach the dolly to the tow
vehicle following the dolly
manufacturer's instructions.
2. Drive the front wheels onto the dolly.
3. Shift the transmission to P (Park).
4. Firmly set the parking brake.
Page 468 of 542
Black plate (92,1)Chevrolet Silverado Owner Manual - 2013 - crc2 - 8/13/12
10-92 Vehicle Care
{WARNING
Shifting a four-wheel-drive
vehicle's transfer case into
N (Neutral) can cause the vehicle
to roll even if the transmission is
in P (Park). The driver or others
could be injured. Make sure the
parking brake is firmly set before
the transfer case is shifted to
N (Neutral).
5. Use an adequate clamping device designed for towing to
ensure that the front wheels are
locked into the straight position.
6. Secure the vehicle to the dolly following the manufacturer's
instructions.
7. Shift the transfer case to N (Neutral). See “Shifting into
Neutral” underFour-Wheel Drive
on page 9‑41 for the proper
procedure to select the neutral
position for the vehicle. 8. Release the parking brake only
after the vehicle being towed is
firmly attached to the towing
vehicle.
9. Turn the ignition to LOCK/OFF.
After towing, see “Shifting Out of
Neutral” underFour-Wheel Drive on
page 9‑41.
Rear Towing (Rear Wheels Off
the Ground)
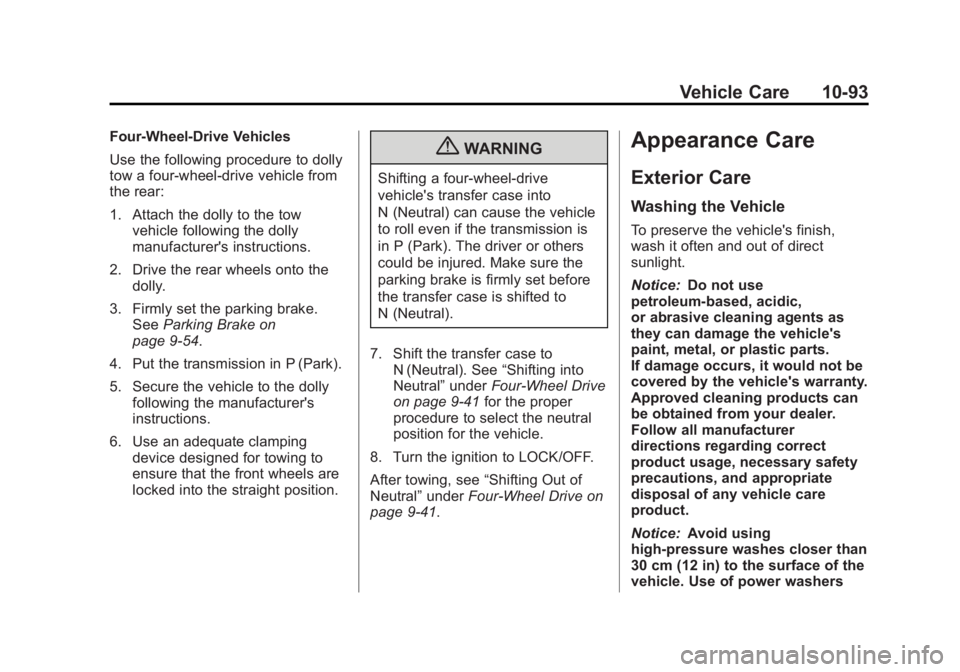
Two‐Wheel‐Drive Vehicles
Use the following procedure to dolly
tow a two-wheel-drive vehicle from
the rear:
1. Attach the dolly to the tow vehicle following the dolly
manufacturer's instructions.
2. Drive the rear wheels onto the dolly.
3. Firmly set the parking brake. See Parking Brake on
page 9‑54.
4. Put the transmission in P (Park).
5. Secure the vehicle to the dolly following the manufacturer's
instructions.
6. Use an adequate clamping device designed for towing to
ensure that the front wheels are
locked into the straight position.
7. Turn the ignition to LOCK/OFF.
Page 469 of 542
Black plate (93,1)Chevrolet Silverado Owner Manual - 2013 - crc2 - 8/13/12
Vehicle Care 10-93
Four‐Wheel‐Drive Vehicles
Use the following procedure to dolly
tow a four-wheel-drive vehicle from
the rear:
1. Attach the dolly to the towvehicle following the dolly
manufacturer's instructions.
2. Drive the rear wheels onto the dolly.
3. Firmly set the parking brake. See Parking Brake on
page 9‑54.
4. Put the transmission in P (Park).
5. Secure the vehicle to the dolly following the manufacturer's
instructions.
6. Use an adequate clamping device designed for towing to
ensure that the front wheels are
locked into the straight position.{WARNING
Shifting a four-wheel-drive
vehicle's transfer case into
N (Neutral) can cause the vehicle
to roll even if the transmission is
in P (Park). The driver or others
could be injured. Make sure the
parking brake is firmly set before
the transfer case is shifted to
N (Neutral).
7. Shift the transfer case to N (Neutral). See “Shifting into
Neutral” underFour-Wheel Drive
on page 9‑41 for the proper
procedure to select the neutral
position for the vehicle.
8. Turn the ignition to LOCK/OFF.
After towing, see “Shifting Out of
Neutral” underFour-Wheel Drive on
page 9‑41.
Appearance Care
Exterior Care
Washing the Vehicle
To preserve the vehicle's finish,
wash it often and out of direct
sunlight.
Notice: Do not use
petroleum-based, acidic,
or abrasive cleaning agents as
they can damage the vehicle's
paint, metal, or plastic parts.
If damage occurs, it would not be
covered by the vehicle's warranty.
Approved cleaning products can
be obtained from your dealer.
Follow all manufacturer
directions regarding correct
product usage, necessary safety
precautions, and appropriate
disposal of any vehicle care
product.
Notice: Avoid using
high-pressure washes closer than
30 cm (12 in) to the surface of the
vehicle. Use of power washers