2013 CHEVROLET ORLANDO windshield
[x] Cancel search: windshieldPage 5 of 372

Black plate (5,1)Chevrolet Orlando Owner Manual - 2013 - CRC - 6/5/12
Introduction v
Vehicle Symbol Chart
Here are some additional symbols
that may be found on the vehicle
and what they mean. For more
information on the symbol, refer to
the Index.
9:Airbag Readiness Light
#:Air Conditioning
!:Antilock Brake System (ABS)
%:Audio Steering Wheel Controls
or OnStar®
$: Brake System Warning Light
":Charging System
I:Cruise Control
B: Engine Coolant Temperature
O:Exterior Lamps
#:Fog Lamps
.: Fuel Gauge
+:Fuses
3: Headlamp High/Low-Beam
Changer
j: LATCH System Child
Restraints
*: Malfunction Indicator Lamp
::Oil Pressure
}:Power
/:Remote Vehicle Start
>:Safety Belt Reminders
7:Tire Pressure Monitor
d:Traction Control/StabiliTrak®
M:Windshield Washer Fluid
Page 7 of 372
Black plate (1,1)Chevrolet Orlando Owner Manual - 2013 - CRC - 6/5/12
In Brief 1-1
In Brief
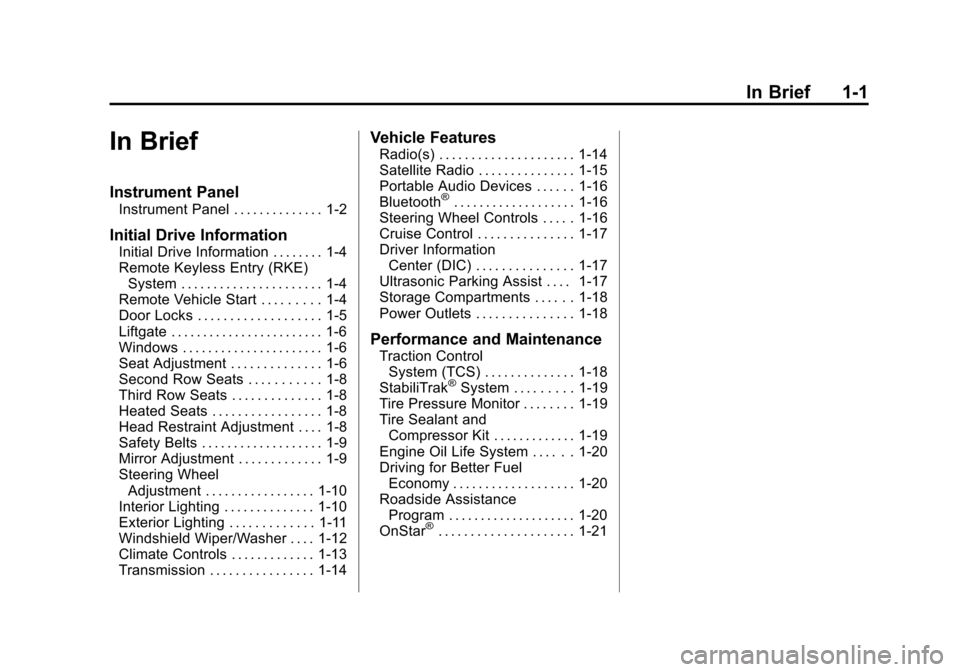
Instrument Panel
Instrument Panel . . . . . . . . . . . . . . 1-2
Initial Drive Information
Initial Drive Information . . . . . . . . 1-4
Remote Keyless Entry (RKE)System . . . . . . . . . . . . . . . . . . . . . . 1-4
Remote Vehicle Start . . . . . . . . . 1-4
Door Locks . . . . . . . . . . . . . . . . . . . 1-5
Liftgate . . . . . . . . . . . . . . . . . . . . . . . . 1-6
Windows . . . . . . . . . . . . . . . . . . . . . . 1-6
Seat Adjustment . . . . . . . . . . . . . . 1-6
Second Row Seats . . . . . . . . . . . 1-8
Third Row Seats . . . . . . . . . . . . . . 1-8
Heated Seats . . . . . . . . . . . . . . . . . 1-8
Head Restraint Adjustment . . . . 1-8
Safety Belts . . . . . . . . . . . . . . . . . . . 1-9
Mirror Adjustment . . . . . . . . . . . . . 1-9
Steering Wheel Adjustment . . . . . . . . . . . . . . . . . 1-10
Interior Lighting . . . . . . . . . . . . . . 1-10
Exterior Lighting . . . . . . . . . . . . . 1-11
Windshield Wiper/Washer . . . . 1-12
Climate Controls . . . . . . . . . . . . . 1-13
Transmission . . . . . . . . . . . . . . . . 1-14
Vehicle Features
Radio(s) . . . . . . . . . . . . . . . . . . . . . 1-14
Satellite Radio . . . . . . . . . . . . . . . 1-15
Portable Audio Devices . . . . . . 1-16
Bluetooth
®. . . . . . . . . . . . . . . . . . . 1-16
Steering Wheel Controls . . . . . 1-16
Cruise Control . . . . . . . . . . . . . . . 1-17
Driver Information
Center (DIC) . . . . . . . . . . . . . . . 1-17
Ultrasonic Parking Assist . . . . 1-17
Storage Compartments . . . . . . 1-18
Power Outlets . . . . . . . . . . . . . . . 1-18
Performance and Maintenance
Traction Control System (TCS) . . . . . . . . . . . . . . 1-18
StabiliTrak
®System . . . . . . . . . 1-19
Tire Pressure Monitor . . . . . . . . 1-19
Tire Sealant and
Compressor Kit . . . . . . . . . . . . . 1-19
Engine Oil Life System . . . . . . 1-20
Driving for Better Fuel Economy . . . . . . . . . . . . . . . . . . . 1-20
Roadside Assistance Program . . . . . . . . . . . . . . . . . . . . 1-20
OnStar
®. . . . . . . . . . . . . . . . . . . . . 1-21
Page 9 of 372

Black plate (3,1)Chevrolet Orlando Owner Manual - 2013 - CRC - 6/5/12
In Brief 1-3
1.Air Vents on page 8‑6.
2. Turn and Lane-Change Lever. See Turn and Lane-Change
Signals on page 6‑4.
Headlamp High/Low-Beam
Changer on page 6‑2.
3. Instrument Cluster on page 5‑8.
4. Windshield Wiper/Washer on
page 5‑3.
Rear Window Wiper/Washer on
page 5‑4.
5. Infotainment on page 7‑1.
6. Infotainment Display.
7. Light Sensor. See Automatic
Headlamp System on page 6‑3.
8. Instrument Panel Storage on
page 4‑1.
USB Port and Auxiliary Input
Jack (Inside Instrument Panel
Storage). See Auxiliary Devices
on page 7‑15
9. CD Player on page 7‑13. 10. TCS/StabiliTrak Button. See
StabiliTrak®System on
page 9‑29.
11. Exterior Lamp Controls on
page 6‑1.
Instrument Panel Illumination
Control on page 6‑6.
Front Fog Lamps on page 6‑5.
12. Hood Release. See Hood on
page 10‑4.
13. Front Storage on page 4‑1.
14. Data Link Connector (DLC) (Out of View). See Malfunction
Indicator Lamp on page 5‑12.
15. Cruise Control on page 9‑31.
16. Steering Wheel Adjustment on
page 5‑2.
17. Horn on page 5‑3.
18. Steering Wheel Controls on
page 5‑3.
19. Power Door Locks on
page 2‑7. 20.
Heated Front Seats on
page 3‑6 (If Equipped).
21. Climate Control Systems on
page 8‑1.
Automatic Climate Control
System on page 8‑3.
22. Shift Lever. See Automatic
Transmission on page 9‑21 or
Manual Transmission on
page 9‑24.
23. Parking Brake on page 9‑27.
24. Power Outlets on page 5‑6.
25. Hazard Warning Flashers on
page 6‑4.
26. Passenger Safety Belt Reminder Light. See Safety
Belt Reminders on page 5‑10.
Page 18 of 372
Black plate (12,1)Chevrolet Orlando Owner Manual - 2013 - CRC - 6/5/12
1-12 In Brief
Windshield Wiper/Washer
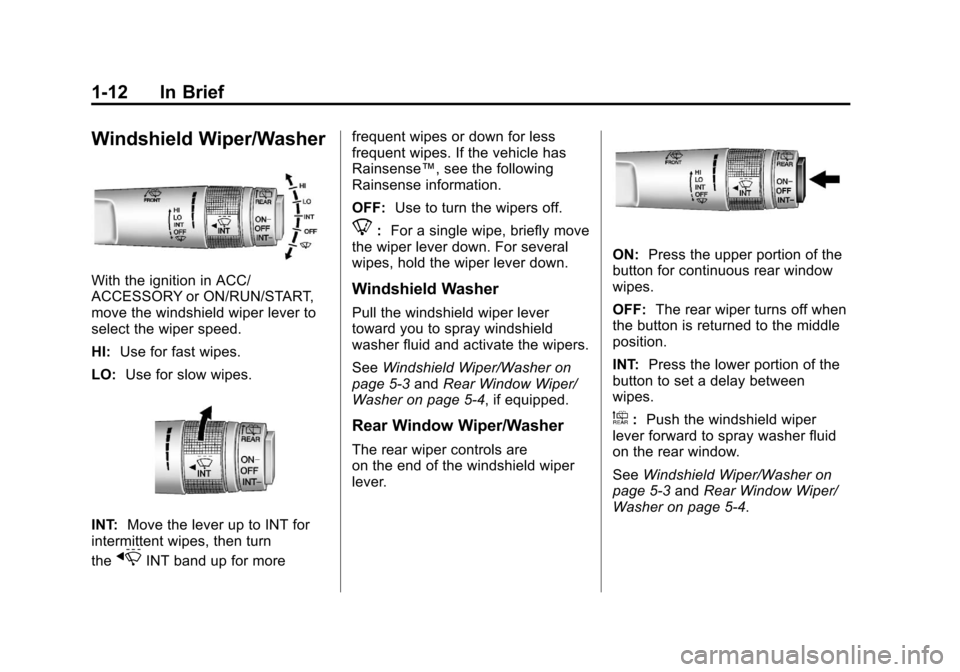
With the ignition in ACC/
ACCESSORY or ON/RUN/START,
move the windshield wiper lever to
select the wiper speed.
HI:Use for fast wipes.
LO: Use for slow wipes.
INT: Move the lever up to INT for
intermittent wipes, then turn
the
xINT band up for more frequent wipes or down for less
frequent wipes. If the vehicle has
Rainsense™, see the following
Rainsense information.
OFF:
Use to turn the wipers off.
8:For a single wipe, briefly move
the wiper lever down. For several
wipes, hold the wiper lever down.
Windshield Washer
Pull the windshield wiper lever
toward you to spray windshield
washer fluid and activate the wipers.
See Windshield Wiper/Washer on
page 5‑3 andRear Window Wiper/
Washer on page 5‑4, if equipped.
Rear Window Wiper/Washer
The rear wiper controls are
on the end of the windshield wiper
lever.
ON: Press the upper portion of the
button for continuous rear window
wipes.
OFF: The rear wiper turns off when
the button is returned to the middle
position.
INT: Press the lower portion of the
button to set a delay between
wipes.
a: Push the windshield wiper
lever forward to spray washer fluid
on the rear window.
See Windshield Wiper/Washer on
page 5‑3 andRear Window Wiper/
Washer on page 5‑4.
Page 37 of 372
Black plate (9,1)Chevrolet Orlando Owner Manual - 2013 - CRC - 6/5/12
Keys, Doors, and Windows 2-9
Press the touch pad located in the
handle of the liftgate, above the
license plate, and lift up to open.
Do not press the touch pad while
closing the liftgate. This will cause
the liftgate to be unlatched.
Always close the liftgate before
driving.Vehicle Security
This vehicle has theft-deterrent
features; however, they do not make
the vehicle impossible to steal.
Vehicle Alarm System
This vehicle has a anti-theft alarm
system.
The LED light, instrument panel
near the windshield, indicates the
status of the system.
Arming the System
1. Close all doors, trunk, andliftgate.
2. Lock the vehicle using the transmitter or the power door
lock button with the door open.
The LED on the instrument
panel should come on and stay
on for about 30 seconds.
3. After 30 seconds, or if the
Q
button on the transmitter is
pressed again, the alarm system will arm, and the LED will begin
to slowly flash indicating the
alarm is operating.
If a door, the hood, or liftgate is
opened without first unlocking with
the transmitter, the turn signals will
flash and the horn will sound for
about 30 seconds. The alarm
system will then re-arm to monitor
for the next unauthorized event.
The theft-deterrent alarm system will
not activate if the doors are locked
with the key.
Disarming the System
To disarm the system, either unlock
the doors using the transmitter,
or start the vehicle.
To avoid setting off the alarm by
accident:
.Lock the vehicle with the
transmitter after all occupants
have left the vehicle and all
doors are closed.
Page 62 of 372
Black plate (16,1)Chevrolet Orlando Owner Manual - 2013 - CRC - 6/5/12
3-16 Seats and Restraints
Why Safety Belts Work
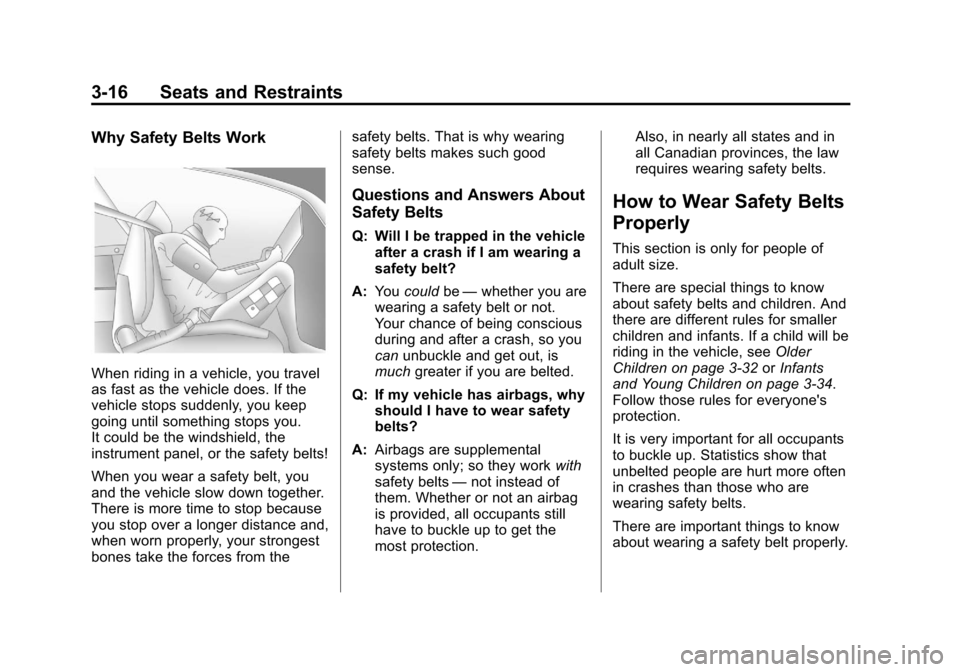
When riding in a vehicle, you travel
as fast as the vehicle does. If the
vehicle stops suddenly, you keep
going until something stops you.
It could be the windshield, the
instrument panel, or the safety belts!
When you wear a safety belt, you
and the vehicle slow down together.
There is more time to stop because
you stop over a longer distance and,
when worn properly, your strongest
bones take the forces from thesafety belts. That is why wearing
safety belts makes such good
sense.
Questions and Answers About
Safety Belts
Q: Will I be trapped in the vehicle
after a crash if I am wearing a
safety belt?
A: You could be—whether you are
wearing a safety belt or not.
Your chance of being conscious
during and after a crash, so you
can unbuckle and get out, is
much greater if you are belted.
Q: If my vehicle has airbags, why should I have to wear safety
belts?
A: Airbags are supplemental
systems only; so they work with
safety belts —not instead of
them. Whether or not an airbag
is provided, all occupants still
have to buckle up to get the
most protection. Also, in nearly all states and in
all Canadian provinces, the law
requires wearing safety belts.
How to Wear Safety Belts
Properly
This section is only for people of
adult size.
There are special things to know
about safety belts and children. And
there are different rules for smaller
children and infants. If a child will be
riding in the vehicle, see
Older
Children on page 3‑32 orInfants
and Young Children on page 3‑34.
Follow those rules for everyone's
protection.
It is very important for all occupants
to buckle up. Statistics show that
unbelted people are hurt more often
in crashes than those who are
wearing safety belts.
There are important things to know
about wearing a safety belt properly.
Page 75 of 372
Black plate (29,1)Chevrolet Orlando Owner Manual - 2013 - CRC - 6/5/12
Seats and Restraints 3-29
Airbags should never be regarded
as anything more than a supplement
to safety belts.
What Will You See after
an Airbag Inflates?
After the frontal airbags and
seat-mounted side impact airbags
inflate, they quickly deflate, so
quickly that some people may not
even realize an airbag inflated.
Roof-rail airbags may still be at least
partially inflated for some time after
they inflate. Some components of
the airbag module may be hot for
several minutes. For location of the
airbags, seeWhere Are the
Airbags? on page 3‑26.
The parts of the airbag that come
into contact with you may be warm,
but not too hot to touch. There may
be some smoke and dust coming
from the vents in the deflated
airbags. Airbag inflation does not
prevent the driver from seeing out of the windshield or being able to steer
the vehicle, nor does it prevent
people from leaving the vehicle.
{WARNING
When an airbag inflates, there
may be dust in the air. This dust
could cause breathing problems
for people with a history of
asthma or other breathing trouble.
To avoid this, everyone in the
vehicle should get out as soon as
it is safe to do so. If you have
breathing problems but cannot
get out of the vehicle after an
airbag inflates, then get fresh air
by opening a window or a door.
If you experience breathing
problems following an airbag
deployment, you should seek
medical attention.
The vehicle has a feature that may
automatically unlock the doors, turn
the interior lamps on, turn the
hazard warning flashers on, and shut off the fuel system after the
airbags inflate. You can lock the
doors, turn the interior lamps off,
and turn the hazard warning
flashers off by using the controls for
those features.
{WARNING
A crash severe enough to inflate
the airbags may have also
damaged important functions in
the vehicle, such as the fuel
system, brake and steering
systems, etc. Even if the vehicle
appears to be drivable after a
moderate crash, there may be
concealed damage that could
make it difficult to safely operate
the vehicle.
Use caution if you should attempt
to restart the engine after a crash
has occurred.
In many crashes severe enough to
inflate the airbag, windshields are
broken by vehicle deformation.
Page 76 of 372
Black plate (30,1)Chevrolet Orlando Owner Manual - 2013 - CRC - 6/5/12
3-30 Seats and Restraints
Additional windshield breakage may
also occur from the front outboard
passenger airbag.
.Airbags are designed to inflate
only once. After an airbag
inflates, you will need some new
parts for the airbag system.
If you do not get them, the
airbag system will not be there
to help protect you in another
crash. A new system will include
airbag modules and possibly
other parts. The service manual
for the vehicle covers the need
to replace other parts.
.The vehicle has a crash sensing
and diagnostic module which
records information after a
crash. SeeVehicle Data
Recording and Privacy on
page 13‑14 andEvent Data
Recorders on page 13‑14.
.Let only qualified technicians
work on the airbag systems.
Improper service can mean that an airbag system will not work
properly. See your dealer for
service.
Servicing the
Airbag-Equipped Vehicle
Airbags affect how the vehicle
should be serviced. There are parts
of the airbag system in several
places around the vehicle. Your
dealer and the service manual have
information about servicing the
vehicle and the airbag system. To
purchase a service manual, see
Service Publications Ordering
Information on page 13‑11.
{WARNING
For up to 10 seconds after the
vehicle is turned off and the
battery is disconnected, an airbag
can still inflate during improper
service. You can be injured if you
are close to an airbag when it
inflates. Avoid yellow connectors.
(Continued)
WARNING (Continued)
They are probably part of the
airbag system. Be sure to follow
proper service procedures, and
make sure the person performing
work for you is qualified to do so.
Adding Equipment to the
Airbag-Equipped Vehicle
Adding accessories that change the
vehicle's frame, bumper system,
height, front end or side sheet
metal, may keep the airbag system
from working properly. The
operation of the airbag system can
also be affected by changing or
moving any parts of the front seats,
safety belts, the airbag sensing and
diagnostic module, steering wheel,
instrument panel, roof-rail airbag
modules, ceiling headliner or pillar
garnish trim, overhead console,
front sensors, side impact sensors,
or airbag wiring.