2013 CHEVROLET MALIBU length
[x] Cancel search: lengthPage 84 of 436

Black plate (32,1)Chevrolet Malibu Owner Manual - 2013 - CRC - 6/6/12
3-32 Seats and Restraints
If the airbag readiness light stays on
after the vehicle is started or comes
on when you are driving, the airbag
system may not work properly. Have
the vehicle serviced right away. See
Airbag Readiness Light on
page 5‑12for more information.
Vehicles with eAssist have a high
voltage battery and a standard 12‐
volt battery. If an airbag inflates or
the vehicle has been in a crash, the
vehicle's sensing system may shut
down the high voltage system.
When this occurs, the high voltage
battery is disconnected and the
vehicle is not charging the 12‐volt
battery or the electrical system. The
vehicle may start but it shuts down
once the 12‐volt battery is depleted.
When the 12‐volt battery is
depleted, the vehicle will not start
and the on‐board jump start feature
is disabled. The airbag readiness
light and/or the 12‐volt battery
warning light are displayed. Before
the vehicle can be operated again, it
must be serviced at your dealer.Child Restraints
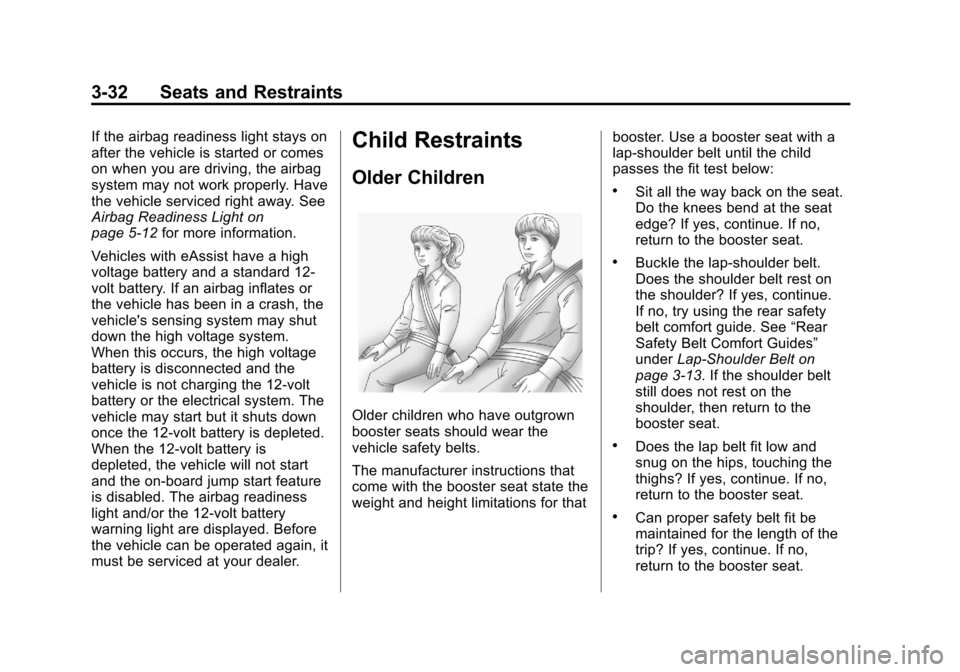
Older Children
Older children who have outgrown
booster seats should wear the
vehicle safety belts.
The manufacturer instructions that
come with the booster seat state the
weight and height limitations for that booster. Use a booster seat with a
lap-shoulder belt until the child
passes the fit test below:
.Sit all the way back on the seat.
Do the knees bend at the seat
edge? If yes, continue. If no,
return to the booster seat.
.Buckle the lap-shoulder belt.
Does the shoulder belt rest on
the shoulder? If yes, continue.
If no, try using the rear safety
belt comfort guide. See
“Rear
Safety Belt Comfort Guides”
under Lap-Shoulder Belt on
page 3‑13. If the shoulder belt
still does not rest on the
shoulder, then return to the
booster seat.
.Does the lap belt fit low and
snug on the hips, touching the
thighs? If yes, continue. If no,
return to the booster seat.
.Can proper safety belt fit be
maintained for the length of the
trip? If yes, continue. If no,
return to the booster seat.
Page 190 of 436

Black plate (30,1)Chevrolet Malibu Owner Manual - 2013 - CRC - 6/6/12
7-30 Infotainment System
3. After the system determineswhat type of Bluetooth device is
being paired, the Bluetooth
device will need to be put into
discovery mode.
4. Some devices may require a Personal Identification Number
(PIN) in order to complete the
pairing process. Locate the
device named “GMusicConnect”
in the list on the Bluetooth
device and follow the
instructions on the device to
enter the four-digit PIN provided
by the infotainment system.
Connecting to a Device
Once a device is paired to the
infotainment system, it can be
connected to the infotainment
system.
To connect a paired device when no
other device is connected to the
infotainment system:
1. Select the Select Device option from the Bluetooth Music
Setup menu. 2. Select the new device.
To connect a paired device when
another device is connected to the
infotainment system:
1. Select the Select Device option
from the Bluetooth Music
Setup menu.
2. Select the new device.
3. The active device is disconnected from the system
and the new device is
connected.
Removing a Device
1. Select Remove Device from the Bluetooth Music Setup menu.
2. Select the device.
3. The device is removed from the system.
Before connecting to the removed
device again, it will need to paired
to the infotainment system. Changing the Default PIN
To change the default PIN:
1. Select Change Default PIN from
the Bluetooth Music
Setup menu.
2. Select one of the pre-defined PINs, or select Other to create
a PIN.
To create a PIN:
1. Select the length of the PIN.
2. Enter the character sequence.
Messages
The following messages may
appear on the infotainment screen.
Poor Bluetooth Signal Quality:
This message displays when the
Bluetooth signal strength is low.
This Feature is Unavailable While
Vehicle is Moving: This message
displays when an action is not
allowed while the vehicle is moving.
Page 237 of 436

Black plate (21,1)Chevrolet Malibu Owner Manual - 2013 - CRC - 6/6/12
Driving and Operating 9-21
Engine Heater
The engine coolant heater,
if available, can help in cold weather
conditions at or below−18°C (0°F)
for easier starting and better fuel
economy during engine warm-up.
Plug in the coolant heater at least
four hours before starting the
vehicle. An internal thermostat in
the plug end of the cord will prevent
engine coolant heater operation at
temperatures above −18°C (0°F).
To Use the Engine Coolant
Heater
1. Turn off the engine.
2. Open the hood and unwrap the
electrical cord.
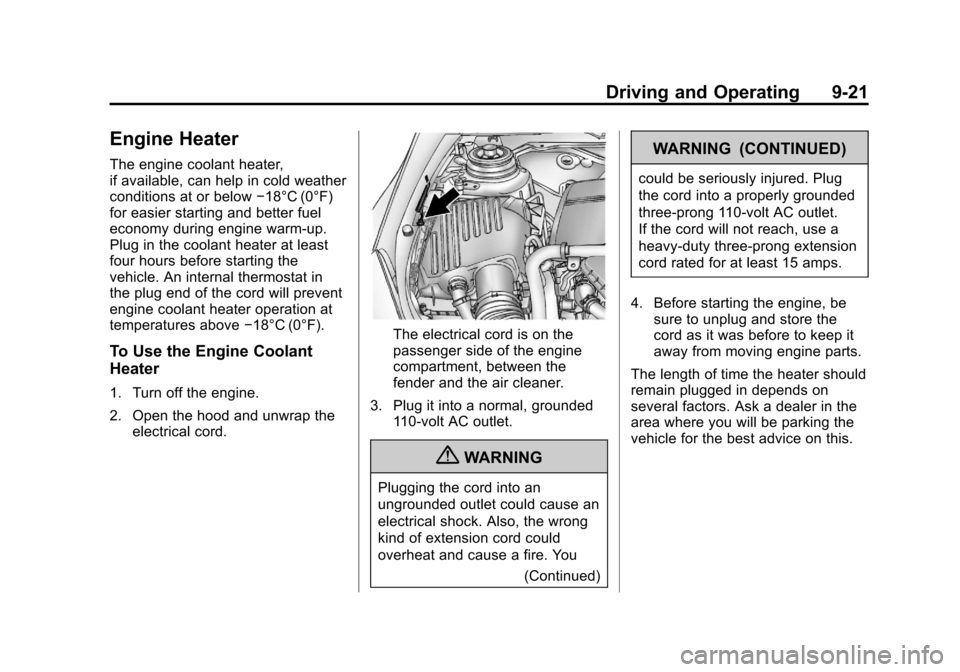
The electrical cord is on the
passenger side of the engine
compartment, between the
fender and the air cleaner.
3. Plug it into a normal, grounded 110-volt AC outlet.
{WARNING
Plugging the cord into an
ungrounded outlet could cause an
electrical shock. Also, the wrong
kind of extension cord could
overheat and cause a fire. You
(Continued)
WARNING (CONTINUED)
could be seriously injured. Plug
the cord into a properly grounded
three-prong 110-volt AC outlet.
If the cord will not reach, use a
heavy-duty three-prong extension
cord rated for at least 15 amps.
4. Before starting the engine, be sure to unplug and store the
cord as it was before to keep it
away from moving engine parts.
The length of time the heater should
remain plugged in depends on
several factors. Ask a dealer in the
area where you will be parking the
vehicle for the best advice on this.
Page 293 of 436

Black plate (27,1)Chevrolet Malibu Owner Manual - 2013 - CRC - 6/6/12
Vehicle Care 10-27
Park Brake and P (Park)
Mechanism Check
{WARNING
When you are doing this check,
the vehicle could begin to move.
You or others could be injured
and property could be damaged.
Make sure there is room in front
of the vehicle in case it begins to
roll. Be ready to apply the regular
brake at once should the vehicle
begin to move.
Park on a fairly steep hill, with the
vehicle facing downhill. Keeping
your foot on the regular brake, set
the parking brake.
.To check the parking brake's
holding ability: With the engine
running and the transmission in
N (Neutral), slowly remove foot
pressure from the regular brake
pedal. Do this until the vehicle is
held by the parking brake only.
.To check the P (Park)
mechanism's holding ability:
With the engine running, shift to
P (Park). Then release the
parking brake followed by the
regular brake.
Contact your dealer if service is
required.
Wiper Blade Replacement
Windshield wiper blades should be
inspected for wear or cracking. See
Maintenance Schedule on
page 11‑2.
It is a good idea to clean the wiper
blade assembly on a regular basis.
When worn, or cleaning is
ineffective, replace the wiper blade.
For proper windshield wiper blade
length and type, see Maintenance
Replacement Parts on page 11‑14.
Notice: Allowing the wiper arm to
touch the windshield when no
wiper blade is installed could
damage the windshield. Any
damage that occurs would not be covered by your warranty. Do not
allow the wiper arm to touch the
windshield.
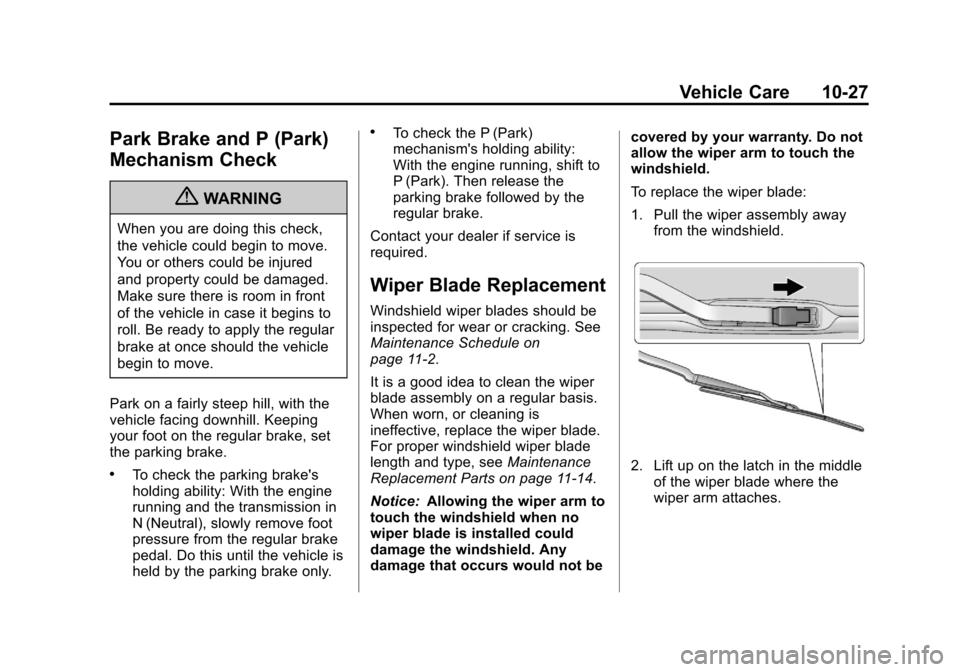
To replace the wiper blade:
1. Pull the wiper assembly away
from the windshield.
2. Lift up on the latch in the middleof the wiper blade where the
wiper arm attaches.