2013 CHEVROLET MALIBU light
[x] Cancel search: lightPage 79 of 436
Black plate (27,1)Chevrolet Malibu Owner Manual - 2013 - CRC - 6/6/12
Seats and Restraints 3-27
WARNING (CONTINUED)
Even if the passenger sensing
system has turned off the front
outboard passenger airbag(s), no
system is fail-safe. No one can
guarantee that an airbag will not
inflate under some unusual
circumstance, even though the
airbag(s) are off.
Secure rear-facing child restraints
in a rear seat, even if the
airbag(s) are off. If you secure a
forward-facing child restraint in
the front outboard passenger
seat, always move the seat as far
back as it will go. It is better to
secure the child restraint in a
rear seat.The passenger sensing system is
designed to turn off the front
outboard passenger frontal airbag
and knee airbag if:.The front outboard passenger
seat is unoccupied.
.The system determines that an
infant is present in a child
restraint.
.A front outboard passenger
takes his/her weight off of the
seat for a period of time.
.Or, if there is a critical problem
with the airbag system or the
passenger sensing system.
When the passenger sensing
system has turned off the front
outboard passenger frontal airbag
and knee airbag, the off indicator
will light and stay lit as a reminder
that the airbags are off. See
Passenger Airbag Status Indicator
on page 5‑13. The passenger sensing system is
designed to turn on the front
outboard passenger frontal airbag
and knee airbag anytime the system
senses that a person of adult size is
sitting properly in the front outboard
passenger seat. When the
passenger sensing system has
allowed the airbags to be enabled,
the on indicator will light and stay lit
as a reminder that the airbags are
active.
For some children, including
children in child restraints and for
very small adults, the passenger
sensing system may or may not turn
off the front outboard passenger
frontal airbag and knee airbag,
depending upon the person's
seating posture and body build.
Everyone in the vehicle who has
outgrown child restraints should
wear a safety belt properly
—
whether or not there is an airbag for
that person.
Page 80 of 436
Black plate (28,1)Chevrolet Malibu Owner Manual - 2013 - CRC - 6/6/12
3-28 Seats and Restraints
{WARNING
If the airbag readiness light ever
comes on and stays on, it means
that something may be wrong
with the airbag system. To help
avoid injury to yourself or others,
have the vehicle serviced right
away. SeeAirbag Readiness
Light on page 5‑12 for more
information, including important
safety information.
If the On Indicator Is Lit for a
Child Restraint
If a child restraint has been installed
and the on indicator is lit:
1. Turn the vehicle off.
2. Remove the child restraint from the vehicle.
3. Remove any additional items from the seat such as blankets,
cushions, seat covers, seat
heaters, or seat massagers. 4. Reinstall the child restraint
following the directions provided
by the child restraint
manufacturer and refer to
Securing Child Restraints (Front
Passenger Seat) on page 3‑50
orSecuring Child Restraints
(Rear Seat) on page 3‑47.
5. If, after reinstalling the child restraint and restarting the
vehicle, the on indicator is still lit,
turn the vehicle off. Then slightly
recline the vehicle seatback and
adjust the seat cushion,
if adjustable, to make sure that
the vehicle seatback is not
pushing the child restraint into
the seat cushion.
Also make sure the child
restraint is not trapped under the
vehicle head restraint. If this
happens, adjust the head
restraint. See Head Restraints
on page 3‑2.
6. Restart the vehicle. The passenger sensing system may
or may not turn off the airbags for a
child in a child restraint depending
upon the child's seating posture and
body build. It is better to secure the
child restraint in a rear seat.
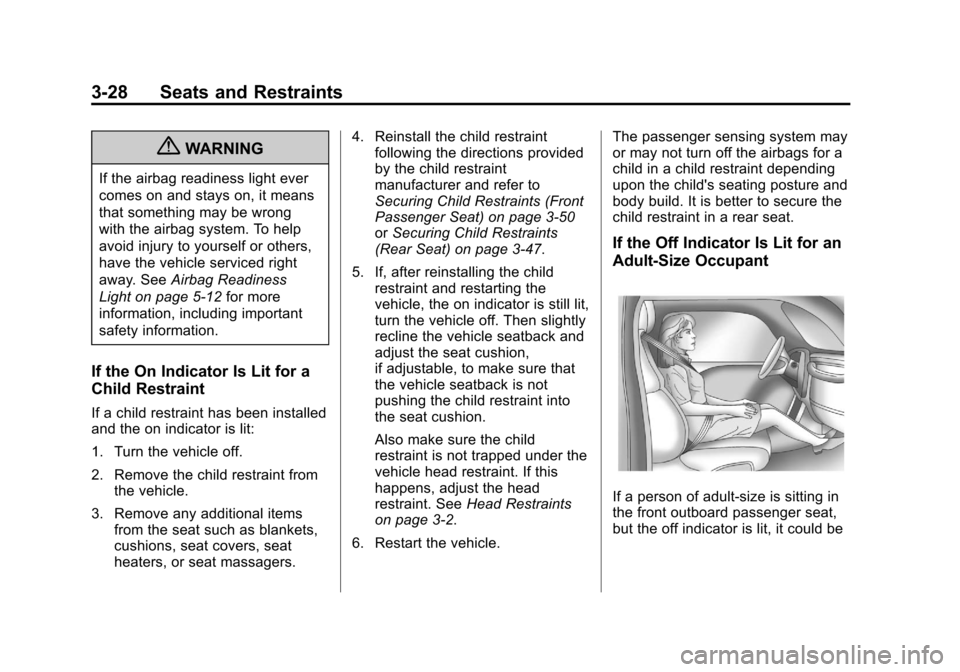
If the Off Indicator Is Lit for an
Adult-Size Occupant
If a person of adult-size is sitting in
the front outboard passenger seat,
but the off indicator is lit, it could be
Page 81 of 436
Black plate (29,1)Chevrolet Malibu Owner Manual - 2013 - CRC - 6/6/12
Seats and Restraints 3-29
because that person is not sitting
properly in the seat. Use the
following steps to allow the system
to detect that person and enable the
front outboard passenger frontal
airbag and knee airbag:
1. Turn the vehicle off.
2. Remove any additional materialfrom the seat, such as blankets,
cushions, seat covers, seat
heaters, seat massagers,
laptops, or other electronic
devices.
3. Place the seatback in the fully upright position.
4. Have the person sit upright in the seat, centered on the seat
cushion, with legs comfortably
extended.
5. Restart the vehicle and have the person remain in this position for
two to three minutes after the on
indicator is lit.Additional Factors Affecting
System Operation
Safety belts help keep the
passenger in position on the seat
during vehicle maneuvers and
braking, which helps the passenger
sensing system maintain the
passenger airbag status. See
“Safety Belts” and“Child Restraints”
in the Index for additional
information about the importance of
proper restraint use.
A thick layer of additional material,
such as a blanket or cushion,
or aftermarket equipment such as
seat covers, seat heaters, and seat
massagers can affect how well the
passenger sensing system
operates. We recommend that you
not use seat covers or other
aftermarket equipment except when
approved by GM for your specific
vehicle. See Adding Equipment to
the Airbag-Equipped Vehicle on
page 3‑30 for more information
about modifications that can affect
how the system operates. A wet seat can affect the
performance of the passenger
sensing system. Here is how:.The passenger sensing system
may turn off the passenger
frontal airbag when liquid is
soaked into the seat. If this
happens, the off indicator will be
lit, and the airbag readiness light
on the instrument panel will also
be lit.
.Liquid pooled on the seat that
has not soaked in may make it
more likely that the passenger
sensing system will turn on the
passenger frontal airbag while a
child restraint or child occupant
is on the seat. If the passenger
frontal airbag is turned on, the
on indicator will be lit.
If the passenger seat gets wet, dry
the seat immediately. If the airbag
readiness light is lit, do not install a
child restraint or allow anyone to
occupy the seat. See Airbag
Readiness Light on page 5‑12 for
important safety information.
Page 83 of 436
Black plate (31,1)Chevrolet Malibu Owner Manual - 2013 - CRC - 6/6/12
Seats and Restraints 3-31
of the seat fabric, could also
interfere with the operation of the
passenger sensing system. This
could either prevent proper
deployment of the passenger
airbag(s) or prevent the passenger
sensing system from properly
turning off the passenger airbag(s).
SeePassenger Sensing System on
page 3‑26.
If your vehicle needs to be modified
because you have a disability and
you have questions about whether
the modifications will affect the
vehicle's airbag system, or if you
have questions about whether the
airbag system will be affected if the
vehicle is modified for any other
reason, call Customer Assistance.
See Customer Assistance Offices
(U.S. and Canada) on page 13‑5 or
Customer Assistance Offices
(Mexico) on page 13‑5.Airbag System Check
The airbag system does not need
regularly scheduled maintenance or
replacement. Make sure the airbag
readiness light is working. See
Airbag Readiness Light on
page 5‑12.
Notice: If an airbag covering is
damaged, opened, or broken, the
airbag may not work properly. Do
not open or break the airbag
coverings. If there are any
opened or broken airbag covers,
have the airbag covering and/or
airbag module replaced. For the
location of the airbags, see
Where Are the Airbags? on
page 3‑21. See your dealer for
service.
Replacing Airbag System
Parts after a Crash
{WARNING
A crash can damage the
airbag systems in the vehicle.
A damaged airbag system
may not work properly and
may not protect you and your
passenger(s) in a crash, resulting
in serious injury or even death.
To help make sure the airbag
systems are working properly
after a crash, have them
inspected and any necessary
replacements made as soon as
possible.
If an airbag inflates, you will need to
replace airbag system parts. See
your dealer for service.
Page 84 of 436
Black plate (32,1)Chevrolet Malibu Owner Manual - 2013 - CRC - 6/6/12
3-32 Seats and Restraints
If the airbag readiness light stays on
after the vehicle is started or comes
on when you are driving, the airbag
system may not work properly. Have
the vehicle serviced right away. See
Airbag Readiness Light on
page 5‑12for more information.
Vehicles with eAssist have a high
voltage battery and a standard 12‐
volt battery. If an airbag inflates or
the vehicle has been in a crash, the
vehicle's sensing system may shut
down the high voltage system.
When this occurs, the high voltage
battery is disconnected and the
vehicle is not charging the 12‐volt
battery or the electrical system. The
vehicle may start but it shuts down
once the 12‐volt battery is depleted.
When the 12‐volt battery is
depleted, the vehicle will not start
and the on‐board jump start feature
is disabled. The airbag readiness
light and/or the 12‐volt battery
warning light are displayed. Before
the vehicle can be operated again, it
must be serviced at your dealer.Child Restraints
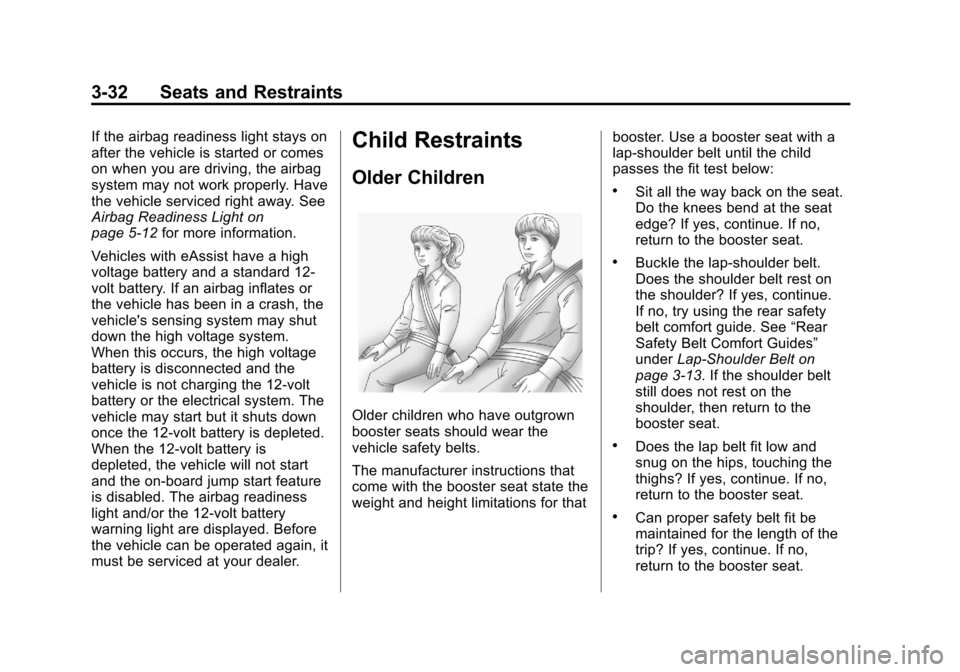
Older Children
Older children who have outgrown
booster seats should wear the
vehicle safety belts.
The manufacturer instructions that
come with the booster seat state the
weight and height limitations for that booster. Use a booster seat with a
lap-shoulder belt until the child
passes the fit test below:
.Sit all the way back on the seat.
Do the knees bend at the seat
edge? If yes, continue. If no,
return to the booster seat.
.Buckle the lap-shoulder belt.
Does the shoulder belt rest on
the shoulder? If yes, continue.
If no, try using the rear safety
belt comfort guide. See
“Rear
Safety Belt Comfort Guides”
under Lap-Shoulder Belt on
page 3‑13. If the shoulder belt
still does not rest on the
shoulder, then return to the
booster seat.
.Does the lap belt fit low and
snug on the hips, touching the
thighs? If yes, continue. If no,
return to the booster seat.
.Can proper safety belt fit be
maintained for the length of the
trip? If yes, continue. If no,
return to the booster seat.
Page 103 of 436
Black plate (51,1)Chevrolet Malibu Owner Manual - 2013 - CRC - 6/6/12
Seats and Restraints 3-51
If the child restraint has the LATCH
system, seeLower Anchors and
Tethers for Children (LATCH
System) on page 3‑40 for how and
where to install the child restraint
using LATCH. If a child restraint is
secured using a safety belt and it
uses a top tether, see Lower
Anchors and Tethers for Children
(LATCH System) on page 3‑40 for
top tether anchor locations.
Do not secure a child seat in a
position without a top tether anchor
if a national or local law requires
that the top tether be anchored, or if
the instructions that come with the
child restraint say that the top strap
must be anchored.
In Canada, the law requires that
forward-facing child restraints have
a top tether, and that the tether be
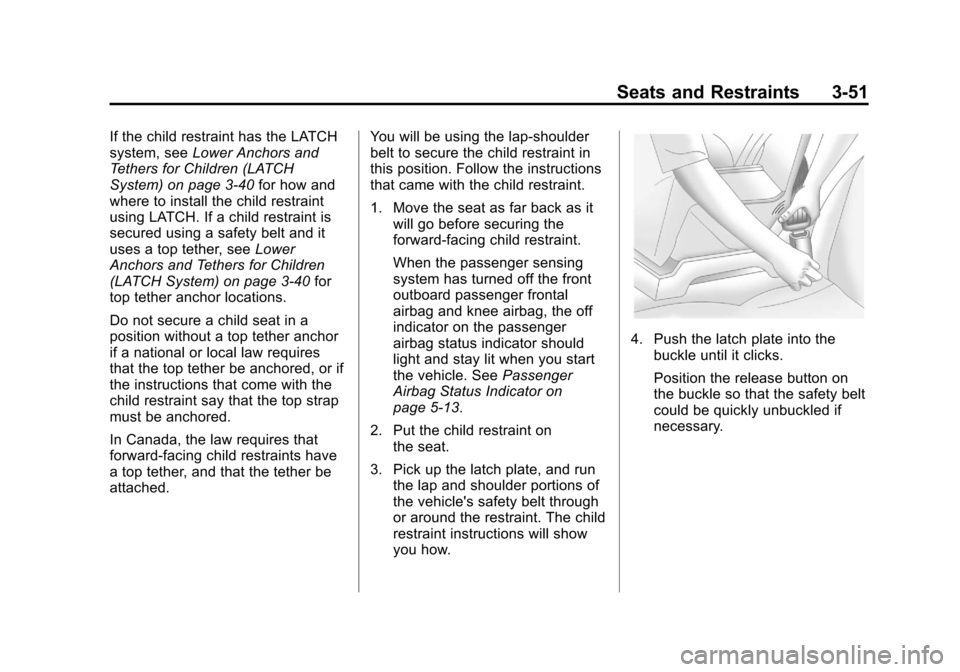
attached. You will be using the lap-shoulder
belt to secure the child restraint in
this position. Follow the instructions
that came with the child restraint.
1. Move the seat as far back as it
will go before securing the
forward-facing child restraint.
When the passenger sensing
system has turned off the front
outboard passenger frontal
airbag and knee airbag, the off
indicator on the passenger
airbag status indicator should
light and stay lit when you start
the vehicle. See Passenger
Airbag Status Indicator on
page 5‑13.
2. Put the child restraint on the seat.
3. Pick up the latch plate, and run the lap and shoulder portions of
the vehicle's safety belt through
or around the restraint. The child
restraint instructions will show
you how.
4. Push the latch plate into thebuckle until it clicks.
Position the release button on
the buckle so that the safety belt
could be quickly unbuckled if
necessary.
Page 109 of 436
Black plate (1,1)Chevrolet Malibu Owner Manual - 2013 - CRC - 6/6/12
Instruments and Controls 5-1
Instruments and
Controls
Controls
Steering Wheel Adjustment . . . 5-2
Steering Wheel Controls . . . . . . 5-2
Horn . . . . . . . . . . . . . . . . . . . . . . . . . . 5-3
Windshield Wiper/Washer . . . . . 5-3
Compass . . . . . . . . . . . . . . . . . . . . . 5-4
Clock . . . . . . . . . . . . . . . . . . . . . . . . . 5-5
Power Outlets . . . . . . . . . . . . . . . . . 5-5
Warning Lights, Gauges, and
Indicators
Warning Lights, Gauges, andIndicators . . . . . . . . . . . . . . . . . . . . 5-7
Instrument Cluster . . . . . . . . . . . . 5-8
Speedometer . . . . . . . . . . . . . . . . 5-10
Odometer . . . . . . . . . . . . . . . . . . . . 5-10
Trip Odometer . . . . . . . . . . . . . . . 5-10
Tachometer . . . . . . . . . . . . . . . . . . 5-10
Fuel Gauge . . . . . . . . . . . . . . . . . . 5-10
Driver Efficiency Gauge . . . . . . 5-11
Engine Coolant Temperature Gauge . . . . . . . . . . . . . . . . . . . . . . 5-11
Safety Belt Reminders . . . . . . . 5-12
Airbag Readiness Light . . . . . . 5-12 Passenger Airbag Status
Indicator . . . . . . . . . . . . . . . . . . . . 5-13
Charging System Light . . . . . . 5-14
Malfunction Indicator Lamp . . . . . . . . . . . . . 5-14
Brake System Warning Light . . . . . . . . . . . . . . . . . . . . . . . 5-17
Electric Parking Brake Light . . . . . . . . . . . . . . . . . . . . . . . 5-17
Service Electric Parking Brake Light . . . . . . . . . . . . . . . . . . . . . . . 5-17
Antilock Brake System (ABS) Warning Light . . . . . . . . . . . . . . 5-18
Lane Departure Warning (LDW) Light . . . . . . . . . . . . . . . . 5-18
Forward Collision Alert (FCA) Warning Light . . . . . . . . . . . . . . 5-19
Traction Off Light . . . . . . . . . . . . 5-19
StabiliTrak
®OFF Light . . . . . . . 5-19
Traction Control System (TCS)/StabiliTrak
®Light . . . . 5-20
Engine Coolant Temperature Warning Light . . . . . . . . . . . . . . 5-20
Tire Pressure Light . . . . . . . . . . 5-21
Engine Oil Pressure Light . . . . 5-22
Low Fuel Warning Light . . . . . . 5-22
Security Light . . . . . . . . . . . . . . . . 5-22
High-Beam On Light . . . . . . . . . 5-23
Front Fog Lamp Light . . . . . . . . 5-23 Lamps On Reminder . . . . . . . . . 5-23
Cruise Control Light . . . . . . . . . 5-23
Door Ajar Light . . . . . . . . . . . . . . 5-24
Information Displays
Center Stack Display . . . . . . . . 5-24
Driver Information
Center (DIC) . . . . . . . . . . . . . . . 5-24
Vehicle Messages
Vehicle Messages . . . . . . . . . . . 5-28
Battery Voltage and ChargingMessages . . . . . . . . . . . . . . . . . . 5-28
Brake System Messages . . . . 5-28
Compass Messages . . . . . . . . . 5-29
Cruise Control Messages . . . . 5-29
Door Ajar Messages . . . . . . . . . 5-29
Engine Cooling System Messages . . . . . . . . . . . . . . . . . . 5-29
Engine Oil Messages . . . . . . . . 5-30
Engine Power Messages . . . . 5-30
Fuel System Messages . . . . . . 5-31
Key and Lock Messages . . . . . 5-31
Lamp Messages . . . . . . . . . . . . . 5-31
Object Detection System Messages . . . . . . . . . . . . . . . . . . 5-31
Ride Control System Messages . . . . . . . . . . . . . . . . . . 5-32
Security Messages . . . . . . . . . . 5-32
Page 113 of 436
Black plate (5,1)Chevrolet Malibu Owner Manual - 2013 - CRC - 6/6/12
Instruments and Controls 5-5
Clock
The infotainment system controls
are used to access the time and
date settings through the menu
system. The clock menu can only
be used with the radio on while in
ON/RUN or ACC/ACCESSORY.
SeeOverview (Radio with CD and
Touchscreen) on page 7‑5 or
Overview (Radio with CD) on
page 7‑2 for information about how
to use the menu system. For
vehicles with a navigation system,
see the separate navigation manual.
Setting the Clock (Radio
with CD)
To set the time:
1. Press the CONFIG button and select Time Settings.
2. Select Set Time.
3. Turn the TUNE/MENU knob to adjust the highlighted number.
4. Press the TUNE/MENU knob to select the next number. 5. To save the time and return to
the Time Settings menu, press
the BACK
/button at any time
or press the TUNE/MENU knob
after adjusting the minutes.
Setting the 12/24 Hour Format
1. Press the CONFIG button and select Time Settings.
2. Highlight 12/24 Hour Format.
3. Press the TUNE/MENU knob to select the 12 hour or 24 hour
display format.
Setting the Clock (Radio with
CD and Touchscreen)
To set the time:
1. Press the CONFIG button toenter the menu options. Turn the
TUNE/MENU knob to scroll
through the available setup
features. Press the TUNE/MENU
knob or press the Time screen
button to display other options
within that feature. 2. Press + or
−to increase or
decrease the Hours and Minutes
displayed on the clock.
12/24 HR Format: Press the 12 HR
screen button for standard time;
press the 24 HR screen button for
military time.
Day + or Day −:Press the Day +
or Day −display buttons to increase
or decrease the day.
Display: Press Display to turn the
display of the time on the screen on
or off.
Power Outlets
The accessory power outlets can be
used to plug in electrical equipment,
such as a cell phone or MP3 player.
There are two accessory power
outlets: one on the center stack
below the climate control system,
and one under the armrest inside
the center console storage.