2013 CHEVROLET MALIBU Back door
[x] Cancel search: Back doorPage 73 of 436
Black plate (21,1)Chevrolet Malibu Owner Manual - 2013 - CRC - 6/6/12
Seats and Restraints 3-21
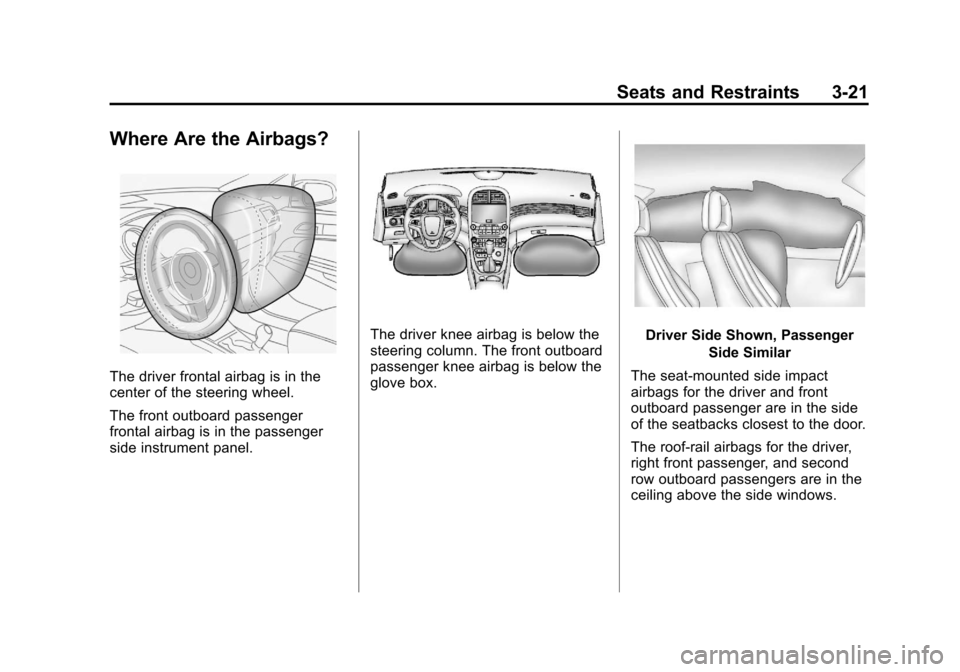
Where Are the Airbags?
The driver frontal airbag is in the
center of the steering wheel.
The front outboard passenger
frontal airbag is in the passenger
side instrument panel.
The driver knee airbag is below the
steering column. The front outboard
passenger knee airbag is below the
glove box.Driver Side Shown, PassengerSide Similar
The seat-mounted side impact
airbags for the driver and front
outboard passenger are in the side
of the seatbacks closest to the door.
The roof-rail airbags for the driver,
right front passenger, and second
row outboard passengers are in the
ceiling above the side windows.
Page 74 of 436
Black plate (22,1)Chevrolet Malibu Owner Manual - 2013 - CRC - 6/6/12
3-22 Seats and Restraints
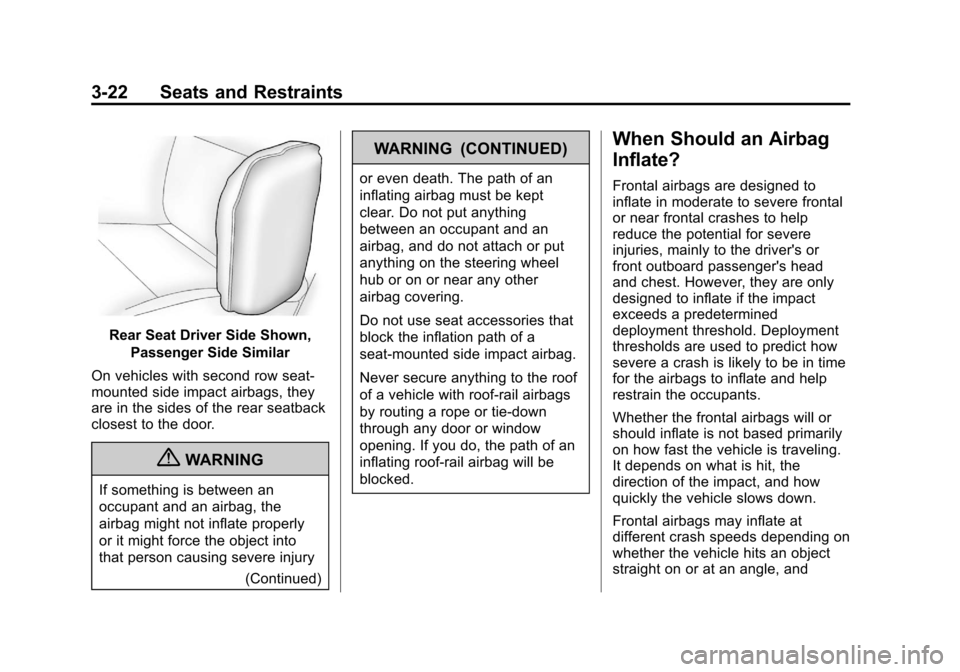
Rear Seat Driver Side Shown,Passenger Side Similar
On vehicles with second row seat‐
mounted side impact airbags, they
are in the sides of the rear seatback
closest to the door.
{WARNING
If something is between an
occupant and an airbag, the
airbag might not inflate properly
or it might force the object into
that person causing severe injury (Continued)
WARNING (CONTINUED)
or even death. The path of an
inflating airbag must be kept
clear. Do not put anything
between an occupant and an
airbag, and do not attach or put
anything on the steering wheel
hub or on or near any other
airbag covering.
Do not use seat accessories that
block the inflation path of a
seat-mounted side impact airbag.
Never secure anything to the roof
of a vehicle with roof-rail airbags
by routing a rope or tie‐down
through any door or window
opening. If you do, the path of an
inflating roof-rail airbag will be
blocked.
When Should an Airbag
Inflate?
Frontal airbags are designed to
inflate in moderate to severe frontal
or near frontal crashes to help
reduce the potential for severe
injuries, mainly to the driver's or
front outboard passenger's head
and chest. However, they are only
designed to inflate if the impact
exceeds a predetermined
deployment threshold. Deployment
thresholds are used to predict how
severe a crash is likely to be in time
for the airbags to inflate and help
restrain the occupants.
Whether the frontal airbags will or
should inflate is not based primarily
on how fast the vehicle is traveling.
It depends on what is hit, the
direction of the impact, and how
quickly the vehicle slows down.
Frontal airbags may inflate at
different crash speeds depending on
whether the vehicle hits an object
straight on or at an angle, and
Page 112 of 436
Black plate (4,1)Chevrolet Malibu Owner Manual - 2013 - CRC - 6/6/12
5-4 Instruments and Controls
Heavy snow or ice can overload the
wipers. A circuit breaker stops them
until the motor cools.
Wipe Parking
If the ignition is turned to LOCK/
OFF while the wipers are on 1, 2,
or
3, they will immediately stop.
If the windshield wiper lever is then
moved to
9before the driver door
is opened, or within 10 minutes, the
wipers will restart and move to the
base of the windshield.
If the ignition is turned to LOCK/
OFF during a windshield wash, the
wipers will stop when they reach the
base of the windshield.
Windshield Washer
Pull the windshield wiper lever
toward you to spray windshield
washer fluid and activate the wipers.
The washer and wipers will continue
until the lever is released or the
maximum wash time is reached. When the windshield wiper lever is
released, additional wipes may
occur depending on how long the
windshield washer had been
activated.
If the washer fluid is low a message
may display on the Driver
Information Center (DIC), see
Washer Fluid Messages on
page 5‑34. For information on
filling the windshield washer fluid
reservoir, seeWasher Fluid on
page 10‑22.
{WARNING
In freezing weather, do not use
the washer until the windshield is
warmed. Otherwise the washer
fluid can form ice on the
windshield, blocking your vision.
Compass
There is a compass display in the
Driver Information Center (DIC). The
compass receives its heading and
other information from the GlobalPositioning System (GPS) antenna,
StabiliTrak, and vehicle speed
information.
Avoid covering the GPS antenna for
long periods of time with objects
that may interfere with the antenna's
ability to receive a satellite signal.
See
Backglass Antenna on
page 7‑21 andSatellite Radio
Antenna on page 7‑21 for the
location of the vehicle's antennas.
The compass system is designed to
operate for a certain number of
miles or degrees of turn before
needing a signal from the GPS
satellites. When the compass
display shows CAL, drive the
vehicle for a short distance in an
open area where it can receive a
GPS signal. The compass system
will automatically determine when
the GPS signal is restored and
provide a heading again. See
Compass Messages on page 5‑29
for more information on the
messages that may be displayed for
the compass.
Page 114 of 436
Black plate (6,1)Chevrolet Malibu Owner Manual - 2013 - CRC - 6/6/12
5-6 Instruments and Controls
The outlet is powered when the
ignition is in ON/RUN or ACC/
ACCESSORY, or until the driver
door is opened within 10 minutes of
turning off the vehicle. SeeRetained
Accessory Power (RAP) on
page 9‑22.
Open the protective cover to use the
accessory power outlet.
Certain electrical accessories may
not be compatible with the
accessory power outlets and could
overload vehicle or adapter fuses.
If there is a problem, see your
dealer.
When adding electrical equipment,
be sure to follow the installation
instructions included with the
equipment. See Add-On Electrical
Equipment on page 9‑50.
Notice: Hanging heavy
equipment from the power outlet
can cause damage not covered
by the vehicle warranty. The
power outlets are designed for
accessory power plugs only, such
as cell phone charge cords.Power Outlet 120 Volt
Alternating Current
The vehicle may have a power
outlet that can be used to plug in
electrical equipment that uses a
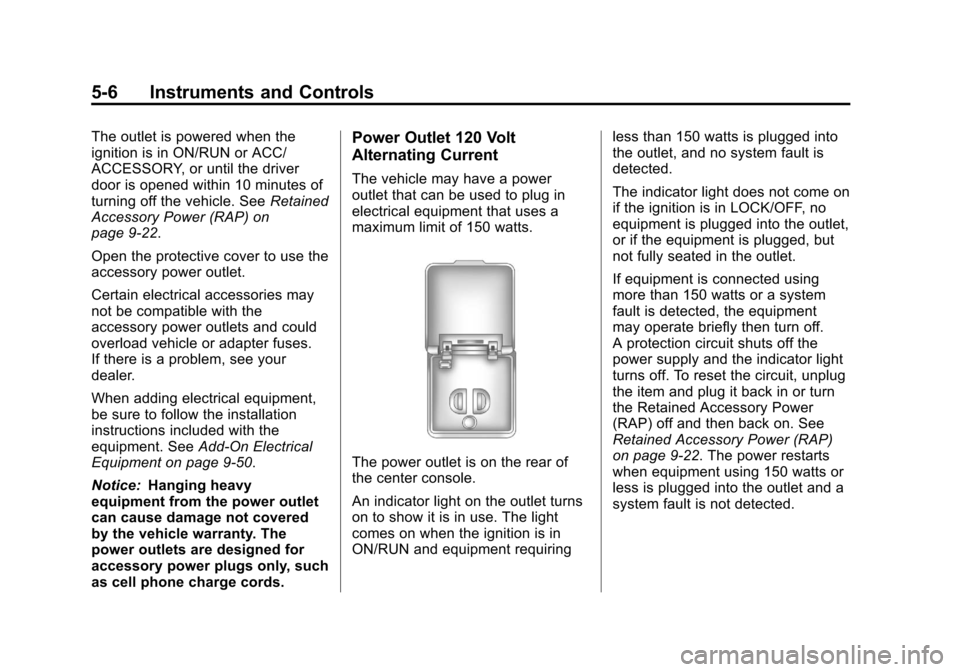
maximum limit of 150 watts.
The power outlet is on the rear of
the center console.
An indicator light on the outlet turns
on to show it is in use. The light
comes on when the ignition is in
ON/RUN and equipment requiring less than 150 watts is plugged into
the outlet, and no system fault is
detected.
The indicator light does not come on
if the ignition is in LOCK/OFF, no
equipment is plugged into the outlet,
or if the equipment is plugged, but
not fully seated in the outlet.
If equipment is connected using
more than 150 watts or a system
fault is detected, the equipment
may operate briefly then turn off.
A protection circuit shuts off the
power supply and the indicator light
turns off. To reset the circuit, unplug
the item and plug it back in or turn
the Retained Accessory Power
(RAP) off and then back on. See
Retained Accessory Power (RAP)
on page 9‑22. The power restarts
when equipment using 150 watts or
less is plugged into the outlet and a
system fault is not detected.
Page 118 of 436
Black plate (10,1)Chevrolet Malibu Owner Manual - 2013 - CRC - 6/6/12
5-10 Instruments and Controls
Speedometer
The speedometer shows the
vehicle's speed in either kilometers
per hour (km/h) or miles per
hour (mph).
Odometer
The odometer shows how far the
vehicle has been driven, in either
kilometers or miles.
This vehicle has a tamper‐resistant
odometer. The digital odometer will
read 999,999 if it is turned back.
If the vehicle needs a new odometer
installed, it must be set to the
mileage total of the old odometer.
If that is not possible, then it must
be set at zero and a label must be
put on the driver door to show the
old mileage reading when the new
odometer was installed.
Trip Odometer
The trip odometer can show how far
the vehicle has been driven since
the trip odometer was last reset.
The trip odometer is accessed and
reset through the Driver Information
Center (DIC). SeeDriver
Information Center (DIC) on
page 5‑24.
Tachometer
The tachometer displays the
engine speed in revolutions per
minute (rpm).
For eAssist vehicles, when the
ignition is in ON/RUN, the
tachometer indicates the vehicle
status. When pointing to AUTO
STOP, the engine is off but the
vehicle is on and can move. The
engine could auto start at any time.
When the indicator points to OFF,
the vehicle is off.
When the engine is on, the
tachometer will indicate the engine’s
revolutions per minute (rpm). The tachometer may vary by several
hundred rpm’s, during auto stop
mode, when the engine is shutting
off and restarting.
A slight bump may be felt when the
transmission is determining the
most fuel efficient operating range.
Fuel Gauge
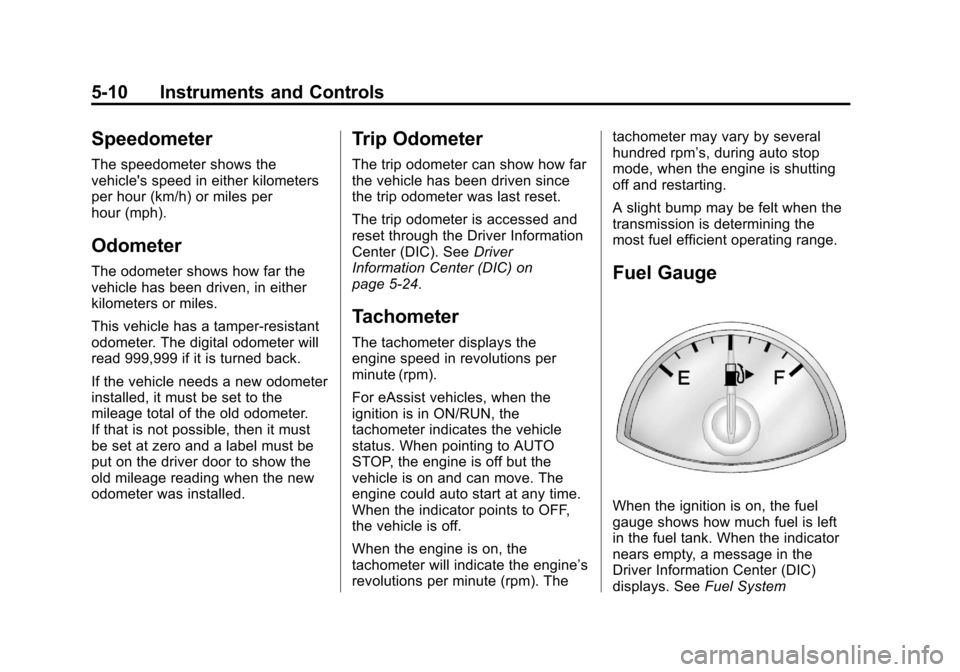
When the ignition is on, the fuel
gauge shows how much fuel is left
in the fuel tank. When the indicator
nears empty, a message in the
Driver Information Center (DIC)
displays. See
Fuel System
Page 119 of 436
Black plate (11,1)Chevrolet Malibu Owner Manual - 2013 - CRC - 6/6/12
Instruments and Controls 5-11
Messages on page 5‑31. The
vehicle still has a little fuel left, but
the vehicle should be fueled soon.
An arrow on the fuel gauge
indicates the side of the vehicle the
fuel door is on.
Here are four things that some
owners ask about. These are
normal and do not indicate a
problem with the fuel gauge:
.At the service station, the gas
pump shuts off before the gauge
reads full.
.It takes a little more or less fuel
to fill up than the gauge
indicated. For example, the
gauge may have indicated the
fuel tank was half full, but it
actually took a little more or less
than half the fuel tank's capacity
to fill it.
.The indicator moves a little while
turning a corner or speeding up.
.The gauge goes back to empty
when the ignition is turned off.
Driver Efficiency Gauge
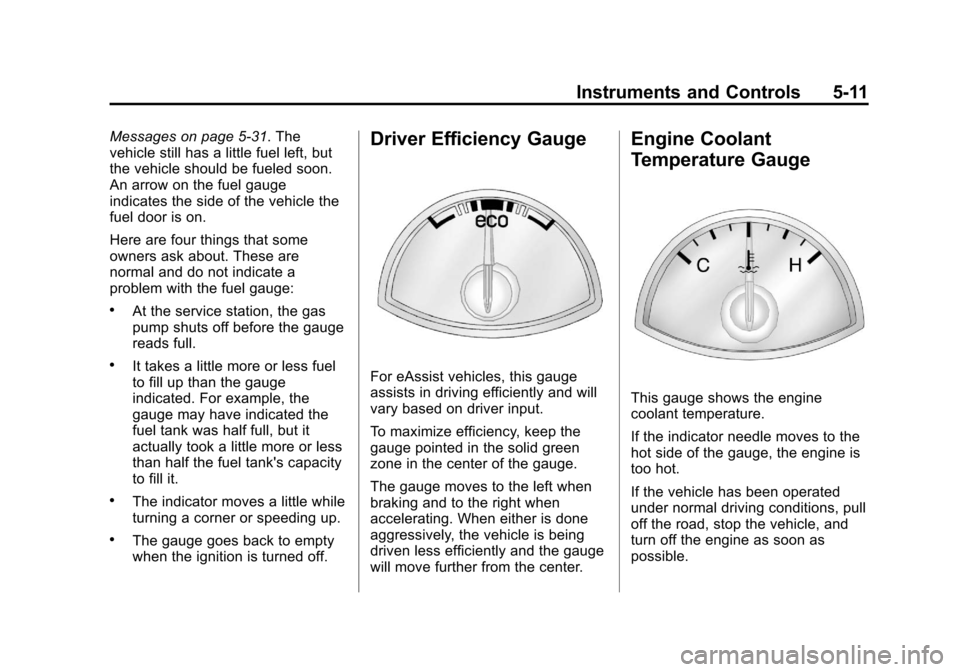
For eAssist vehicles, this gauge
assists in driving efficiently and will
vary based on driver input.
To maximize efficiency, keep the
gauge pointed in the solid green
zone in the center of the gauge.
The gauge moves to the left when
braking and to the right when
accelerating. When either is done
aggressively, the vehicle is being
driven less efficiently and the gauge
will move further from the center.
Engine Coolant
Temperature Gauge
This gauge shows the engine
coolant temperature.
If the indicator needle moves to the
hot side of the gauge, the engine is
too hot.
If the vehicle has been operated
under normal driving conditions, pull
off the road, stop the vehicle, and
turn off the engine as soon as
possible.
Page 143 of 436
Black plate (35,1)Chevrolet Malibu Owner Manual - 2013 - CRC - 6/6/12
Instruments and Controls 5-35
Vehicle
Personalization
The audio system controls are used
to access the personalization
menus for customizing vehicle
features.
CONFIG (Configuration):Press to
access the Configuration
Settings menu.
TUNE/MENU: Turn to scroll
through the menus. Press to enter
the menus and select the menu
items.
BACK
/: Press to exit or move
backward in a menu.
Entering the Personalization
Menus
1. Press CONFIG to access the Configuration Settings menu.
2. Turn the TUNE/MENU knob to highlight Vehicle Settings.
3. Press TUNE/MENU to select the Vehicle Settings menu. The following list of menu items will
be available:
.Climate and Air Quality
.Comfort and Convenience
.Language
.Lighting
.Power Door Locks
.Remote Locking, Unlocking,
Starting
.Return to Factory Settings
Turn the TUNE/MENU knob to
highlight the menu. Press TUNE/
MENU to select it. Each of the
menus is detailed in the following
information.
Climate and Air Quality
Select the Climate and Air Quality
menu and the following may be
displayed:
.Auto Fan Speed
.Auto Defog
.Auto Rear Defog Auto Fan Speed
This will allow you to select the
automatic fan speed. It can be
adjusted to run lower or higher than
normal.
Press TUNE/MENU when Auto Fan
Speed is highlighted to open the
menu. Turn the TUNE/MENU knob
to highlight High, Medium, or Low.
Press TUNE/MENU to confirm the
selection and move back to the
last menu.
Remote Start Heated Seats
When turned on, this feature will
turn the heated seats on when using
remote start on cold days.
Press TUNE/MENU when Remote
Start Heated Seats is highlighted.
Turn the TUNE/MENU knob to
select On or Off. Press TUNE/
MENU to confirm the selection and
move back to the last menu.
Page 144 of 436
Black plate (36,1)Chevrolet Malibu Owner Manual - 2013 - CRC - 6/6/12
5-36 Instruments and Controls
Auto Defog
Only vehicles with dual automatic
climate control will have this option.
This will allow you to turn the auto
defog on or off.
Press TUNE/MENU when Auto
Defog is highlighted to open the
menu. Turn the TUNE/MENU knob
to highlight On or Off. Press TUNE/
MENU to confirm the selection and
move back to the last menu.
Auto Rear Defog
This will allow you to turn the auto
rear defog on or off. This feature will
automatically turn on the rear
window defogger when it is cold
outside.
Press TUNE/MENU when Auto
Rear Defog is highlighted to open
the menu. Turn the TUNE/MENU
knob to highlight On or Off. Press
TUNE/MENU to confirm the
selection and move back to the
last menu.Comfort and Convenience
Select the Comfort and
Convenience menu and the
following may be displayed:
.Easy Exit Driver Seat
.Chime Volume
.Reverse Tilt Mirror
Easy Exit Driver Seat
When on, this feature will move the
driver seat rearward upon turning
the ignition off and opening the
driver door. This may be done to
make it easier to exit the vehicle.
See “Easy Exit Driver Seat” under
Memory Seats on page 3‑6.
This feature can be turned on or off.
Press TUNE/MENU when Easy Exit
Driver Seat is highlighted. Turn the
TUNE/MENU knob to select On or
Off. Press TUNE/MENU to confirm
and go back to the last menu. Chime Volume
This allows selection of the chime
volume level.
Press TUNE/MENU when Chime
Volume is highlighted. Turn the
TUNE/MENU knob to select Normal
or High. Press TUNE/MENU to
confirm and go back to the
last menu.
Reverse Tilt Mirror
When on, both the driver and
passenger mirrors will tilt downward
when the vehicle is shifted to
R (Reverse) to improve visibility of
the ground near the rear wheels.
They will return to their previous
driving position when the vehicle is
shifted out of R (Reverse), the
ignition is turned to OFF, or the
vehicle is left in R (Reverse). See
Reverse Tilt Mirrors on page 2‑16.
Press TUNE/MENU when Reverse
Tilt Mirror is highlighted. Turn the
TUNE/MENU knob to select On or
Off. Press TUNE/MENU to confirm
and go back to the last menu.