2013 CHEVROLET IMPALA buttons
[x] Cancel search: buttonsPage 134 of 350
Black plate (38,1)Chevrolet Impala Owner Manual - 2013 - crc - 8/27/12
5-38 Instruments and Controls
NO CHANGE:No change will be
made to this feature. The current
setting will remain.
To select a setting, press the set/
reset button while the desired
setting is displayed on the DIC.
FACTORY SETTINGS
This feature allows you to set all of
the customization features back to
their factory default settings.
Press the customization button until
FACTORY SETTINGS appears on
the DIC display. Press the set/reset
button once to access the settings
for this feature. Then press the
customization button to scroll
through the following settings:
RESTORE ALL (default): The
customization features will be set to
their factory default settings.
DO NOT RESTORE: The
customization features will not be
set to their factory default settings. To select a setting, press the set/
reset button while the desired
setting is displayed on the DIC.
EXIT FEATURE SETTINGS
This feature allows you to exit the
FEATURE SETTINGS menu.
Press the customization button until
FEATURE SETTINGS PRESS
V
TO EXIT appears in the DIC display.
Press the set/reset button once to
exit the menu.
If you do not exit, pressing the
customization button again will
return you to the beginning of the
FEATURE SETTINGS menu.
Exiting the Feature
Settings Menu
The feature settings menu will be
exited when any of the following
occurs:
.The vehicle is shifted out of
P (Park).
.The vehicle is no longer in
ON/RUN.
.The trip/fuel or vehicle
information DIC buttons are
pressed.
.The end of the feature settings
menu is reached and exited.
.A 40-second time period has
elapsed with no selection made.
Page 135 of 350
Black plate (39,1)Chevrolet Impala Owner Manual - 2013 - crc - 8/27/12
Instruments and Controls 5-39
Universal Remote
System
SeeRadio Frequency Statement on
page 13‑15 for information
regarding Part 15 of the Federal
Communications Commission (FCC)
rules and Industry Canada
Standards RSS-GEN/210/220/310.
Universal Remote System
Programming
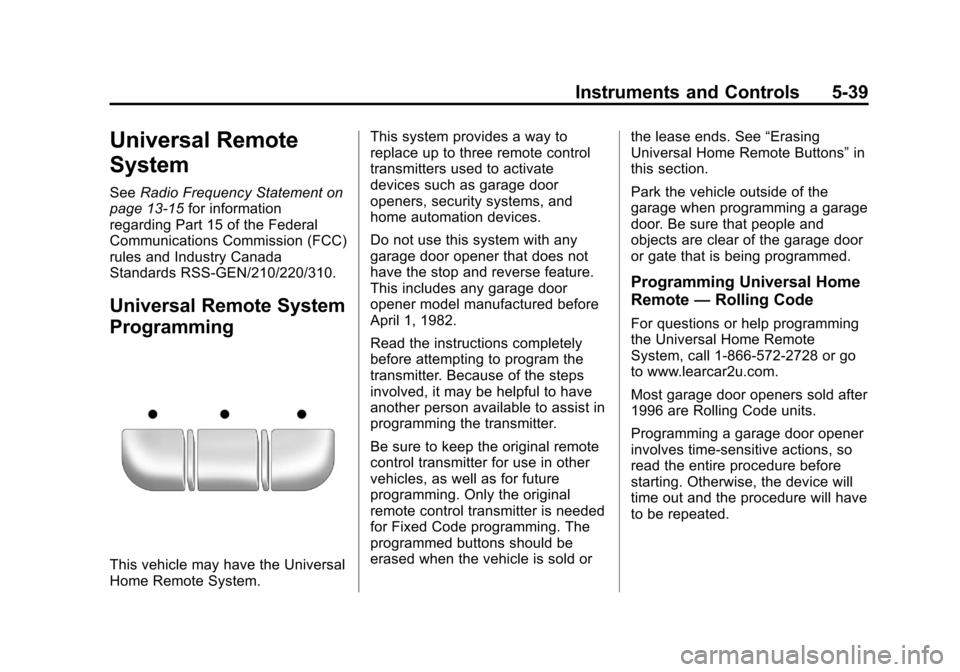
This vehicle may have the Universal
Home Remote System. This system provides a way to
replace up to three remote control
transmitters used to activate
devices such as garage door
openers, security systems, and
home automation devices.
Do not use this system with any
garage door opener that does not
have the stop and reverse feature.
This includes any garage door
opener model manufactured before
April 1, 1982.
Read the instructions completely
before attempting to program the
transmitter. Because of the steps
involved, it may be helpful to have
another person available to assist in
programming the transmitter.
Be sure to keep the original remote
control transmitter for use in other
vehicles, as well as for future
programming. Only the original
remote control transmitter is needed
for Fixed Code programming. The
programmed buttons should be
erased when the vehicle is sold or
the lease ends. See
“Erasing
Universal Home Remote Buttons” in
this section.
Park the vehicle outside of the
garage when programming a garage
door. Be sure that people and
objects are clear of the garage door
or gate that is being programmed.
Programming Universal Home
Remote —Rolling Code
For questions or help programming
the Universal Home Remote
System, call 1-866-572-2728 or go
to www.learcar2u.com.
Most garage door openers sold after
1996 are Rolling Code units.
Programming a garage door opener
involves time-sensitive actions, so
read the entire procedure before
starting. Otherwise, the device will
time out and the procedure will have
to be repeated.
Page 136 of 350
Black plate (40,1)Chevrolet Impala Owner Manual - 2013 - crc - 8/27/12
5-40 Instruments and Controls
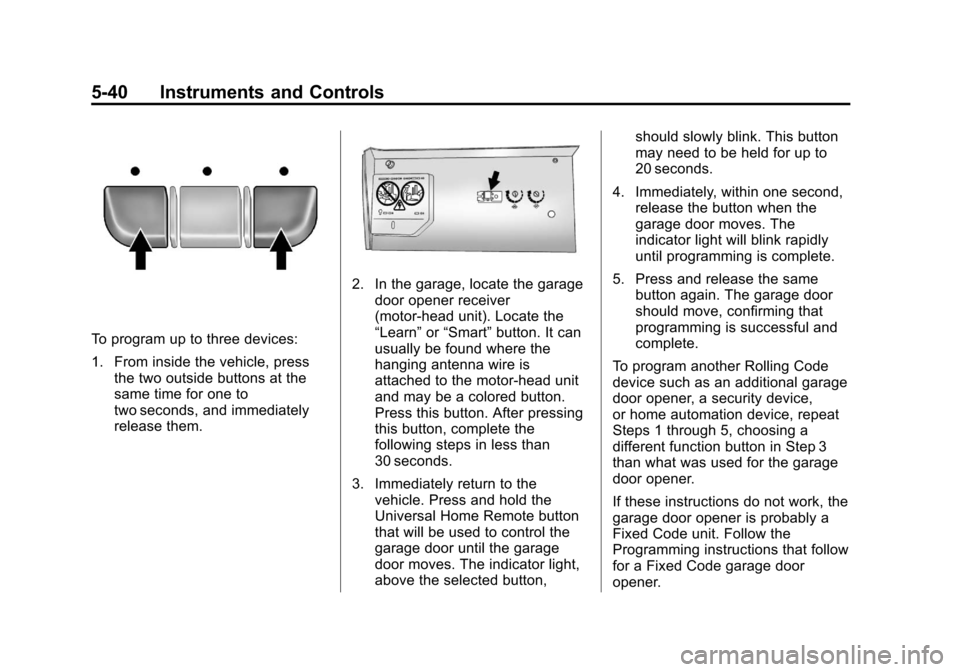
To program up to three devices:
1. From inside the vehicle, pressthe two outside buttons at the
same time for one to
two seconds, and immediately
release them.
2. In the garage, locate the garage
door opener receiver
(motor-head unit). Locate the
“Learn” or“Smart” button. It can
usually be found where the
hanging antenna wire is
attached to the motor-head unit
and may be a colored button.
Press this button. After pressing
this button, complete the
following steps in less than
30 seconds.
3. Immediately return to the vehicle. Press and hold the
Universal Home Remote button
that will be used to control the
garage door until the garage
door moves. The indicator light,
above the selected button, should slowly blink. This button
may need to be held for up to
20 seconds.
4. Immediately, within one second, release the button when the
garage door moves. The
indicator light will blink rapidly
until programming is complete.
5. Press and release the same button again. The garage door
should move, confirming that
programming is successful and
complete.
To program another Rolling Code
device such as an additional garage
door opener, a security device,
or home automation device, repeat
Steps 1 through 5, choosing a
different function button in Step 3
than what was used for the garage
door opener.
If these instructions do not work, the
garage door opener is probably a
Fixed Code unit. Follow the
Programming instructions that follow
for a Fixed Code garage door
opener.
Page 139 of 350
Black plate (43,1)Chevrolet Impala Owner Manual - 2013 - crc - 8/27/12
Instruments and Controls 5-43
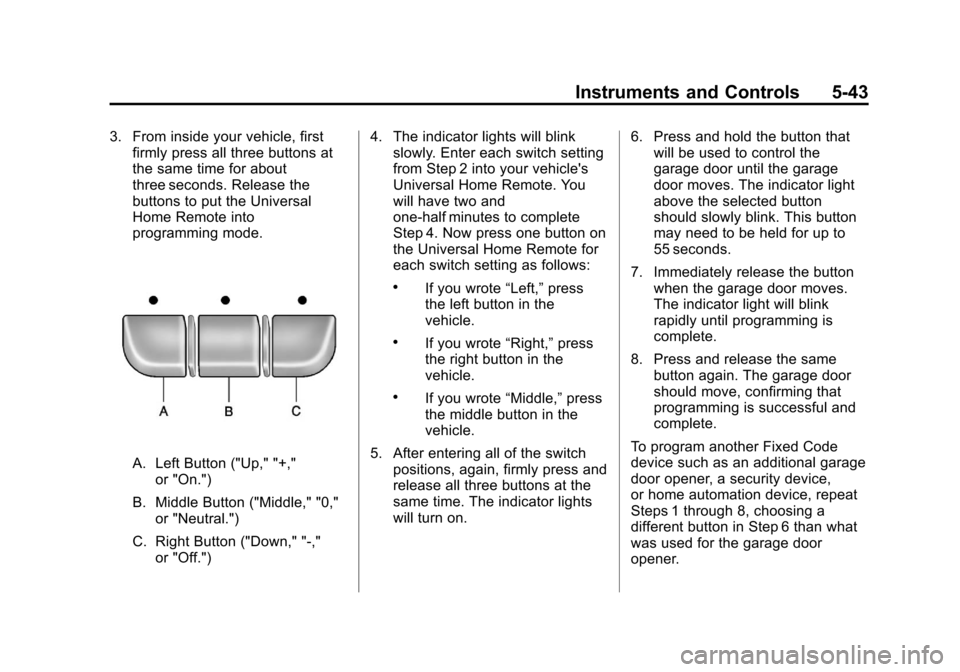
3. From inside your vehicle, firstfirmly press all three buttons at
the same time for about
three seconds. Release the
buttons to put the Universal
Home Remote into
programming mode.
A. Left Button ("Up," "+,"
or "On.")
B. Middle Button ("Middle," "0," or "Neutral.")
C. Right Button ("Down," "-," or "Off.") 4. The indicator lights will blink
slowly. Enter each switch setting
from Step 2 into your vehicle's
Universal Home Remote. You
will have two and
one-half minutes to complete
Step 4. Now press one button on
the Universal Home Remote for
each switch setting as follows:
.If you wrote “Left,”press
the left button in the
vehicle.
.If you wrote “Right,”press
the right button in the
vehicle.
.If you wrote “Middle,”press
the middle button in the
vehicle.
5. After entering all of the switch positions, again, firmly press and
release all three buttons at the
same time. The indicator lights
will turn on. 6. Press and hold the button that
will be used to control the
garage door until the garage
door moves. The indicator light
above the selected button
should slowly blink. This button
may need to be held for up to
55 seconds.
7. Immediately release the button when the garage door moves.
The indicator light will blink
rapidly until programming is
complete.
8. Press and release the same button again. The garage door
should move, confirming that
programming is successful and
complete.
To program another Fixed Code
device such as an additional garage
door opener, a security device,
or home automation device, repeat
Steps 1 through 8, choosing a
different button in Step 6 than what
was used for the garage door
opener.
Page 140 of 350
Black plate (44,1)Chevrolet Impala Owner Manual - 2013 - crc - 8/27/12
5-44 Instruments and Controls
Universal Remote System
Operation
Press and hold the appropriate
button for at least half of a second.
The indicator light will come on
while the signal is being transmitted.
Reprogramming Universal
Home Remote Buttons
Any of the three buttons can be
reprogrammed by repeating the
instructions.
Erasing Universal Home
Remote Buttons
The programmed buttons should be
erased when the vehicle is sold or
the lease ends.
To erase either Rolling Code or
Fixed Code on the Universal Home
Remote device:
1. Press and hold the 2 outsidebuttons at the same time for
approximately 20 seconds, until
the indicator lights, located
directly above the buttons, begin
to blink rapidly. 2. Once the indicator lights begin to
blink, release both buttons. The
codes from all buttons will be
erased.
For help or information on the
Universal Home Remote System,
call the customer assistance phone
number under Customer Assistance
Offices on page 13‑3.
Page 155 of 350
Black plate (7,1)Chevrolet Impala Owner Manual - 2013 - crc - 8/27/12
Infotainment System 7-7
double beep sounds. The radio
goes to a stored preset, plays for
a few seconds, then goes to the
next stored preset. Press
©
SEEK again to stop scanning
preset stations.
¨SEEK:Press to seek or scan
stations with a strong signal in the
selected band.
.To seek stations, press and
release
¨SEEK to go to the
next station and stay there.
.To scan stations, press and hold¨SEEK for a few seconds until
the radio beeps once. The radio
goes to a station, plays for a few
seconds, then goes to the next
station. Press
¨SEEK again to
stop scanning.
.To scan preset stations in the
selected band, press and hold
¨
SEEK for four seconds until a
double beep sounds. The radio
goes to a stored preset, plays for
a few seconds, then goes to the next stored preset. Press
¨
SEEK again to stop scanning
preset stations.
Storing Radio Stations
Drivers are encouraged to store
radio station while the vehicle is
parked. See
Defensive Driving on
page 9‑2. Tune to stored radio
stations using the presets, favorites
button, and steering wheel controls,
if the vehicle has this feature.
Radios that have a FAV button store
radio stations as favorites, up to
36 stations can be programmed as
favorites using the 6 softkeys below
the radio station frequency tabs and
by using the FAV button. Press the
FAV button to go through up to
6 pages of favorites, each having
6 favorite stations available per
page. Each page of favorites can
contain any combination of AM, FM,
or XM, if equipped, stations.
Radios that do not have a FAV
button store radio stations as
presets, up to 18 stations (6 FM1, 6 FM2, and 6 AM), can be
programmed on the 6 numbered
pushbuttons.
Storing a Radio Station as a
Preset, Radio with CD (Base)
Radios that have numbered
pushbuttons store radio stations as
presets.
Up to 18 stations (6 FM1, 6 FM2,
and 6 AM), can be programmed on
the six numbered buttons.
To store preset stations:
1. Tune to a radio station.
2. Press and hold one of the
6 numbered pushbuttons for
3 seconds until a beep sounds.
3. Repeat Steps 1 and 2 to store additional radio stations.
Storing a Radio Station as a
Favorite, Radio with CD (MP3)
Radios that have a FAV button store
radio stations as favorites.
To store a station as a favorite:
1. Tune to a radio station.
Page 162 of 350

Black plate (14,1)Chevrolet Impala Owner Manual - 2013 - crc - 8/27/12
7-14 Infotainment System
Inserting a Disc
Insert the disc partway into the slot,
label side up. The player pulls it in
and the disc begins playing.
Use an adapter ring when playing
the smaller 8 cm (3 in) discs.
Smaller discs with the adapter ring
are loaded the same way as a
full-size disc.
Ejecting a Disc
ZEJECT:Press to eject the disc.
If the disc is not removed after
several seconds, the CD player
automatically pulls the disc back in.
Playing a CD
When a CD is inserted into the
player, the CD symbol displays. As
each new track starts to play, the
track number displays.
If the ignition or radio is turned off
when a CD is in the player, the CD
stays in the player. If the ignition or
radio is turned on when a CD is in the player, the CD starts to play
where it stopped, if it was the last
selected audio source.
Buttons and Knobs
The buttons and knobs on the radio
control the following features.
f(Tune):
Turn to select tracks on
the CD.
©SEEK: Press to go to the start of
the current track, if more than
10 seconds have played. Press and
hold or press multiple times to
continue moving backward through
the tracks on the CD.
¨SEEK: Press to go to the next
track. Press and hold or press
multiple times to continue moving
forward through the tracks on
the CD.
sREV (Reverse): Press and hold
to reverse playback quickly within a
track. Sound is heard at a reduced
volume and the elapsed time of the
track displays. Release to resume
playing the track.
\FWD (Fast Forward): Press
and hold to advance playback
quickly within a track. Sound is
heard at a reduced volume and the
elapsed time of the track displays.
Release to resume playing the
track.
4(Information): Press to display
available additional information
about the current track.
BAND: Press to listen to the radio
while a CD is playing. The CD
remains inside the CD player.
CD/AUX (CD/Auxiliary): Press to
play a CD while listening to the
radio or a portable audio device.
Press this button again and the
system automatically searches for
an auxiliary input device, such as a
portable audio player. If a portable
audio player is not connected, No
Aux Input Device Found may
display.
Page 164 of 350
Black plate (16,1)Chevrolet Impala Owner Manual - 2013 - crc - 8/27/12
7-16 Infotainment System
Playing an MP3
Order of Play
Tracks are played in the following
order:
.Play begins from the first track in
the first playlist and continues
sequentially through all tracks in
each playlist. When the last
track of the last playlist has
played, play continues from the
first track of the first playlist.
.Play begins from the first track in
the first folder and continues
sequentially through all tracks in
each folder. When the last track
of the last folder has played,
play continues from the first
track of the first folder.
When playback starts from a new
folder, the new track name displays
unless folder mode has been
chosen as the default display, then
the new folder name displays. Buttons and Knobs
The buttons and knobs on the radio
control the following features.
f(Tune):
Turn to select MP3 files
on the disc.
©SEEK: Press to go to the start of
the track, if more than 10 seconds
have played. Press and hold or
press multiple times to continue
moving backward through tracks.
¨SEEK: Press to go to the next
track. Press and hold or press
multiple times to continue moving
forward through tracks.
sREV (Reverse): Press and hold
to reverse playback quickly. Sound
is heard at a reduced volume and
the elapsed time of the track
displays. Release
sREV to
resume playing.
\FWD (Fast Forward): Press
and hold to advance playback
quickly. Sound is heard at a reduced volume and the elapsed time of the
track displays. Release
\FWD to
resume playing.
4(Information): Press to display
available additional information
about the current track.
BAND: Press to listen to the radio
while an MP3 disc is playing. The
MP3 disc remains inside the CD
player.
CD/AUX (CD/Auxiliary): Press to
play an MP3 disc while listening to
the radio or a portable audio device.
Press this button again and the
system automatically searches for
an auxiliary input device, such as a
portable audio player. If a portable
audio player is not connected, No
Aux Input Device Found may
display.
Softkeys
The six softkeys below the radio
display are used to control functions
that display as tabs.
The softkeys below the radio display
control the following features.