2013 CHEVROLET EXPRESS CARGO VAN wheel size
[x] Cancel search: wheel sizePage 311 of 402

Black plate (63,1)Chevrolet Express Owner Manual - 2013 - 1stPrintReady - 6/19/12
Vehicle Care 10-63
brakes, rollover airbags, traction
control, and electronic stability
control, the performance of these
systems can also be affected.
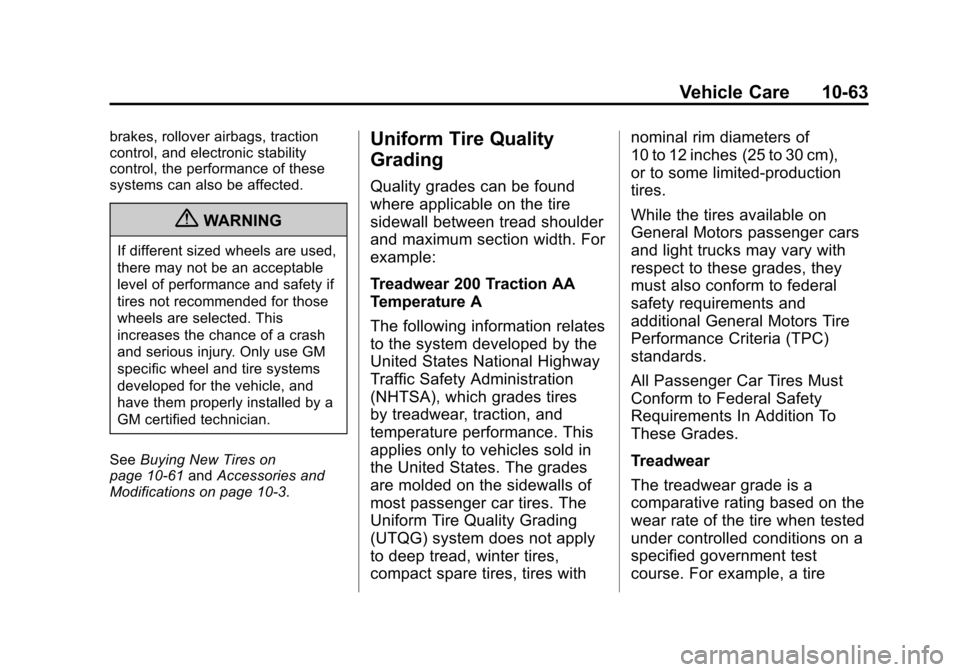
{WARNING
If different sized wheels are used,
there may not be an acceptable
level of performance and safety if
tires not recommended for those
wheels are selected. This
increases the chance of a crash
and serious injury. Only use GM
specific wheel and tire systems
developed for the vehicle, and
have them properly installed by a
GM certified technician.
See Buying New Tires on
page 10‑61 andAccessories and
Modifications on page 10‑3.
Uniform Tire Quality
Grading
Quality grades can be found
where applicable on the tire
sidewall between tread shoulder
and maximum section width. For
example:
Treadwear 200 Traction AA
Temperature A
The following information relates
to the system developed by the
United States National Highway
Traffic Safety Administration
(NHTSA), which grades tires
by treadwear, traction, and
temperature performance. This
applies only to vehicles sold in
the United States. The grades
are molded on the sidewalls of
most passenger car tires. The
Uniform Tire Quality Grading
(UTQG) system does not apply
to deep tread, winter tires,
compact spare tires, tires with nominal rim diameters of
10 to 12 inches (25 to 30 cm),
or to some limited-production
tires.
While the tires available on
General Motors passenger cars
and light trucks may vary with
respect to these grades, they
must also conform to federal
safety requirements and
additional General Motors Tire
Performance Criteria (TPC)
standards.
All Passenger Car Tires Must
Conform to Federal Safety
Requirements In Addition To
These Grades.
Treadwear
The treadwear grade is a
comparative rating based on the
wear rate of the tire when tested
under controlled conditions on a
specified government test
course. For example, a tire
Page 314 of 402

Black plate (66,1)Chevrolet Express Owner Manual - 2013 - 1stPrintReady - 6/19/12
10-66 Vehicle Care
WARNING (CONTINUED)
crash. To help avoid damage to
the vehicle, drive slowly, readjust,
or remove the device if it is
contacting the vehicle. Do not
spin the vehicle's tires. Follow the
manufacturer's instructions.
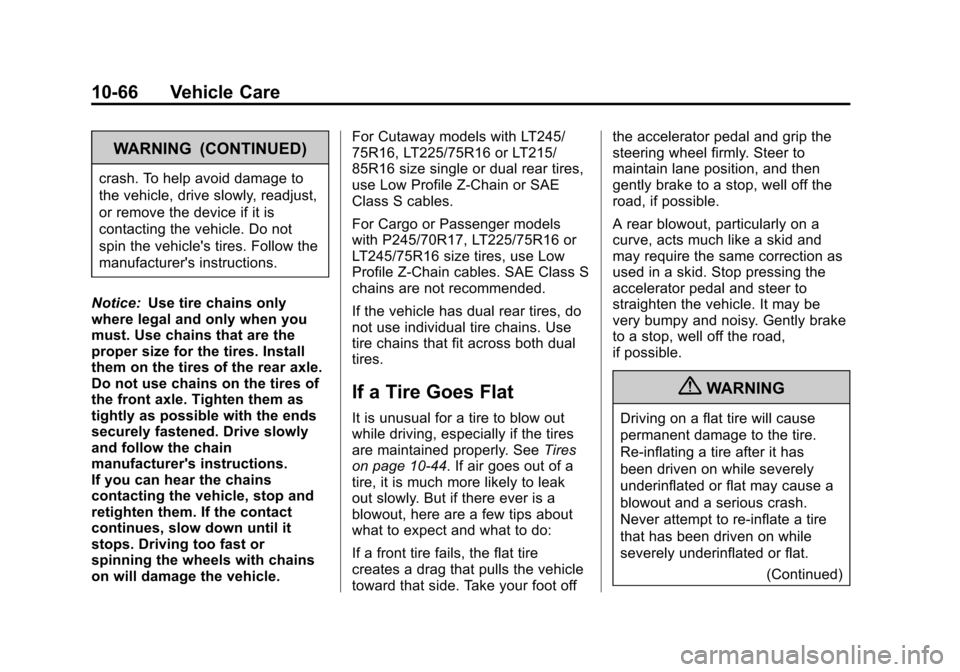
Notice: Use tire chains only
where legal and only when you
must. Use chains that are the
proper size for the tires. Install
them on the tires of the rear axle.
Do not use chains on the tires of
the front axle. Tighten them as
tightly as possible with the ends
securely fastened. Drive slowly
and follow the chain
manufacturer's instructions.
If you can hear the chains
contacting the vehicle, stop and
retighten them. If the contact
continues, slow down until it
stops. Driving too fast or
spinning the wheels with chains
on will damage the vehicle. For Cutaway models with LT245/
75R16, LT225/75R16 or LT215/
85R16 size single or dual rear tires,
use Low Profile Z-Chain or SAE
Class S cables.
For Cargo or Passenger models
with P245/70R17, LT225/75R16 or
LT245/75R16 size tires, use Low
Profile Z-Chain cables. SAE Class S
chains are not recommended.
If the vehicle has dual rear tires, do
not use individual tire chains. Use
tire chains that fit across both dual
tires.
If a Tire Goes Flat
It is unusual for a tire to blow out
while driving, especially if the tires
are maintained properly. See
Tires
on page 10‑44. If air goes out of a
tire, it is much more likely to leak
out slowly. But if there ever is a
blowout, here are a few tips about
what to expect and what to do:
If a front tire fails, the flat tire
creates a drag that pulls the vehicle
toward that side. Take your foot off the accelerator pedal and grip the
steering wheel firmly. Steer to
maintain lane position, and then
gently brake to a stop, well off the
road, if possible.
A rear blowout, particularly on a
curve, acts much like a skid and
may require the same correction as
used in a skid. Stop pressing the
accelerator pedal and steer to
straighten the vehicle. It may be
very bumpy and noisy. Gently brake
to a stop, well off the road,
if possible.
{WARNING
Driving on a flat tire will cause
permanent damage to the tire.
Re-inflating a tire after it has
been driven on while severely
underinflated or flat may cause a
blowout and a serious crash.
Never attempt to re-inflate a tire
that has been driven on while
severely underinflated or flat.
(Continued)
Page 317 of 402

Black plate (69,1)Chevrolet Express Owner Manual - 2013 - 1stPrintReady - 6/19/12
Vehicle Care 10-69
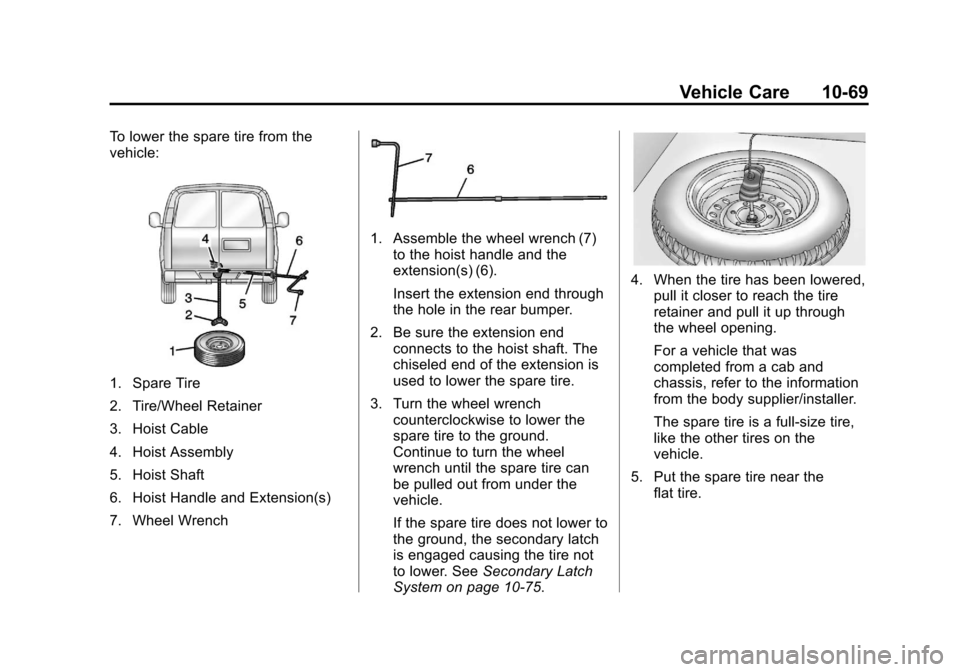
To lower the spare tire from the
vehicle:
1. Spare Tire
2. Tire/Wheel Retainer
3. Hoist Cable
4. Hoist Assembly
5. Hoist Shaft
6. Hoist Handle and Extension(s)
7. Wheel Wrench
1. Assemble the wheel wrench (7)to the hoist handle and the
extension(s) (6).
Insert the extension end through
the hole in the rear bumper.
2. Be sure the extension end connects to the hoist shaft. The
chiseled end of the extension is
used to lower the spare tire.
3. Turn the wheel wrench counterclockwise to lower the
spare tire to the ground.
Continue to turn the wheel
wrench until the spare tire can
be pulled out from under the
vehicle.
If the spare tire does not lower to
the ground, the secondary latch
is engaged causing the tire not
to lower. See Secondary Latch
System on page 10‑75.
4. When the tire has been lowered,
pull it closer to reach the tire
retainer and pull it up through
the wheel opening.
For a vehicle that was
completed from a cab and
chassis, refer to the information
from the body supplier/installer.
The spare tire is a full-size tire,
like the other tires on the
vehicle.
5. Put the spare tire near the flat tire.
Page 325 of 402

Black plate (77,1)Chevrolet Express Owner Manual - 2013 - 1stPrintReady - 6/19/12
Vehicle Care 10-77
8. Tilt the retainer at the end of thecable and pull it through the
wheel opening. Pull the tire out
from under the vehicle.
Notice: If you drive away before
the spare tire or secondary
latch system cable has been
reinstalled, you could damage the
vehicle. Always reinstall this
cable before driving the vehicle.
9. If the cable is hanging under the
vehicle, turn the wheel wrench in
the hoist shaft hole in the
bumper clockwise to raise the
cable back up.
Have the hoist assembly inspected
as soon as you can. You will not be
able to store a spare or flat tire
using the hoist assembly until it has
been repaired or replaced. To continue changing the flat tire,
return to Step 4 of
“Storing a Flat or
Spare Tire and Tools” underTire
Changing on page 10‑68.
Full-Size Spare Tire
If this vehicle came with a full-size
spare tire, it was fully inflated when
new, however, it can lose air over
time. Check the inflation pressure
regularly. See Tire Pressure on
page 10‑53 andVehicle Load Limits
on page 9‑10. For instructions on
how to remove, install, or store a
spare tire, see Tire Changing on
page 10‑68. After installing the spare tire on the
vehicle, stop as soon as possible
and check that the spare is correctly
inflated. The spare tire is made to
perform well at speeds up to
112 km/h (70 mph) at the
recommended inflation pressure, so
you can finish your trip.
Have the damaged or flat road tire
repaired or replaced back onto the
vehicle, as soon as possible, so the
spare tire will be available in case it
is needed again.
Do not mix tires and wheels of
different sizes, because they will not
fit. Keep the spare tire and its wheel
together.
Page 400 of 402

Black plate (10,1)Chevrolet Express Owner Manual - 2013 - 1stPrintReady - 6/19/12
i-10 INDEX
Service (cont'd)Publications Ordering
Information . . . . . . . . . . . . . . . . 13-16
Scheduling Appointments . . . 13-12
Vehicle Messages . . . . . . . . . . . . 5-36
Servicing the Airbag . . . . . . . . . . . 3-31
Shift Lock Control Function Check, Automatic
Transmission . . . . . . . . . . . . . . . . 10-30
Shifting Into Park . . . . . . . . . . . . . . . . . . . . . . 9-19
Out of Park . . . . . . . . . . . . . . . . . . . 9-20
Side Door . . . . . . . . . . . . . . . . . . . . . . 2-9
Sidemarker Bulb Replacement . . . . . . . . . . 10-34
Signals, Turn and Lane-Change . . . . . . . . . . . . . . . . . 6-4
Sliding Door . . . . . . . . . . . . . . . . . . . 2-10
Specifications and
Capacities . . . . . . . . . . . . . . . . . . . . 12-2
Speedometer . . . . . . . . . . . . . . . . . . 5-10
StabiliTrak OFF Light . . . . . . . . . . . . . . . . . . . . . 5-21
System . . . . . . . . . . . . . . . . . . . . . . . 9-32
Start Vehicle, Remote . . . . . . . . . . 2-4
Starter Switch Check . . . . . . . . . 10-30
Starting the Engine . . . . . . . . . . . . 9-16 Steering . . . . . . . . . . . . . . . . . . . . . . . . 9-4
Fluid, Power . . . . . . . . . . . . . . . . 10-23
Wheel Adjustment . . . . . . . . . . . . . 5-2
Wheel Controls . . . . . . . . . . . . . . . . 5-2
Storage Areas Front . . . . . . . . . . . . . . . . . . . . . . . . . . 4-1
Stuck Vehicle . . . . . . . . . . . . . . . . . . . 9-9
Sun Visors . . . . . . . . . . . . . . . . . . . . . 2-18
Swing-out Windows . . . . . . . . . . . . 2-16
Switches Airbag On-Off . . . . . . . . . . . . . . . . . 3-23
Symbols . . . . . . . . . . . . . . . . . . . . . . . . . . iv
System Infotainment . . . . . . . . . . . . . . . . . . . 7-1
Noise Control . . . . . . . . . . . . . . . 10-29
T
Taillamps . . . . . . . . . . . . . . . . . . . . . 10-35
Text Telephone (TTY) Users . . . 13-6
Theft-Deterrent Systems . . . . . . . 2-11Immobilizer . . . . . . . . . . . . . . . . . . . 2-11
Time . . . . . . . . . . . . . . . . . . . . . . . . . . . . 5-6
Tires Buying New Tires . . . . . . . . . . . 10-61
Chains . . . . . . . . . . . . . . . . . . . . . . 10-65
Changing . . . . . . . . . . . . . . . . . . . 10-68 Tires (cont'd)
Designations . . . . . . . . . . . . . . . 10-48
Different Size . . . . . . . . . . . . . . . 10-62
Dual Rotation . . . . . . . . . . . . . . . 10-59
Full-Size Spare . . . . . . . . . . . . . 10-77
If a Tire Goes Flat . . . . . . . . . . 10-66
Inflation Monitor System . . . . 10-55
Inspection . . . . . . . . . . . . . . . . . . 10-58
Messages . . . . . . . . . . . . . . . . . . . . 5-36
Pressure Light . . . . . . . . . . . . . . . . 5-22
Pressure Monitor System . . . 10-54
Rotation . . . . . . . . . . . . . . . . . . . . 10-58
Secondary Latch System . . . 10-75
Sidewall Labeling . . . . . . . . . . . 10-46
Terminology and
Definitions . . . . . . . . . . . . . . . . . 10-50
Uniform Tire Quality Grading . . . . . . . . . . . . . . . . . . . 10-63
Wheel Alignment and Tire Balance . . . . . . . . . . . . . . . . . . . 10-64
Wheel Replacement . . . . . . . . 10-65
When It Is Time for New Tires . . . . . . . . . . . . . . . . . . . . . . 10-60
Winter . . . . . . . . . . . . . . . . . . . . . . 10-45
Tow/Haul Mode . . . . . . . . . . . . . . . . 9-29
Tow/Haul Mode Light . . . . . . . . . . 5-21
Page 401 of 402

Black plate (11,1)Chevrolet Express Owner Manual - 2013 - 1stPrintReady - 6/19/12
INDEX i-11
TowingDriving Characteristics . . . . . . . . 9-47
Equipment . . . . . . . . . . . . . . . . . . . . 9-54
General Information . . . . . . . . . . 9-47
Recreational Vehicle . . . . . . . . 10-81
Trailer . . . . . . . . . . . . . . . . . . . . . . . . 9-49
Vehicle . . . . . . . . . . . . . . . . . . . . . 10-81
Traction Control System (TCS)/StabiliTrak
®Light . . . . . . . . . . . . 5-22
Trailer
Tow Mirrors . . . . . . . . . . . . . . . . . . . 2-14
Towing . . . . . . . . . . . . . . . . . . . . . . . . 9-49
Transmission Automatic . . . . . . . . . . . . . . . 9-22, 9-26
Fluid, Automatic . . . . . 10-10, 10-12
Messages . . . . . . . . . . . . . . . . . . . . 5-37
Transportation Program, Courtesy . . . . . . . . . . . . . . . . . . . . 13-13
Trip Odometer . . . . . . . . . . . . . . . . . 5-10
Turn and Lane-Change Signals . . . . . . . . . . . . . . . . . . . . . . . . 6-4
U
Ultrasonic Parking Assist . . . . . . 9-37
Uniform Tire QualityGrading . . . . . . . . . . . . . . . . . . . . . 10-63
Using This Manual . . . . . . . . . . . . . . . . iii
V
Vehicle Canadian Owners . . . . . . . . . . . . . . . iii
Control . . . . . . . . . . . . . . . . . . . . . . . . 9-3
Identification
Number (VIN) . . . . . . . . . . . . . . . 12-1
Load Limits . . . . . . . . . . . . . . . . . . . 9-10
Messages . . . . . . . . . . . . . . . . . . . . 5-29
Personalization . . . . . . . . . . . . . . . 5-38
Reminder Messages . . . . . . . . . . 5-38
Remote Start . . . . . . . . . . . . . . . . . . 2-4
Security . . . . . . . . . . . . . . . . . . . . . . 2-11
Towing . . . . . . . . . . . . . . . . . . . . . . 10-81 Vehicle Care
Tire Pressure . . . . . . . . . . . . . . . 10-53
Vehicle Data Recording . . . . . . . 13-19
Ventilation, Air . . . . . . . . . . . . . . . . . . 8-7
Visors . . . . . . . . . . . . . . . . . . . . . . . . . 2-18
Voltmeter Gauge . . . . . . . . . . . . . . 5-13W
Warning Brake System Light . . . . . . . . . . . 5-20
Warning Lights, Gauges, and Indicators . . . . . . . . . . . . . . . . . . . . . 5-8
Warnings . . . . . . . . . . . . . . . . . . . . . . . . . iv
Cautions and Danger . . . . . . . . . . . .iv
Hazard Flashers . . . . . . . . . . . . . . . 6-4
Washer Fluid . . . . . . . . . . . . . . . . . 10-23
Wheels Alignment and Tire
Balance . . . . . . . . . . . . . . . . . . . 10-64
Different Size . . . . . . . . . . . . . . . 10-62
Replacement . . . . . . . . . . . . . . . 10-65