Page 22 of 388

Black plate (16,1)Chevrolet Equinox Owner Manual - 2013 - CRC - 5/21/12
1-16 In Brief
Storing a Favorite Station
Stations from all bands can be
stored in the favorite lists in any
order. Up to six stations can be
stored in each favorite page and the
number of available favorite pages
can be set.
To store the station to a position in
the list, press the corresponding
numeric button 1-6 until the station
can be heard again.
For more information, see“Storing
and Retrieving Favorites” inAM-FM
Radio on page 7‑7.
Setting the Clock
For detailed instructions on setting
either clock, see Clock on page 5‑5.
To set the time:
1. Press
Hto enter the menu
options. Turn the MENU/SEL
knob to scroll through the
available setup features.
2. Press + or −to decrease or
increase the Hours and Minutes
displayed on the clock. 12/24 HR Format:
Press the 12 HR
screen button for standard time;
press the 24 HR screen button for
military time.
Day + or Day −:Press the Day +
and Day −display buttons to
increase or decrease the day.
Display: Press the Display to turn
the display of the time on the screen
on or off.
Satellite Radio
Vehicles with a SiriusXM® satellite
radio tuner and a valid SiriusXM
satellite radio subscription can
receive SiriusXM programming.
SiriusXM Satellite Radio
Service
SiriusXM is a satellite radio service
based in the 48 contiguous United
States and 10 Canadian provinces.
SiriusXM satellite radio has a wide
variety of programming and
commercial-free music, coast to coast, and in digital-quality sound.
A fee is required to receive the
SiriusXM service.
Refer to:
.www.siriusxm.com or call
1-866-635-2349 (U.S.).
.www.xmradio.ca or call
1-877-209-0079 (Canada).
See Satellite Radio on page 7‑9.
Portable Audio Devices
Some vehicles have a 3.5 mm
(1/8 in) auxiliary input and a USB
port in the center console bin.
External devices such as iPods®,
laptop computers, MP3 players, CD
changers, and USB drives may be
connected, depending on the audio
system.
SeeAuxiliary Devices on page 7‑17.
Page 111 of 388

Black plate (5,1)Chevrolet Equinox Owner Manual - 2013 - CRC - 5/21/12
Instruments and Controls 5-5
Clock
The infotainment system controls,
located on the instrument panel, are
used to access the time and date
settings through the menu system.
SeeOperation on page 7‑4 for
information about how to use the
menu system.
Setting the Clock with Date
Display
To set the Time and Date:
1. Turn the infotainment system on.
2. Press the CONFIG button and select Time and Date Settings.
3. Select Set Time or Set Date.
4. Turn the MENU/SEL knob to adjust the highlighted value.
5. Press the MENU/SEL knob to select the next value.
6. To save the time or date and return to the Time and Date
Settings menu, press the
E
BACK button at any time or
press the MENU/SEL knob after
adjusting the minutes or year.
To set the 12/24 hour format:
1. Turn the infotainment system on.
2. Press the CONFIG button and select Time and Date Settings.
3. Highlight 12/24 Hour Format.
4. Press the MENU/SEL knob to select the 12 hour or 24 hour
display format.
To set the month and day format:
1. Turn the infotainment system on.
2. Press the CONFIG button and select Time and Date Settings.
3. Highlight Month and Day Format.
4. Press the MENU/SEL knob to select MM/DD (month/day) or
DD/MM (day/month).
To set the auto time adjust:
1. Turn the infotainment system on. 2. Press the CONFIG button and
select Time and Date Settings.
3. Highlight Auto Time Adjust.
4. Press the MENU/SEL knob to turn Auto Time Adjust on or off.
5. Press the MENU/SEL knob to select Time Zone, and then
select the time zone.
6. Press the MENU/SEL knob to turn Daylight Savings on or off.
Setting the Clock Without Date
Display
To set the Time and Date:
1. Turn the infotainment system on.
2. Press the CONFIG button andselect Time Settings, or press
the
Hbutton.
3. Select Set Time.
4. Turn the MENU/SEL knob to adjust the highlighted value.
5. Press the MENU/SEL knob to select the next value.
Page 112 of 388

Black plate (6,1)Chevrolet Equinox Owner Manual - 2013 - CRC - 5/21/12
5-6 Instruments and Controls
6. To save the time and return tothe Time Settings menu, press
the
EBACK button at any
time or press the MENU/SEL
knob after adjusting the minutes.
To set the 12/24 hour format:
1. Turn the infotainment system on.
2. Press the CONFIG button and select Time Settings, or press
the
Hbutton.
3. Highlight 12/24 Hour Format.
4. Press the MENU/SEL knob to select the 12 hour or 24 hour
display format.
Setting the Clock (Radio with
CD and Touchscreen)
To set the time:
1. Press the CONFIG button toenter the menu options. Turn the
TUNE/MENU knob to scroll
through the available setup
features. Press the TUNE/MENU knob or press the Time screen
button to display other options
within that feature.
2. Press + or −to decrease or
increase the Hours and Minutes
displayed on the clock.
12/24 HR Format: Press the 12 HR
screen button for standard time;
press the 24 HR screen button for
military time.
Day + or Day −:Press the Day +
or Day −display buttons to increase
or decrease the day.
Display: Press Display to turn the
display of the time on the screen on
or off.
Power Outlets
The accessory power outlets can be
used to connect electrical
equipment, such as a cell phone or
MP3 player. There are four accessory power
outlets in the following locations:
below the CD slot, inside the center
console storage, on the rear of the
center console storage, and in the
rear cargo compartment.
To use the outlets, remove the cover
and close when not in use.
Notice:
Leaving electrical
equipment plugged in for an
extended period of time while the
vehicle is off will drain the
battery. Always unplug electrical
equipment when not in use and
do not plug in equipment that
exceeds the maximum 20 ampere
rating.
Certain accessory plugs may not be
compatible with the accessory
power outlets and could overload
vehicle and adapter fuses. If a
problem is experienced, see your
dealer.
Page 150 of 388

Black plate (4,1)Chevrolet Equinox Owner Manual - 2013 - CRC - 5/21/12
6-4 Lighting
Have the bulbs replaced. If the bulb
is not burned out, check the fuse;
seeFuses on page 10‑30 for more
information.
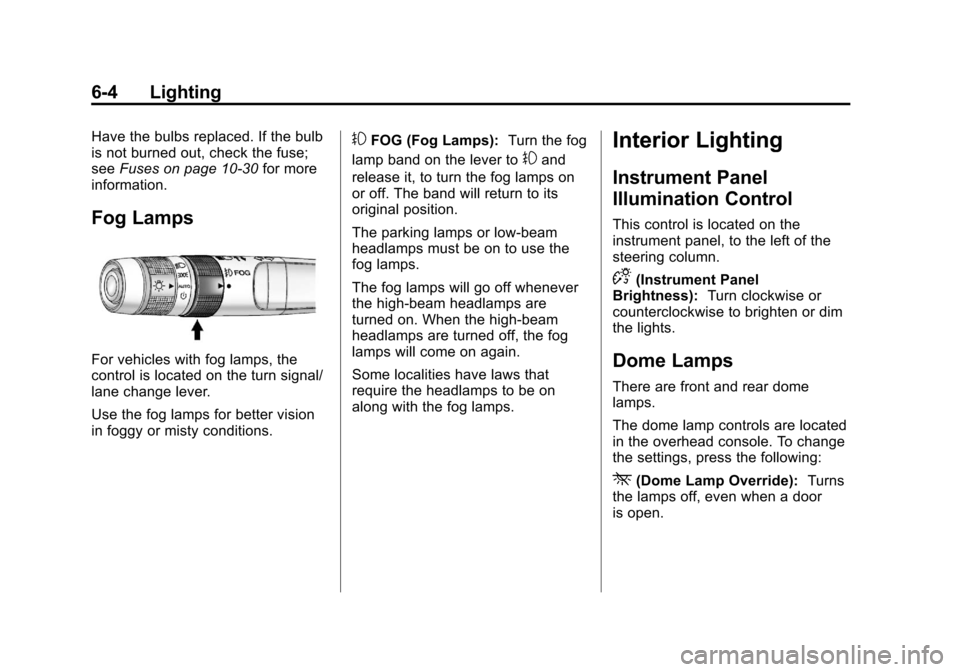
Fog Lamps
For vehicles with fog lamps, the
control is located on the turn signal/
lane change lever.
Use the fog lamps for better vision
in foggy or misty conditions.
#FOG (Fog Lamps): Turn the fog
lamp band on the lever to
#and
release it, to turn the fog lamps on
or off. The band will return to its
original position.
The parking lamps or low‐beam
headlamps must be on to use the
fog lamps.
The fog lamps will go off whenever
the high-beam headlamps are
turned on. When the high‐beam
headlamps are turned off, the fog
lamps will come on again.
Some localities have laws that
require the headlamps to be on
along with the fog lamps.
Interior Lighting
Instrument Panel
Illumination Control
This control is located on the
instrument panel, to the left of the
steering column.
D(Instrument Panel
Brightness): Turn clockwise or
counterclockwise to brighten or dim
the lights.
Dome Lamps
There are front and rear dome
lamps.
The dome lamp controls are located
in the overhead console. To change
the settings, press the following:
*(Dome Lamp Override): Turns
the lamps off, even when a door
is open.