2013 CHEVROLET EQUINOX instrument panel
[x] Cancel search: instrument panelPage 80 of 388
Black plate (30,1)Chevrolet Equinox Owner Manual - 2013 - CRC - 5/21/12
3-30 Seats and Restraints
The on indicator may be lit if an
object, such as a briefcase,
handbag, grocery bag, laptop or
other electronic device, is put on an
unoccupied seat. If this is not
desired remove the object from
the seat.
{WARNING
Stowing of articles under the
passenger seat or between the
passenger seat cushion and
seatback may interfere with the
proper operation of the passenger
sensing system.
Servicing the
Airbag-Equipped Vehicle
Airbags affect how the vehicle
should be serviced. There are parts
of the airbag system in several
places around the vehicle. Your
dealer and the service manual have
information about servicing the
vehicle and the airbag system. Topurchase a service manual, see
Service Publications Ordering
Information on page 13‑11.
{WARNING
For up to 10 seconds after the
vehicle is turned off and the
battery is disconnected, an airbag
can still inflate during improper
service. You can be injured if you
are close to an airbag when it
inflates. Avoid yellow connectors.
They are probably part of the
airbag system. Be sure to follow
proper service procedures, and
make sure the person performing
work for you is qualified to do so.
Adding Equipment to the
Airbag-Equipped Vehicle
Q: Is there anything I might add
to or change about the vehicle
that could keep the airbags
from working properly?
A: Yes. If you add things that
change the vehicle's frame,
bumper system, height, front end
or side sheet metal, they may
keep the airbag system from
working properly. Changing or
moving any parts of the front
seats, safety belts, the airbag
sensing and diagnostic module,
steering wheel, instrument
panel, roof-rail airbag modules,
ceiling headliner or pillar garnish
trim, overhead console, front
sensors, side impact sensors,
rollover sensor module, or airbag
wiring can affect the operation of
the airbag system.
In addition, the vehicle has a
passenger sensing system for
the right front passenger
position, which includes sensors
Page 103 of 388
Black plate (1,1)Chevrolet Equinox Owner Manual - 2013 - CRC - 5/21/12
Storage 4-1
Storage
Storage Compartments
Instrument Panel Storage . . . . . 4-1
Glove Box . . . . . . . . . . . . . . . . . . . . 4-1
Cupholders . . . . . . . . . . . . . . . . . . . 4-1
Center Console Storage . . . . . . 4-1
Additional Storage Features
Cargo Cover . . . . . . . . . . . . . . . . . . 4-2
Cargo Tie-Downs . . . . . . . . . . . . . 4-2
Convenience Net . . . . . . . . . . . . . 4-2
Roof Rack System
Roof Rack System . . . . . . . . . . . . 4-2
Storage
Compartments
Instrument Panel Storage
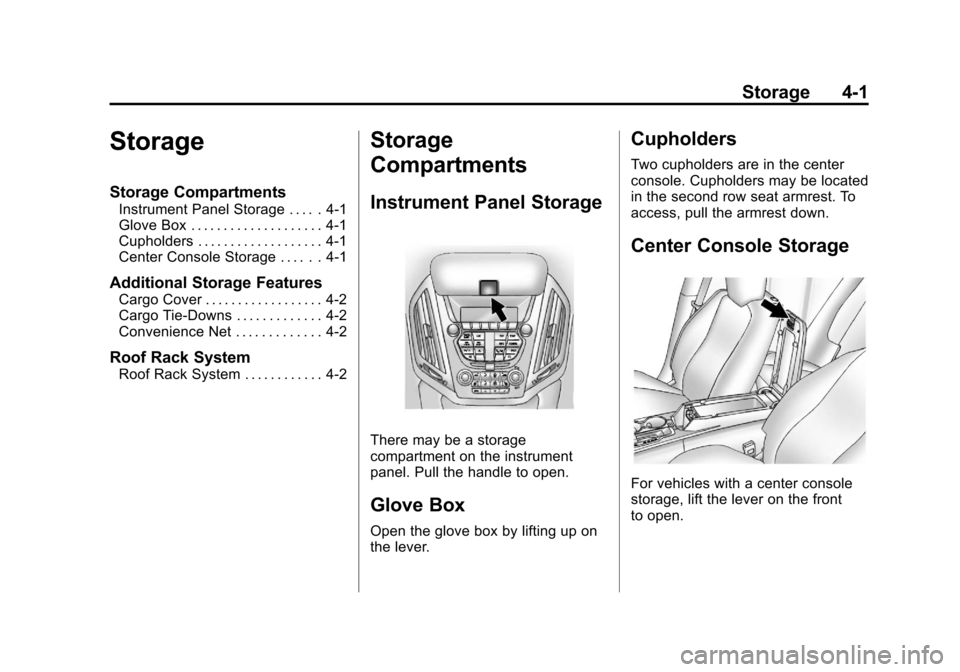
There may be a storage
compartment on the instrument
panel. Pull the handle to open.
Glove Box
Open the glove box by lifting up on
the lever.
Cupholders
Two cupholders are in the center
console. Cupholders may be located
in the second row seat armrest. To
access, pull the armrest down.
Center Console Storage
For vehicles with a center console
storage, lift the lever on the front
to open.
Page 111 of 388
Black plate (5,1)Chevrolet Equinox Owner Manual - 2013 - CRC - 5/21/12
Instruments and Controls 5-5
Clock
The infotainment system controls,
located on the instrument panel, are
used to access the time and date
settings through the menu system.
SeeOperation on page 7‑4 for
information about how to use the
menu system.
Setting the Clock with Date
Display
To set the Time and Date:
1. Turn the infotainment system on.
2. Press the CONFIG button and select Time and Date Settings.
3. Select Set Time or Set Date.
4. Turn the MENU/SEL knob to adjust the highlighted value.
5. Press the MENU/SEL knob to select the next value.
6. To save the time or date and return to the Time and Date
Settings menu, press the
E
BACK button at any time or
press the MENU/SEL knob after
adjusting the minutes or year.
To set the 12/24 hour format:
1. Turn the infotainment system on.
2. Press the CONFIG button and select Time and Date Settings.
3. Highlight 12/24 Hour Format.
4. Press the MENU/SEL knob to select the 12 hour or 24 hour
display format.
To set the month and day format:
1. Turn the infotainment system on.
2. Press the CONFIG button and select Time and Date Settings.
3. Highlight Month and Day Format.
4. Press the MENU/SEL knob to select MM/DD (month/day) or
DD/MM (day/month).
To set the auto time adjust:
1. Turn the infotainment system on. 2. Press the CONFIG button and
select Time and Date Settings.
3. Highlight Auto Time Adjust.
4. Press the MENU/SEL knob to turn Auto Time Adjust on or off.
5. Press the MENU/SEL knob to select Time Zone, and then
select the time zone.
6. Press the MENU/SEL knob to turn Daylight Savings on or off.
Setting the Clock Without Date
Display
To set the Time and Date:
1. Turn the infotainment system on.
2. Press the CONFIG button andselect Time Settings, or press
the
Hbutton.
3. Select Set Time.
4. Turn the MENU/SEL knob to adjust the highlighted value.
5. Press the MENU/SEL knob to select the next value.
Page 121 of 388
Black plate (15,1)Chevrolet Equinox Owner Manual - 2013 - CRC - 5/21/12
Instruments and Controls 5-15
or stumbling on acceleration.
These conditions might go away
once the engine is warmed up.
If one or more of these conditions
occurs, change the fuel brand used.
It may require at least one full tank
of the proper fuel to turn the light off.
See Recommended Fuel on
page 9‑47.
If none of the above have made the
light turn off, your dealer can check
the vehicle. The dealer has the
proper test equipment and
diagnostic tools to fix any
mechanical or electrical problems
that might have developed.
Emissions Inspection and
Maintenance Programs
Depending on where you live, your
vehicle may be required to
participate in an emission control
system inspection and maintenance
program. For the inspection, the
emission system test equipment will
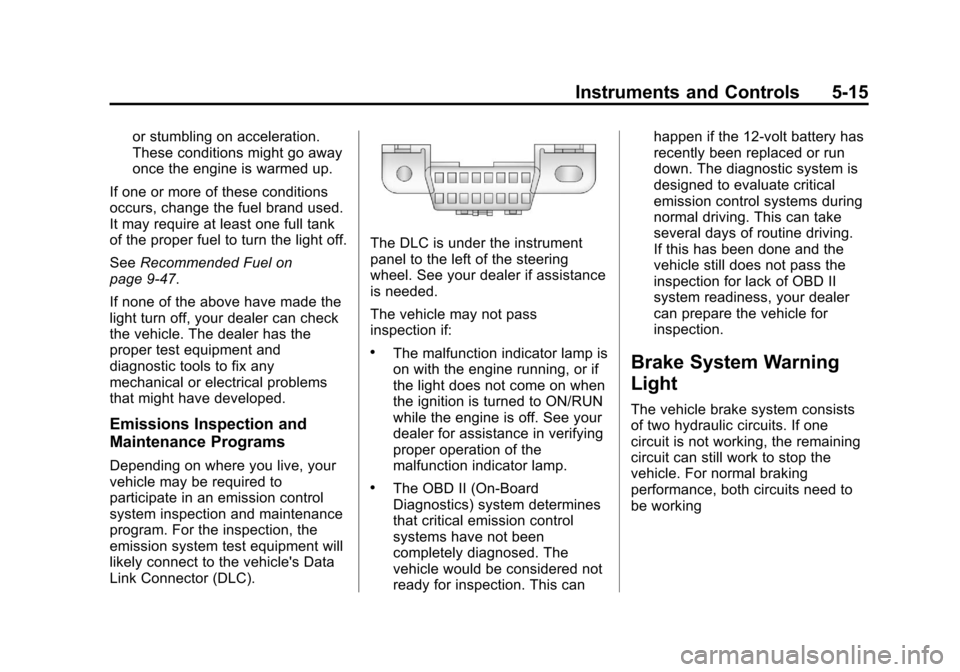
likely connect to the vehicle's Data
Link Connector (DLC).
The DLC is under the instrument
panel to the left of the steering
wheel. See your dealer if assistance
is needed.
The vehicle may not pass
inspection if:
.The malfunction indicator lamp is
on with the engine running, or if
the light does not come on when
the ignition is turned to ON/RUN
while the engine is off. See your
dealer for assistance in verifying
proper operation of the
malfunction indicator lamp.
.The OBD II (On-Board
Diagnostics) system determines
that critical emission control
systems have not been
completely diagnosed. The
vehicle would be considered not
ready for inspection. This can happen if the 12-volt battery has
recently been replaced or run
down. The diagnostic system is
designed to evaluate critical
emission control systems during
normal driving. This can take
several days of routine driving.
If this has been done and the
vehicle still does not pass the
inspection for lack of OBD II
system readiness, your dealer
can prepare the vehicle for
inspection.
Brake System Warning
Light
The vehicle brake system consists
of two hydraulic circuits. If one
circuit is not working, the remaining
circuit can still work to stop the
vehicle. For normal braking
performance, both circuits need to
be working
Page 123 of 388
Black plate (17,1)Chevrolet Equinox Owner Manual - 2013 - CRC - 5/21/12
Instruments and Controls 5-17
If the regular brake system warning
light is not on, the vehicle still has
brakes, but not antilock brakes.
If the regular brake system warning
light is also on, the vehicle does not
have antilock brakes and there is a
problem with the regular brakes.
SeeBrake System Warning Light on
page 5‑15.
See Brake System Messages on
page 5‑26 for all brake‐related DIC
messages.
Lane Departure Warning
(LDW) Light
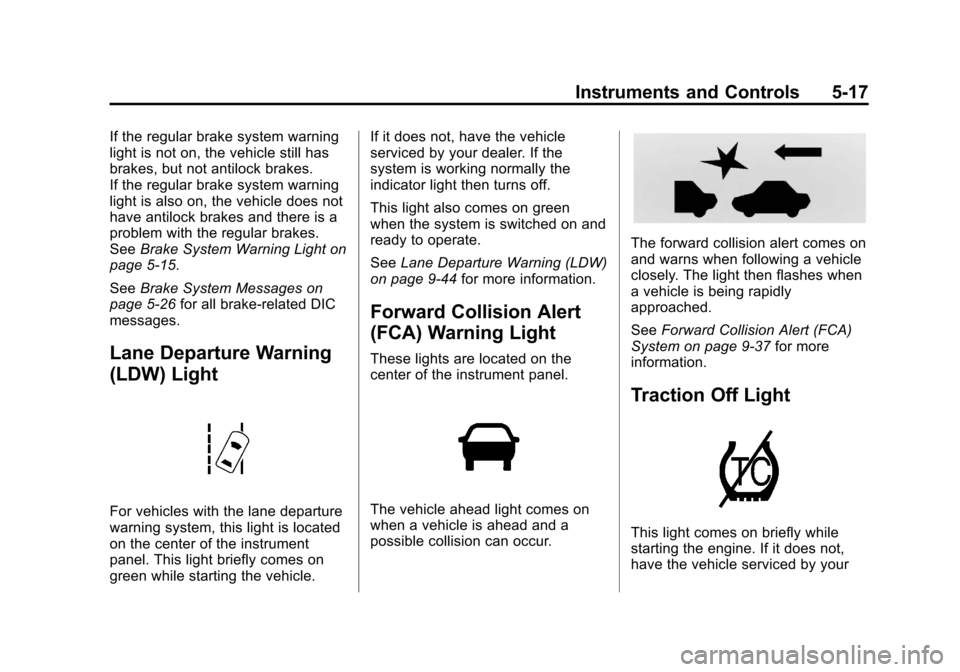
For vehicles with the lane departure
warning system, this light is located
on the center of the instrument
panel. This light briefly comes on
green while starting the vehicle. If it does not, have the vehicle
serviced by your dealer. If the
system is working normally the
indicator light then turns off.
This light also comes on green
when the system is switched on and
ready to operate.
See
Lane Departure Warning (LDW)
on page 9‑44 for more information.
Forward Collision Alert
(FCA) Warning Light
These lights are located on the
center of the instrument panel.
The vehicle ahead light comes on
when a vehicle is ahead and a
possible collision can occur.
The forward collision alert comes on
and warns when following a vehicle
closely. The light then flashes when
a vehicle is being rapidly
approached.
SeeForward Collision Alert (FCA)
System on page 9‑37 for more
information.
Traction Off Light
This light comes on briefly while
starting the engine. If it does not,
have the vehicle serviced by your
Page 128 of 388
Black plate (22,1)Chevrolet Equinox Owner Manual - 2013 - CRC - 5/21/12
5-22 Instruments and Controls
Information Displays
Driver Information
Center (DIC)
The vehicle may have a Driver
Information Center (DIC). It displays
information about the vehicle and
warning messages if there is a
system problem detected. DIC
messages display in the center of
the instrument panel cluster. See
Vehicle Messages on page 5‑25for
more information.
The vehicle may also have features
that can be customized through the
controls on the radio. See Vehicle
Personalization on page 5‑32 for
more information.
DIC Operation and Displays
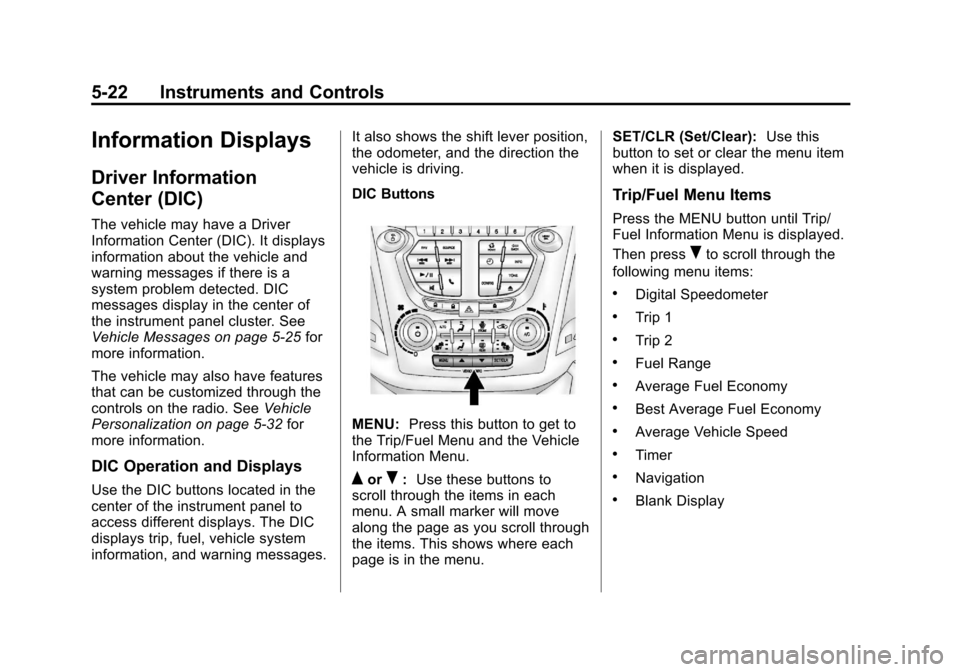
Use the DIC buttons located in the
center of the instrument panel to
access different displays. The DIC
displays trip, fuel, vehicle system
information, and warning messages. It also shows the shift lever position,
the odometer, and the direction the
vehicle is driving.
DIC Buttons
MENU:
Press this button to get to
the Trip/Fuel Menu and the Vehicle
Information Menu.
QorR: Use these buttons to
scroll through the items in each
menu. A small marker will move
along the page as you scroll through
the items. This shows where each
page is in the menu. SET/CLR (Set/Clear):
Use this
button to set or clear the menu item
when it is displayed.
Trip/Fuel Menu Items
Press the MENU button until Trip/
Fuel Information Menu is displayed.
Then press
Rto scroll through the
following menu items:
.Digital Speedometer
.Trip 1
.Trip 2
.Fuel Range
.Average Fuel Economy
.Best Average Fuel Economy
.Average Vehicle Speed
.Timer
.Navigation
.Blank Display
Page 142 of 388
Black plate (36,1)Chevrolet Equinox Owner Manual - 2013 - CRC - 5/21/12
5-36 Instruments and Controls
Delayed Door Lock
When on, this feature will delay the
locking of the doors. If you want to
override the delay you can press the
power door lock on the instrument
panel.
Press the MENU/SEL knob when
“Delayed Door Lock”is highlighted.
Turn the knob to select “On”or“Off.”
Press the knob to confirm and go
back to the last menu.
Remote Lock/Unlock/Start
Select Remote Lock/Unlock/Start
and the following will be displayed:
.Remote Unlock Light Feedback
.Remote Lock Feedback
.Remote Door Unlock
.Memory Remote Recall Remote Unlock Light Feedback
When on, the exterior lamps will
flash when unlocking the vehicle
with the RKE transmitter.
Press the MENU/SEL knob when
“Remote Unlock Light Feedback”
is
highlighted. Turn the knob to select
“Flash Lights” or“Off. ”Press the
knob to confirm and go back to the
last menu.
Remote Lock Feedback
This allows selection of what type of
feedback is given when unlocking
the vehicle with the RKE transmitter.
Press the MENU/SEL knob when
“Remote Lock Feedback” is
highlighted. Turn the knob to select
“Lights and Horn,” “Lights Only,”
“Horn Only,” or“Off. ”Press the knob
to confirm and go back to the
last menu. Remote Door Unlock
This allows selection of which doors
will unlock when pressing the unlock
button on the RKE transmitter.
Press the MENU/SEL knob when
“Remote Door Unlock”
is
highlighted. Turn the knob to select
“All Doors” or“Driver Door.” Press
the knob to confirm and go back to
the last menu.
Memory Remote Recall
This allows the Memory Remote
Recall feature to be turned on or off.
When on, this feature will recall the
current driver's last seat, outside
mirrors upon unlocking the driver
door with the RKE, and opening that
door. The current driver is identified
when the RKE transmitter is used to
unlock the driver door. See “Memory
Remote Recall” underMemory
Seats on page 3‑6 for more
information.
Page 147 of 388
Black plate (1,1)Chevrolet Equinox Owner Manual - 2013 - CRC - 5/21/12
Lighting 6-1
Lighting
Exterior Lighting
Exterior Lamp Controls . . . . . . . . 6-1
Headlamp High/Low-BeamChanger . . . . . . . . . . . . . . . . . . . . . 6-1
Flash-to-Pass . . . . . . . . . . . . . . . . . 6-2
Daytime Running Lamps (DRL) . . . . . . . . . . . . . . . . 6-2
Automatic Headlamp System . . . . . . . . . . . . . . . . . . . . . . 6-2
Hazard Warning Flashers . . . . . 6-3
Turn and Lane-Change Signals . . . . . . . . . . . . . . . . . . . . . . 6-3
Fog Lamps . . . . . . . . . . . . . . . . . . . . 6-4
Interior Lighting
Instrument Panel Illumination Control . . . . . . . . . . . . . . . . . . . . . . 6-4
Dome Lamps . . . . . . . . . . . . . . . . . 6-4
Reading Lamps . . . . . . . . . . . . . . . 6-5
Lighting Features
Entry Lighting . . . . . . . . . . . . . . . . . 6-5
Battery Load Management . . . . 6-5
Exterior Lighting
Exterior Lamp Controls
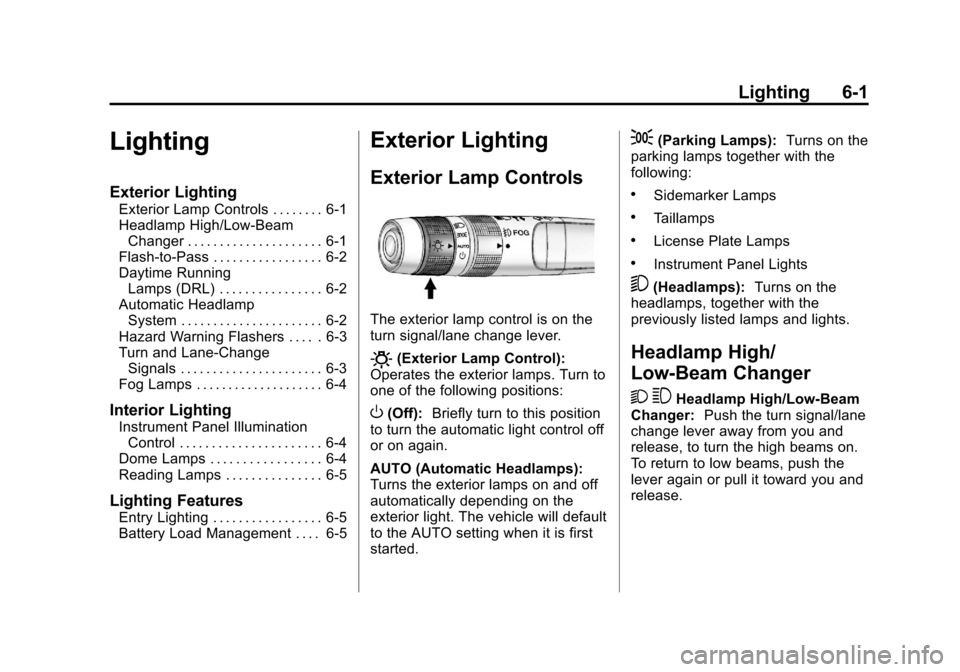
The exterior lamp control is on the
turn signal/lane change lever.
O(Exterior Lamp Control):
Operates the exterior lamps. Turn to
one of the following positions:
O(Off): Briefly turn to this position
to turn the automatic light control off
or on again.
AUTO (Automatic Headlamps):
Turns the exterior lamps on and off
automatically depending on the
exterior light. The vehicle will default
to the AUTO setting when it is first
started.
;(Parking Lamps): Turns on the
parking lamps together with the
following:
.Sidemarker Lamps
.Taillamps
.License Plate Lamps
.Instrument Panel Lights
5(Headlamps): Turns on the
headlamps, together with the
previously listed lamps and lights.
Headlamp High/
Low-Beam Changer
2 3
Headlamp High/Low‐Beam
Changer: Push the turn signal/lane
change lever away from you and
release, to turn the high beams on.
To return to low beams, push the
lever again or pull it toward you and
release.