2013 CHEVROLET CRUZE run flat
[x] Cancel search: run flatPage 197 of 394
Black plate (7,1)Chevrolet Cruze Owner Manual - 2013 - crc - 10/16/12
Driving and Operating 9-7
.Have good tires with proper
tread depth. SeeTires on
page 10‑38.
.Turn off cruise control.
Highway Hypnosis
Always be alert and pay attention to
your surroundings while driving.
If you become tired or sleepy, find a
safe place to park the vehicle
and rest.
Other driving tips include:
.Keep the vehicle well ventilated.
.Keep the interior
temperature cool.
.Keep your eyes moving —scan
the road ahead and to the sides.
.Check the rearview mirror and
vehicle instruments often.
Hill and Mountain Roads
Driving on steep hills or through
mountains is different than driving
on flat or rolling terrain. Tips for
driving in these conditions include:
.Keep the vehicle serviced and in
good shape.
.Check all fluid levels and brakes,
tires, cooling system, and
transmission.
.Shift to a lower gear when going
down steep or long hills.
{WARNING
If you do not shift down, the
brakes could get so hot that they
would not work well. You would
then have poor braking or even
none going down a hill. You could
crash. Shift down to let the engine
assist the brakes on a steep
downhill slope.
{WARNING
Coasting downhill in N (Neutral)
or with the ignition off is
dangerous. The brakes will have
to do all the work of slowing down
and they could get so hot that
they would not work well. You
would then have poor braking or
even none going down a hill.
Steering may also be affected
when ignition is off. You could
crash. Always have the engine
running and the vehicle in gear
when going downhill.
.Stay in your own lane. Do not
swing wide or cut across the
center of the road. Drive at
speeds that let you stay in your
own lane.
.Be alert on top of hills;
something could be in your lane
(stalled car, accident).
Page 207 of 394
Black plate (17,1)Chevrolet Cruze Owner Manual - 2013 - crc - 10/16/12
Driving and Operating 9-17
uncharged battery or a battery with
low voltage, try charging or jump
starting the battery. SeeJump
Starting on page 10‑77.
If charging or jump starting the
battery does not work, locate the
hole below the ignition lock. Insert a
flat bladed tool or another key from
the key chain into the opening.
When the lever can be felt, actuate
the lever toward the driver, and
remove the key from the ignition.
Ignition Positions
(Keyless Access)
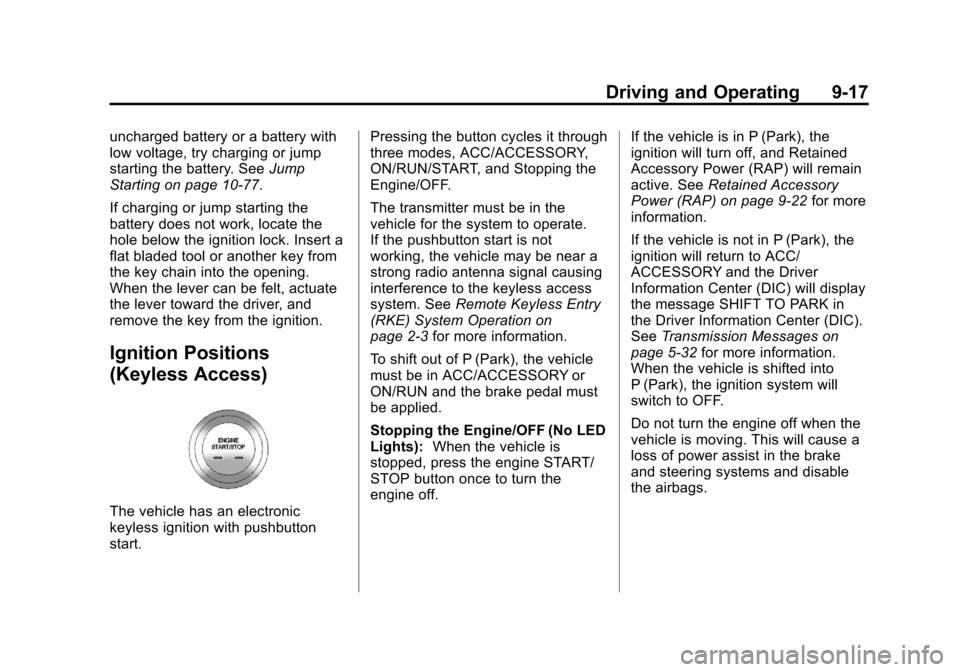
The vehicle has an electronic
keyless ignition with pushbutton
start. Pressing the button cycles it through
three modes, ACC/ACCESSORY,
ON/RUN/START, and Stopping the
Engine/OFF.
The transmitter must be in the
vehicle for the system to operate.
If the pushbutton start is not
working, the vehicle may be near a
strong radio antenna signal causing
interference to the keyless access
system. See
Remote Keyless Entry
(RKE) System Operation on
page 2‑3 for more information.
To shift out of P (Park), the vehicle
must be in ACC/ACCESSORY or
ON/RUN and the brake pedal must
be applied.
Stopping the Engine/OFF (No LED
Lights): When the vehicle is
stopped, press the engine START/
STOP button once to turn the
engine off. If the vehicle is in P (Park), the
ignition will turn off, and Retained
Accessory Power (RAP) will remain
active. See
Retained Accessory
Power (RAP) on page 9‑22 for more
information.
If the vehicle is not in P (Park), the
ignition will return to ACC/
ACCESSORY and the Driver
Information Center (DIC) will display
the message SHIFT TO PARK in
the Driver Information Center (DIC).
See Transmission Messages on
page 5‑32 for more information.
When the vehicle is shifted into
P (Park), the ignition system will
switch to OFF.
Do not turn the engine off when the
vehicle is moving. This will cause a
loss of power assist in the brake
and steering systems and disable
the airbags.
Page 243 of 394
Black plate (53,1)Chevrolet Cruze Owner Manual - 2013 - crc - 10/16/12
Driving and Operating 9-53
When towing at high altitude on
steep uphill grades, engine coolant
boils at a lower temperature than at
normal altitudes. If the engine is
turned off immediately after towing
at high altitude on steep uphill
grades, the vehicle could show
signs similar to engine overheating.
To avoid this, let the engine run
while parked, preferably on level
ground, with the transmission in
P (Park) for a few minutes before
turning the engine off. If the
overheat warning comes on, see
Engine Overheating on page 10‑19.
Parking on Hills
{WARNING
Parking the vehicle on a hill with
the trailer attached can be
dangerous. If something goes
wrong, the rig could start to move.
People can be injured, and both
the vehicle and the trailer can be
damaged. When possible, always
park the rig on a flat surface.If parking the rig on a hill:
1. Press the brake pedal, but do
not shift into P (Park) yet. Turn
the wheels into the curb if facing
downhill or into traffic if facing
uphill.
2. Have someone place chocks under the trailer wheels.
3. When the wheel chocks are in place, release the brake pedal
until the chocks absorb the load.
4. Reapply the brake pedal. Then apply the parking brake and shift
into P (Park) for vehicles with an
automatic transmission or into
gear for vehicles with a manual
transmission.
5. Release the brake pedal.
Leaving After Parking on a Hill
1. Apply and hold the brake pedal while you:
.Start the engine.
.Shift into a gear.
.Release the parking brake. 2. Let up on the brake pedal.
3. Drive slowly until the trailer is
clear of the chocks.
4. Stop and have someone pick up and store the chocks.
Maintenance When Trailer
Towing
The vehicle needs service more
often when pulling a trailer. See the
Maintenance Schedule on
page 11‑2. Things that are
especially important in trailer
operation are automatic
transmission fluid, engine oil, axle
lubricant, belts, cooling system and
brake system. Inspect these before
and during the trip.
Check periodically to see that all
hitch nuts and bolts are tight.
Page 307 of 394
Black plate (61,1)Chevrolet Cruze Owner Manual - 2013 - crc - 10/16/12
Vehicle Care 10-61
This vehicle may come with a jack,
spare tire, and wheel block(s) or a
tire sealant and compressor kit. To
use the jacking equipment to
change a spare tire safely, follow
the instructions below. Then see
Tire Changing on page 10‑69. To
use the tire sealant and compressor
kit, seeTire Sealant and
Compressor Kit on page 10‑61.
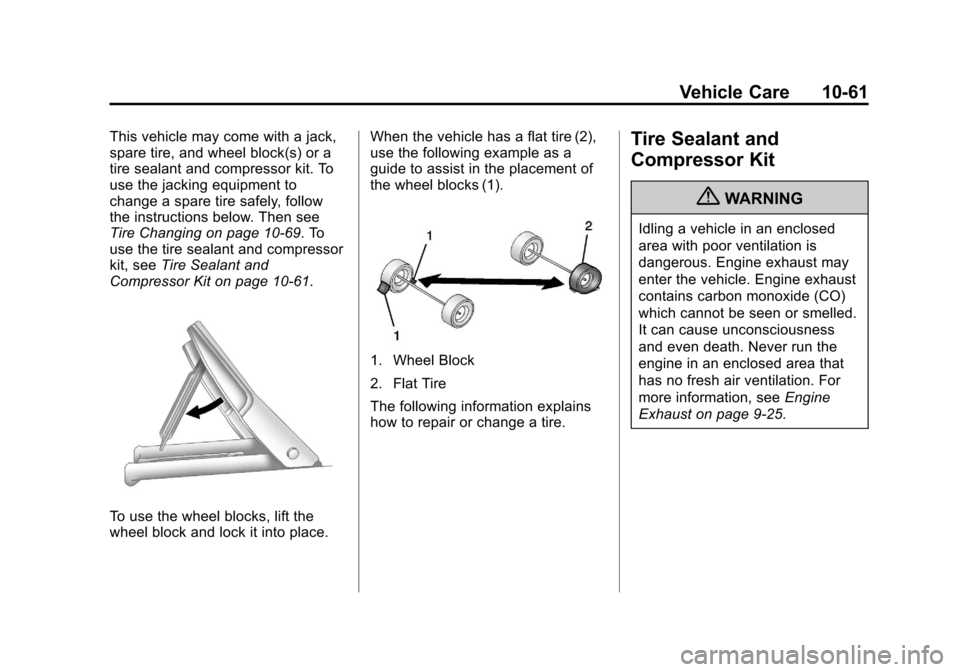
To use the wheel blocks, lift the
wheel block and lock it into place. When the vehicle has a flat tire (2),
use the following example as a
guide to assist in the placement of
the wheel blocks (1).
1. Wheel Block
2. Flat Tire
The following information explains
how to repair or change a tire.
Tire Sealant and
Compressor Kit
{WARNING
Idling a vehicle in an enclosed
area with poor ventilation is
dangerous. Engine exhaust may
enter the vehicle. Engine exhaust
contains carbon monoxide (CO)
which cannot be seen or smelled.
It can cause unconsciousness
and even death. Never run the
engine in an enclosed area that
has no fresh air ventilation. For
more information, see
Engine
Exhaust on page 9‑25.
Page 310 of 394
Black plate (64,1)Chevrolet Cruze Owner Manual - 2013 - crc - 10/16/12
10-64 Vehicle Care
4. Remove the valve stem cap fromthe flat tire by turning it
counterclockwise.
5. Attach the sealant/air hose (7) onto the tire valve stem. Turn it
clockwise until it is tight.
6. Plug the power plug (3) into the accessory power outlet in the
vehicle. Unplug all items from
other accessory power outlets.
See Power Outlets on page 5‑6.
If the vehicle has an accessory
power outlet, do not use the
cigarette lighter.
If the vehicle only has a cigarette
lighter, use the cigarette lighter.
Do not pinch the power plug
cord in the door or window.
7. Start the vehicle. The vehicle must be running while using the
air compressor. 8. Press the on/off button (4) to
turn the tire sealant and
compressor kit on.
The compressor will inject
sealant and air into the tire.
The pressure gauge (5) will
initially show a high pressure
while the compressor pushes the
sealant into the tire. Once the
sealant is completely dispersed
into the tire, the pressure will
quickly drop and start to rise
again as the tire inflates with
air only.
9. Inflate the tire to the recommended inflation pressure
using the pressure gauge (5).
The recommended inflation
pressure can be found on the
Tire and Loading Information
label. See Tire Pressure on
page 10‑47.
The pressure gauge (5) may
read higher than the actual tire
pressure while the compressor is
on. Turn the compressor off to
get an accurate pressure reading. The compressor may
be turned on/off until the correct
pressure is reached.
Notice: If the recommended
pressure cannot be reached after
approximately 25 minutes, the
vehicle should not be driven
farther. The tire is too severely
damaged and the tire sealant and
compressor kit cannot inflate the
tire. Remove the power plug from
the accessory power outlet and
unscrew the inflating hose from
the tire valve. See Roadside
Assistance Program on
page 13‑5.
Page 313 of 394
Black plate (67,1)Chevrolet Cruze Owner Manual - 2013 - crc - 10/16/12
Vehicle Care 10-67
8. Plug the power plug (3) into theaccessory power outlet in the
vehicle. Unplug all items from
other accessory power outlets.
See Power Outlets on page 5‑6.
If the vehicle has an accessory
power outlet, do not use the
cigarette lighter.
If the vehicle only has a cigarette
lighter, use the cigarette lighter.
Do not pinch the power plug
cord in the door or window.
9. Start the vehicle. The vehicle must be running while using the
air compressor.
10. Press the on/off button (4) to turn the compressor on.
The compressor will inflate the
tire with air only. 11. Inflate the tire to the
recommended inflation
pressure using the pressure
gauge (5). The recommended
inflation pressure can be found
on the Tire and Loading
Information label. See Tire
Pressure on page 10‑47.
The pressure gauge (5) may
read higher than the actual tire
pressure while the compressor
is on. Turn the compressor off
to get an accurate reading. The
compressor may be turned on/
off until the correct pressure is
reached.
12. Press the on/off button (4) to turn the tire sealant and
compressor kit off.
Be careful while handling the
tire sealant and compressor kit
as it could be warm after
usage. 13. Unplug the power plug (3) from
the accessory power outlet in
the vehicle.
14. Disconnect the air only hose (6) from the tire valve stem by
lifting the lever. Replace the tire
valve stem cap.
15. Replace the air only hose (6) and the power plug (3) back in
its original location.
16. Place the equipment in the original storage location in the
vehicle.
The tire sealant and compressor kit
has an accessory adapter located in
a compartment on the bottom of its
housing that may be used to inflate
air mattresses, balls, etc.
Page 314 of 394
Black plate (68,1)Chevrolet Cruze Owner Manual - 2013 - crc - 10/16/12
10-68 Vehicle Care
Removal and Installation of the
Sealant Canister
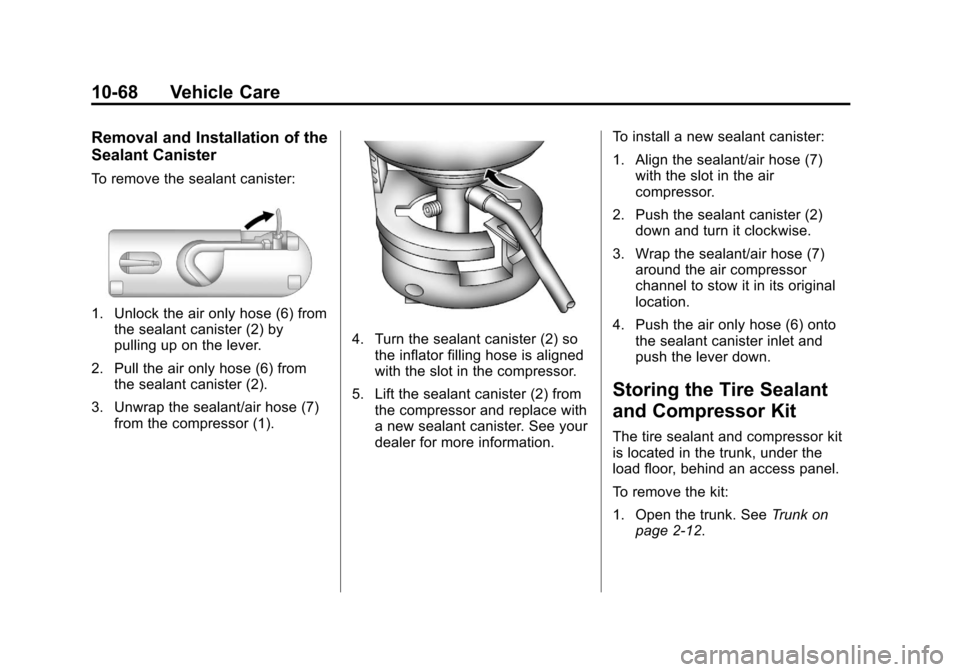
To remove the sealant canister:
1. Unlock the air only hose (6) fromthe sealant canister (2) by
pulling up on the lever.
2. Pull the air only hose (6) from the sealant canister (2).
3. Unwrap the sealant/air hose (7) from the compressor (1).
4. Turn the sealant canister (2) sothe inflator filling hose is aligned
with the slot in the compressor.
5. Lift the sealant canister (2) from the compressor and replace with
a new sealant canister. See your
dealer for more information. To install a new sealant canister:
1. Align the sealant/air hose (7)
with the slot in the air
compressor.
2. Push the sealant canister (2) down and turn it clockwise.
3. Wrap the sealant/air hose (7) around the air compressor
channel to stow it in its original
location.
4. Push the air only hose (6) onto the sealant canister inlet and
push the lever down.
Storing the Tire Sealant
and Compressor Kit
The tire sealant and compressor kit
is located in the trunk, under the
load floor, behind an access panel.
To remove the kit:
1. Open the trunk. See Trunk on
page 2‑12.
Page 315 of 394
Black plate (69,1)Chevrolet Cruze Owner Manual - 2013 - crc - 10/16/12
Vehicle Care 10-69
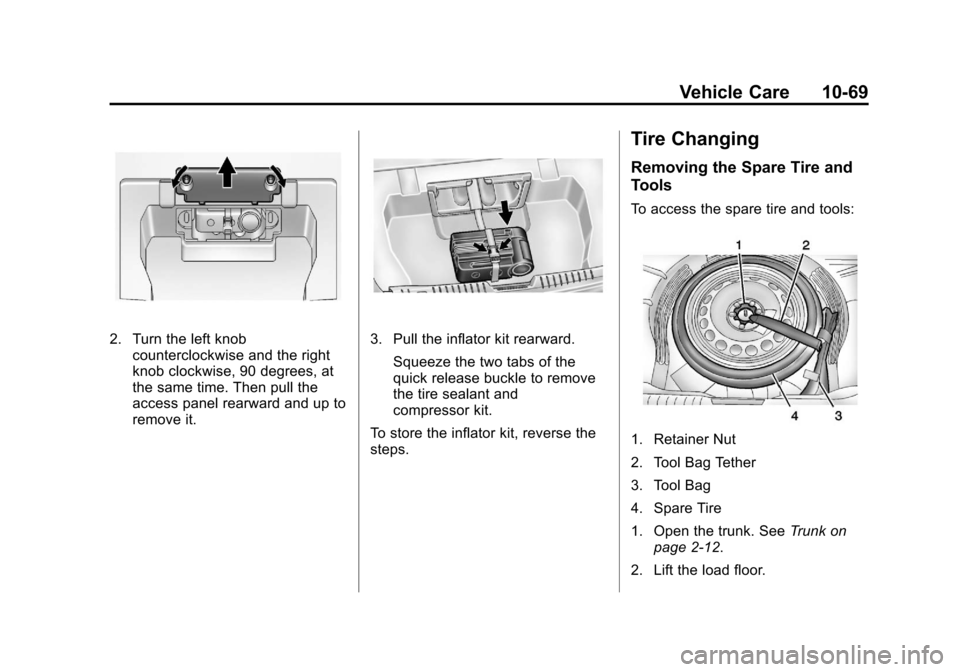
2. Turn the left knobcounterclockwise and the right
knob clockwise, 90 degrees, at
the same time. Then pull the
access panel rearward and up to
remove it.3. Pull the inflator kit rearward.
Squeeze the two tabs of the
quick release buckle to remove
the tire sealant and
compressor kit.
To store the inflator kit, reverse the
steps.
Tire Changing
Removing the Spare Tire and
Tools
To access the spare tire and tools:
1. Retainer Nut
2. Tool Bag Tether
3. Tool Bag
4. Spare Tire
1. Open the trunk. See Trunk on
page 2‑12.
2. Lift the load floor.