2013 CHEVROLET CRUZE ECU
[x] Cancel search: ECUPage 276 of 394
Black plate (30,1)Chevrolet Cruze Owner Manual - 2013 - crc - 10/16/12
10-30 Vehicle Care
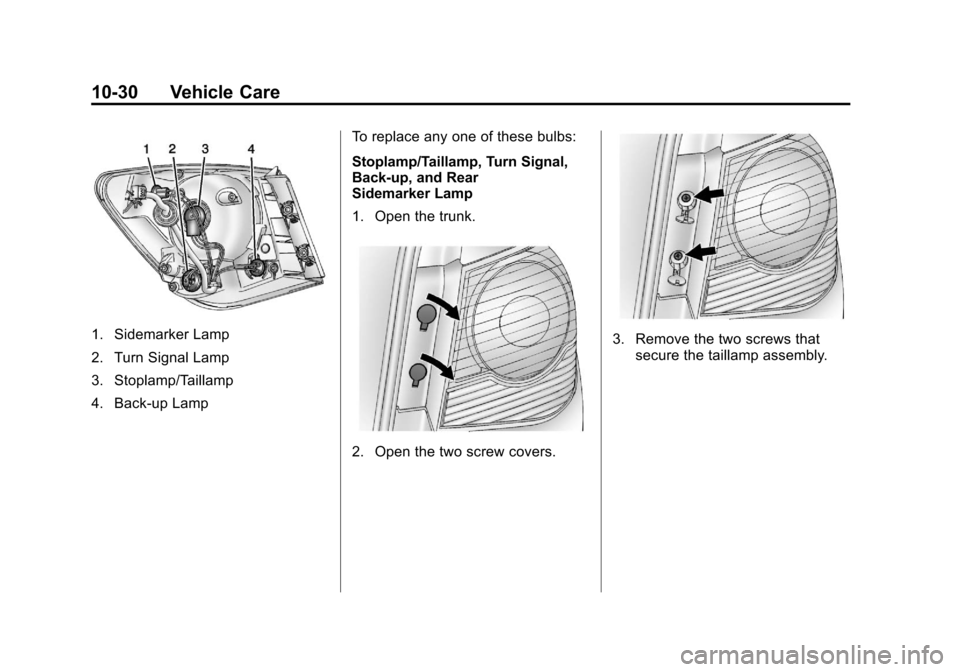
1. Sidemarker Lamp
2. Turn Signal Lamp
3. Stoplamp/Taillamp
4. Back-up LampTo replace any one of these bulbs:
Stoplamp/Taillamp, Turn Signal,
Back-up, and Rear
Sidemarker Lamp
1. Open the trunk.
2. Open the two screw covers.
3. Remove the two screws that
secure the taillamp assembly.
Page 277 of 394
Black plate (31,1)Chevrolet Cruze Owner Manual - 2013 - crc - 10/16/12
Vehicle Care 10-31
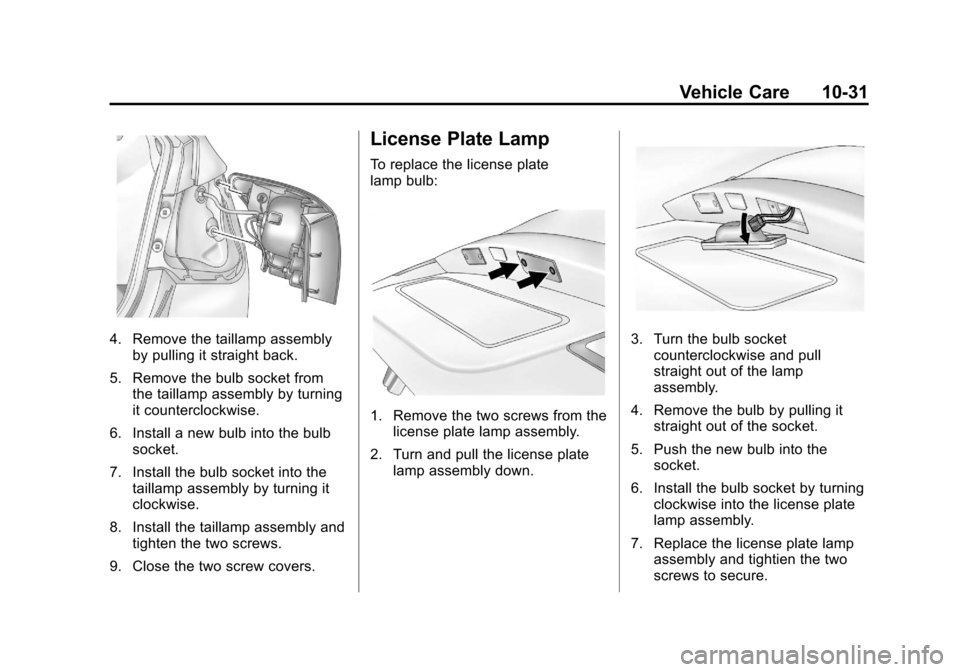
4. Remove the taillamp assemblyby pulling it straight back.
5. Remove the bulb socket from the taillamp assembly by turning
it counterclockwise.
6. Install a new bulb into the bulb socket.
7. Install the bulb socket into the taillamp assembly by turning it
clockwise.
8. Install the taillamp assembly and tighten the two screws.
9. Close the two screw covers.
License Plate Lamp
To replace the license plate
lamp bulb:
1. Remove the two screws from the license plate lamp assembly.
2. Turn and pull the license plate lamp assembly down.
3. Turn the bulb socketcounterclockwise and pull
straight out of the lamp
assembly.
4. Remove the bulb by pulling it straight out of the socket.
5. Push the new bulb into the socket.
6. Install the bulb socket by turning clockwise into the license plate
lamp assembly.
7. Replace the license plate lamp assembly and tightien the two
screws to secure.
Page 312 of 394

Black plate (66,1)Chevrolet Cruze Owner Manual - 2013 - crc - 10/16/12
10-66 Vehicle Care
20. Dispose of the used sealantcanister (2) and sealant/air
hose (7) assembly at a local
dealer or in accordance with
local state codes and practices.
21. Replace it with a new canister available from your dealer.
22. After temporarily sealing a tire using the tire sealant and
compressor kit, take the
vehicle to an authorized dealer
within 161 km (100 mi) of
driving to have the tire repaired
or replaced.Using the Tire Sealant and
Compressor Kit without
Sealant to Inflate a Tire (Not
Punctured)
To use the air compressor to inflate
a tire with air only and not sealant:
If a tire goes flat, avoid further tire
and wheel damage by driving slowly
to a level place. Turn on the hazard
warning flashers. See Hazard
Warning Flashers on page 6‑4. See
If a Tire Goes Flat on
page 10‑59 for other important
safety warnings.
1. Remove the tire sealant and compressor kit from its storage
location. See Storing the Tire
Sealant and Compressor Kit on
page 10‑68.
2. Unlock the air only hose (6) from the sealant canister (2) by
pulling up on the lever.
3. Pull the air only hose (6) from the sealant canister (2).
4. Remove the power plug (3) from the air compressor (1).
5. Place the kit on the ground. Make sure the tire valve stem is
positioned close to the ground
so the hose will reach it.
6. Remove the tire valve stem cap by turning it counterclockwise.
7. Attach the air only hose (6) onto the tire valve stem and press the
lever down to secure it.
Page 326 of 394
Black plate (80,1)Chevrolet Cruze Owner Manual - 2013 - crc - 10/16/12
10-80 Vehicle Care
Notice:If the jumper cables are
connected or removed in the
wrong order, electrical shorting
may occur and damage the
vehicle. The repairs would not be
covered by the vehicle warranty.
Always connect and remove the
jumper cables in the correct
order, making sure that the
cables do not touch each other or
other metal.
Jumper Cable Removal
Reverse sequence exactly when
removing jumper cables.Towing
Towing the Vehicle
Notice: Incorrectly towing a
disabled vehicle may cause
damage. The damage would not
be covered by the vehicle
warranty. Do not lash or hook to
the chassis components
including the front and rear
subframes, suspension control
arms and links during towing and
recovery of a disabled vehicle or
to secure the vehicle to a flatbed
car carrier. Use the proper nylon
strap harnesses around the tires
to secure the flatbed car carrier.
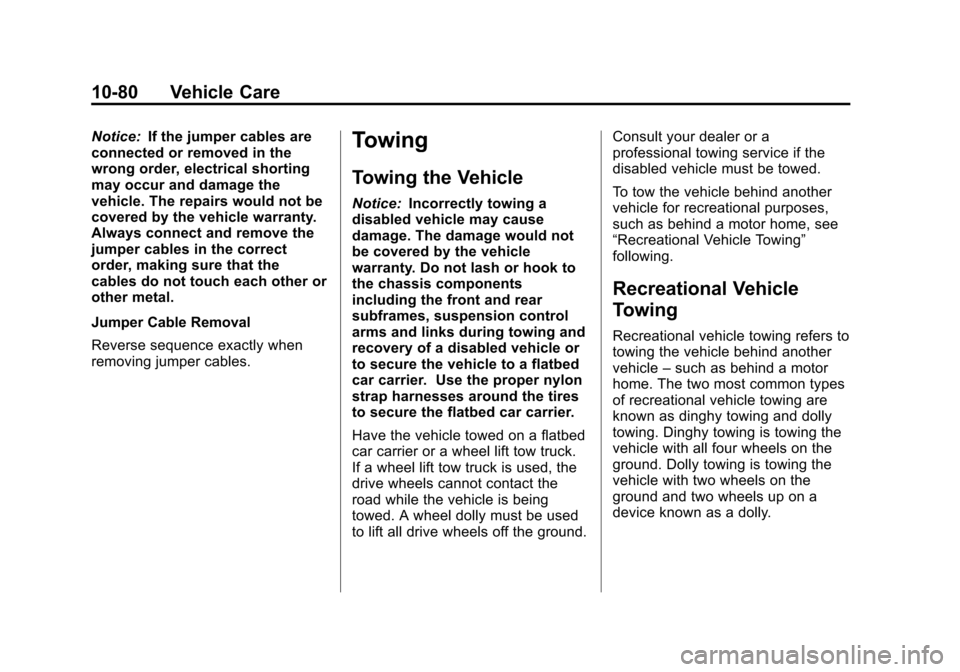
Have the vehicle towed on a flatbed
car carrier or a wheel lift tow truck.
If a wheel lift tow truck is used, the
drive wheels cannot contact the
road while the vehicle is being
towed. A wheel dolly must be used
to lift all drive wheels off the ground. Consult your dealer or a
professional towing service if the
disabled vehicle must be towed.
To tow the vehicle behind another
vehicle for recreational purposes,
such as behind a motor home, see
“Recreational Vehicle Towing”
following.
Recreational Vehicle
Towing
Recreational vehicle towing refers to
towing the vehicle behind another
vehicle
–such as behind a motor
home. The two most common types
of recreational vehicle towing are
known as dinghy towing and dolly
towing. Dinghy towing is towing the
vehicle with all four wheels on the
ground. Dolly towing is towing the
vehicle with two wheels on the
ground and two wheels up on a
device known as a dolly.
Page 327 of 394
Black plate (81,1)Chevrolet Cruze Owner Manual - 2013 - crc - 10/16/12
Vehicle Care 10-81
Here are some important things to
consider before recreational vehicle
towing:
.The towing capacity of the
towing vehicle. Be sure to read
the tow vehicle manufacturer's
recommendations.
.How far the vehicle will be
towed. Some vehicles have
restrictions on how far and how
long they can tow.
.The proper towing equipment.
See your dealer or trailering
professional for additional advice
and equipment
recommendations.
.If the vehicle is ready to be
towed. Just as preparing the
vehicle for a long trip, make sure
the vehicle is prepared to be
towed.
Dinghy Towing (With
Automatic Transmission)
Notice:If the vehicle is towed
with all four wheels on the
ground, the drivetrain
components could be damaged.
The repairs would not be covered
by the vehicle warranty. Do not
tow the vehicle with all four
wheels on the ground.
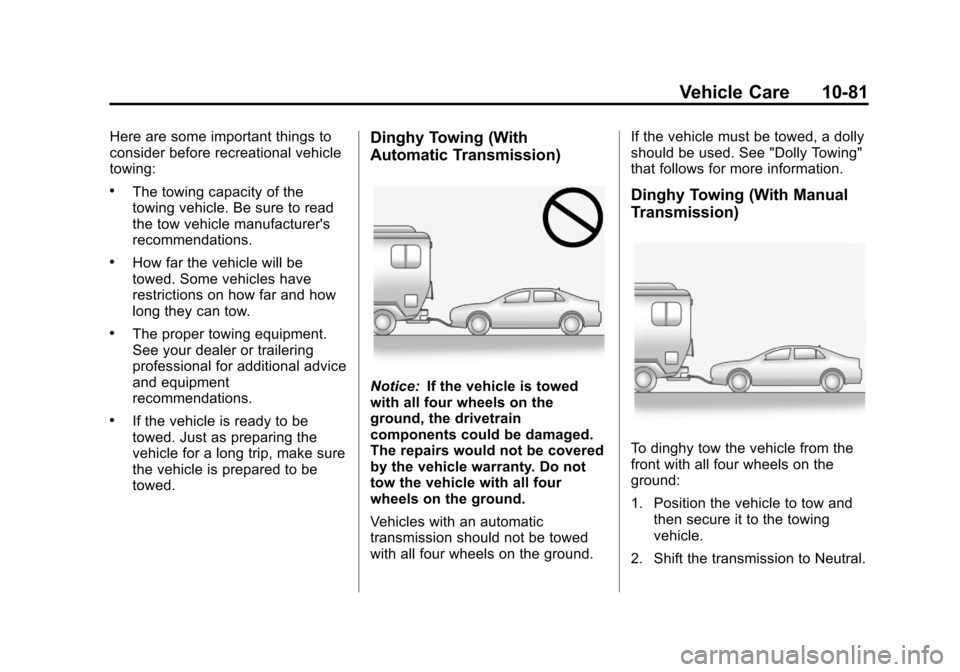
Vehicles with an automatic
transmission should not be towed
with all four wheels on the ground. If the vehicle must be towed, a dolly
should be used. See "Dolly Towing"
that follows for more information.
Dinghy Towing (With Manual
Transmission)
To dinghy tow the vehicle from the
front with all four wheels on the
ground:
1. Position the vehicle to tow and
then secure it to the towing
vehicle.
2. Shift the transmission to Neutral.
Page 329 of 394
Black plate (83,1)Chevrolet Cruze Owner Manual - 2013 - crc - 10/16/12
Vehicle Care 10-83
4. Clamp the steering wheel in astraight-ahead position with a
clamping device designed for
towing.
5. Remove the key from the ignition.
6. Secure the vehicle to the dolly.
7. Release the parking brake.
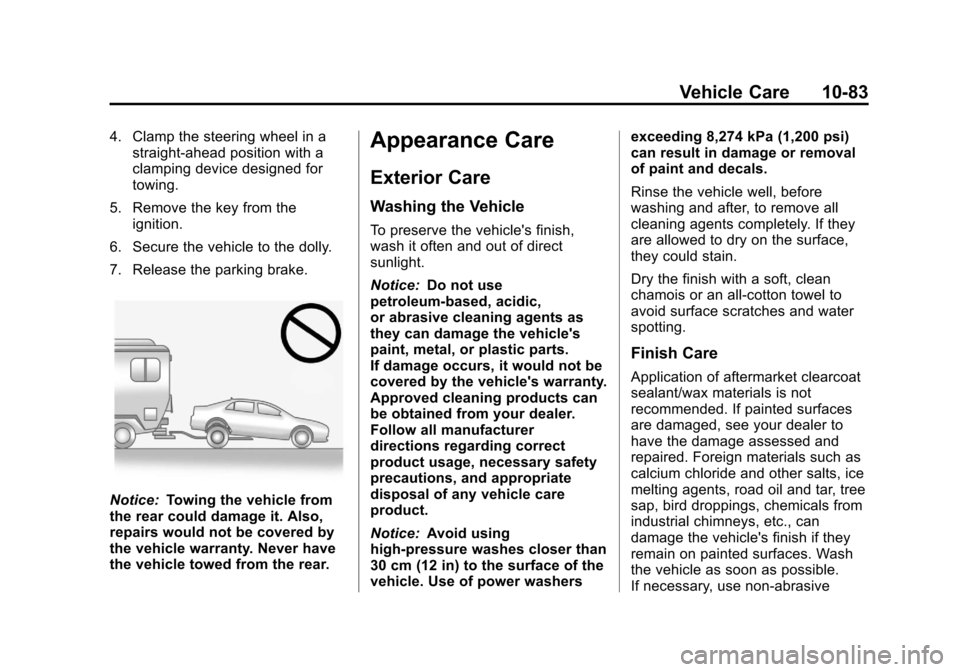
Notice: Towing the vehicle from
the rear could damage it. Also,
repairs would not be covered by
the vehicle warranty. Never have
the vehicle towed from the rear.
Appearance Care
Exterior Care
Washing the Vehicle
To preserve the vehicle's finish,
wash it often and out of direct
sunlight.
Notice: Do not use
petroleum-based, acidic,
or abrasive cleaning agents as
they can damage the vehicle's
paint, metal, or plastic parts.
If damage occurs, it would not be
covered by the vehicle's warranty.
Approved cleaning products can
be obtained from your dealer.
Follow all manufacturer
directions regarding correct
product usage, necessary safety
precautions, and appropriate
disposal of any vehicle care
product.
Notice: Avoid using
high-pressure washes closer than
30 cm (12 in) to the surface of the
vehicle. Use of power washers exceeding 8,274 kPa (1,200 psi)
can result in damage or removal
of paint and decals.
Rinse the vehicle well, before
washing and after, to remove all
cleaning agents completely. If they
are allowed to dry on the surface,
they could stain.
Dry the finish with a soft, clean
chamois or an all-cotton towel to
avoid surface scratches and water
spotting.
Finish Care
Application of aftermarket clearcoat
sealant/wax materials is not
recommended. If painted surfaces
are damaged, see your dealer to
have the damage assessed and
repaired. Foreign materials such as
calcium chloride and other salts, ice
melting agents, road oil and tar, tree
sap, bird droppings, chemicals from
industrial chimneys, etc., can
damage the vehicle's finish if they
remain on painted surfaces. Wash
the vehicle as soon as possible.
If necessary, use non-abrasive
Page 336 of 394
Black plate (90,1)Chevrolet Cruze Owner Manual - 2013 - crc - 10/16/12
10-90 Vehicle Care
Floor Mats
{WARNING
If a floor mat is the wrong size or
is not properly installed, it can
interfere with the pedals.
Interference with the pedals can
cause unintended acceleration
and/or increased stopping
distance which can cause a crash
and injury. Make sure the floor
mat does not interfere with the
pedals.Use the following guidelines for
proper floor mat usage:
.The original equipment floor
mats were designed for your
vehicle. If the floor mats need
replacing, it is recommended
that GM certified floor mats be
purchased. Non-GM floor mats
may not fit properly and may
interfere with the pedals. Always
check that the floor mats do not
interfere with the pedals.
.Use the floor mat with the
correct side up. Do not turn
it over.
.Do not place anything on top of
the driver side floor mat.
.Use only a single floor mat on
the driver side.
.Do not place one floor mat on
top of another.
Removing and Replacing the
Floor Mats
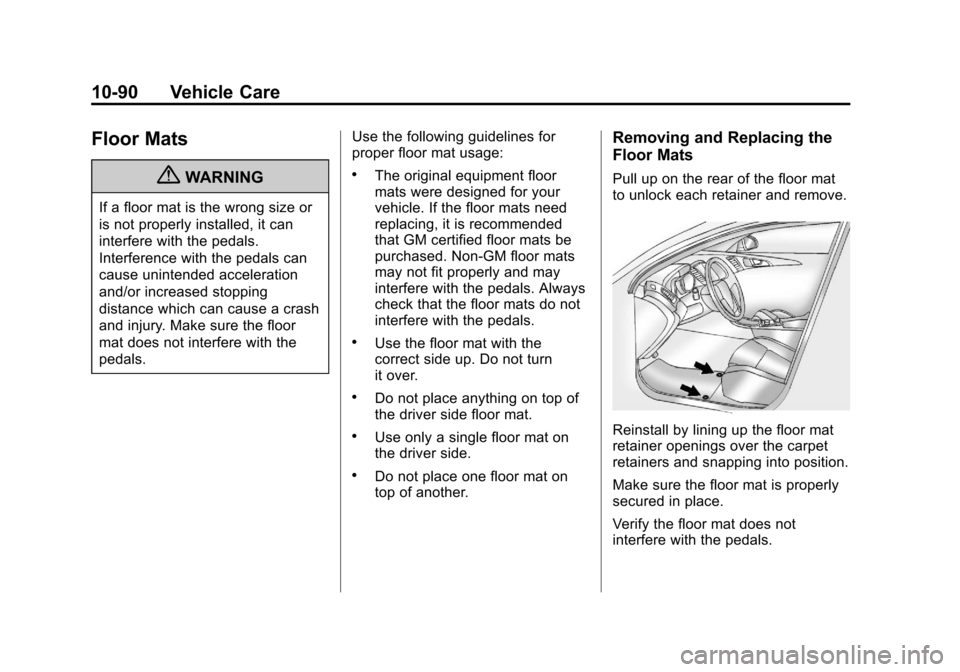
Pull up on the rear of the floor mat
to unlock each retainer and remove.
Reinstall by lining up the floor mat
retainer openings over the carpet
retainers and snapping into position.
Make sure the floor mat is properly
secured in place.
Verify the floor mat does not
interfere with the pedals.
Page 362 of 394
Black plate (6,1)Chevrolet Cruze Owner Manual - 2013 - crc - 10/16/12
13-6 Customer Information
.Model, year, color, and license
plate number of the vehicle.
.Odometer reading, Vehicle
Identification Number (VIN), and
delivery date of the vehicle.
.Description of the problem.
Coverage
Services are provided up to 5 years/
160 000 km (100,000 mi), whichever
comes first.
In the U.S., anyone driving the
vehicle is covered. In Canada, a
person driving the vehicle without
permission from the owner is not
covered.
Roadside Assistance is not a part of
the New Vehicle Limited Warranty.
Chevrolet and General Motors of
Canada Limited reserve the right to
make any changes or discontinue
the Roadside Assistance program at
any time without notification.Chevrolet and General Motors of
Canada Limited reserve the right to
limit services or payment to an
owner or driver if they decide the
claims are made too often, or the
same type of claim is made many
times.
Services Provided
.Emergency Fuel Delivery:
Delivery of enough fuel for the
vehicle to get to the nearest
service station.
.Lock-Out Service:
Service to
unlock the vehicle if you are
locked out. A remote unlock may
be available if you have OnStar.
For security reasons, the driver
must present identification
before this service is given.
.Emergency Tow from a Public
Road or Highway: Tow to the
nearest Chevrolet dealer for
warranty service, or if the vehicle
was in a crash and cannot be
driven. Assistance is also given
when the vehicle is stuck in the
sand, mud, or snow.
.Flat Tire Change: Service to
change a flat tire with the spare
tire. The spare tire, if equipped,
must be in good condition and
properly inflated. It is the owner's
responsibility for the repair or
replacement of the tire if it is not
covered by the warranty.
.Battery Jump Start: Service to
jump start a dead battery.
Services Not Included in
Roadside Assistance
.Impound towing caused by
violation of any laws.
.Legal fines.
.Mounting, dismounting,
or changing of snow tires,
chains, or other traction devices.
.Towing or services for vehicles
driven on a non-public road or
highway.