2013 CHEVROLET CAPTIVA SPORT warning light
[x] Cancel search: warning lightPage 212 of 374
Black plate (24,1)Chevrolet Captiva Sport Owner Manual - 2013 - crc - 11/12/12
9-24 Driving and Operating
Drive Systems All-Wheel Drive Vehicles with this feature always
send engine power to all four
wheels. It is fully automatic, and
adjusts itself as needed for road
conditions.
When using a compact spare tire on
an AWD vehicle, the system
automatically detects the compact
spare and disables AWD. To restore
AWD operation and prevent
excessive wear on the system,
replace the compact spare with a
full-size tire as soon as possible.
See Compact Spare Tire on
page 10 ‑ 64 . Brakes Antilock Brake
System (ABS) This vehicle has the Antilock Brake
System (ABS), an advanced
electronic braking system that helps
prevent a braking skid.
When the vehicle begins to drive
away, ABS checks itself.
A momentary motor or clicking noise
might be heard while this test is
going on, and it might even be
noticed that the brake pedal moves
a little. This is normal.
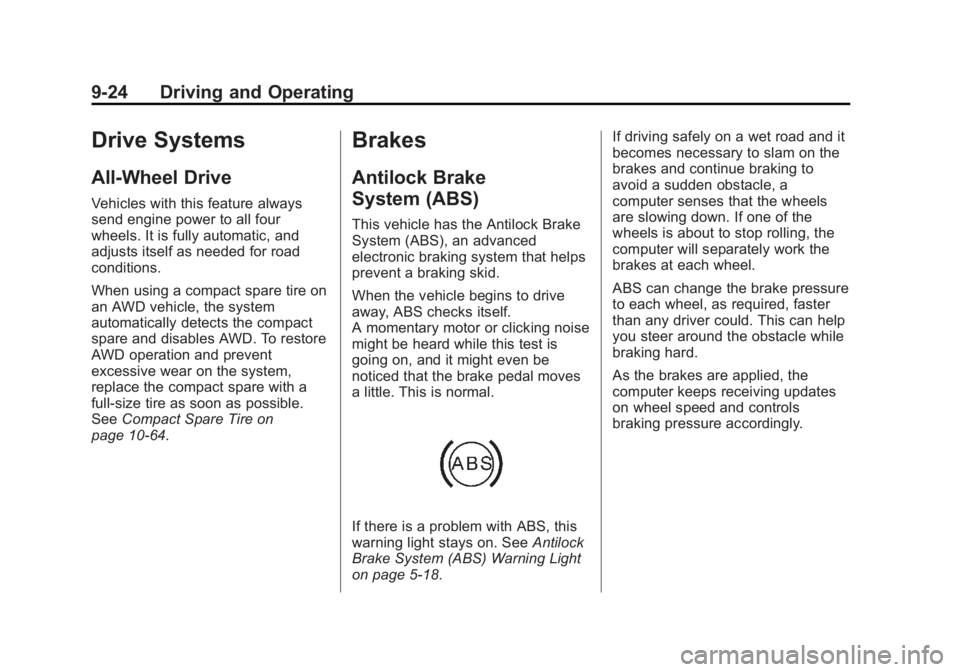
If there is a problem with ABS, this
warning light stays on. See Antilock
Brake System (ABS) Warning Light
on page 5 ‑ 18 . If driving safely on a wet road and it
becomes necessary to slam on the
brakes and continue braking to
avoid a sudden obstacle, a
computer senses that the wheels
are slowing down. If one of the
wheels is about to stop rolling, the
computer will separately work the
brakes at each wheel.
ABS can change the brake pressure
to each wheel, as required, faster
than any driver could. This can help
you steer around the obstacle while
braking hard.
As the brakes are applied, the
computer keeps receiving updates
on wheel speed and controls
braking pressure accordingly.
Page 213 of 374
Black plate (25,1)Chevrolet Captiva Sport Owner Manual - 2013 - crc - 11/12/12
Driving and Operating 9-25Remember: ABS does not change
the time needed to get a foot up to
the brake pedal or always decrease
stopping distance. If you get too
close to the vehicle in front of you,
there will not be enough time to
apply the brakes if that vehicle
suddenly slows or stops. Always
leave enough room up ahead to
stop, even with ABS.
Using ABS Do not pump the brakes. Just hold
the brake pedal down firmly and let
ABS work. You might hear the ABS
pump or motor operating and feel
the brake pedal pulsate, but this is
normal.
Braking in Emergencies
ABS allows you to steer and brake
at the same time. In many
emergencies, steering can help
more than even the very best
braking. Parking Brake
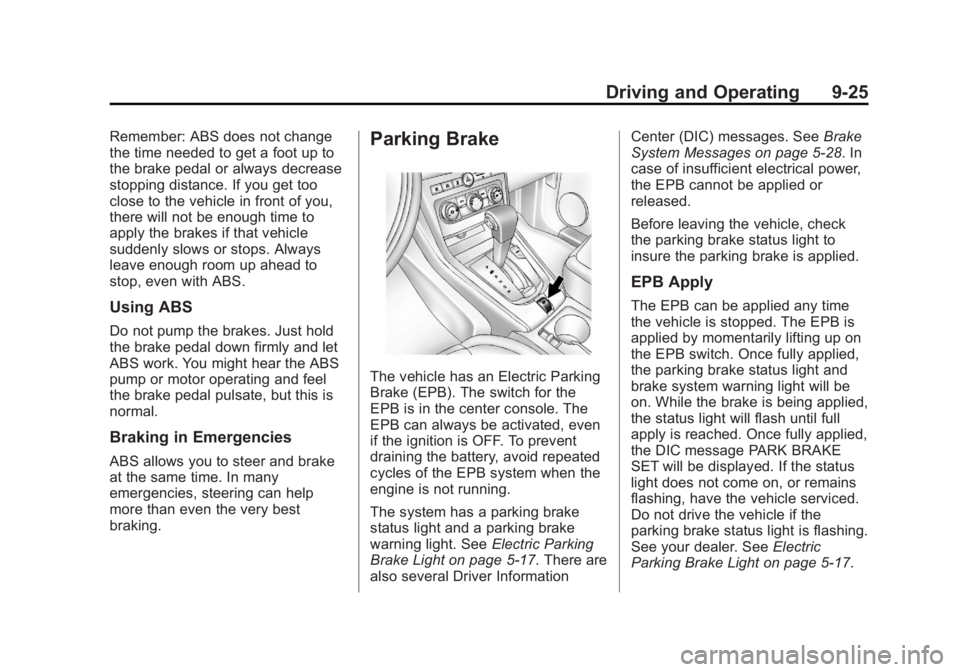
The vehicle has an Electric Parking
Brake (EPB). The switch for the
EPB is in the center console. The
EPB can always be activated, even
if the ignition is OFF. To prevent
draining the battery, avoid repeated
cycles of the EPB system when the
engine is not running.
The system has a parking brake
status light and a parking brake
warning light. See Electric Parking
Brake Light on page 5 ‑ 17 . There are
also several Driver Information Center (DIC) messages. See Brake
System Messages on page 5 ‑ 28 . In
case of insufficient electrical power,
the EPB cannot be applied or
released.
Before leaving the vehicle, check
the parking brake status light to
insure the parking brake is applied.
EPB Apply The EPB can be applied any time
the vehicle is stopped. The EPB is
applied by momentarily lifting up on
the EPB switch. Once fully applied,
the parking brake status light and
brake system warning light will be
on. While the brake is being applied,
the status light will flash until full
apply is reached. Once fully applied,
the DIC message PARK BRAKE
SET will be displayed. If the status
light does not come on, or remains
flashing, have the vehicle serviced.
Do not drive the vehicle if the
parking brake status light is flashing.
See your dealer. See Electric
Parking Brake Light on page 5 ‑ 17 .
Page 214 of 374
Black plate (26,1)Chevrolet Captiva Sport Owner Manual - 2013 - crc - 11/12/12
9-26 Driving and Operating If the EPB is applied while the
vehicle is in motion, a chime will
sound, and the DIC message
RELEASE PARK BRAKE SWITCH
will be displayed. The vehicle will
decelerate as long as the switch is
held in the up position. Releasing
the EPB switch during deceleration
will release the parking brake. If the
switch is held in the up position until
the vehicle comes to a stop, the
EPB will remain applied.
If the parking brake status light
flashes continuously, the EPB is
only partially applied or released,
or there is a problem with the EPB.
The DIC message SERVICE
PARKING BRAKE will be displayed.
If this light flashes continuously,
release the EPB, and attempt to
apply it again. If this light continues
to flash, do not drive the vehicle.
See your dealer.
If the parking brake warning light is
on, the EPB has detected an error
in another system and is operating
with reduced functionality. To apply
the EPB when this light is on, lift up on the EPB switch and hold it in the
up position. Full application of the
parking brake by the EPB system
may take a longer period of time
than normal when this light is on.
Continue to hold the switch until the
parking brake status light remains
on. If the parking brake warning light
is on, see your dealer.
If the EPB fails to apply, the rear
wheels should be blocked to
prevent vehicle movement.
EPB Release To release the EPB, place the
ignition in the ACC/ACCESSORY or
ON/RUN position, apply and hold
the brake pedal, and push down
momentarily on the EPB switch.
If you attempt to release the EPB
without the brake pedal applied, a
chime will sound, and the DIC
message STEP ON BRAKE TO
RELEASE PARK BRAKE will be
displayed. The EPB is released
when the parking brake status light
is off. If the parking brake warning light is
on, the EPB has detected an error
in another system and is operating
with reduced functionality. To
release the EPB when this light is
on, push down on the EPB switch
and hold it in the down position.
EPB release may take a longer
period of time than normal when this
light is on. Continue to hold the
switch until the parking brake status
light is off. If the light is on, see your
dealer.
Notice: Driving with the parking
brake on can overheat the brake
system and cause premature
wear or damage to brake system
parts. Make sure that the parking
brake is fully released and the
brake warning light is off before
driving.
Page 217 of 374
Black plate (29,1)Chevrolet Captiva Sport Owner Manual - 2013 - crc - 11/12/12
Driving and Operating 9-29The Traction Control System (TCS)/
StabiliTrak button is on the
instrument panel.
TCS can be turned off or on by
pressing and releasing the TCS/
StabiliTrak button
g . To disable both
StabiliTrak and TCS, press and hold
the button
g until
g turns on solid in
the instrument cluster. The
appropriate DIC message displays.
See Ride Control System Messages
on page 5 ‑ 32 .
It is recommended to leave the
system on for normal driving
conditions, but it may be necessary
to turn the system off if the vehicle
is stuck in sand, mud, ice or snow,
and you want to “ rock ” the vehicle to
attempt to free it.
If cruise control is being used when
StabiliTrak activates, the cruise
control automatically disengages.
The cruise control can be
re-engaged when road conditions
allow. See Cruise Control on
page 9 ‑ 29 . Cruise Control With cruise control, the vehicle can
maintain a speed of about 40 km/h
(25 mph) or more without keeping
your foot on the accelerator. Cruise
control does not work at speeds
below 40 km/h (25 mph).
On vehicles with the StabiliTrak ®
feature, the system may begin to
limit wheel spin while you are using
cruise control. If this happens, the
cruise control will automatically
disengage. See StabiliTrak ®
System
on page 9 ‑ 28 .
{ WARNING
Cruise control can be dangerous
where you cannot drive safely at
a steady speed. So, do not use
the cruise control on winding
roads or in heavy traffic.
Cruise control can be dangerous
on slippery roads. On such roads,
fast changes in tire traction can
(Continued) WARNING (Continued) cause excessive wheel slip, and
you could lose control. Do not use
cruise control on slippery roads.
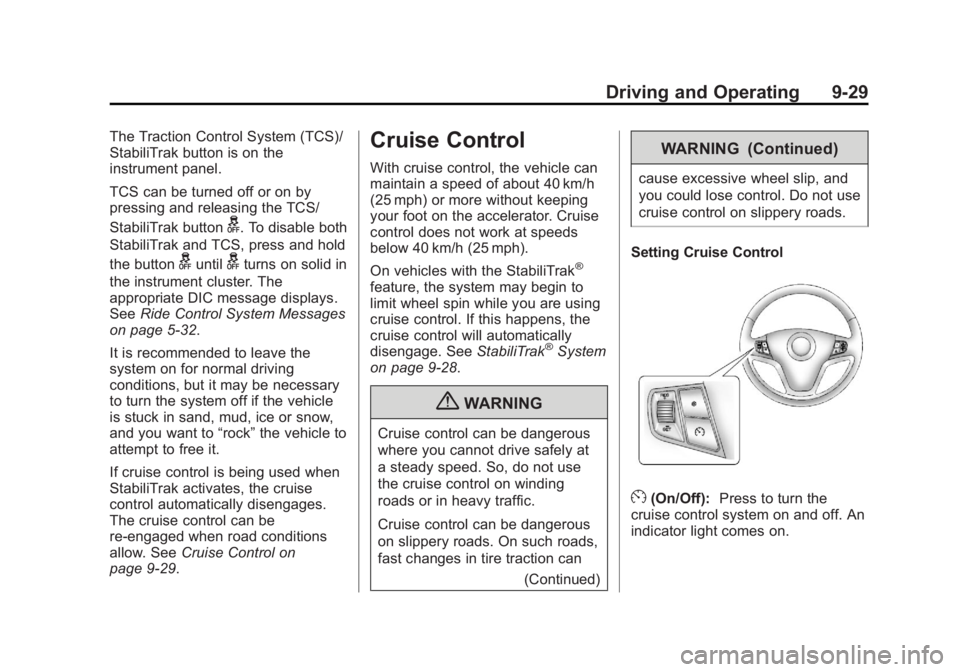
Setting Cruise Control
E (On/Off): Press to turn the
cruise control system on and off. An
indicator light comes on.
Page 219 of 374
Black plate (31,1)Chevrolet Captiva Sport Owner Manual - 2013 - crc - 11/12/12
Driving and Operating 9-31Passing Another Vehicle While
Using Cruise Control
Use the accelerator pedal to
increase the vehicle's speed. When
you take your foot off the pedal, the
vehicle will slow down to the
previously set cruise control speed.
Using Cruise Control on Hills
How well the cruise control works
on hills depends upon the vehicle's
speed, load, and the steepness of
the hills. When going up steep hills,
you might have to step on the
accelerator pedal to maintain the
vehicle's speed. When going
downhill, you might have to brake or
shift to a lower gear to maintain the
vehicle's speed. For some vehicles
the transmission may automatically
downshift when going down hills to
help maintain the vehicle's speed.
When the brakes are applied, the
cruise control shuts off. Ending Cruise Control
There are two ways to disengage
the cruise control: .
Step lightly on the brake pedal;
when cruise control disengages,
the indicator light on the
instrument cluster goes out. .
Press
E to turn off the cruise
control system.
Erasing Speed Memory
The cruise control set speed
memory is erased when the cruise
control or the ignition is turned off. Object Detection
Systems Ultrasonic Parking Assist If available, the Ultrasonic Rear
Parking Assist (URPA) system
assists the driver with parking and
avoiding objects while in
R (Reverse). URPA operates at
speeds less than 8 km/h (5 mph).
The sensors on the rear bumper are
used to detect objects up to
2.5 m (8 ft) behind the vehicle, and
at least 25 cm (10 in) off the ground
and below liftgate level.
{ WARNING
The URPA system does not
detect children, pedestrians,
bicyclists, animals, or objects
below the bumper or that are too
close or too far from the vehicle.
It is not available at speeds
greater than 8 km/h (5 mph). To
(Continued)
Page 226 of 374
Black plate (38,1)Chevrolet Captiva Sport Owner Manual - 2013 - crc - 11/12/12
9-38 Driving and Operating The tethered fuel cap is located
behind a hinged fuel door on the
driver side of the vehicle. On some
vehicles with Remote Keyless Entry,
the fuel door is locked and unlocked
when the vehicle doors are locked
and unlocked.
To remove the fuel cap, turn it
slowly counterclockwise. The fuel
cap has a spring in it; if the cap is
released too soon, it will spring back
to the right. To avoid fuel contact on
the painted surface of the vehicle
when filling the fuel tank, place the
tethered cap on the fuel filler door.
Be careful not to spill fuel. Do not
top off or overfill the tank and wait a
few seconds after you have finished
pumping before removing the
nozzle. Clean fuel from painted
surfaces as soon as possible. See
Exterior Care on page 10 ‑ 72 .
When replacing the fuel cap, turn it
clockwise until it clicks. Make sure
the cap is fully installed. The
diagnostic system can determine if
the fuel cap has been left off or improperly installed. This would
allow fuel to evaporate into the
atmosphere. See Malfunction
Indicator Lamp on page 5 ‑ 14 .
{ WARNINGIf a fire starts while you are
refueling, do not remove the
nozzle. Shut off the flow of fuel by
shutting off the pump or by
notifying the station attendant.
Leave the area immediately.
Notice: If a new fuel cap is
needed, be sure to get the right
type of cap from your dealer. The
wrong type of fuel cap might not
fit properly, might cause the
malfunction indicator lamp to
light, and could damage the fuel
tank and emissions system. See
Malfunction Indicator Lamp on
page 5 ‑ 14 . Filling a Portable Fuel
Container
{ WARNINGFilling a portable fuel container
while it is in the vehicle can cause
fuel vapors that can ignite either
by static electricity or other
means. You or others could be
badly burned and the vehicle
could be damaged. Always: .
Use approved fuel
containers. .
Remove the container from
the vehicle, trunk, or pickup
bed before filling. .
Place the container on the
ground.
(Continued)
Page 227 of 374
Black plate (39,1)Chevrolet Captiva Sport Owner Manual - 2013 - crc - 11/12/12
Driving and Operating 9-39WARNING (Continued) .
Place the nozzle inside the fill
opening of the container
before dispensing fuel, and
keep it in contact with the fill
opening until filling is
complete. .
Fill the container no more
than 95% full to allow for
expansion. .
Do not smoke, light matches,
or use lighters while
pumping fuel. .
Avoid using cell phones or
other electronic devices. Towing General Towing
Information Only use towing equipment that has
been designed for the vehicle.
Contact your dealer or trailering
dealer for assistance with preparing
the vehicle for towing a trailer. Read
the entire section before towing a
trailer.
For towing a disabled vehicle, see
Towing the Vehicle on page 10 ‑ 69 .
For towing the vehicle behind
another vehicle such as a motor
home, see Recreational Vehicle
Towing on page 10 ‑ 69 .
Driving Characteristics
and Towing Tips Driving with a Trailer
When towing a trailer: .
Become familiar with the state
and local laws that apply
specifically to trailer towing. .
Do not tow a trailer during the
first 800 km (500 mi), to prevent
damage to the engine, axle or
other parts. .
Then, during the first 800 km
(500 mi) trailer towing, do not
drive over 80 km/h (50 mph) and
do not make starts at full throttle. .
The vehicle can tow in D (Drive)
but M (Manual Mode) is
recommended. See Manual
Mode on page 9 ‑ 22 . Use a lower
gear if the transmission shifts
too often.
{ WARNING
When towing a trailer, exhaust
gases may collect at the rear of
the vehicle and enter if the
liftgate, trunk/hatch, or rear-most
window is open.
When towing a trailer:
(Continued)
Page 248 of 374
Black plate (14,1)Chevrolet Captiva Sport Owner Manual - 2013 - crc - 11/12/12
10-14 Vehicle Care If the coolant inside the coolant
surge tank is hot, do not do anything
else until it cools down. The vehicle
should be parked on a level surface.
The coolant level should be
between the MIN and MAX lines.
If it is not, you may have a leak at
the radiator hoses, heater hoses,
radiator, water pump, or somewhere
else in the cooling system.
{ WARNINGHeater and radiator hoses, and
other engine parts, can be very
hot. Do not touch them. If you do,
you can be burned.
Do not run the engine if there is a
leak. If you run the engine, it
could lose all coolant. That could
cause an engine fire, and you
could be burned. Get any leak
fixed before you drive the vehicle.
If there seems to be no leak, with
the engine on, check to see if the
engine cooling fan(s) is running. If the engine is overheating, the fan
should be running. If it is not, the
vehicle needs service. Turn off the
engine.
Notice: Engine damage from
running the engine without
coolant is not covered by the
warranty.
Notice: Using coolant other than
DEX-COOL ®
can cause premature
engine, heater core, or radiator
corrosion. In addition, the engine
coolant could require changing
sooner, at 50 000 km (30,000 mi)
or 24 months, whichever occurs
first. Any repairs would not be
covered by the vehicle warranty.
Always use DEX-COOL
(silicate-free) coolant in the
vehicle.
Engine Coolant The cooling system in the vehicle is
filled with DEX-COOL ®
engine
coolant. This coolant is designed to
remain in the vehicle for 5 years or 240 000 km (150,000 mi), whichever
occurs first, if only DEX-COOL
extended life coolant is added.
The following explains the cooling
system and how to add coolant
when it is low. If there is a problem
with engine overheating, see Engine
Overheating on page 10 ‑ 18 .
A 50/50 mixture of clean, drinkable
water and DEX-COOL coolant will: .
Give freezing protection down to
− 37°C ( − 34°F). .
Give boiling protection up to
129°C (265°F). .
Protect against rust and
corrosion. .
Help keep the proper engine
temperature. .
Let the warning lights and
gauges work as they should.
Notice: Using coolant other than
DEX-COOL ®
can cause premature
engine, heater core, or radiator
corrosion. In addition, the engine
coolant could require changing