2013 CHEVROLET AVALANCHE center console
[x] Cancel search: center consolePage 30 of 494

Black plate (24,1)Chevrolet Avalanche Owner Manual - 2013 - CRC - 8/27/12
1-24 In Brief
V:Press to set or reset certain
functions and to turn off or
acknowledge messages on the DIC.
For more information, see Driver
Information Center (DIC) on
page 5‑25.
Vehicle Customization
Some vehicle features can be
programmed by using the DIC
buttons next to the steering wheel.
These features include:
.Language
.Door Lock and Unlock Settings
.RKE Lock and Unlock Feedback
.Lighting
.Chime Volume
.Memory Features
See Vehicle Personalization (With
DIC Buttons) on page 5‑44.
Rear Vision
Camera (RVC)
If available, the RVC displays a
view of the area behind the vehicle
when the vehicle is shifted into
R (Reverse). This is displayed on
the inside rearview mirror or the
navigation screen, if equipped.
To clean the camera lens, near the
tailgate handle, rinse it with water
and wipe it with a soft cloth.
For more information, see Rear
Vision Camera (RVC) on page 9‑51.
Ultrasonic Parking Assist
If available, this system uses
sensors on the rear bumper to
assist with parking and avoiding
objects while in R (Reverse).
It operates at speeds less than
8 km/h (5 mph). URPA uses audible
beeps to provide distance and
system information. Keep the sensors on the vehicle's
rear bumper clean to ensure proper
operation.
See
Ultrasonic Parking Assist on
page 9‑49.
Power Outlets
Accessory power outlets can be
used to plug in electrical equipment,
such as a cell phone or MP3 player.
The vehicle may have two
accessory power outlets located
on the instrument panel and one
inside the center floor console.
The vehicle may also have an outlet
on the rear of the center floor
console above the cupholder door.
The accessory power outlet is
operational at all times.
See Power Outlets on page 5‑8.
Page 115 of 494

Black plate (1,1)Chevrolet Avalanche Owner Manual - 2013 - CRC - 8/27/12
Storage 4-1
Storage
Storage Compartments
Glove Box . . . . . . . . . . . . . . . . . . . . 4-1
Cupholders . . . . . . . . . . . . . . . . . . . 4-1
Overhead Console . . . . . . . . . . . . 4-1
Armrest Storage . . . . . . . . . . . . . . 4-1
Center Console Storage . . . . . . 4-1
Top-Box Storage . . . . . . . . . . . . . . 4-2
Luggage/Load Locations
Cargo Area . . . . . . . . . . . . . . . . . . . 4-2
Additional Storage Features
Cargo Cover Panels . . . . . . . . . . 4-5
Cargo Tie-Downs . . . . . . . . . . . . 4-11
Roof Rack System
Roof Rack System . . . . . . . . . . . 4-11
Storage
Compartments
Glove Box
Lift up on the glove box lever to
open it.
Cupholders
For vehicles with cupholders for
front and rear passengers, the
cupholders are located in the center
console and on the back of the
center console.
Press down and release the access
door to open and use the front
cupholders.
Pull down on the door located on
the back of the console to use the
rear cupholders. Push on the door
to close it.
Push down and then back to
remove the front cupholder for
cleaning.For vehicles with a rear armrest/
cupholder, pull up and out on the
tab on the top center of the armrest.
Pull the armrest down to access the
cupholder.
Overhead Console
For vehicles with an overhead
console, it contains reading lights
and a small storage area.
Press the button next to each light
to turn it on and off.
Armrest Storage
Vehicles may have a center armrest
storage compartment in front of the
bench seat. Open it by folding the
armrest down and pressing the
handle on the front.
Center Console Storage
For vehicles with a console
compartment, cupholders are
located between the bucket seats.
Press the button and lift the console
cover to open.
Page 134 of 494

Black plate (8,1)Chevrolet Avalanche Owner Manual - 2013 - CRC - 8/27/12
5-8 Instruments and Controls
5. To decrease the time or date, doone of the following:
.Press the©SEEK button.
.Press thesREV button.
.Turn thefknob
counterclockwise.
To change the time default setting
from 12 hour to 24 hour or to change
the date default setting from month/
day/year to day/month/year:
1. Press the
Hbutton and then
the softkey located below the
forward arrow tab. 12H, 24H, the
date MM/DD (month and day),
and DD/MM/ (day and month)
displays.
2. Press the softkey located below the desired option.
3. Press the
Hbutton again to
apply the desired option, or let
the screen time out.
Power Outlets
Accessory power outlets can be
used to plug in electrical equipment,
such as a cell phone or MP3 player.
The vehicle may have two
accessory power outlets located on
the instrument panel and one inside
the center floor console.
The vehicle may also have an outlet
on the rear of the center floor
console above the cupholder door.
Remove the cover to access and
replace when not in use. The
accessory power outlet is
operational at all times.
{WARNING
Power is always supplied to the
outlets. Do not leave electrical
equipment plugged in when the
vehicle is not in use because the
vehicle could catch fire and cause
injury or death. Notice:
Leaving electrical
equipment plugged in for an
extended period of time while
the vehicle is off will drain the
battery. Always unplug electrical
equipment when not in use and
do not plug in equipment that
exceeds the maximum 20 ampere
rating.
Certain power accessory plugs
may not be compatible with the
accessory power outlets and could
overload vehicle and adapter fuses.
If a problem is experienced, see
your dealer.
When adding electrical equipment,
be sure to follow the proper
installation instructions included
with the equipment. See Add-On
Electrical Equipment on page 9‑76.
Notice: Hanging heavy
equipment from the power outlet
can cause damage not covered
by the vehicle warranty. The
power outlets are designed for
accessory power plugs only, such
as cell phone charge cords.
Page 142 of 494

Black plate (16,1)Chevrolet Avalanche Owner Manual - 2013 - CRC - 8/27/12
5-16 Instruments and Controls
{WARNING
If the airbag readiness light stays
on after the vehicle is started or
comes on while driving, it means
the airbag system might not be
working properly. The airbags in
the vehicle might not inflate in a
crash, or they could even inflate
without a crash. To help avoid
injury, have the vehicle serviced
right away.
If there is a problem with the airbag
system, a Driver Information Center
(DIC) message may also come on.
See Airbag System Messages on
page 5‑40.
Passenger Airbag Status
Indicator
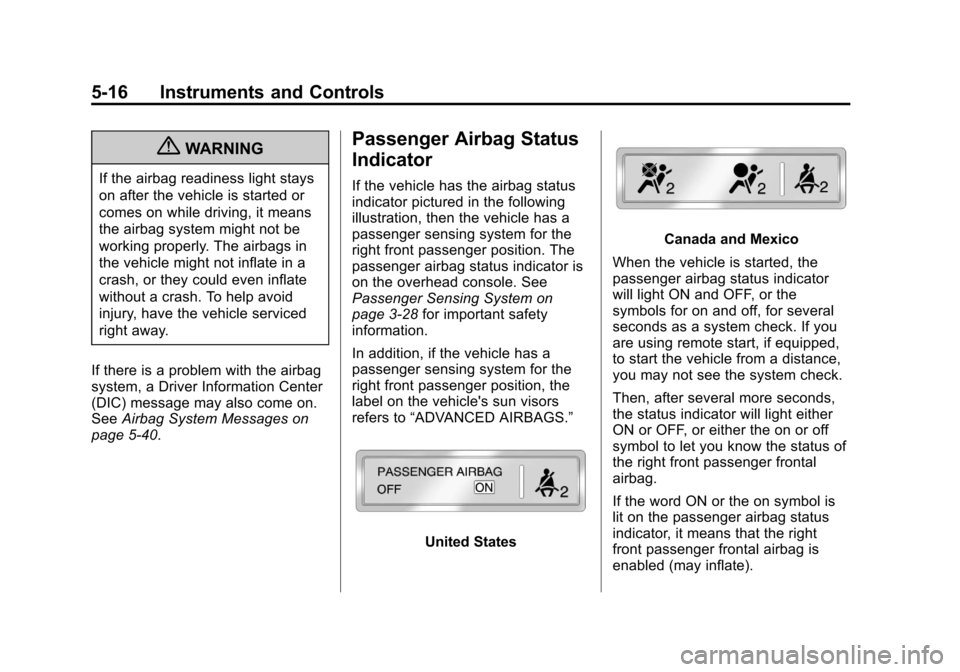
If the vehicle has the airbag status
indicator pictured in the following
illustration, then the vehicle has a
passenger sensing system for the
right front passenger position. The
passenger airbag status indicator is
on the overhead console. See
Passenger Sensing System on
page 3‑28 for important safety
information.
In addition, if the vehicle has a
passenger sensing system for the
right front passenger position, the
label on the vehicle's sun visors
refers to “ADVANCED AIRBAGS.”
United States
Canada and Mexico
When the vehicle is started, the
passenger airbag status indicator
will light ON and OFF, or the
symbols for on and off, for several
seconds as a system check. If you
are using remote start, if equipped,
to start the vehicle from a distance,
you may not see the system check.
Then, after several more seconds,
the status indicator will light either
ON or OFF, or either the on or off
symbol to let you know the status of
the right front passenger frontal
airbag.
If the word ON or the on symbol is
lit on the passenger airbag status
indicator, it means that the right
front passenger frontal airbag is
enabled (may inflate).
Page 225 of 494

Black plate (33,1)Chevrolet Avalanche Owner Manual - 2013 - CRC - 8/27/12
Infotainment System 7-33
.Files with an .mp3 or .wma file
extension.
.AAC files stored on an iPod.
.FAT16
.FAT32
Connecting a USB Storage
Device or iPod
The USB Port can be used to
control an iPod or a USB storage
device.
To connect a USB storage device,
connect the device to the USB port
located in the center console or on
the instrument panel.
To connect an iPod, connect one
end of the USB cable that came
with the iPod to the iPod’s dock
connector and connect the other
end to the USB port located in the
center console or on the instrument
panel. If the vehicle is on and the
USB connection works,“OK to
disconnect” and a GM logo may
appear on the iPod and iPod appears on the radio display. The
iPod music appears on the radio’s
display and begins playing.
The iPod charges while it is
connected to the vehicle if the
vehicle is in the ACC/ACCESSORY
or ON/RUN position. When the
vehicle is turned off, the iPod
automatically powers off and will not
charge or draw power from the
vehicle's battery.
If you have an older iPod model that
is not supported, it can still be used
by connecting it to the Auxiliary
Input Jack using a standard 3.5 mm
(1/8 in) stereo cable. See
“Using the
Auxiliary Input Jack” earlier for more
information.
Using the Radio to Control a
USB Storage Device or iPod
The radio can control a USB
storage device or an iPod using the
radio buttons and knobs and display
song information on the radio’s
display.
f(Tune): Turn to select files.
©SEEK:Press to go to the start of
the track, if more than ten seconds
have played. Press and hold or
press multiple times to continue
moving backward through tracks.
¨SEEK: Press to go to the next
track. Press and hold or press
multiple times to continue moving
forward through tracks.
sREV (Reverse): Press and hold
to reverse playback quickly. Sound
is heard at a reduced volume.
Release
sREV to resume playing.
The elapsed time of the file
displays.
\FWD (Fast Forward): Press
and hold to advance playback
quickly. Sound is heard at a reduced
volume. Release
\FWD to
resume playing. The elapsed time of
the file displays.
4(Information): Press to display
additional information about the
selected track.
Page 484 of 494

Black plate (2,1)Chevrolet Avalanche Owner Manual - 2013 - CRC - 8/27/12
i-2 INDEX
B
Battery . . . . . . . . . . . . . . . . . . . . . . . 10-25Jump Starting . . . . . . . . . . . . . . . 10-78
Load Management . . . . . . . . . . . . . 6-8
Power Protection . . . . . . . . . . . . . . 6-8
Voltage and ChargingMessages . . . . . . . . . . . . . . . . . . . 5-34
Blade Replacement, Wiper . . . 10-29
Bluetooth . . . . . . . . . . . . . . . . . . . . . . 7-48
Brake Pedal and Adjustable
Throttle . . . . . . . . . . . . . . . . . . . . . . 9-21
System Warning Light . . . . . . . . 5-20
Brakes . . . . . . . . . . . . . . . . . . . . . . . . 10-22 Antilock . . . . . . . . . . . . . . . . . . . . . . . 9-41
Assist . . . . . . . . . . . . . . . . . . . . . . . . . 9-42
Fluid . . . . . . . . . . . . . . . . . . . . . . . . 10-23
Parking . . . . . . . . . . . . . . . . . . . . . . . 9-42
System Messages . . . . . . . . . . . . 5-35
Braking . . . . . . . . . . . . . . . . . . . . . . . . . 9-3
Break-In, New Vehicle . . . . . . . . . 9-20
Bulb Replacement . . . . . . . . . . . . 10-32
Fog Lamps . . . . . . . . . . . . . . . . . . . . 6-6
Halogen Bulbs . . . . . . . . . . . . . . 10-31
Headlamp Aiming . . . . . . . . . . . 10-30 Bulb Replacement (cont'd)
Headlamps . . . . . . . . . . . . . . . . . 10-31
License Plate Lamps . . . . . . . 10-32
Taillamps, Turn Signal,
Sidemarker, Stoplamps,
and Backup Lamps . . . . . . . . 10-31
Buying New Tires . . . . . . . . . . . . . 10-58
C
Calibration . . . . . . . . . . . . . . . . . . . . . . 5-5
California Fuel Requirements . . . . . . . . . . . 9-56
Perchlorate MaterialsRequirements . . . . . . . . . . . . . . . 10-3
Warning . . . . . . . . . . . . . . . . . . . . . . 10-2
Camera, Rear Vision . . . . . . . . . . 9-51
Canadian Vehicle Owners . . . . . . . . iii
Capacities and
Specifications . . . . . . . . . . . . . . . . 12-2
Carbon Monoxide
Engine Exhaust . . . . . . . . . . . . . . . 9-28
Midgate
®. . . . . . . . . . . . . . . . . . . . . . 2-8
Tailgate . . . . . . . . . . . . . . . . . . . . . . . 2-14
Winter Driving . . . . . . . . . . . . . . . . 9-12 Cargo
Area . . . . . . . . . . . . . . . . . . . . . . . . . . . 4-2
Cover Panels . . . . . . . . . . . . . . . . . . 4-5
Tie-Downs . . . . . . . . . . . . . . . . . . . . 4-11
Cautions, Danger, and Warnings . . . . . . . . . . . . . . . . . . . . . . . . iv
CD Player . . . . . . . . . . . . . . . . . . . . . 7-15
CD/DVD Player . . . . . . . . . . . . . . . . 7-20
Center Console Storage . . . . . . . . 4-1
Center Seat . . . . . . . . . . . . . . . . . . . . 3-3
Chains, Tire . . . . . . . . . . . . . . . . . . 10-63
Charging System Light . . . . . . . . 5-17
Check
Engine Light . . . . . . . . . . . . . . . . . . 5-17
IgnitionTransmission Lock . . . . . . . . 10-28
Child Restraints Infants and YoungChildren . . . . . . . . . . . . . . . . . . . . . 3-37
Lower Anchors and Tethers for Children . . . . . . . . . 3-43
Older Children . . . . . . . . . . . . . . . . 3-35
Securing . . . . . . . . . . 3-49, 3-51, 3-52
Systems . . . . . . . . . . . . . . . . . . . . . . 3-39
Circuit Breakers . . . . . . . . . . . . . . 10-34
Page 493 of 494

Black plate (11,1)Chevrolet Avalanche Owner Manual - 2013 - CRC - 8/27/12
INDEX i-11
Starting the Engine . . . . . . . . . . . . 9-23
Steering . . . . . . . . . . . . . . . . . . . . . . . . 9-4Fluid, Power . . . . . . . . . . . . . . . . 10-20
Wheel Adjustment . . . . . . . . . . . . . 5-2
Wheel Controls . . . . . . . . . . . . . . . . 5-2
Steps Power Assist . . . . . . . . . . . . . . . . . 2-15
Stoplamps and Back-Up Lamps Bulb Replacement . . . . . . . . . . 10-31
Storage Areas Armrest . . . . . . . . . . . . . . . . . . . . . . . . 4-1
Cargo Area . . . . . . . . . . . . . . . . . . . . 4-2
Center Console . . . . . . . . . . . . . . . . 4-1
Glove Box . . . . . . . . . . . . . . . . . . . . . 4-1
Roof Rack System . . . . . . . . . . . . 4-11
Top-Box Storage . . . . . . . . . . . . . . . 4-2
Stuck Vehicle . . . . . . . . . . . . . . . . . . 9-14
Sun Visors . . . . . . . . . . . . . . . . . . . . . 2-24
Sunroof . . . . . . . . . . . . . . . . . . . . . . . . 2-25
Symbols . . . . . . . . . . . . . . . . . . . . . . . . . . iv
System Infotainment . . . . . . . . . . . . . . . . . . . 7-1
Roof Rack . . . . . . . . . . . . . . . . . . . . 4-11T
Tachometer . . . . . . . . . . . . . . . . . . . . 5-11
Tailgate . . . . . . . . . . . . . . . . . . . . . . . . 2-14
TaillampsBulb Replacement . . . . . . . . . . 10-31
Text Telephone (TTY) Users . . . 13-6
Theft-Deterrent Systems . . . . . . . 2-17 Immobilizer . . . . . . . . . . . . . . . . . . . 2-17
Throttle, Adjustable . . . . . . . . . . . . 9-21
Time . . . . . . . . . . . . . . . . . . . . . . . . . . . . 5-7
Tires Buying New Tires . . . . . . . . . . . 10-58
Chains . . . . . . . . . . . . . . . . . . . . . . 10-63
Changing . . . . . . . . . . . . . . . . . . . 10-66
Designations . . . . . . . . . . . . . . . 10-46
Different Size . . . . . . . . . . . . . . . 10-60
Full-Size Spare . . . . . . . . . . . . . 10-77
If a Tire Goes Flat . . . . . . . . . . 10-64
Inflation Monitor System . . . . 10-53
Inspection . . . . . . . . . . . . . . . . . . 10-56
Messages . . . . . . . . . . . . . . . . . . . . 5-41
Pressure Light . . . . . . . . . . . . . . . . 5-22
Pressure Monitor System . . . 10-52
Rotation . . . . . . . . . . . . . . . . . . . . 10-56
Secondary Latch System . . . 10-75
Sidewall Labeling . . . . . . . . . . . 10-44 Tires (cont'd)
Terminology and
Definitions . . . . . . . . . . . . . . . . . 10-48
Uniform Tire Quality
Grading . . . . . . . . . . . . . . . . . . . 10-61
Wheel Alignment and Tire Balance . . . . . . . . . . . . . . . . . . . 10-62
Wheel Replacement . . . . . . . . 10-62
When It Is Time for New Tires . . . . . . . . . . . . . . . . . . . . . . 10-58
Winter . . . . . . . . . . . . . . . . . . . . . . 10-43
Top-Box Storage . . . . . . . . . . . . . . . . 4-2
Tow/Haul Mode . . . . . . . . . . . . . . . . 9-33
Tow/Haul Mode Light . . . . . . . . . . 5-21
Towing Driving Characteristics . . . . . . . . 9-60
Equipment . . . . . . . . . . . . . . . . . . . . 9-67
General Information . . . . . . . . . . 9-60
Recreational Vehicle . . . . . . . . 10-83
Trailer . . . . . . . . . . . . . . . . . . . . . . . . 9-63
Trailer Sway Control (TSC) . . . 9-76
Vehicle . . . . . . . . . . . . . . . . . . . . . 10-83
Traction
Control System (TCS)/StabiliTrak
®Light . . . . . . . . . . . . 5-22