2013 CHEVROLET AVALANCHE steering wheel
[x] Cancel search: steering wheelPage 130 of 494

Black plate (4,1)Chevrolet Avalanche Owner Manual - 2013 - CRC - 8/27/12
5-4 Instruments and Controls
3. Press and release¨to move up
one track within the selected
category.
b/g(Mute/Push to Talk): Press
to silence the vehicle speakers only.
Press again to turn the sound on.
For vehicles with Bluetooth or
OnStar systems, press and hold for
longer than two seconds to interact
with those systems. See Bluetooth
on page 7‑48 andOnStar Overview
on page 14‑1 for more information.
SRCE (Source/Voice
Recognition): Press to switch
between the radio and CD, and for
equipped vehicles, the DVD, front
auxiliary, and rear auxiliary.
For vehicles with the navigation
system, press and hold this button
for longer than one second to
initiate voice recognition. See “Voice
Recognition” in the Navigation
System manual for more
information.
¨(Seek): Press to go to the next
radio station while in AM, FM,
or SiriusXM
®.
For vehicles with or without a
navigation system:
Press
¨to go to the next track or
chapter while sourced to the CD or
DVD slot.
Press
¨to select a track or a folder
when navigating folders on an iPod
or USB device.
For vehicles with a navigation
system:
1. Press and hold
¨until a beep is
heard, to place the radio into
SCAN mode. A station will play
for five seconds before moving
to the next station.
2. To stop the SCAN function, press
¨again. While listening to a CD/DVD, press
and hold
¨to quickly move forward
through the tracks. Release to stop
on the desired track.
+
e: Press to increase volume.
−
e: Press to decrease volume.
Horn
To sound the horn, press the center
pad on the steering wheel.
Windshield Wiper/Washer
The front wiper control is located on
the turn and lane-change lever.
The windshield wipers are
controlled by turning the band
with
zon it.
Page 145 of 494

Black plate (19,1)Chevrolet Avalanche Owner Manual - 2013 - CRC - 8/27/12
Instruments and Controls 5-19
The following may correct an
emission control system
malfunction:
.Check that the fuel cap is fully
installed. SeeFilling the Tank on
page 9‑58. The diagnostic
system can determine if the
fuel cap has been left off or
improperly installed. A loose or
missing fuel cap allows fuel to
evaporate into the atmosphere.
A few driving trips with the cap
properly installed should turn the
light off.
.Check that good quality fuel is
used. Poor fuel quality causes
the engine not to run as
efficiently as designed and may
cause stalling after start-up,
stalling when the vehicle is
changed into gear, misfiring,
hesitation on acceleration,
or stumbling on acceleration.
These conditions might go away
once the engine is warmed up. If one or more of these conditions
occurs, change the fuel brand used.
It may require at least one full tank
of the proper fuel to turn the light off.
See
Recommended Fuel on
page 9‑55.
If none of the above have made the
light turn off, your dealer can check
the vehicle. The dealer has the
proper test equipment and
diagnostic tools to fix any
mechanical or electrical problems
that might have developed.Emissions Inspection and
Maintenance Programs
Depending on where you live,
your vehicle may be required to
participate in an emission control
system inspection and maintenance
program. For the inspection, the
emission system test equipment will
likely connect to the vehicle's Data
Link Connector (DLC).
The DLC is under the instrument
panel to the left of the steering
wheel. See your dealer if assistance
is needed.
The vehicle may not pass
inspection if:
.The malfunction indicator lamp is
on with the engine running, or if
the light does not come on when
the ignition is turned to ON/RUN
while the engine is off. See your
dealer for assistance in verifying
proper operation of the
malfunction indicator lamp.
.The OBD II (On-Board
Diagnostics) system determines
that critical emission control
systems have not been
completely diagnosed. The
vehicle would be considered
not ready for inspection.
Page 151 of 494

Black plate (25,1)Chevrolet Avalanche Owner Manual - 2013 - CRC - 8/27/12
Instruments and Controls 5-25
Information Displays
Driver Information
Center (DIC)
Your vehicle has a Driver
Information Center (DIC).
The DIC displays information about
your vehicle. It also displays
warning messages if a system
problem is detected.
All messages will appear in the
DIC display located below the
tachometer in the instrument panel
cluster.
The DIC comes on when the ignition
is on. After a short delay, the DIC
will display the information that was
last displayed before the engine
was turned off.
Operation and Displays
The DIC has different displays
which can be accessed by pressing
the DIC buttons located on the
instrument panel, next to the
steering wheel. If the vehicle does
not have DIC buttons, the trip
odometer reset stem can be used to
access some of the menu items
The DIC displays trip, fuel, and
vehicle system information, and
warning messages if a system
problem is detected.
The DIC also allows some features
to be customized. SeeVehicle
Personalization (With DIC Buttons)
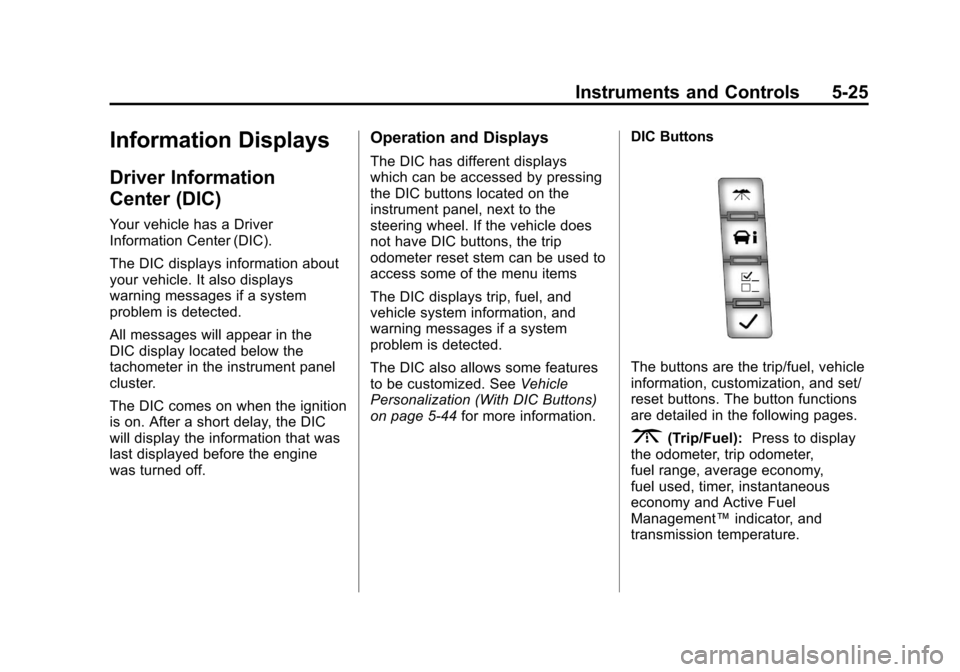
on page 5‑44 for more information. DIC Buttons
The buttons are the trip/fuel, vehicle
information, customization, and set/
reset buttons. The button functions
are detailed in the following pages.
3(Trip/Fuel):
Press to display
the odometer, trip odometer,
fuel range, average economy,
fuel used, timer, instantaneous
economy and Active Fuel
Management™ indicator, and
transmission temperature.
Page 185 of 494

Black plate (1,1)Chevrolet Avalanche Owner Manual - 2013 - CRC - 8/27/12
Lighting 6-1
Lighting
Exterior Lighting
Exterior Lamp Controls . . . . . . . . 6-1
Exterior Lamps OffReminder . . . . . . . . . . . . . . . . . . . . 6-3
Headlamp High/Low-Beam Changer . . . . . . . . . . . . . . . . . . . . . 6-3
Flash-to-Pass . . . . . . . . . . . . . . . . . 6-3
Daytime Running Lamps (DRL) . . . . . . . . . . . . . . . . 6-3
Automatic Headlamp System . . . . . . . . . . . . . . . . . . . . . . 6-4
Hazard Warning Flashers . . . . . 6-5
Turn and Lane-Change Signals . . . . . . . . . . . . . . . . . . . . . . 6-5
Fog Lamps . . . . . . . . . . . . . . . . . . . . 6-6
Exterior Cargo Lamps . . . . . . . . . 6-6
Interior Lighting
Instrument Panel Illumination Control . . . . . . . . . . . . . . . . . . . . . . 6-7
Dome Lamps . . . . . . . . . . . . . . . . . 6-7
Reading Lamps . . . . . . . . . . . . . . . 6-7
Lighting Features
Entry/Exit Lighting . . . . . . . . . . . . . 6-8
Battery Load Management . . . . 6-8
Battery Power Protection . . . . . . 6-8
Exterior Lighting
Exterior Lamp Controls
The exterior lamp control is located
on the instrument panel to the left of
the steering wheel.
It controls the following systems:
.Headlamps
.Taillamps
.Parking Lamps
.License Plate Lamps
.Instrument Panel Lights
Page 202 of 494

Black plate (10,1)Chevrolet Avalanche Owner Manual - 2013 - CRC - 8/27/12
7-10 Infotainment System
Radio
AM-FM Radio
Radio Data System (RDS)
For radios with the Radio Data
System (RDS) feature, it only works
with FM stations that broadcast
RDS information. This system relies
upon receiving specific information
from these stations and only works
when the information is available.
While the radio is tuned to an
FM-RDS station, the station name
or call letters displays. In rare
cases, a radio station could
broadcast incorrect information that
causes the radio features to work
improperly. If this happens, contact
the radio station.
4(Information) (RDS Features):
For vehicles with RDS features,
press
4to display additional text
information related to the current
FM-RDS station. If information is
available, the song title information
displays on the top line of the display and artist information
displays on the bottom line. When
information is not available,
“NO
INFO” displays.
Finding a Station
BAND: Press to switch between
AM, FM, or XM™, if equipped.
f(Tune): Turn to manually select
radio stations.
©SEEK: Press to seek the
previous radio station. Press
and hold for a few seconds until a
beep sounds to scan for radio
stations in descending order, press
the
©SEEK button again to stop
scanning radio stations. The radio
only seeks and scans stations with
a strong signal that are in the
selected band.
¨SEEK: Press to seek the next
radio station. Press and hold for a
few seconds until a beep sounds to
scan for radio stations in ascending
order, press the
¨SEEK button
again to stop scanning radio stations. The radio only seeks and
scans stations with a strong signal
that are in the selected band.
sREV:
Press to manually tune to
a radio station in descending order.
\FWD: Press to manually tune to
a radio station in ascending order.
FAV (Favorites): Press to select
different favorite pages for stored
radio stations.
Storing Radio Stations
Drivers are encouraged to store
radio station while the vehicle is
parked, see Defensive Driving on
page 9‑3. Tune to stored radio
stations using the presets, favorites
button, and steering wheel controls,
if the vehicle has this feature.
Up to 36 stations can be
programmed as favorites using the
sixbutton. Press the FAV button to
go through up to six pages of
favorites, each having six favorite
stations available per page. Each
Page 204 of 494

Black plate (12,1)Chevrolet Avalanche Owner Manual - 2013 - CRC - 8/27/12
7-12 Infotainment System
sREV:Press to go to the
previous SiriusXM category.
\FWD: Press to go to the next
SiriusXM category.
FAV (Favorites): Press to select
different favorites pages for stored
radio stations.
CAT (Category): The CAT button is
used to find SiriusXM channels
when the radio is in the XM mode.
Finding a Category (CAT)
Station
To find XM channels in a category:
1. Press the CAT button to display the category tabs. Continue
pressing the CAT button until the
desired category name displays.
.Radios with CD and DVD
can also navigate the
category list by pressing the
\FWD or thesREV
buttons. 2. Press either of the two softkeys
below the desired category tab
to immediately tune to the first
SiriusXM station in that category.
To go to the previous or next
SiriusXM station in the selected
category, do one of the
following:
.Turn thefknob.
.Press the softkey below the
right or left arrows in the
category tab.
.Press©SEEK or¨SEEK.
3. To exit the category search mode, press the FAV button or
BAND button to display the
favorites again.
Adding and Removing Categories
Categories cannot be added or
removed while the vehicle is moving
faster than 8 km/h (5 mph).
To add or remove a category:
1. Press the MENU button. 2. Press the softkey located below
the XM CAT tab.
3. Turn the
fknob to display the
category to add or remove.
4. Press the softkey located under the Add or Remove tab.
To restore all removed
categories, press the softkey
under the Restore All tab.
5. Repeat the steps to remove more categories.
Storing SiriusXM Channels
Drivers are encouraged to store
SiriusXM channels while the vehicle
is parked; see Defensive Driving on
page 9‑3. Tune to stored radio
stations using the presets, favorites
button, and steering wheel controls,
if the vehicle has this feature.
Up to 36 stations can be
programmed as favorites using
the six softkeys below the radio
station frequency tabs and by using
the FAV button. Press the FAV
button to go through up to six pages
Page 241 of 494

Black plate (49,1)Chevrolet Avalanche Owner Manual - 2013 - CRC - 8/27/12
Infotainment System 7-49
When to Speak:A short tone
sounds after the system responds
indicating when it is waiting for a
voice command. Wait until the tone
and then speak.
How to Speak: Speak clearly in a
calm and natural voice.
Audio System
When using the in-vehicle Bluetooth
system, sound comes through the
vehicle's front audio system
speakers and overrides the audio
system. Use the audio system
volume knob, during a call, to
change the volume level. The
adjusted volume level remains in
memory for later calls. To prevent
missed calls, a minimum volume
level is used if the volume is turned
down too low.
Bluetooth Controls
Use the buttons on the steering
wheel to operate the in-vehicle
Bluetooth system. See Steering
Wheel Controls on page 5‑2.
b/g(Push to Talk): Press to
answer incoming calls, confirm
system information, and start
speech recognition.
c/x(End): Press to end a call,
reject a call, or cancel an operation.
Pairing
A Bluetooth-enabled cell phone
must be paired to the Bluetooth
system and then connected to the
vehicle before it can be used. See
the cell phone manufacturer's user
guide for Bluetooth functions before
pairing the cell phone. If a Bluetooth
phone is not connected, calls will be
made using OnStar Hands-Free
Calling, if equipped. See OnStar
Overview on page 14‑1.
Pairing Information
.A Bluetooth phone with MP3
capability cannot be paired to
the vehicle as a phone and an
MP3 player at the same time.
.Up to five cell phones can be
paired to the Bluetooth system.
.The pairing process is disabled
when the vehicle is moving.
.Pairing only needs to be
completed once, unless the
pairing information on the cell
phone changes or the cell phone
is deleted from the system.
.Only one paired cell phone can
be connected to the Bluetooth
system at a time.
.If multiple paired cell phones are
within range of the system, the
system connects to the first
available paired cell phone in the
order that they were first paired
to the system. To connect to a
different paired phone, see
“Connecting to a Different
Phone” later in this section.
Pairing a Phone
1. Press and hold
b/gfor
two seconds.
2. Say “Bluetooth.” This command
can be skipped.
Page 257 of 494

Black plate (9,1)Chevrolet Avalanche Owner Manual - 2013 - CRC - 8/27/12
Climate Controls 8-9
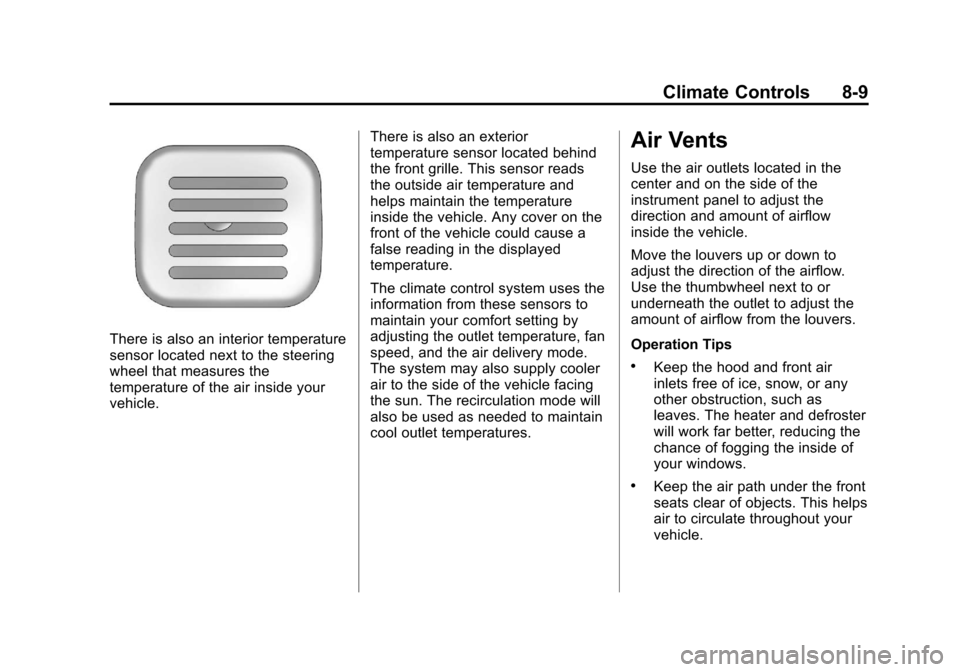
There is also an interior temperature
sensor located next to the steering
wheel that measures the
temperature of the air inside your
vehicle.There is also an exterior
temperature sensor located behind
the front grille. This sensor reads
the outside air temperature and
helps maintain the temperature
inside the vehicle. Any cover on the
front of the vehicle could cause a
false reading in the displayed
temperature.
The climate control system uses the
information from these sensors to
maintain your comfort setting by
adjusting the outlet temperature, fan
speed, and the air delivery mode.
The system may also supply cooler
air to the side of the vehicle facing
the sun. The recirculation mode will
also be used as needed to maintain
cool outlet temperatures.
Air Vents
Use the air outlets located in the
center and on the side of the
instrument panel to adjust the
direction and amount of airflow
inside the vehicle.
Move the louvers up or down to
adjust the direction of the airflow.
Use the thumbwheel next to or
underneath the outlet to adjust the
amount of airflow from the louvers.
Operation Tips
.Keep the hood and front air
inlets free of ice, snow, or any
other obstruction, such as
leaves. The heater and defroster
will work far better, reducing the
chance of fogging the inside of
your windows.
.Keep the air path under the front
seats clear of objects. This helps
air to circulate throughout your
vehicle.