2013 CHEVROLET AVALANCHE parking brake
[x] Cancel search: parking brakePage 321 of 494

Black plate (63,1)Chevrolet Avalanche Owner Manual - 2013 - CRC - 8/27/12
Driving and Operating 9-63
2. Have someone place chocksunder the trailer wheels.
3. When the wheel chocks are in place, release the regular brakes
until the chocks absorb the load.
4. Reapply the brake pedal. Then apply the parking brake and shift
into P (Park).
5. Release the brake pedal.
Leaving After Parking on a Hill
1. Apply and hold the brake pedal.
2. Start the engine.
3. Shift into a gear.
4. Release the parking brake.
5. Let up on the brake pedal.
6. Drive slowly until the trailer is clear of the chocks.
7. Stop and have someone pick up and store the chocks.
Maintenance when Trailer
Towing
The vehicle needs service more
often when pulling a trailer. See
Maintenance Schedule on
page 11‑3. Things that are
especially important in trailer
operation are automatic
transmission fluid, engine oil, axle
lubricant, belts, cooling system, and
brake system. It is a good idea to
inspect these before and during
the trip.
Check periodically to see that all
hitch nuts and bolts are tight.
Trailer Towing
Do not tow a trailer during break-in.
See New Vehicle Break-In on
page 9‑20 for more information.
{WARNING
The driver can lose control when
pulling a trailer if the correct
equipment is not used or the
vehicle is not driven properly. For
example, if the trailer is too
heavy, the brakes may not work
well—or even at all. The driver
and passengers could be
seriously injured. The vehicle may
also be damaged; the resulting
repairs would not be covered by
the vehicle warranty. Pull a trailer
only if all the steps in this section
have been followed. Ask your
dealer for advice and information
about towing a trailer with the
vehicle.
Page 328 of 494
Black plate (70,1)Chevrolet Avalanche Owner Manual - 2013 - CRC - 8/27/12
9-70 Driving and Operating
Tow/Haul is a feature that assists
when pulling a heavy trailer or a
large or heavy load. SeeTow/Haul
Mode on page 9‑33 for more
information.
Tow/Haul is designed to be most
effective when the vehicle and
trailer combined weight is at least
75 percent of the vehicle's Gross
Combined Weight Rating (GCWR).
See “Weight of the Trailer” inTrailer
Towing on page 9‑63. Tow/Haul is
most useful under the following
driving conditions:
.When pulling a heavy trailer or a
large or heavy load through
rolling terrain.
.When pulling a heavy trailer or a
large or heavy load in
stop-and-go traffic.
.When pulling a heavy trailer or a
large or heavy load in busy
parking lots where improved low
speed control of the vehicle is
desired. Operating the vehicle in Tow/Haul
when lightly loaded or with no
trailer at all will not cause damage.
However, there is no benefit to the
selection of Tow/Haul when the
vehicle is unloaded. Such a
selection when unloaded may
result in unpleasant engine and
transmission driving characteristics
and reduced fuel economy. Tow/
Haul is recommended only when
pulling a heavy trailer or a large or
heavy load.
Integrated Trailer Brake
Control System
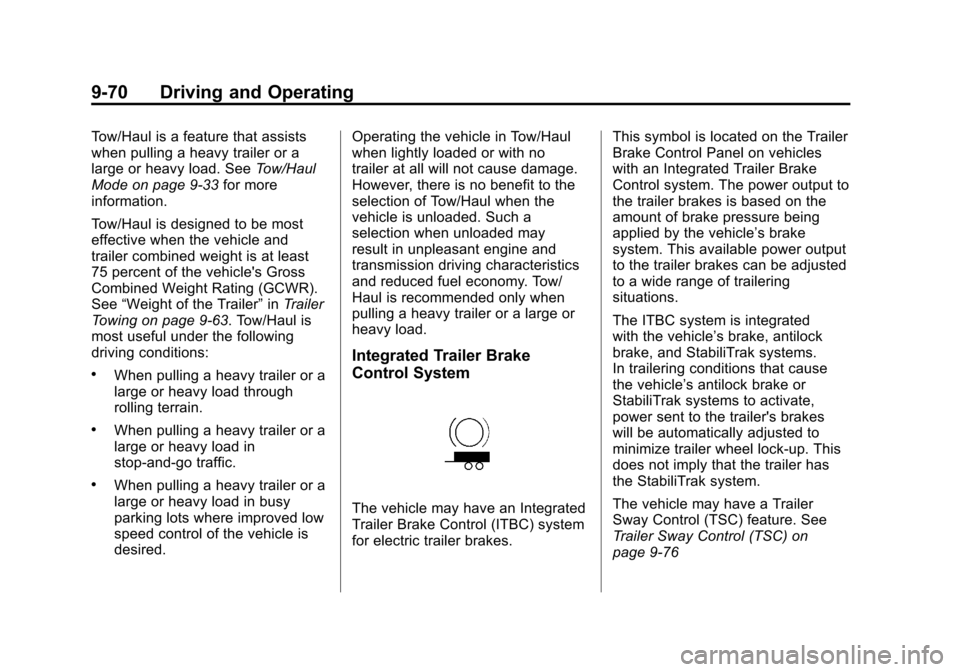
The vehicle may have an Integrated
Trailer Brake Control (ITBC) system
for electric trailer brakes.
This symbol is located on the Trailer
Brake Control Panel on vehicles
with an Integrated Trailer Brake
Control system. The power output to
the trailer brakes is based on the
amount of brake pressure being
applied by the vehicle’s brake
system. This available power output
to the trailer brakes can be adjusted
to a wide range of trailering
situations.
The ITBC system is integrated
with the vehicle’s brake, antilock
brake, and StabiliTrak systems.
In trailering conditions that cause
the vehicle’
s antilock brake or
StabiliTrak systems to activate,
power sent to the trailer's brakes
will be automatically adjusted to
minimize trailer wheel lock-up. This
does not imply that the trailer has
the StabiliTrak system.
The vehicle may have a Trailer
Sway Control (TSC) feature. See
Trailer Sway Control (TSC) on
page 9‑76
Page 345 of 494
Black plate (11,1)Chevrolet Avalanche Owner Manual - 2013 - CRC - 8/27/12
Vehicle Care 10-11
2. Apply the parking brake andplace the shift lever in P (Park).
3. With your foot on the brake pedal, move the shift lever
through each gear range,
pausing for about three seconds
in each range. Then, move the
shift lever back to P (Park).
4. Allow the engine to idle (500 –800 rpm) for at least
one minute. Slowly release the
brake pedal.
5. Keep the engine running and press the Trip/Fuel button
or trip odometer reset stem
until TRANS TEMP
(Transmission Temperature)
displays on the Driver
Information Center (DIC). 6. Using the TRANS TEMP
reading, determine and
perform the appropriate check
procedure. If the TRANS TEMP
reading is not within the required
temperature ranges, allow the
vehicle to cool, or operate the
vehicle until the appropriate
transmission fluid temperature is
reached.
Cold Check Procedure
Use this procedure only as a
reference to determine if the
transmission has enough fluid to be
operated safely until a hot check
procedure can be made. The hot
check procedure is the most
accurate method to check the fluid
level. Perform the hot check
procedure at the first opportunity.
Use this cold check procedure to
check fluid level when the
transmission temperature is
between 27°C and 32°C (80°F
and 90°F).
1. Locate the transmission dipstick at the rear of the engine
compartment, on the passenger
side of the vehicle.
See Engine Compartment
Overview on page 10‑5 for more
information.
2. Flip the handle up and then pull out the dipstick and wipe it with
a clean rag or paper towel.
3. Install the dipstick by pushing it back in all the way, wait
three seconds, and then pull it
back out again.
4. Check both sides of the dipstick and read the lower level. Repeat
the check procedure to verify the
reading.
Page 362 of 494
Black plate (28,1)Chevrolet Avalanche Owner Manual - 2013 - CRC - 8/27/12
10-28 Vehicle Care
2. Firmly apply both the parkingbrake and the regular brake.
See Parking Brake on
page 9‑42.
Do not use the accelerator
pedal, and be ready to turn off
the engine immediately if it
starts.
3. Try to start the engine in each gear. The vehicle should start
only in P (Park) or N (Neutral).
If the vehicle starts in any other
position, contact your dealer for
service.Automatic Transmission
Shift Lock Control
Function Check
{WARNING
When you are doing this
inspection, the vehicle could
move suddenly. If the vehicle
moves, you or others could be
injured.
1. Before starting this check, be sure there is enough room
around the vehicle. It should be
parked on a level surface.
2. Firmly apply the parking brake. See Parking Brake on
page 9‑42.
Be ready to apply the regular
brake immediately if the vehicle
begins to move. 3. With the engine off, turn the
ignition on, but do not start the
engine. Without applying the
regular brake, try to move the
shift lever out of P (Park) with
normal effort. If the shift lever
moves out of P (Park), contact
your dealer for service.
Ignition Transmission
Lock Check
While parked, and with the parking
brake set, try to turn the ignition to
LOCK/OFF in each shift lever
position.
.The ignition should turn to
LOCK/OFF only when the shift
lever is in P (Park).
.The ignition key should come
out only in LOCK/OFF.
Contact your dealer if service is
required.
Page 363 of 494
Black plate (29,1)Chevrolet Avalanche Owner Manual - 2013 - CRC - 8/27/12
Vehicle Care 10-29
Park Brake and P (Park)
Mechanism Check
{WARNING
When you are doing this check,
the vehicle could begin to move.
You or others could be injured
and property could be damaged.
Make sure there is room in front
of the vehicle in case it begins to
roll. Be ready to apply the regular
brake at once should the vehicle
begin to move.
Park on a fairly steep hill, with the
vehicle facing downhill. Keeping
your foot on the regular brake, set
the parking brake.
.To check the parking brake's
holding ability: With the engine
running and the transmission in
N (Neutral), slowly remove foot
pressure from the regular brake
pedal. Do this until the vehicle is
held by the parking brake only.
.To check the P (Park)
mechanism's holding ability:
With the engine running, shift to
P (Park). Then release the
parking brake followed by the
regular brake.
Contact your dealer if service is
required.
Wiper Blade Replacement
Windshield wiper blades should be
inspected for wear or cracking. See
Maintenance Schedule on
page 11‑3.
Replacement blades come in
different types and are removed in
different ways.
Front Wiper Blade
Replacement
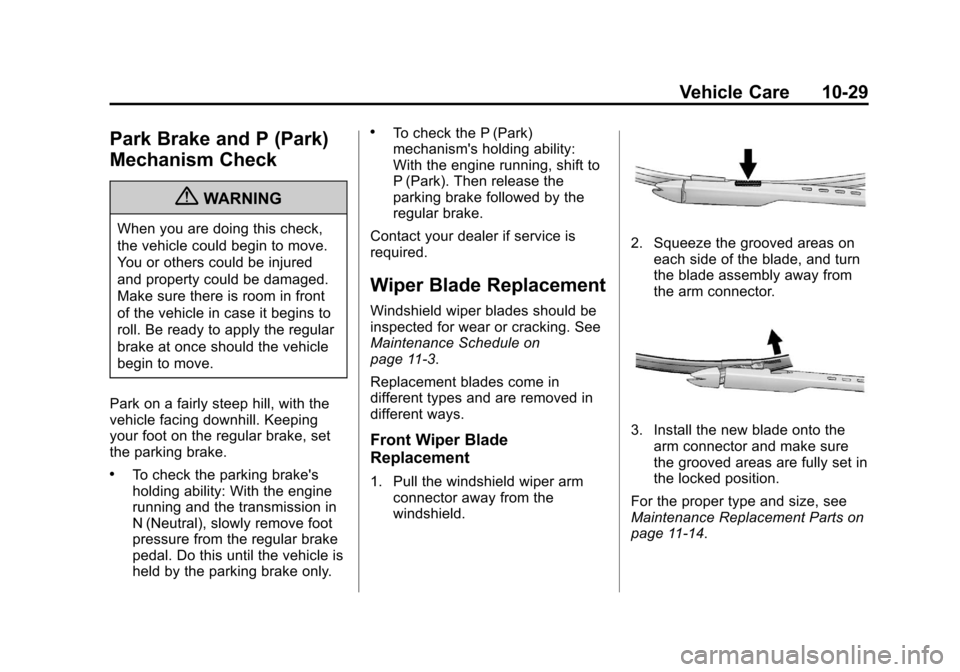
1. Pull the windshield wiper arm connector away from the
windshield.
2. Squeeze the grooved areas oneach side of the blade, and turn
the blade assembly away from
the arm connector.
3. Install the new blade onto thearm connector and make sure
the grooved areas are fully set in
the locked position.
For the proper type and size, see
Maintenance Replacement Parts on
page 11‑14.
Page 372 of 494

Black plate (38,1)Chevrolet Avalanche Owner Manual - 2013 - CRC - 8/27/12
10-38 Vehicle Care
J-CaseFuses Usage
57 Cooling Fan 1
58 Automatic Level Control
Compressor
59 Heavy Duty Antilock Brake
System
60 Cooling Fan 2
61 Antilock Brake System 1
62 Starter
63 Stud 2 (Trailer Brakes)
64 Left Bussed Electrical Center 1 J-Case
Fuses Usage
65 Electric Running Boards
66 Not Used
67 Transfer Case
68 Stud 1 (Trailer Connector Battery
Power)
69 Mid-Bussed Electrical Center 1
70 Climate Control Blower
71 Power Liftgate Module
72 Left Bussed Electrical Center 2 Relays Usage
FAN HI Cooling Fan High Speed
FAN LO Cooling Fan Low Speed
FAN CNTRL Cooling Fan Control
HDLP
LO/HID Low-Beam
Headlamp
FOG LAMP Front Fog Lamps
A/C
CMPRSR Air Conditioning
Compressor
STRTR Starter
PWR/TRN Powertrain
FUEL PMP Fuel Pump
PRK LAMP Parking Lamps
REAR
DEFOG Rear Defogger
RUN/CRNK Switched Power
Page 389 of 494

Black plate (55,1)Chevrolet Avalanche Owner Manual - 2013 - CRC - 8/27/12
Vehicle Care 10-55
.The TPMS sensor matching
process was not done or not
completed successfully after
rotating the tires. The
malfunction light and the DIC
message should go off after
successfully completing the
sensor matching process. See
“TPMS Sensor Matching
Process”later in this section.
.One or more TPMS sensors are
missing or damaged. The
malfunction light and the DIC
message should go off when the
TPMS sensors are installed and
the sensor matching process is
performed successfully. See
your dealer for service.
.Replacement tires or wheels do
not match the original equipment
tires or wheels. Tires and wheels
other than those recommended
could prevent the TPMS from
functioning properly. See Buying
New Tires on page 10‑58.
.Operating electronic devices or
being near facilities using radio
wave frequencies similar to the
TPMS could cause the TPMS
sensors to malfunction.
If the TPMS is not functioning
properly, it cannot detect or signal a
low tire condition. See your dealer
for service if the TPMS malfunction
light and DIC message come on
and stay on.
TPMS Sensor Matching
Process
Each TPMS sensor has a unique
identification code. The identification
code needs to be matched to a new
tire/wheel position after rotating the
vehicle’s tires or replacing one or
more of the TPMS sensors. Also,
the TPMS sensor matching process
should be performed after replacing
a spare tire with a road tire
containing the TPMS sensor. The
malfunction light and the DIC
message should go off at the next
ignition cycle. The sensors are
matched to the tire/wheel positions, using a TPMS relearn tool, in the
following order: driver side front tire,
passenger side front tire, passenger
side rear tire, and driver side rear.
See your dealer for service or to
purchase a relearn tool.
There are two minutes to match
the first tire/wheel position, and
five minutes overall to match all four
tire/wheel positions. If it takes
longer, the matching process stops
and must be restarted.
The TPMS sensor matching
process is:
1. Set the parking brake.
2. Turn the ignition to ON/RUN with
the engine off.
3. Press the Remote Keyless Entry (RKE) transmitter's
QandK
buttons at the same time for
approximately five seconds. The
horn sounds twice to signal the
receiver is in relearn mode and
the TIRE LEARNING ACTIVE
message displays on the DIC
screen.
Page 399 of 494
Black plate (65,1)Chevrolet Avalanche Owner Manual - 2013 - CRC - 8/27/12
Vehicle Care 10-65
WARNING (Continued)
changing a flat tire. If it is used for
anything else, you or others could
be badly injured or killed if the
vehicle slips off the jack. If a jack
is provided with the vehicle, only
use it for changing a flat tire.
If a tire goes flat, avoid further tire
and wheel damage by driving slowly
to a level place, well off the road,
if possible. Turn on the hazard
warning flashers. See Hazard
Warning Flashers on page 6‑5.
{WARNING
Changing a tire can be
dangerous. The vehicle can slip
off the jack and roll over or fall
causing injury or death. Find a
level place to change the tire. To
help prevent the vehicle from
moving:
1. Set the parking brake firmly.
2. Put the shift lever in P (Park).
3. For vehicles with four-wheel-drive with a
N (Neutral) transfer case
position, be sure the
transfer case is in a drive
gear —not in N (Neutral).
4. Turn off the engine and do not restart while the vehicle
is raised.
5. Do not allow passengers to remain in the vehicle.
(Continued)
WARNING (Continued)
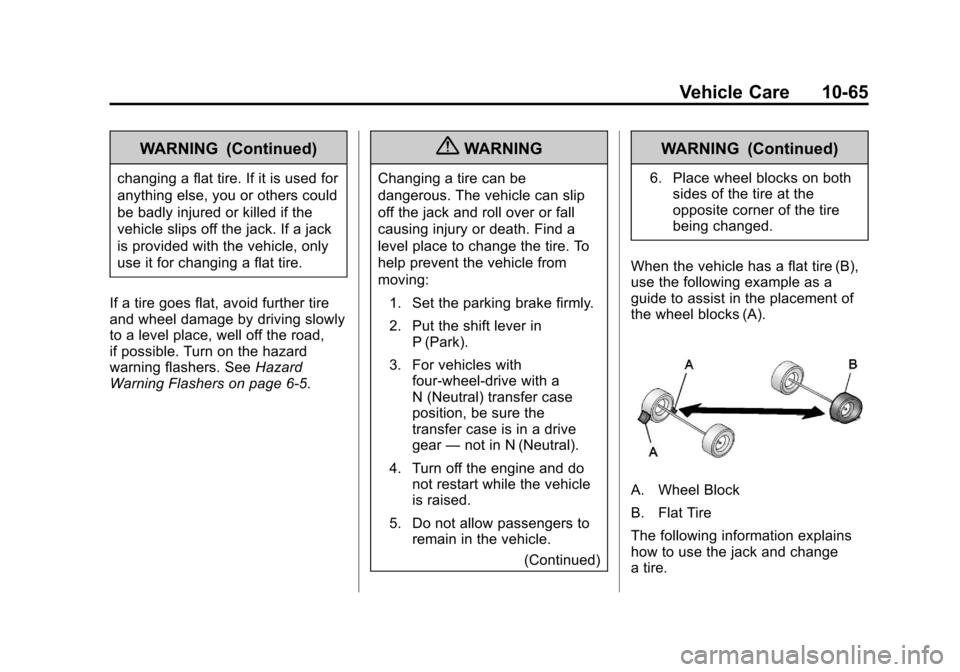
6. Place wheel blocks on bothsides of the tire at the
opposite corner of the tire
being changed.
When the vehicle has a flat tire (B),
use the following example as a
guide to assist in the placement of
the wheel blocks (A).
A. Wheel Block
B. Flat Tire
The following information explains
how to use the jack and change
a tire.