2013 CHEVROLET AVALANCHE engine
[x] Cancel search: enginePage 399 of 494
Black plate (65,1)Chevrolet Avalanche Owner Manual - 2013 - CRC - 8/27/12
Vehicle Care 10-65
WARNING (Continued)
changing a flat tire. If it is used for
anything else, you or others could
be badly injured or killed if the
vehicle slips off the jack. If a jack
is provided with the vehicle, only
use it for changing a flat tire.
If a tire goes flat, avoid further tire
and wheel damage by driving slowly
to a level place, well off the road,
if possible. Turn on the hazard
warning flashers. See Hazard
Warning Flashers on page 6‑5.
{WARNING
Changing a tire can be
dangerous. The vehicle can slip
off the jack and roll over or fall
causing injury or death. Find a
level place to change the tire. To
help prevent the vehicle from
moving:
1. Set the parking brake firmly.
2. Put the shift lever in P (Park).
3. For vehicles with four-wheel-drive with a
N (Neutral) transfer case
position, be sure the
transfer case is in a drive
gear —not in N (Neutral).
4. Turn off the engine and do not restart while the vehicle
is raised.
5. Do not allow passengers to remain in the vehicle.
(Continued)
WARNING (Continued)
6. Place wheel blocks on bothsides of the tire at the
opposite corner of the tire
being changed.
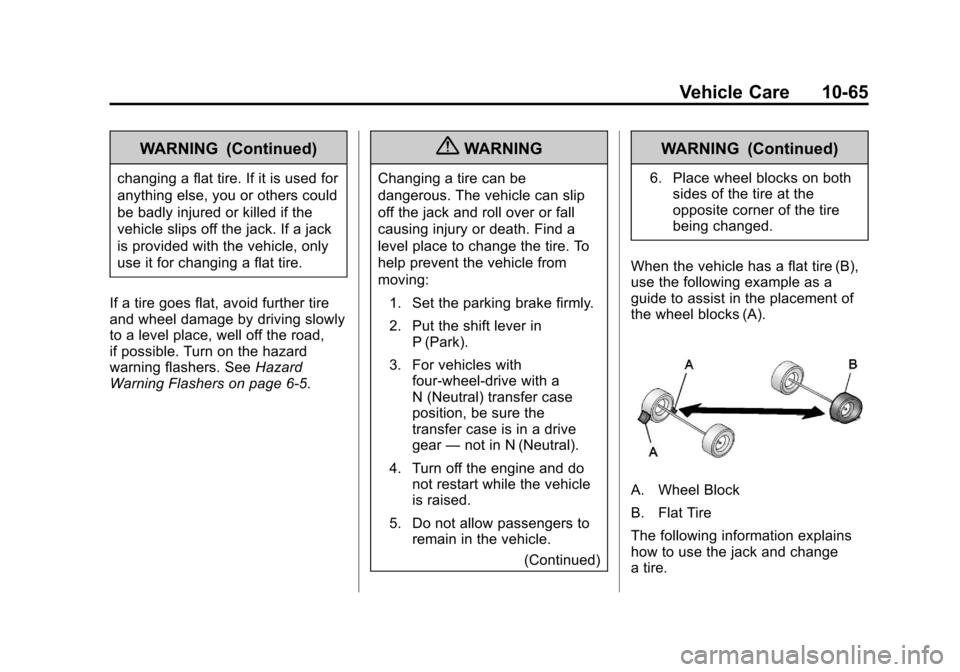
When the vehicle has a flat tire (B),
use the following example as a
guide to assist in the placement of
the wheel blocks (A).
A. Wheel Block
B. Flat Tire
The following information explains
how to use the jack and change
a tire.
Page 414 of 494
Black plate (80,1)Chevrolet Avalanche Owner Manual - 2013 - CRC - 8/27/12
10-80 Vehicle Care
Your vehicle has a remote
positive (+) jump starting
terminal and a remote
negative (−) jump starting
terminal. You should always use
these remote terminals instead
of the terminals on the battery.
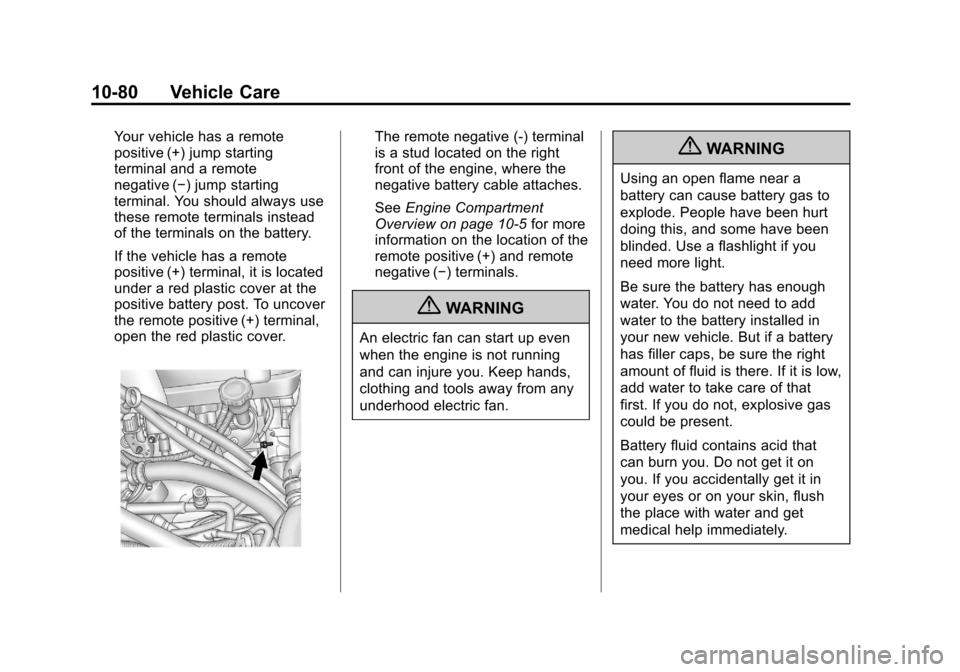
If the vehicle has a remote
positive (+) terminal, it is located
under a red plastic cover at the
positive battery post. To uncover
the remote positive (+) terminal,
open the red plastic cover.The remote negative (-) terminal
is a stud located on the right
front of the engine, where the
negative battery cable attaches.
SeeEngine Compartment
Overview on page 10‑5 for more
information on the location of the
remote positive (+) and remote
negative (−) terminals.
{WARNING
An electric fan can start up even
when the engine is not running
and can injure you. Keep hands,
clothing and tools away from any
underhood electric fan.
{WARNING
Using an open flame near a
battery can cause battery gas to
explode. People have been hurt
doing this, and some have been
blinded. Use a flashlight if you
need more light.
Be sure the battery has enough
water. You do not need to add
water to the battery installed in
your new vehicle. But if a battery
has filler caps, be sure the right
amount of fluid is there. If it is low,
add water to take care of that
first. If you do not, explosive gas
could be present.
Battery fluid contains acid that
can burn you. Do not get it on
you. If you accidentally get it in
your eyes or on your skin, flush
the place with water and get
medical help immediately.
Page 415 of 494
Black plate (81,1)Chevrolet Avalanche Owner Manual - 2013 - CRC - 8/27/12
Vehicle Care 10-81
{WARNING
Fans or other moving engine
parts can injure you badly. Keep
your hands away from moving
parts once the engine is running.
5. Check that the jumper cables do not have loose or missing
insulation. If they do, you could
get a shock. The vehicles could
be damaged too.
Before you connect the cables,
here are some basic things you
should know. Positive (+) will go
to positive (+) or to a remote
positive (+) terminal if the vehicle
has one. Negative (−) will go to a
heavy, unpainted metal engine
part or to a remote negative (−)
terminal if the vehicle has one.
Do not connect positive (+) to
negative (−) or you will get a
short that would damage the
battery and maybe other parts
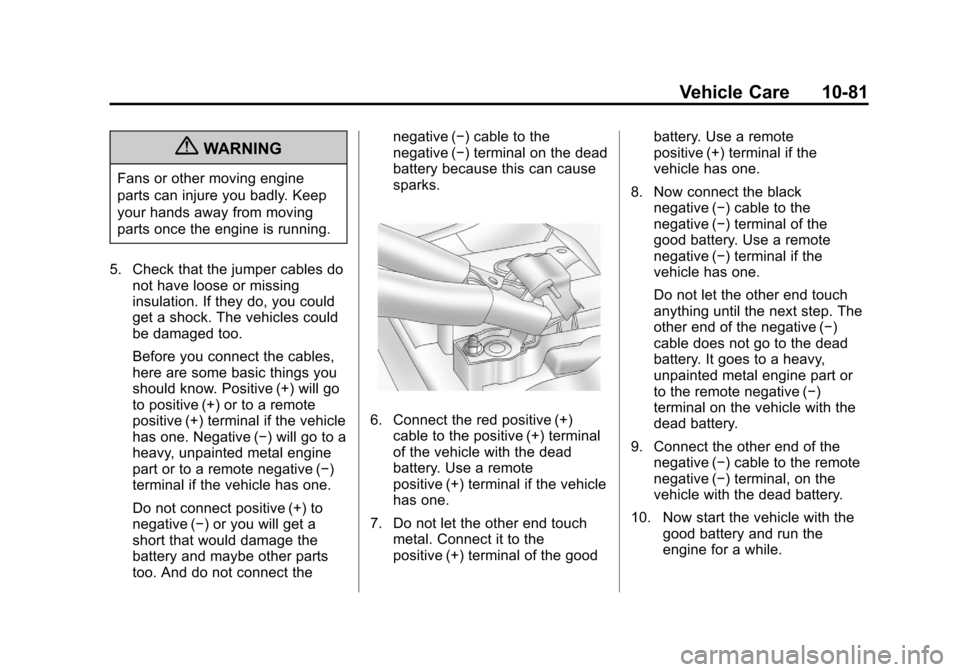
too. And do not connect the negative (−) cable to the
negative (−) terminal on the dead
battery because this can cause
sparks.
6. Connect the red positive (+)
cable to the positive (+) terminal
of the vehicle with the dead
battery. Use a remote
positive (+) terminal if the vehicle
has one.
7. Do not let the other end touch metal. Connect it to the
positive (+) terminal of the good battery. Use a remote
positive (+) terminal if the
vehicle has one.
8. Now connect the black negative (−) cable to the
negative (−) terminal of the
good battery. Use a remote
negative (−) terminal if the
vehicle has one.
Do not let the other end touch
anything until the next step. The
other end of the negative (−)
cable does not go to the dead
battery. It goes to a heavy,
unpainted metal engine part or
to the remote negative (−)
terminal on the vehicle with the
dead battery.
9. Connect the other end of the negative (−) cable to the remote
negative (−) terminal, on the
vehicle with the dead battery.
10. Now start the vehicle with the good battery and run the
engine for a while.
Page 416 of 494
Black plate (82,1)Chevrolet Avalanche Owner Manual - 2013 - CRC - 8/27/12
10-82 Vehicle Care
11. Try to start the vehicle that hadthe dead battery. If it will not
start after a few tries, it
probably needs service.
Notice: If the jumper cables are
connected or removed in the
wrong order, electrical shorting
may occur and damage the
vehicle. The repairs would not be
covered by the vehicle warranty.
Always connect and remove the
jumper cables in the correct
order, making sure that the
cables do not touch each other or
other metal.
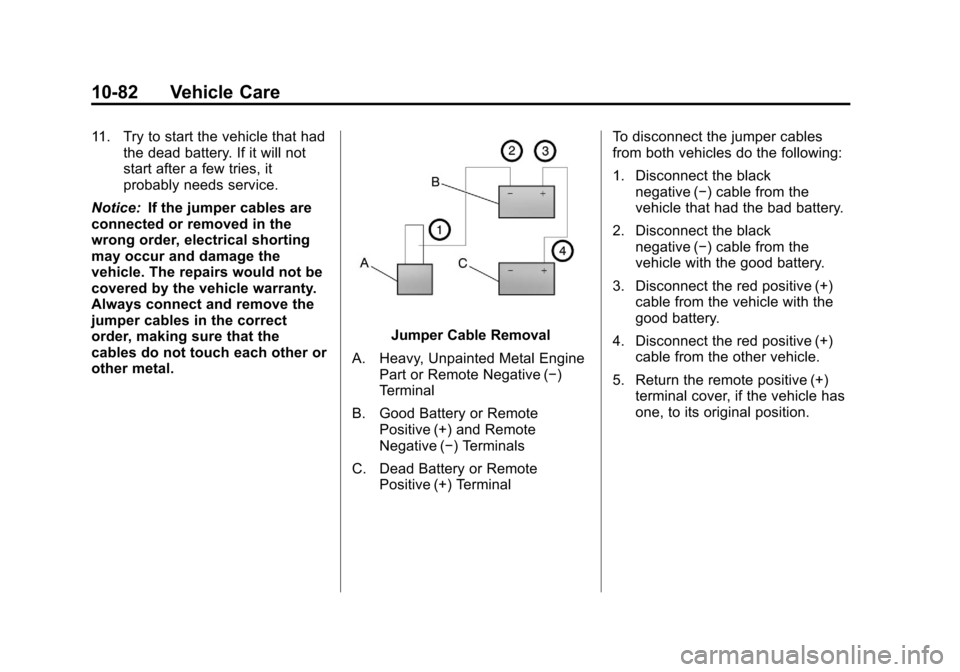
Jumper Cable Removal
A. Heavy, Unpainted Metal Engine Part or Remote Negative (−)
Terminal
B. Good Battery or Remote Positive (+) and Remote
Negative (−) Terminals
C. Dead Battery or Remote Positive (+) Terminal To disconnect the jumper cables
from both vehicles do the following:
1. Disconnect the black
negative (−) cable from the
vehicle that had the bad battery.
2. Disconnect the black negative (−) cable from the
vehicle with the good battery.
3. Disconnect the red positive (+) cable from the vehicle with the
good battery.
4. Disconnect the red positive (+) cable from the other vehicle.
5. Return the remote positive (+) terminal cover, if the vehicle has
one, to its original position.
Page 418 of 494
Black plate (84,1)Chevrolet Avalanche Owner Manual - 2013 - CRC - 8/27/12
10-84 Vehicle Care
Dinghy Towing
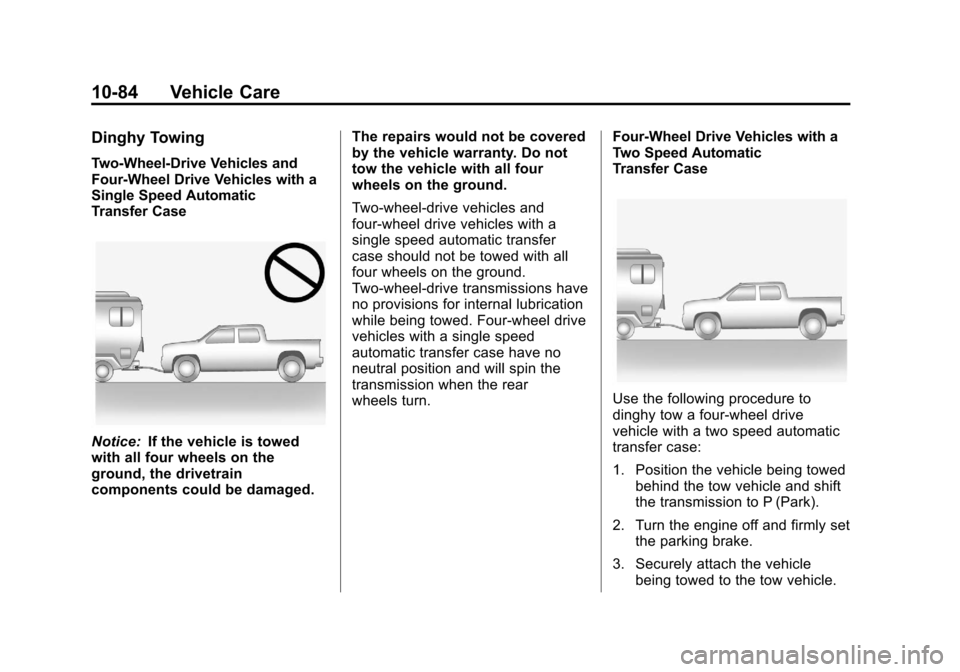
Two-Wheel-Drive Vehicles and
Four-Wheel Drive Vehicles with a
Single Speed Automatic
Transfer Case
Notice:If the vehicle is towed
with all four wheels on the
ground, the drivetrain
components could be damaged. The repairs would not be covered
by the vehicle warranty. Do not
tow the vehicle with all four
wheels on the ground.
Two-wheel-drive vehicles and
four-wheel drive vehicles with a
single speed automatic transfer
case should not be towed with all
four wheels on the ground.
Two-wheel-drive transmissions have
no provisions for internal lubrication
while being towed. Four-wheel drive
vehicles with a single speed
automatic transfer case have no
neutral position and will spin the
transmission when the rear
wheels turn.
Four-Wheel Drive Vehicles with a
Two Speed Automatic
Transfer Case
Use the following procedure to
dinghy tow a four-wheel drive
vehicle with a two speed automatic
transfer case:
1. Position the vehicle being towed
behind the tow vehicle and shift
the transmission to P (Park).
2. Turn the engine off and firmly set the parking brake.
3. Securely attach the vehicle being towed to the tow vehicle.
Page 433 of 494
Black plate (3,1)Chevrolet Avalanche Owner Manual - 2013 - CRC - 8/27/12
Service and Maintenance 11-3
Maintenance
Schedule
Owner Checks and Services
At Each Fuel Stop
.Check the engine oil level. See
Engine Oil on page 10‑6.
Once a Month
.Check the tire inflation
pressures. See Tire Pressure on
page 10‑51.
.Inspect the tires for wear. See
Tire Inspection on page 10‑56.
.Check the windshield washer
fluid level. See Washer Fluid on
page 10‑21.
Engine Oil Change
When the CHANGE ENGINE OIL
SOON message displays, have the
engine oil and filter changed within
the next 1 000 km/600 mi. If driven
under the best conditions, the
engine oil life system might not indicate the need for vehicle service
for more than a year. The engine oil
and filter must be changed at least
once a year and the oil life system
must be reset. Your trained dealer
technician can perform this work.
If the engine oil life system is reset
accidentally, service the vehicle
within 5 000 km/3,000 mi since the
last service. Reset the oil life
system when the oil is changed.
See
Engine Oil Life System on
page 10‑9.
Tire Rotation and Required
Services Every 12 000 km/
7,500 mi
Rotate the tires, if recommended for
the vehicle, and perform the
following services. See Tire
Rotation on page 10‑56.
.Check engine oil level and oil
life percentage. If needed,
change engine oil and filter, and
reset oil life system. See Engine
Oil on page 10‑6 andEngine Oil
Life System on page 10‑9.
.Check engine coolant level. See
Engine Coolant on page 10‑15.
.Check windshield washer fluid
level. See Washer Fluid on
page 10‑21.
.Visually inspect windshield wiper
blades for wear, cracking,
or contamination. See Exterior
Care on page 10‑88. Replace
worn or damaged wiper blades.
See Wiper Blade Replacement
on page 10‑29.
.Check tire inflation pressures.
See Tire Pressure on
page 10‑51.
.Inspect tire wear. See Tire
Inspection on page 10‑56.
.Visually check for fluid leaks.
.Inspect engine air cleaner filter.
See Engine Air Cleaner/Filter on
page 10‑13.
.Inspect brake system.
Page 439 of 494

Black plate (9,1)Chevrolet Avalanche Owner Manual - 2013 - CRC - 8/27/12
Service and Maintenance 11-9
Battery
The battery supplies power to start
the engine and operate any
additional electrical accessories.
.To avoid break‐down or failure to
start the vehicle, maintain a
battery with full cranking power.
.Trained dealer technicians have
the diagnostic equipment to test
the battery and ensure that the
connections and cables are
corrosion‐free.
Belts
.Belts may need replacing if they
squeak or show signs of
cracking or splitting.
.Trained dealer technicians can
inspect the belts and
recommend replacement when
necessary. Brakes
Brakes stop the vehicle and are
crucial to safe driving.
.Signs of brake wear may include
chirping, grinding, or squealing
noises, or difficulty stopping.
.Trained dealer technicians have
access to tools and equipment
to inspect the brakes and
recommend quality parts
engineered for the vehicle.
Fluids
Proper fluid levels and approved
fluids protect the vehicle’s
systems and components. See
Recommended Fluids and
Lubricants on page 11‑12 for GM
approved fluids.
.Engine oil and windshield
washer fluid levels should be
checked at every fuel fill.
.Instrument cluster lights may
come on to indicate that fluids
may be low and need to be
filled. Hoses
Hoses transport fluids and should
be regularly inspected to ensure
that there are no cracks or leaks.
With a multi‐point inspection, your
dealer can inspect the hoses and
advise if replacement is needed.
Lamps
Properly working headlamps,
taillamps, and brake lamps are
important to see and be seen on
the road.
.Signs that the headlamps need
attention include dimming, failure
to light, cracking, or damage.
The brake lamps need to be
checked periodically to ensure
that they light when braking.
.With a multi‐point inspection,
your dealer can check the lamps
and note any concerns.
Page 442 of 494
Black plate (12,1)Chevrolet Avalanche Owner Manual - 2013 - CRC - 8/27/12
11-12 Service and Maintenance
Recommended Fluids, Lubricants, and Parts
Recommended Fluids and Lubricants
Fluids and lubricants identified below by name, part number, or specification can be obtained from your dealer.Usage Fluid/Lubricant
Engine Oil Use only engine oil licensed to the dexos1 specfication, or equivalent, of the proper SAE viscosity grade. ACDelco dexos1 Synthetic Blend is
recommended. SeeEngine Oil on page 10‑6.
Engine Coolant 50/50 mixture of clean, drinkable water and use only DEX-COOL Coolant. SeeEngine Coolant on page 10‑15.
Hydraulic Brake System DOT 3 Hydraulic Brake Fluid (GM Part No. 12377967, in Canada 89021320).
Windshield Washer Automotive windshield washer fluid that meets regional freeze protection requirements.
Power Steering System GM Power Steering Fluid (GM Part No. 89021184, in Canada 89021186).
Automatic Transmission DEXRON
®-VI Automatic Transmission Fluid.
Key Lock Cylinders Multi-Purpose Lubricant, Superlube (GM Part No. 12346241, in Canada 10953474).
Chassis Lubrication Chassis Lubricant (GM Part No. 12377985, in Canada 88901242) or lubricant meeting requirements of NLGI #2, Category LB or GC-LB.