2013 BMW X6M towing
[x] Cancel search: towingPage 67 of 327

Automatic Hold is deactivated.
If the vehicle is being held by Automatic Hold,
then press on the brake pedal to deactivate it.
When the parking brake is set manually, refer
to page 61, Automatic Hold is deactivated au‐
tomatically.
Driving Automatic Hold is activated: the vehicle is au‐
tomatically secured against rolling when it
stops.
The indicator lamp lights up in green.
Indicator lamp in Canadian models.
Step on the accelerator pedal to drive off.
The brake is released automatically.
The indicator lamp goes out.
Before driving into a car wash
Deactivate Automatic Hold; otherwise,
the parking brake will be set when the vehicle
is stationary and the vehicle will no longer be
able to roll.◀
Parking
The parking brake is automatically set if the
engine is switched off while the vehicle is be‐
ing held by Automatic Hold.
The indicator lamp changes from green
to red.
Indicator lamp in Canadian models.
The parking brake is not set if the engine is
switched off while the vehicle is coasting to a
halt. Automatic Hold is deactivated.Take the remote control with you
Take the remote control with you when
leaving the vehicle so that children, for exam‐
ple, cannot release the parking brake.◀
Malfunction
In the event of a failure or malfunction of the
parking brake, secure the vehicle against roll‐
ing using a wheel chock, for example, when
leaving it.
Releasing the parking brake manually In the event of an electrical power loss or elec‐
trical malfunction, you can release the parking
brake manually.
Secure the vehicle against rolling
Before releasing the parking brake man‐
ually, and whenever you park the vehicle with
the parking brake released, ensure that posi‐
tion P of the automatic transmission is en‐
gaged. Note the display in the instrument clus‐
ter.
In addition, secure the vehicle against rolling,
e.g. with a wheel chock. Otherwise there is a
danger that the vehicle could roll if parked on a
steep slope.◀
Jump-starting and towing, refer to page 289.
Unlocking1.Open the left-hand side panel in the cargo
area.2.Remove the first aid kit and the warning tri‐
angle. Close the bracket of the warning tri‐
angle.3.Insert the screwdriver, which is contained
in the onboard vehicle tool kit under theSeite 63DrivingControls63
Online Edition for Part no. 01 40 2 910 876 - VII/13
Page 145 of 327
it back into the bracket holding the hook to
prevent damage and injury.
Then slide the fastening system toward the
front in order to permit the best possible use of
the cargo area.
Removing brackets Press down the brackets, slide them up to the
notches of the rails and remove them.
Depending on the vehicle's equipment, the adaptive fixing system can be stored under thecargo floor cover in the cargo area.
Ski bag
The ski bag is designed for safe, clean trans‐
port of up to 4 pairs of standard skis or up to
2 snowboards.
Skis with a length of up to 6 ft/2.10 m can be
stowed using the ski bag. When stowing skis
with a length of 6 ft/2.10 m, the capacity of the
ski bag is reduced as the bag narrows.
Folding in display screen
Before loading the ski bag, fold in the
display screen of the DVD systems in the rear;
otherwise, the display screen could be dam‐
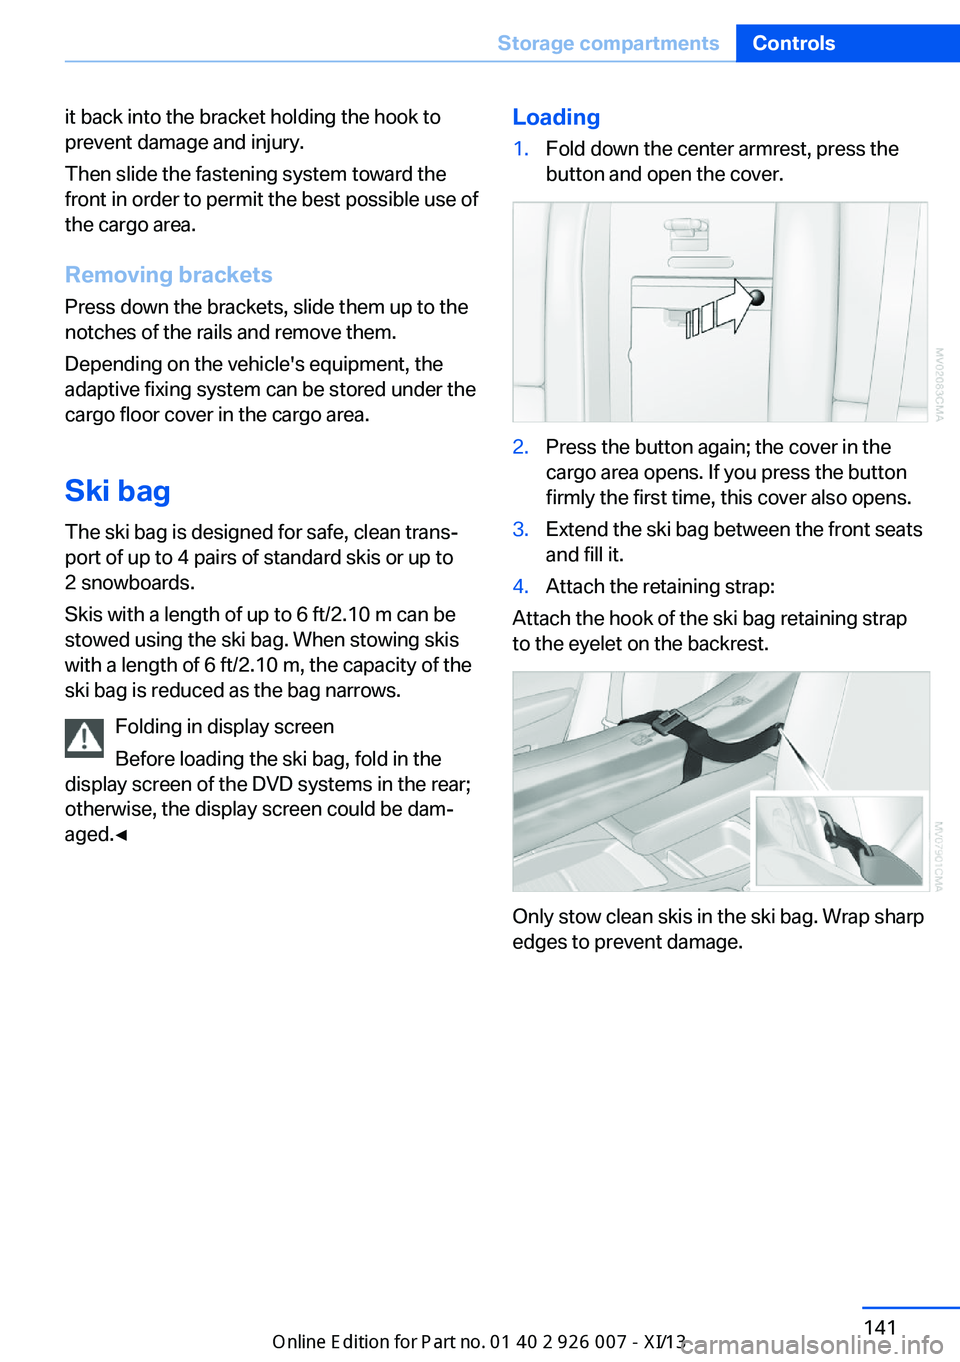
aged.◀Loading1.Fold down the center armrest, press the
button and open the cover.2.Press the button again; the cover in the
cargo area opens. If you press the button
firmly the first time, this cover also opens.3.Extend the ski bag between the front seats
and fill it.4.Attach the retaining strap:
Attach the hook of the ski bag retaining strap
to the eyelet on the backrest.
Only stow clean skis in the ski bag. Wrap sharp
edges to prevent damage.
Seite 141Storage compartmentsControls141
Online Edition for Part no. 01 40 2 910 876 - VII/13
Page 154 of 327
LoadingVehicle equipment
This chapter describes all series equipment as
well as country-specific and special equipment
offered for this model series.Therefore, it also
describes equipment that may not be found in
your vehicle, for instance due to the selected
special equipment or the country version. This
also applies to safety-related functions and
systems.
General information Overloading the vehicle
To avoid exceeding the approved carry‐
ing capacity of the tires, never overload the ve‐
hicle. Overloading can lead to overheating and
increases the rate at which damage develops
inside the tires. This could result in a sudden
loss of tire inflation pressure.◀
No fluids in the cargo area
Make sure that fluids do not leak into the
cargo area; otherwise, the vehicle may be dam‐
aged.◀
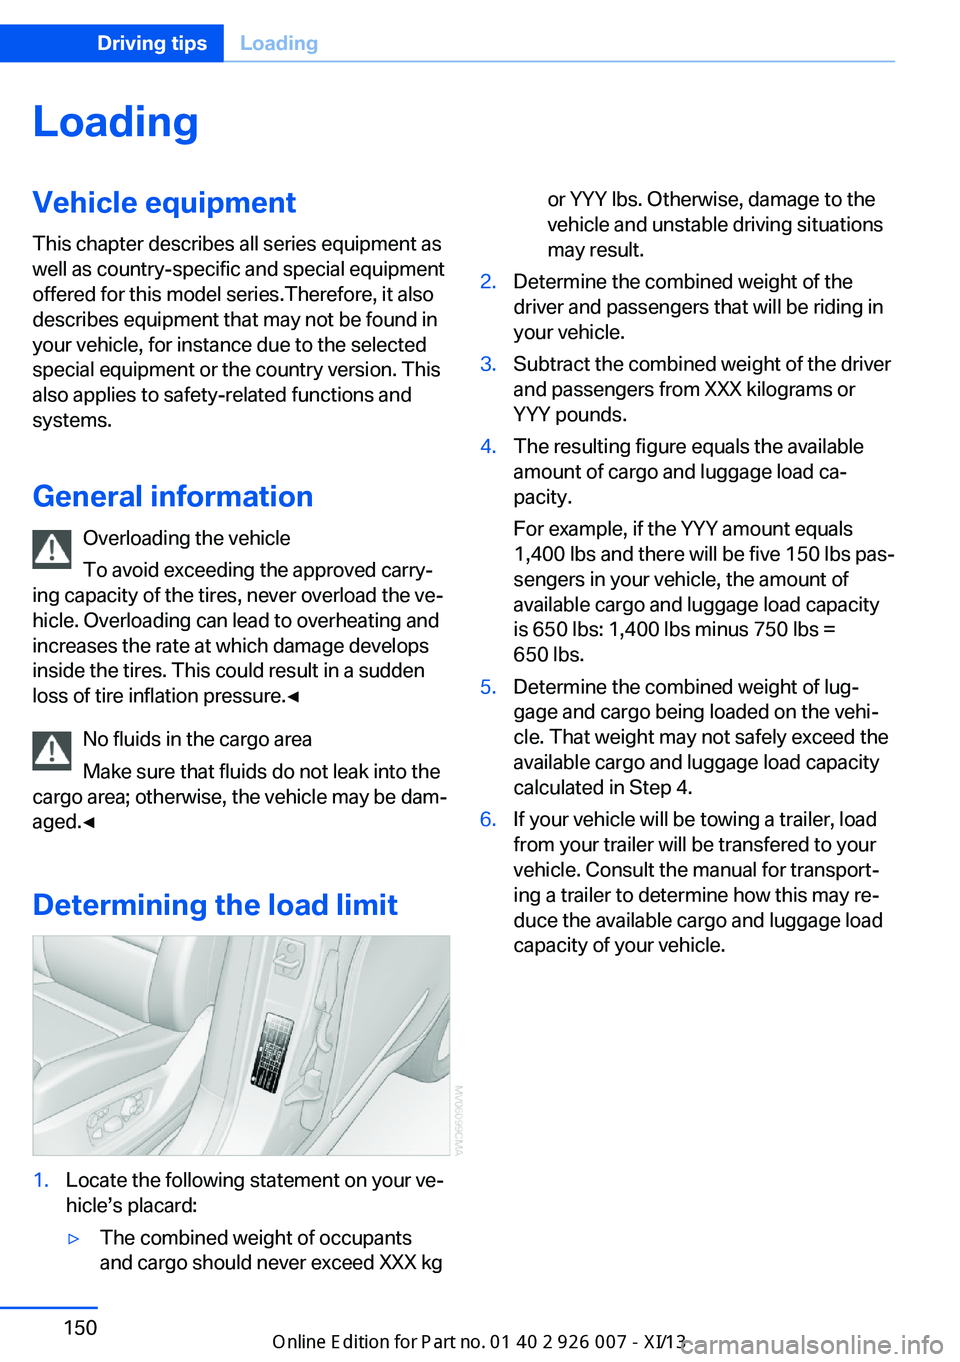
Determining the load limit1.Locate the following statement on your ve‐
hicle’s placard:▷The combined weight of occupants
and cargo should never exceed XXX kgor YYY lbs. Otherwise, damage to the
vehicle and unstable driving situations
may result.2.Determine the combined weight of the
driver and passengers that will be riding in
your vehicle.3.Subtract the combined weight of the driver
and passengers from XXX kilograms or
YYY pounds.4.The resulting figure equals the available
amount of cargo and luggage load ca‐
pacity.
For example, if the YYY amount equals
1,400 lbs and there will be five 150 lbs pas‐
sengers in your vehicle, the amount of
available cargo and luggage load capacity
is 650 lbs: 1,400 lbs minus 750 lbs =
650 lbs.5.Determine the combined weight of lug‐
gage and cargo being loaded on the vehi‐
cle. That weight may not safely exceed the
available cargo and luggage load capacity
calculated in Step 4.6.If your vehicle will be towing a trailer, load
from your trailer will be transfered to your
vehicle. Consult the manual for transport‐
ing a trailer to determine how this may re‐
duce the available cargo and luggage load
capacity of your vehicle.Seite 150Driving tipsLoading150
Online Edition for Part no. 01 40 2 910 876 - VII/13
Page 155 of 327
Load
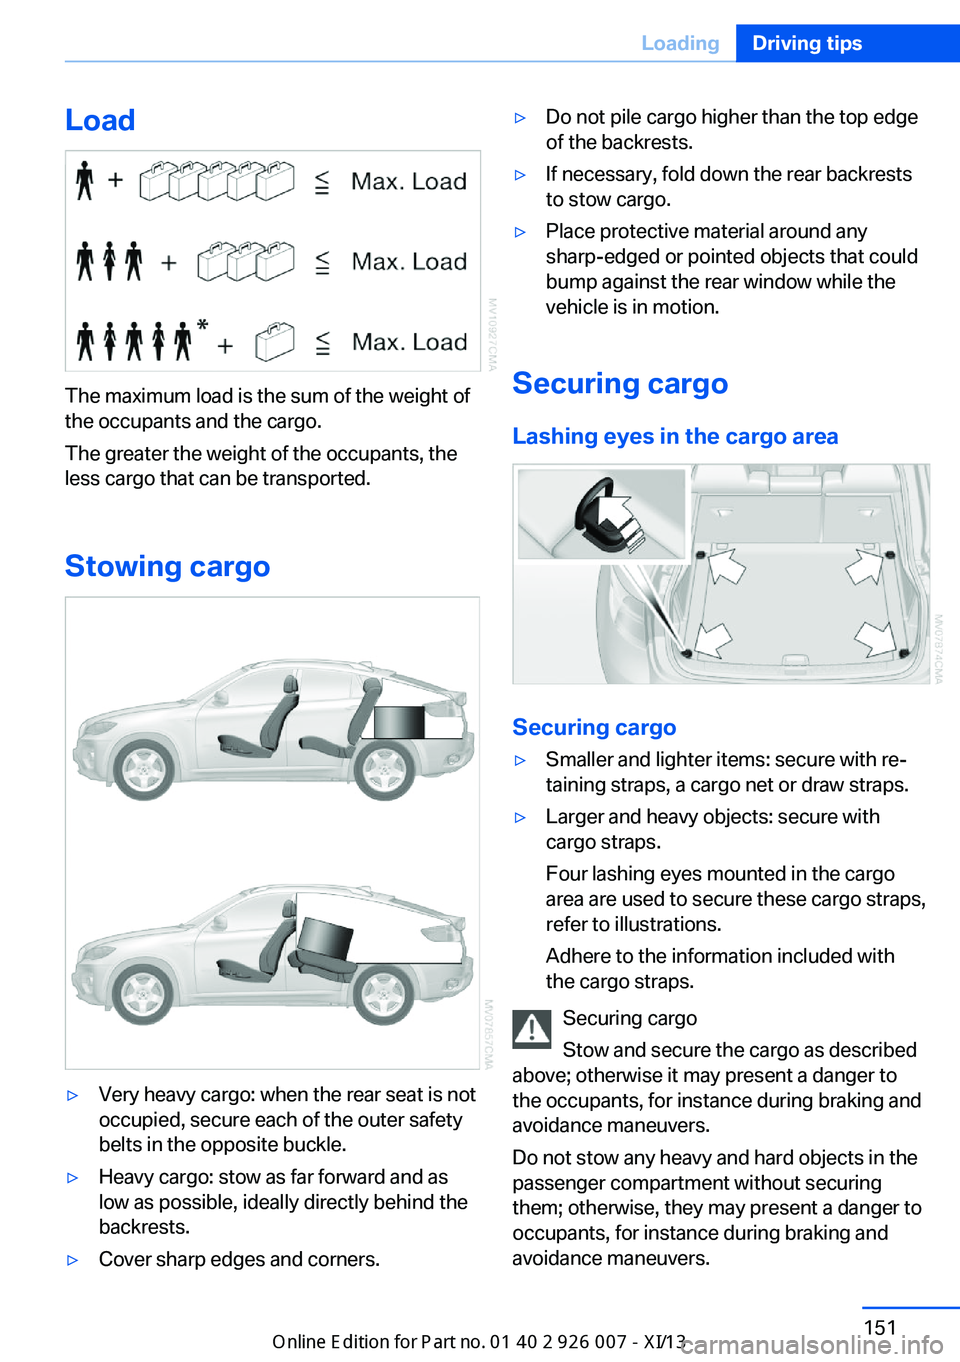
The maximum load is the sum of the weight of
the occupants and the cargo.
The greater the weight of the occupants, the
less cargo that can be transported.
Stowing cargo
▷Very heavy cargo: when the rear seat is not
occupied, secure each of the outer safety
belts in the opposite buckle.▷Heavy cargo: stow as far forward and as
low as possible, ideally directly behind the
backrests.▷Cover sharp edges and corners.▷Do not pile cargo higher than the top edge
of the backrests.▷If necessary, fold down the rear backrests
to stow cargo.▷Place protective material around any
sharp-edged or pointed objects that could
bump against the rear window while the
vehicle is in motion.
Securing cargo
Lashing eyes in the cargo area
Securing cargo
▷Smaller and lighter items: secure with re‐
taining straps, a cargo net or draw straps.▷Larger and heavy objects: secure with
cargo straps.
Four lashing eyes mounted in the cargo
area are used to secure these cargo straps,
refer to illustrations.
Adhere to the information included with
the cargo straps.
Securing cargo
Stow and secure the cargo as described
above; otherwise it may present a danger to
the occupants, for instance during braking and
avoidance maneuvers.
Do not stow any heavy and hard objects in the
passenger compartment without securing
them; otherwise, they may present a danger to
occupants, for instance during braking and
avoidance maneuvers.
Seite 151LoadingDriving tips151
Online Edition for Part no. 01 40 2 910 876 - VII/13
Page 293 of 327
other attempt in order to allow the dis‐
charged battery to recharge.3.Let both engines run for several minutes.4.Disconnect the jumper cables in the re‐
verse order.
Check the battery and recharge if necessary.
Tow-starting and towing Observe applicable laws and regulations
Observe applicable laws and regulations
for tow-starting and towing.◀
No additional passengers
Do not transport any passengers other
than the driver in a vehicle that is being
towed.◀
Transporting your vehicle
Note Your vehicle is not permitted to be towed.
Therefore, contact a service center in the
event of a breakdown.
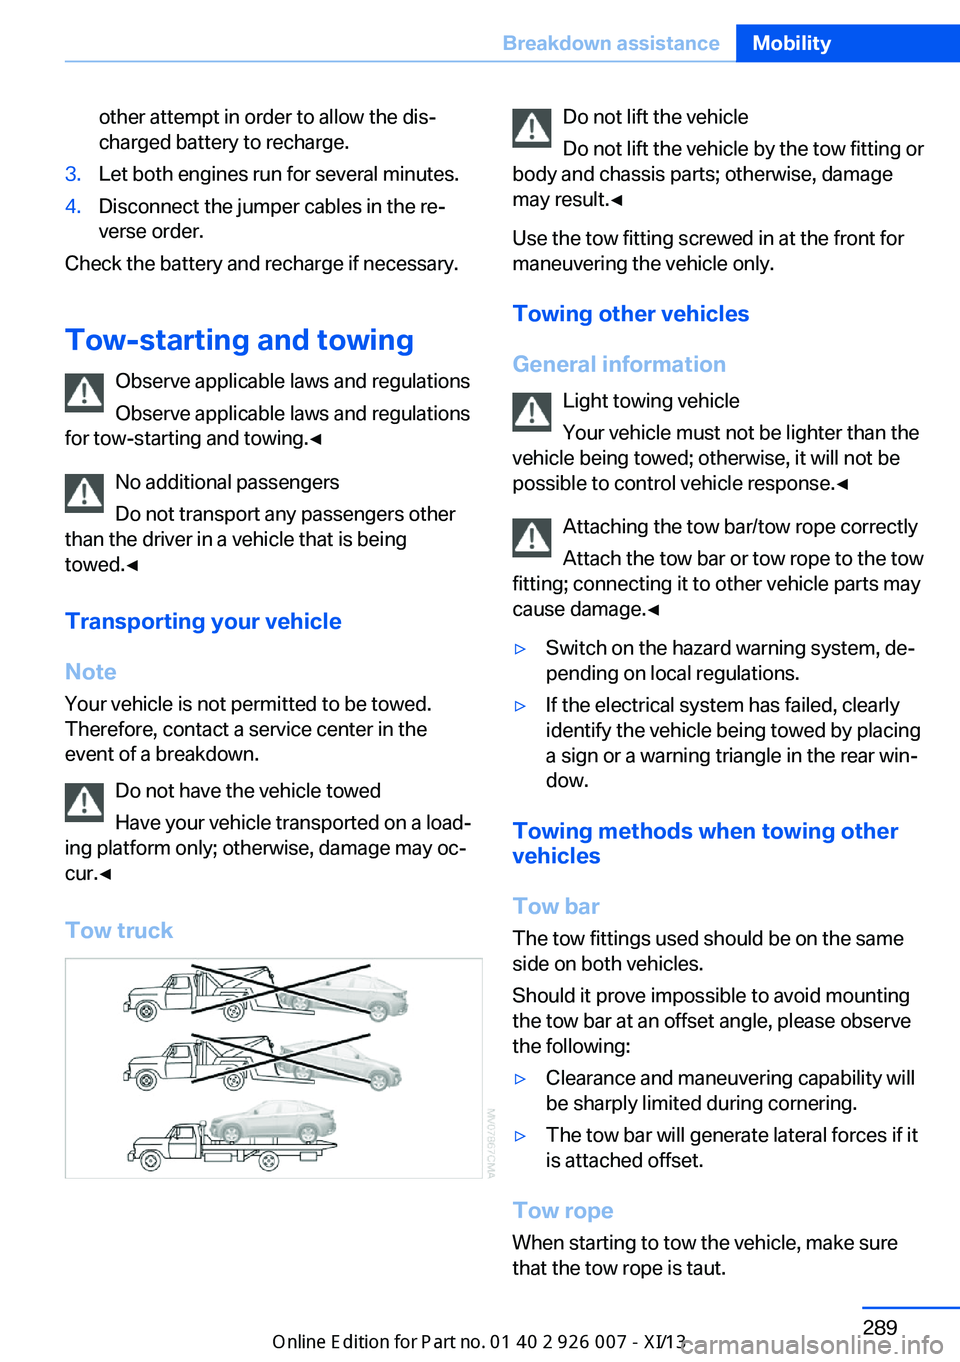
Do not have the vehicle towed
Have your vehicle transported on a load‐
ing platform only; otherwise, damage may oc‐
cur.◀
Tow truck
Do not lift the vehicle
Do not lift the vehicle by the tow fitting or
body and chassis parts; otherwise, damage
may result.◀
Use the tow fitting screwed in at the front for
maneuvering the vehicle only.
Towing other vehicles
General information Light towing vehicle
Your vehicle must not be lighter than the
vehicle being towed; otherwise, it will not be
possible to control vehicle response.◀
Attaching the tow bar/tow rope correctly
Attach the tow bar or tow rope to the tow
fitting; connecting it to other vehicle parts may
cause damage.◀▷Switch on the hazard warning system, de‐
pending on local regulations.▷If the electrical system has failed, clearly
identify the vehicle being towed by placing
a sign or a warning triangle in the rear win‐
dow.
Towing methods when towing other
vehicles
Tow bar The tow fittings used should be on the same
side on both vehicles.
Should it prove impossible to avoid mounting
the tow bar at an offset angle, please observe
the following:
▷Clearance and maneuvering capability will
be sharply limited during cornering.▷The tow bar will generate lateral forces if it
is attached offset.
Tow rope
When starting to tow the vehicle, make sure
that the tow rope is taut.
Seite 289Breakdown assistanceMobility289
Online Edition for Part no. 01 40 2 910 876 - VII/13
Page 294 of 327
To avoid jerking and the associated stresses
on the vehicle components when towing, al‐
ways use nylon ropes or nylon straps.
Attaching the tow rope correctly
Only secure the tow rope on the tow fit‐
ting; otherwise, damage can occur when it is
secured on other parts of the vehicle.◀
Tow fitting
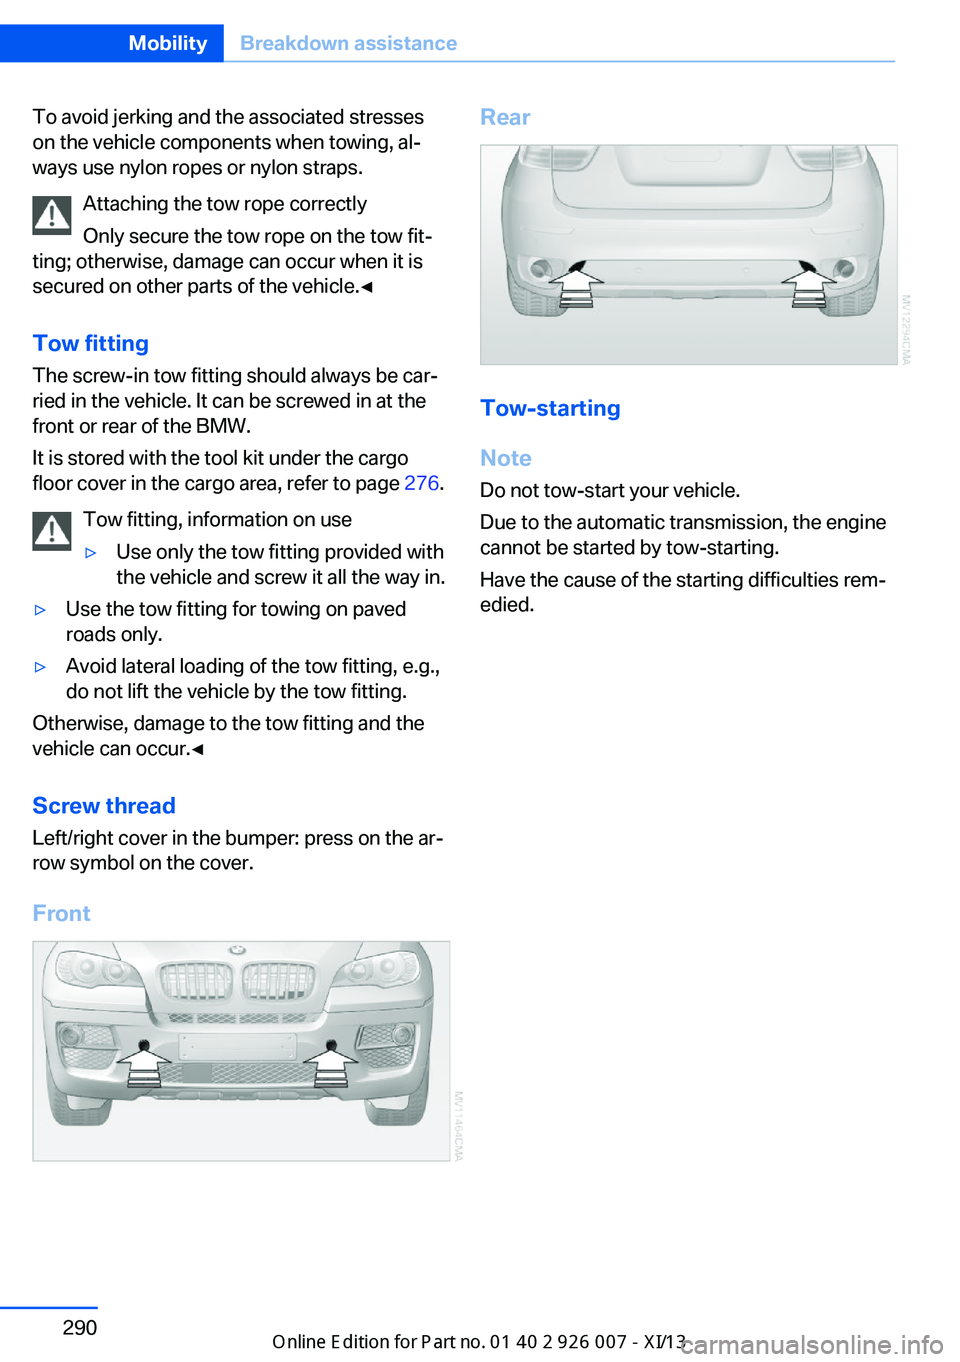
The screw-in tow fitting should always be car‐
ried in the vehicle. It can be screwed in at the
front or rear of the BMW.
It is stored with the tool kit under the cargo
floor cover in the cargo area, refer to page 276.
Tow fitting, information on use▷Use only the tow fitting provided with
the vehicle and screw it all the way in.▷Use the tow fitting for towing on paved
roads only.▷Avoid lateral loading of the tow fitting, e.g.,
do not lift the vehicle by the tow fitting.
Otherwise, damage to the tow fitting and the
vehicle can occur.◀
Screw thread Left/right cover in the bumper: press on the ar‐
row symbol on the cover.
Front
Rear
Tow-starting
Note Do not tow-start your vehicle.
Due to the automatic transmission, the engine
cannot be started by tow-starting.
Have the cause of the starting difficulties rem‐
edied.
Seite 290MobilityBreakdown assistance290
Online Edition for Part no. 01 40 2 910 876 - VII/13
Page 316 of 327

DVD system in rear 210
DVD, video 192
Dynamic destination guid‐ ance 176
Dynamic Performance Con‐ trol 98
Dynamic Stability Control DSC 96
Dynamic Traction Control DTC 97
E
Easy entry/exit 53
EfficientDynamics, refer to Saving fuel 153
Electrical malfunction– Door lock 34– Driver's door 34– Fuel filler flap 258
Electrical malfunction, park‐
ing brake 63
Electric seat adjustment 45
Electric steering wheel ad‐
justment 53
Electronic brake-force distri‐ bution 96
Electronic engine oil level check 271
Electronic Stability Program ESP, refer to Dynamic Sta‐
bility Control DSC 96
Emergency operation
– Door lock, refer to Manual
operation 34
Emergency operation, fuel
filler flap, unlocking man‐
ually 258
Emergency Request 286
Emergency service, refer to Roadside Assistance 287
Energy-conscious driving, re‐ fer to Current fuel consump‐
tion 71
Energy, saving, refer to Sav‐ ing fuel 153
Engine, breaking in 146
Engine compartment 270
Engine coolant, refer to Cool‐ ant 273
Engine oil, adding 272
Engine oil, additives, refer to Approved engine oils 272
Engine oil, alternative oil types 273
Engine oil, BMW maintenance system 274
Engine oil change intervals, refer to Service require‐
ments 74
Engine oil, checking the level 271
Engine oil, filling ca‐ pacity 299
Engine oil temperature 71
Engine oil types, alterna‐ tive 272
Engine oil types, ap‐ proved 272
Engine, overheating, refer to Coolant temperature 71
Engine start, assistance 287
Engine, starting 60
Engine, starting– Comfort Access 37
Engine, starting, Start/Stop
button 59
Engine, stopping, Start/Stop button 59
Engine, switching off 60
Environmentally friendly driv‐ ing, refer to Current fuel
consumption 71
Equalizer 180
Equipment, interior 129
ESP Electronic Stability Pro‐ gram, refer to Dynamic Sta‐
bility Control DSC 96
Exchanging wheels/tires 267
Exhaust system 146
Exterior mirrors 51
Exterior mirrors, adjusting 51
Exterior mirrors, automatic dimming 52
Exterior mirrors, automatic
heating 52
Exterior mirrors, folding in and out 52
External audio device 138
External devices 202
External temperature dis‐ play 70
External temperature display, changing the units of meas‐
ure, changing the units of
measure on the Control Dis‐
play 79
External temperature warn‐ ing 70
Externel temperature dis‐ play 70
Eyes for securing cargo 151
F
Fader 180
Failure messages, refer to Check Control 76
False alarm– Avoiding unintentional
alarms 40– Ending an alarm 40
Fastening safety belts, refer
to Safety belts 47
Fault messages, refer to Check Control 76
Filling capacities 299
Filter, refer to Microfilter/acti‐ vated-charcoal filter 126
Fine wood, care 293
First aid kit 287
Fitting for towing 290
Fixing system, adaptive 140
Flashing when locking/ unlocking 33
Flat Tire Monitor FTM 88
Flat Tire Monitor FTM, snow chains 269
Flat tire, run-flat tires 268
Flat tire, Tire Pressure Moni‐ tor TPM 90
Seite 312ReferenceEverything from A to Z312
Online Edition for Part no. 01 40 2 910 876 - VII/13
Page 317 of 327

Flat tire, warning lamp 89, 91
Flat tire, wheel change 280
Flooding, refer to Driving through water 147
Floor carpet, care 293
Floor mats, care 293
FM/AM station 182
Fog on windows, remov‐ ing 123
Foldable rear seat back‐ rest 135
Foot brake 147
Footwell lamps, refer to Inte‐ rior lamps 85
For your own safety 6
Four-wheel drive, refer to xDrive 98
Front airbags 86
Front fog lamps 84
Front fog lamps, bulb replace‐ ment 278
Front fog lamps, indicator lamp 84
FTM Flat Tire Monitor 88
Fuel 260
Fuel– Refer to Average fuel con‐
sumption 73
Fuel, additives 260
Fuel, average consump‐ tion 73
Fuel cap 258
Fuel cap, closing 258
Fuel consumption display
– Average fuel consump‐
tion 73
Fuel consumption display,
current fuel consump‐
tion 71
Fuel-efficient driving, refer to Current fuel consump‐
tion 71
Fuel filler flap, closing 258
Fuel filler flap, opening 258
Fuel filler flap, unlocking in case of an electrical mal‐
function 258
Fuel gauge 72
Fuel, saving 153
Fuel tank capacity, refer to Filling capacities 299
Fuel tank contents, refer to Filling capacities 299
Fuel tank, refer to Filling ca‐ pacities 299
Fuse 284
G
Garage door opener, refer to Universal Garage Door
Opener 129
Gasoline 260
Gasoline gauge, refer to Fuel gauge 72
Gasoline quality 260
Gas station recommenda‐ tion 171
Gear change, automatic transmission with Step‐
tronic 68
Gear change, via shift pad‐ dles 69
General driving notes 146
Glass sunroof, closing 43
Glass sunroof, electric– Convenient operation 33– Remote control 33
Glass sunroof, initializing 43
Glass sunroof, opening 43
Glass sunroof, pinch protec‐ tion 43
Glass sunroof, power fail‐ ure 43
Glass sunroof, tilting 42
Glove compartment 137
Glove compartment, light‐ ing 137
GPS navigation, refer to Navi‐ gation system 158
Gross vehicle weight, refer to Weights 298
H
Handbrake, refer to Parking brake 61
Hand-held transmitter, alter‐ nating code 130
Hands-free microphone 16
Hazard warning sys‐ tem 16, 286
HDC Hill Descent Control 99
HD Radio 183
Head airbags 86
Headlamp control, auto‐ matic 81, 82
Headlamp courtesy delay fea‐ ture 82
Headlamp flasher 64, 83
Headlamp flasher, indicator lamp 15
Headlamps 81
Headlamps, care 292
Headlamps, cleaning 66
Headlamps, cleaning, washer fluid 67
Headliner 17
Headphones, connecting, rear DVD system 211
Head restraints 49
Head-up Display 118
Head-up Display, care 294
Heatable rear window 123
Heating 121
Heating– Seats 46
Heating, interior 121
Heating, mirrors 52
Heating, residual heat 125
Heating with the engine switched off, refer to Resid‐
ual heat 125
Heavy cargo, refer to Stowing cargo 151
Height, refer to Dimen‐ sions 298
High-beam Assistant 83
High beams 83
Seite 313Everything from A to ZReference313
Online Edition for Part no. 01 40 2 910 876 - VII/13