2013 BMW X6M sport mode
[x] Cancel search: sport modePage 44 of 327

Arming and disarming the alarm
system
General information
When you lock or unlock the vehicle, either
with the remote control or at the door lock, the
alarm system is armed or disarmed at the
same time.
Door lock and armed alarm systemUnlocking via the door lock will trigger the
alarm on some market-specific versions.
To stop this alarm, unlock the vehicle with the
remote control or switch on the ignition.
Tailgate and armed alarm system
The tailgate can be opened using the remote
control, even if the alarm system is armed.
Press the button on the remote control.
After the tailgate is closed, it is locked and
monitored again by the alarm system. The haz‐
ard warning system flashes once.
In some market-specific versions, the tailgate
can only be opened using the remote control if
the vehicle was unlocked first.
Switching off the alarm
▷Unlock the vehicle using the remote con‐
trol, refer to page 32.▷Insert the remote control all the way into
the ignition lock.
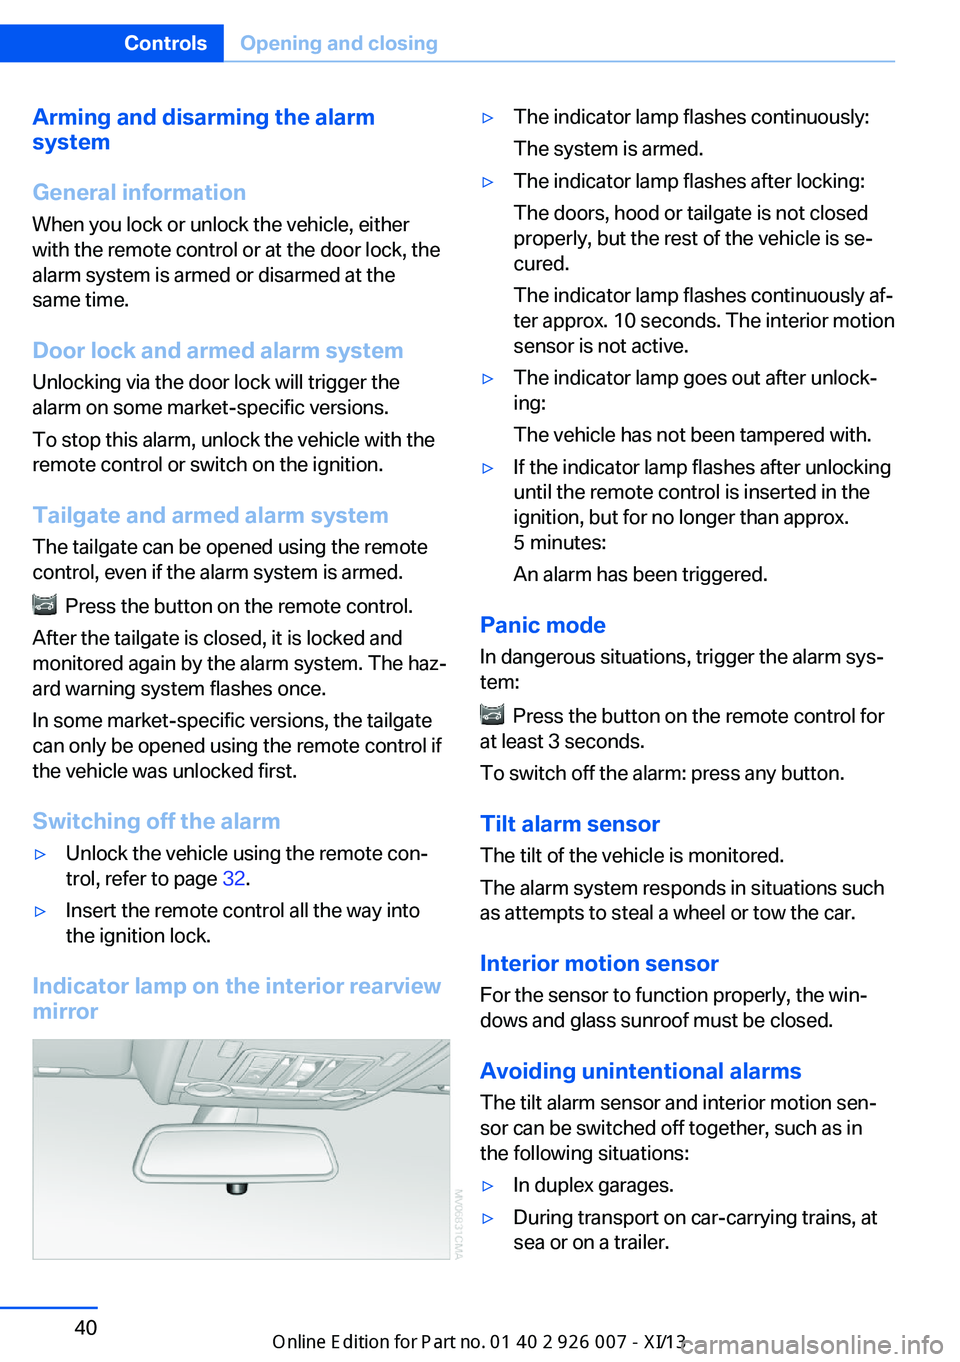
Indicator lamp on the interior rearview
mirror
▷The indicator lamp flashes continuously:
The system is armed.▷The indicator lamp flashes after locking:
The doors, hood or tailgate is not closed
properly, but the rest of the vehicle is se‐
cured.
The indicator lamp flashes continuously af‐
ter approx. 10 seconds. The interior motion
sensor is not active.▷The indicator lamp goes out after unlock‐
ing:
The vehicle has not been tampered with.▷If the indicator lamp flashes after unlocking
until the remote control is inserted in the
ignition, but for no longer than approx.
5 minutes:
An alarm has been triggered.
Panic mode
In dangerous situations, trigger the alarm sys‐
tem:
Press the button on the remote control for
at least 3 seconds.
To switch off the alarm: press any button.
Tilt alarm sensor The tilt of the vehicle is monitored.
The alarm system responds in situations such
as attempts to steal a wheel or tow the car.
Interior motion sensor
For the sensor to function properly, the win‐
dows and glass sunroof must be closed.
Avoiding unintentional alarms The tilt alarm sensor and interior motion sen‐
sor can be switched off together, such as in
the following situations:
▷In duplex garages.▷During transport on car-carrying trains, at
sea or on a trailer.Seite 40ControlsOpening and closing40
Online Edition for Part no. 01 40 2 910 876 - VII/13
Page 58 of 327

Transporting children safelyVehicle equipmentThis chapter describes all series equipment as
well as country-specific and special equipment
offered for this model series.Therefore, it also
describes equipment that may not be found in
your vehicle, for instance due to the selected
special equipment or the country version. This
also applies to safety-related functions and
systems.
The right place for children
Note Children in the vehicle
Do not leave children unattended in the
vehicle; otherwise, they could endanger them‐
selves and other persons, e.g., by opening the
doors.◀
Children should always be in the rear
Accident research shows that the safest place
for children is on the rear seat.
Transporting children in the rear
Transport children younger than
13 years of age or shorter than 5 ft/150 cm on
the rear seats only, using child restraint fixing
systems suitable for the age, weight, and
height of the child. Otherwise, there is the in‐
creased danger of injury in an accident.
Children 13 years of age or older must wear a
safety belt as soon as a suitable child restraint
fixing system can no longer be used, due to
their age, weight and size.◀
Children on the front passenger seat
Should it be necessary to use a child restraint
fixing system on the front passenger seat,
make sure that the front and side airbags onthe front passenger side are deactivated. Auto‐
matic deactivation of front passenger airbags,
refer to page 87.
Deactivating the front passenger airbags
If a child restraint fixing system is used in
the front passenger seat, the front passenger
airbags must be deactivated; otherwise, there
is an increased risk of injury to the child when
the airbags are triggered, even with a child re‐
straint fixing system.◀
Installing child restraint
fixing systems
Notes Manufacturer's information for child re‐
straint fixing systems
To select, mount and use child restraint fixing
systems, observe the information provided by
the system manufacturer; otherwise, the pro‐
tective effect can be impaired.◀
On the front passenger seat After installing a child restraint fixing system
on the front passenger seat, ensure that the
front and side airbags on the front passenger
side are deactivated.
Deactivating the front passenger airbags
If a child restraint fixing system is used in
the front passenger seat, the front passenger
airbags must be deactivated; otherwise, there
is an increased risk of injury to the child when
the airbags are triggered, even with a child re‐
straint fixing system.◀
Seat position and height
Before installing a child restraint fixing system,
move the front passenger seat as far back asSeite 54ControlsTransporting children safely54
Online Edition for Part no. 01 40 2 910 876 - VII/13
Page 72 of 327

▷With the vehicle stationary, press on the
brake pedal before shifting out of P or N;
otherwise, the shift command will not be
executed: shift lock.
Press on the brake pedal until you start
driving
To prevent the vehicle from creeping after you
select a driving position, maintain pressure on
the brake pedal until you are ready to start.◀
Engaging transmission positions D, R,
N
Briefly push the selector lever in the desired di‐
rection, beyond a resistance point if necessary.
When shifting out of P or into R, simultane‐
ously push the unlock button 1.
The engaged transmission position is dis‐
played on the selector lever.
After releasing the selector lever, it returns to
its center position.
Engaging transmission position P Select only when the vehicle is stationary.
Press button P.
Sport program and manual mode M/S
Activating the Sport program
Push the selector lever to the left out of trans‐
mission position D.
The Sport program is activated and DS or the
engaged gear is displayed in the instrument
cluster, for example S4.
This position is recommended for a perform‐
ance-oriented driving style.
Activating manual mode
Push the selector lever to the left out of trans‐
mission position D.
Push the selector lever forward or backward.
Manual mode becomes active and the gear is
changed.
The engaged gear is displayed in the instru‐
ment cluster, e.g., M1.
▷To shift down: press the selector lever for‐
ward.▷To shift up: press the selector lever back‐
ward.
The transmission only shifts up or down if the
rpm and vehicle speed are appropriate. If the
engine speed is too high, the transmission
does not shift down.
The selected gear is briefly displayed in the in‐
strument panel, followed by the current gear.
Ending the Sport program/manual
mode
Push the selector lever to the right.
Seite 68ControlsDriving68
Online Edition for Part no. 01 40 2 910 876 - VII/13
Page 154 of 327

LoadingVehicle equipment
This chapter describes all series equipment as
well as country-specific and special equipment
offered for this model series.Therefore, it also
describes equipment that may not be found in
your vehicle, for instance due to the selected
special equipment or the country version. This
also applies to safety-related functions and
systems.
General information Overloading the vehicle
To avoid exceeding the approved carry‐
ing capacity of the tires, never overload the ve‐
hicle. Overloading can lead to overheating and
increases the rate at which damage develops
inside the tires. This could result in a sudden
loss of tire inflation pressure.◀
No fluids in the cargo area
Make sure that fluids do not leak into the
cargo area; otherwise, the vehicle may be dam‐
aged.◀
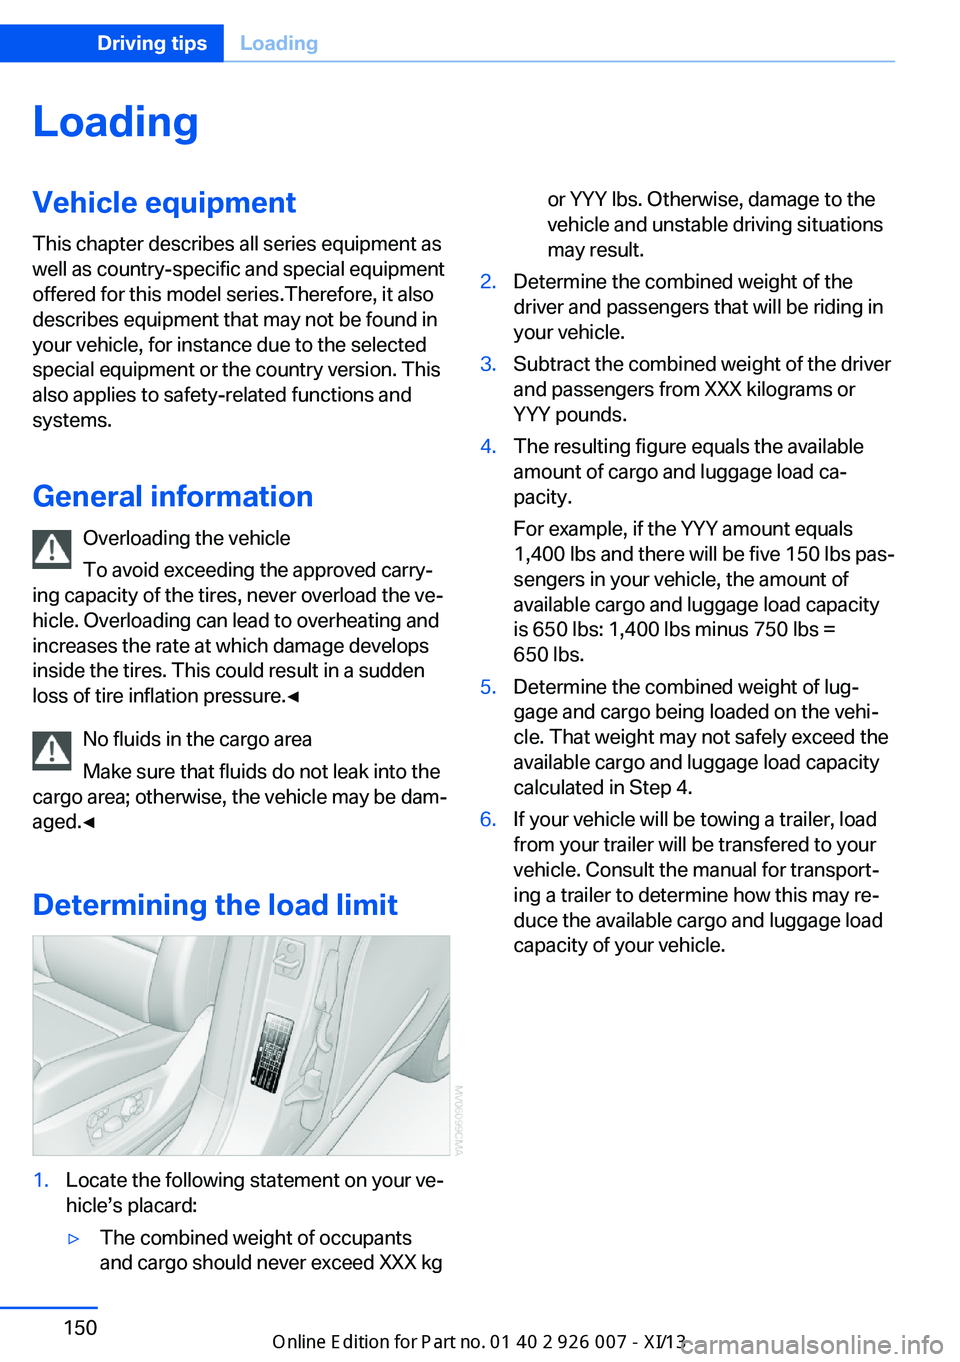
Determining the load limit1.Locate the following statement on your ve‐
hicle’s placard:▷The combined weight of occupants
and cargo should never exceed XXX kgor YYY lbs. Otherwise, damage to the
vehicle and unstable driving situations
may result.2.Determine the combined weight of the
driver and passengers that will be riding in
your vehicle.3.Subtract the combined weight of the driver
and passengers from XXX kilograms or
YYY pounds.4.The resulting figure equals the available
amount of cargo and luggage load ca‐
pacity.
For example, if the YYY amount equals
1,400 lbs and there will be five 150 lbs pas‐
sengers in your vehicle, the amount of
available cargo and luggage load capacity
is 650 lbs: 1,400 lbs minus 750 lbs =
650 lbs.5.Determine the combined weight of lug‐
gage and cargo being loaded on the vehi‐
cle. That weight may not safely exceed the
available cargo and luggage load capacity
calculated in Step 4.6.If your vehicle will be towing a trailer, load
from your trailer will be transfered to your
vehicle. Consult the manual for transport‐
ing a trailer to determine how this may re‐
duce the available cargo and luggage load
capacity of your vehicle.Seite 150Driving tipsLoading150
Online Edition for Part no. 01 40 2 910 876 - VII/13
Page 214 of 327

DVD system in rearVehicle equipmentThis chapter describes all series equipment as
well as country-specific and special equipment
offered for this model series.Therefore, it also
describes equipment that may not be found in
your vehicle, for instance due to the selected
special equipment or the country version. This
also applies to safety-related functions and
systems.
General information
With the DVD system in the rear you can play
CDs and DVDs with audio, video and image
data. The DVD system can also play data from
attached external audio and video devices. Au‐
dio output is possible both via headphones
and via the vehicle speakers.
You can control the DVD system using the but‐
tons on the CD-/DVD player or using the re‐
mote control.
Some functions are operated using the remote
control.
Enabling DVD system
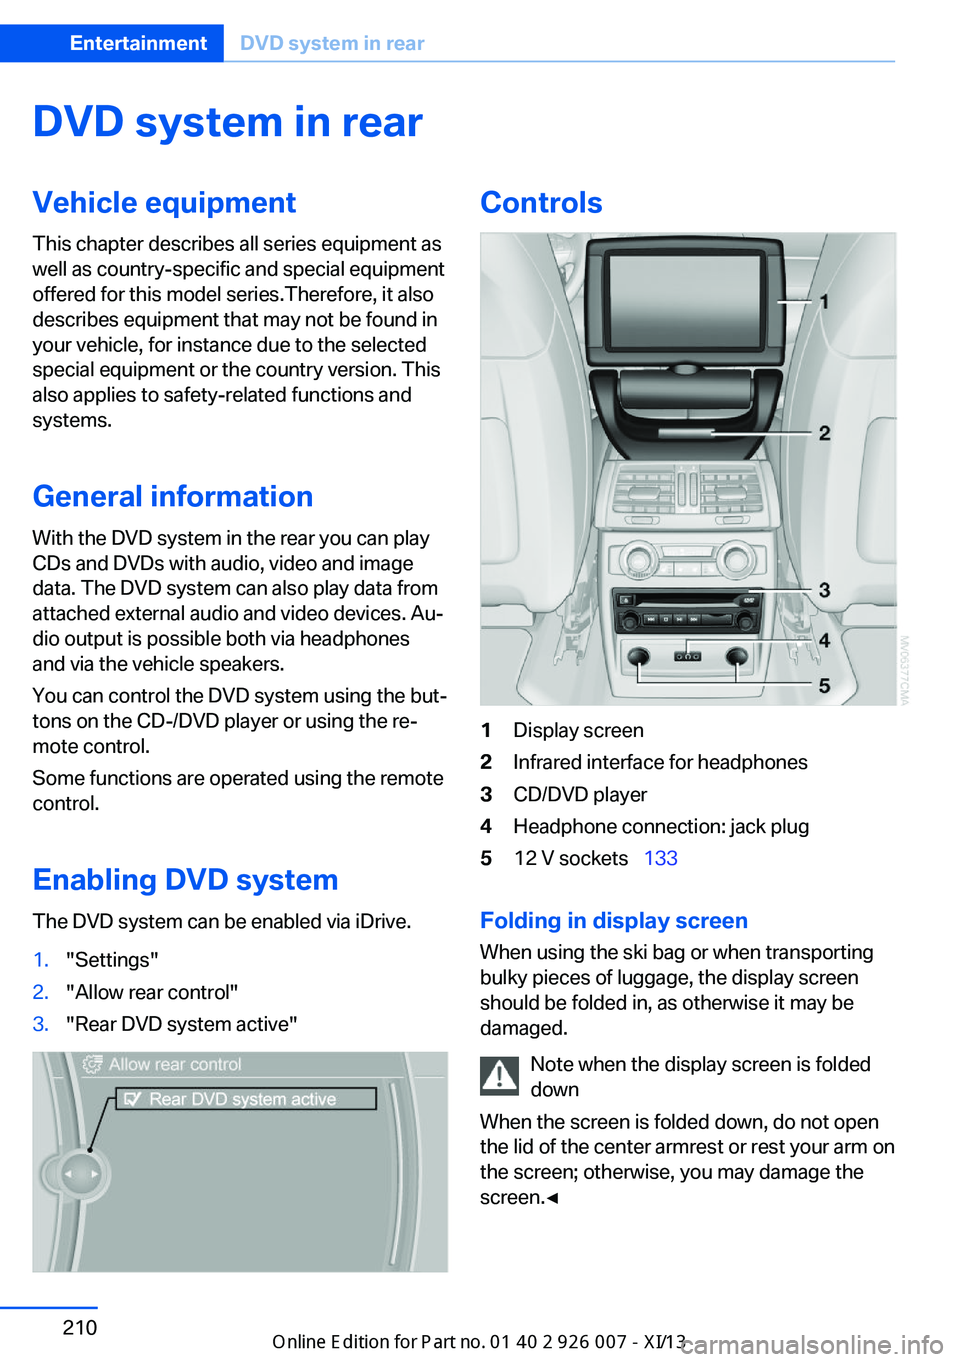
The DVD system can be enabled via iDrive.1."Settings"2."Allow rear control"3."Rear DVD system active"Controls1Display screen2Infrared interface for headphones3CD/DVD player4Headphone connection: jack plug512 V sockets 133
Folding in display screen
When using the ski bag or when transporting
bulky pieces of luggage, the display screen
should be folded in, as otherwise it may be
damaged.
Note when the display screen is folded
down
When the screen is folded down, do not open
the lid of the center armrest or rest your arm on
the screen; otherwise, you may damage the
screen.◀
Seite 210EntertainmentDVD system in rear210
Online Edition for Part no. 01 40 2 910 876 - VII/13
Page 295 of 327

CareVehicle equipmentThis chapter describes all series equipment as
well as country-specific and special equipment
offered for this model series.Therefore, it also
describes equipment that may not be found in
your vehicle, for instance due to the selected
special equipment or the country version. This
also applies to safety-related functions and
systems.
Car washes
Notes Steam jets or high-pressure washers
When using steam jets or high-pressure
washers, hold them a sufficient distance away
and use a maximum temperature of
140 ℉/60 ℃.
Holding them too close or using excessively
high pressures or temperatures can cause
damage or preliminary damage that may then lead to long-term damage.
Follow the operating instructions for the high-
pressure washer.◀
Cleaning sensors/cameras with high-
pressure washers
When using high-pressure washers, do not
spray the exterior sensors and cameras, for
Park Distance Control or the backup camera,
for instance, for extended periods of time and
only from a distance of at least 12 in/30 cm.◀
Regularly remove foreign bodies, such as
leaves, from the area below the windshield
when the hood is open.
Wash your vehicle frequently, particularly in
winter.
Intense soiling and road salt can damage the
vehicle.Washing in automatic car washes
Give preference to cloth car washes or those
that use soft brushes in order to avoid paint
damage.
Notes
Note the following:▷Make sure that the wheels and tires are not
damaged by the transport mechanisms.▷Fold in the exterior mirrors; otherwise, they
may be damaged, depending on the width
of the vehicle.▷Deactivate rain sensor, refer to page 66, to
prevent unintentional wiper action.▷Remove additional attachments, for in‐
stance a spoiler or telephone antenna, if
there is a risk that these may be damaged.
Guide rails in car washes
Avoid car washes with guide rails higher
than 4 in/10 cm; otherwise, the vehicle body
could be damaged.◀
Before driving into a car wash The vehicle is able to roll if the following steps
are taken.
1.Insert the remote control into the ignition
lock, even with Comfort Access.2.Engage transmission position N.3.Release the parking brake.4.Deactivating Automatic Hold, refer to
page 62.5.Switch the engine off.6.Leave the remote control in the ignition
lock so that the vehicle can roll.
Transmission position P will be engaged:
▷Automatically after approx. 30 minutes.Seite 291CareMobility291
Online Edition for Part no. 01 40 2 910 876 - VII/13
Page 314 of 327

California Proposition 65Warning 7
Camera, care 294
Camera, refer to Backup cam‐ era 113
Camera, side view 118
Camera, Top View 117
Can holder, refer to Cu‐ pholder 139
Car battery, refer to Vehicle battery 283
Car care products 292
Care 291
Care, displays 294
Care, vehicle 292
Cargo 150
Cargo area– Comfort Access 38
Cargo area, capacities 298
Cargo area, enlarging 135
Cargo area lamp, refer to Inte‐ rior lamps 85
Cargo area lid, refer to Tail‐
gate 36
Cargo area, opening/closing, refer to Tailgate 36
Cargo area, refer to Cargo area 135
Cargo cover 135
Cargo, securing with ski bag, refer to Securing cargo 142
Cargo straps, securing cargo 151
Car key, refer to Integrated key/remote control 30
Carpet, care 293
Car phone, installation loca‐ tion, refer to Center arm‐
rest 138
Car phone, refer to Tele‐ phone 226
Car vacuum cleaner, connect‐ ing, refer to Connecting
electrical devices 133
Car wash 291
Catalytic converter, refer to Hot exhaust system 146
CBC, refer to Cornering Brake
Control 96
CBS Condition Based Serv‐ ice 274
CD/DVD 190
CD/DVD changer 194
CD/DVD in rear 211
CD/DVD notes 196
CD, refer to Playing audio tracks, rear DVD sys‐
tem 216
CDs, storing 197
Cell phone 226
Cell phone, installation loca‐ tion, refer to Center arm‐
rest 138
Center armrest, front 138
Center armrest, rear 138
Center brake lamp 280
Center console, refer to Around the center con‐
sole 16
Central locking– Comfort Access 37– From the inside 35– Setting the unlocking char‐
acteristics 32
Central locking system
– From the outside 32– Principle 32
Central screen, refer to Con‐
trol Display 19
Changes, technical, refer to Safety 6
Changing wheels/tires 267
Chassis number, refer to En‐ gine compartment 270
Check Control 76
Children, transporting 54
Child restraint fixing system LATCH 55
Child restraint fixing sys‐ tems 54
Child restraint fixing systems, mounting 54
Child safety locks 57
Child seat, mounting 54
Child seats, refer to Trans‐
porting children safely 54
Chrome parts, care 293
Cigarette lighter, connecting electrical devices 133
Cigarette lighter, refer to Lighter 133
Cigarette lighter socket 133
Circulation of air, refer to Re‐ circulated air mode 124
Cleaning, displays 294
Cleaning your BMW, refer to Care 291
Clock 70
Clock, 12h/24h mode 78
Closing– From the inside 35– From the outside 32
Clothes hooks 138
Cockpit 12
Cold start, refer to Starting the engine 60
Combination instrument, refer to Instrument cluster 14
Combination switch, refer to Turn signal/high beams/
headlamp flasher 64
Combination switch, refer to Washer/wiper system 65
Comfort Access
– Battery replacement 39
Comfort area, refer to Around
the center console 16
Compact wheel, inflation pressure 262
Compartment for remote control, refer to Ignition
lock 59
Compartments, refer to Stor‐ age compart‐
ments 137, 138
Compass, digital 131
Computer 72
Computer, displaying infor‐ mation 72
Computer, displays on the Control Display 73
Seite 310ReferenceEverything from A to Z310
Online Edition for Part no. 01 40 2 910 876 - VII/13
Page 322 of 327

Safety belts, reminder 48
Safety switch for rear win‐ dows 42
Safety systems– Safety belts 47
Safety systems, airbags 86
Safety tires, refer to Run-flat tires 268
Satellite radio 184
Saving fuel 153
Scale, changing during navi‐ gation 172
Screen, folding open/closed, rear DVD system 210
Screen, refer to Control Dis‐ play 19
Search, refer to BMW On‐ line 252
Seat adjustment, electric 45
Seat adjustment, manual 44
Seat and mirror memory 50
Seat belts
– Refer to Safety belts 47
Seat heating 46
Seat heating, rear 46
Seats
– Adjusting electrically 45– Heating 46– Memory, refer to Seat and
mirror memory 50– Sitting safely 44– Storing the setting, refer to
Seat and mirror memory 50– Ventilation, refer to Active
seat ventilation and seat
heating 46
Seats, adjusting 44
Seats, backrest width 45
Seats, shoulder support 45
Selector lever, automatic transmission with Step‐
tronic 67
Selector lever lock, releas‐ ing 68
Self-leveling suspension 101
Sensors, care 294
Service and warranty 7
Service data in the remote
control 274
Service interval display, refer to Condition Based Service
CBS 274
Service interval display, refer to Service requirements 74
Service requirements 74
Service requirements, CBS Condition Based Serv‐
ice 274
Service, Roadside Assis‐ tance 287
Settings, clock, 12h/24h mode 78
Settings, configuring, refer to Personal Profile 30
Settings, DVD 193
Settings on the Control Dis‐ play, changing 78
Shifting, automatic transmis‐ sion with Steptronic 68
Shift paddles 69
Short commands, voice acti‐ vation 300
Side airbags 86
Side View 117
Side windows, refer to Win‐ dows 41
Size, refer to Dimensions 298
Ski bag 141
Slide/tilt glass roof, refer to Glass sunroof 42
Slot for remote control 59
Smokers' package, refer to Ashtray 133
Snap-in adapter, mobile phone 237
Snap-in adapter, refer to Storage compartment of
center armrest 138
Snow chains 269
Socket, OBD Onboard Diag‐ nosis 275
Socket, refer to Connecting electrical devices 133 Software applications,
iPhone 255
Software part number 226
Software update 208
SOS, refer to Emergency Re‐ quest, initiating 286
Sound output 182, 190
Spare fuse 284
Special destinations, naviga‐ tion 163
Special equipment, series equipment 6
Speed, average 72
Speed limit 77
Speed limit, setting 77
Speedometer 14
Speed, with winter tires 268
Split screen 22
Split screen map set‐ tings 173
Spoken instructions, naviga‐ tion 171
Sport program, automatic transmission with Step‐
tronic 68
Spray nozzles, refer to Clean‐ ing the windshield and head‐
lamps 66
Spray nozzles, refer to Wind‐ shield washer nozzles 66
Stability control systems 96
Start/Stop button 59
Start/Stop button, starting the engine 60
Start/Stop button, switching off the engine 60
Starting the engine 60
Start problems, refer to Jump-starting 287
State/province, selecting for navigation 160
Stations, stored 188
Station, storing 182
Status information, iDrive 22
Status of Owner's Manual 6
Steam jets 291 Seite 318ReferenceEverything from A to Z318
Online Edition for Part no. 01 40 2 910 876 - VII/13