2013 BMW X6M warning lights
[x] Cancel search: warning lightsPage 114 of 327

The system stores and maintains the speed.
Accelerating using the lever Accelerating slightly:
Press the lever to the resistance point, arrow 1,
until the desired speed is reached.
Accelerating significantly:
Press the lever beyond the resistance point,
arrow 1, until the desired speed is reached.
The vehicle accelerates without pressure on
the accelerator pedal. The system stores and
maintains the speed.
Decreasing speed
Repeatedly pull the lever to the resistance
point or beyond, arrow 2, until the desired
speed is displayed.▷Each time the lever is pulled to the resist‐
ance point, the desired speed is decreased
by approx. 1 mph/1 km/h.▷Each time the lever is pulled beyond the
resistance point, the desired speed is re‐
duced by up to 5 mph/10 km/h until the
minimum speed of 20 mph/30 km/h is ach‐
ieved.
The system stores and maintains the speed.
Interrupting the system
Press the lever up or down, arrow 3: dis‐
play 1 in the speedometer changes color, refer
to page 110.
In addition, the system is interrupted:
▷When the brakes are applied.▷When the transmission position D is disen‐
gaged.▷When DTC is activated or DSC is deacti‐
vated.▷When DSC or ABS is intervening.
Warning lamp
The warning lamp lights up if cruise
control has been deactivated auto‐
matically, e.g., by a control intervention of the
DSC. A message appears on the Control Dis‐
play.
Resuming cruising speed
Press button 4:
The stored speed is resumed and maintained.
Deactivating the system▷Press the lever upward or downward twice,
arrow 3.▷Switch off the ignition.
The stored speed is cleared.
Displays in the instrument cluster
1Stored desired speed▷Green: the system is active.▷Orange: the system is interrupted.2Selected desired speed appears briefly
If the display --- mph or --- km/h appears
briefly, conditions may not be adequate to op‐
erate the system.
Call up Check Control messages, refer to
page 77.
Malfunction The warning lamp lights up. The sys‐
tem is malfunctioning or has failed.
A message appears on the Control
Display. More information, refer to page 76.
Seite 110ControlsDriving comfort110
Online Edition for Part no. 01 40 2 910 876 - VII/13
Page 115 of 327

Park Distance Control PDCThe concept
In addition to the PDC Park Distance Control,
the backup camera, refer to page 113, can be
switched on.
PDC supports you when parking. A slow ap‐
proach to an object in front of or behind your
vehicle is announced by:▷Signal tones.▷Visual display.
Measurement
Measurements are made by ultrasound sen‐
sors in the bumpers.
The range is approx. 6 ft/2 m.
An acoustic warning is first given:
▷By the front sensors and two rear corner
sensors at approx. 24 in/60 cm.▷By the rear middle sensors at approx.
5 ft/1.50 m.
System limits
Check the traffic situation as well
PDC cannot serve as a substitute for the
driver's personal judgment of the traffic situa‐
tion. Check the traffic situation around the ve‐
hicle with your own eyes. Otherwise, an acci‐
dent could result from road users or objects
located outside of the PDC detection range.
Loud noises from outside and inside the vehi‐
cle may prevent you from hearing the PDC's
signal tone.◀
Avoid driving quickly with PDC
Avoid approaching an object quickly.
Avoid driving away quickly while PDC is not yet
active.
For technical reasons, the system may other‐
wise be too late in issuing a warning.◀
Limits of ultrasonic measurement
The detection of objects can reach the physi‐
cal limits of ultrasonic measurement, for in‐
stance:▷With tow bars and trailer hitches.▷With thin or wedge-shaped objects.▷With low objects.▷With objects with corners and sharp edges.
Low objects already displayed, e.g., curbs, can
move into the blind area of the sensors before
or after a continuous tone sounds.
High, protruding objects such as ledges may
not be detected.
False warnings
PDC may issue a warning under the following
conditions even though there is no obstacle
within the detection range:
▷In heavy rain.▷When sensors are very dirty or covered in
ice.▷When sensors are covered in snow.▷On rough road surfaces.▷In large buildings with right angles and
smooth walls, e.g., in underground ga‐
rages.▷In heavy exhaust.▷Due to other ultrasound sources, e.g.,
sweeping machines, high pressure steam
cleaners or neon lights.
Switching on automatically
With the engine running or the ignition
switched on, shift the selector lever into posi‐
tion R.
Switching off automatically when
driving forward
The system switches off when a certain dis‐
tance or speed is exceeded.
Switch on the system again if necessary.
Seite 111Driving comfortControls111
Online Edition for Part no. 01 40 2 910 876 - VII/13
Page 116 of 327

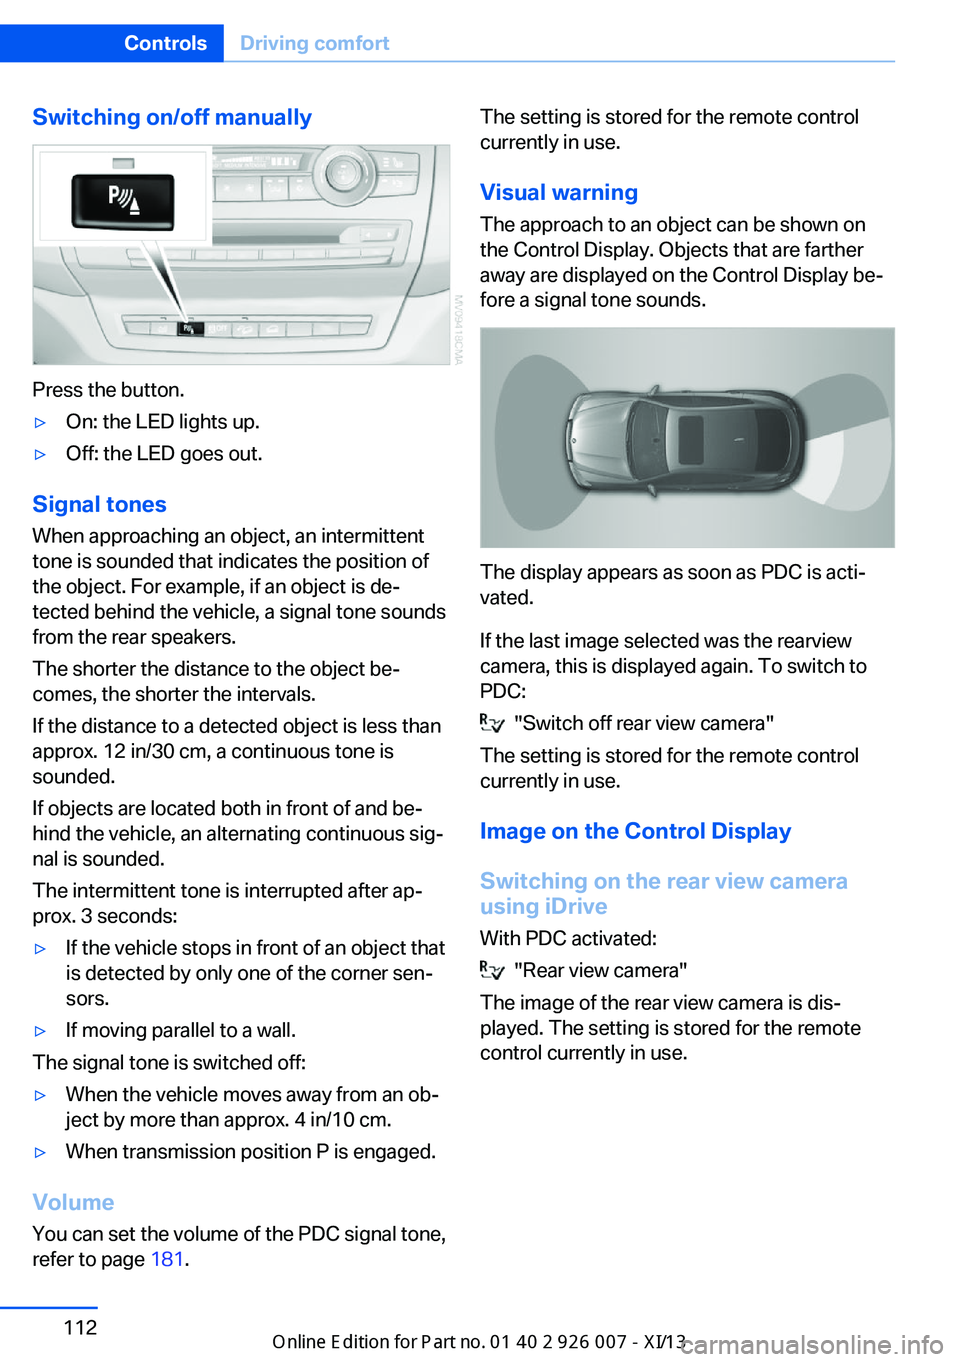
Switching on/off manually
Press the button.
▷On: the LED lights up.▷Off: the LED goes out.
Signal tonesWhen approaching an object, an intermittent
tone is sounded that indicates the position of
the object. For example, if an object is de‐
tected behind the vehicle, a signal tone sounds
from the rear speakers.
The shorter the distance to the object be‐
comes, the shorter the intervals.
If the distance to a detected object is less than
approx. 12 in/30 cm, a continuous tone is
sounded.
If objects are located both in front of and be‐
hind the vehicle, an alternating continuous sig‐
nal is sounded.
The intermittent tone is interrupted after ap‐
prox. 3 seconds:
▷If the vehicle stops in front of an object that
is detected by only one of the corner sen‐
sors.▷If moving parallel to a wall.
The signal tone is switched off:
▷When the vehicle moves away from an ob‐
ject by more than approx. 4 in/10 cm.▷When transmission position P is engaged.
Volume
You can set the volume of the PDC signal tone,
refer to page 181.
The setting is stored for the remote control
currently in use.
Visual warning
The approach to an object can be shown on
the Control Display. Objects that are farther
away are displayed on the Control Display be‐
fore a signal tone sounds.
The display appears as soon as PDC is acti‐
vated.
If the last image selected was the rearview
camera, this is displayed again. To switch to
PDC:
"Switch off rear view camera"
The setting is stored for the remote control
currently in use.
Image on the Control Display
Switching on the rear view camera
using iDrive
With PDC activated:
"Rear view camera"
The image of the rear view camera is dis‐
played. The setting is stored for the remote
control currently in use.
Seite 112ControlsDriving comfort112
Online Edition for Part no. 01 40 2 910 876 - VII/13
Page 120 of 327

▷Approx. 7 ft/2 m to the side.▷Approx. 7 ft/2 m to the rear.
Obstacles up to the height of the exterior mir‐
rors are thus detected in a timely fashion.
System limits
Top View cannot be used in the following sit‐
uations:
▷With a door open.▷With the tailgate open.▷With an exterior mirror folded in.▷In poor light.
The arrows next to the vehicle are displayed in
a shaded form on the Control Display and a
symbol appears at the corresponding location
on the vehicle.
Check the traffic situation as well
Check the traffic situation around the ve‐
hicle with your own eyes. Otherwise, an acci‐
dent could result from road users or objects lo‐
cated outside the picture area of the
cameras.◀
Switching on automatically
Select transmission position R with the engine
running.
The images from Top View and PDC are dis‐
played when the system has been switched on
using iDrive.
Switching off automatically when
driving forward
The system switches off when a certain dis‐
tance or speed is exceeded.
Switch on the system again if necessary.
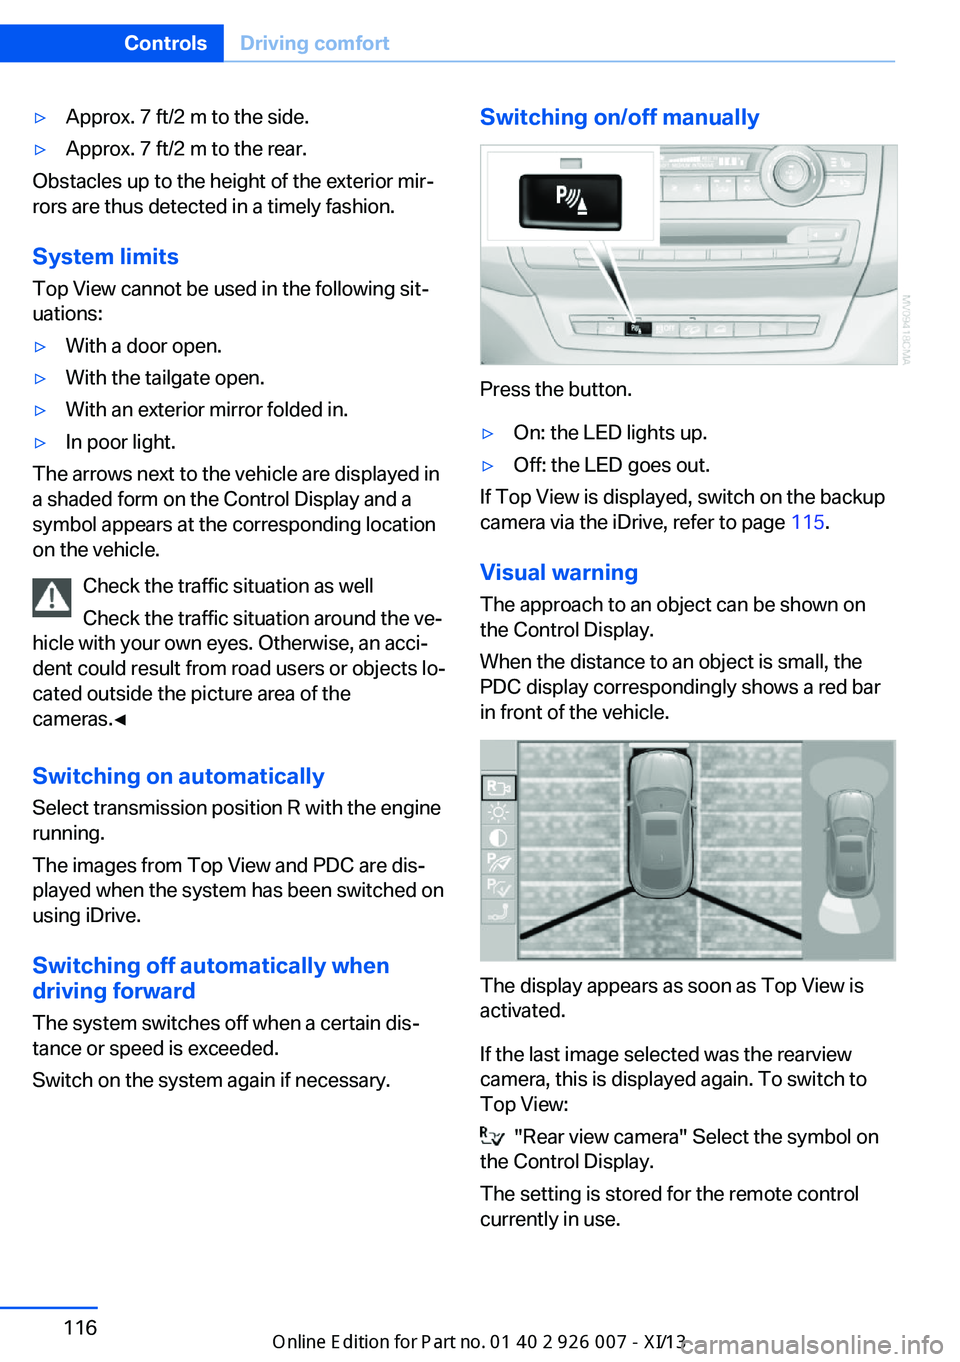
Switching on/off manually
Press the button.
▷On: the LED lights up.▷Off: the LED goes out.
If Top View is displayed, switch on the backup
camera via the iDrive, refer to page 115.
Visual warning
The approach to an object can be shown on
the Control Display.
When the distance to an object is small, the
PDC display correspondingly shows a red bar
in front of the vehicle.
The display appears as soon as Top View is
activated.
If the last image selected was the rearview
camera, this is displayed again. To switch to
Top View:
"Rear view camera" Select the symbol on
the Control Display.
The setting is stored for the remote control
currently in use.
Seite 116ControlsDriving comfort116
Online Edition for Part no. 01 40 2 910 876 - VII/13
Page 279 of 327

Maintenance and repair should be performed
by your service center. Make sure to have reg‐
ular maintenance procedures recorded in the
vehicle's Service and Warranty Information
Booklet for US models, and in the Warranty
and Service Guide Booklet for Canadian mod‐
els. These entries are proof of regular mainte‐
nance.
Socket for OBD Onboard
Diagnosis
Socket for Onboard Diagnosis
The socket for Onboard Diagnosis may
only be used by the service center, by work‐
shops that operate according to the specifica‐
tions of the vehicle manufacturer with appro‐
priately trained personnel, and by other
authorized persons. Otherwise, its use may
lead to vehicle malfunctions.◀
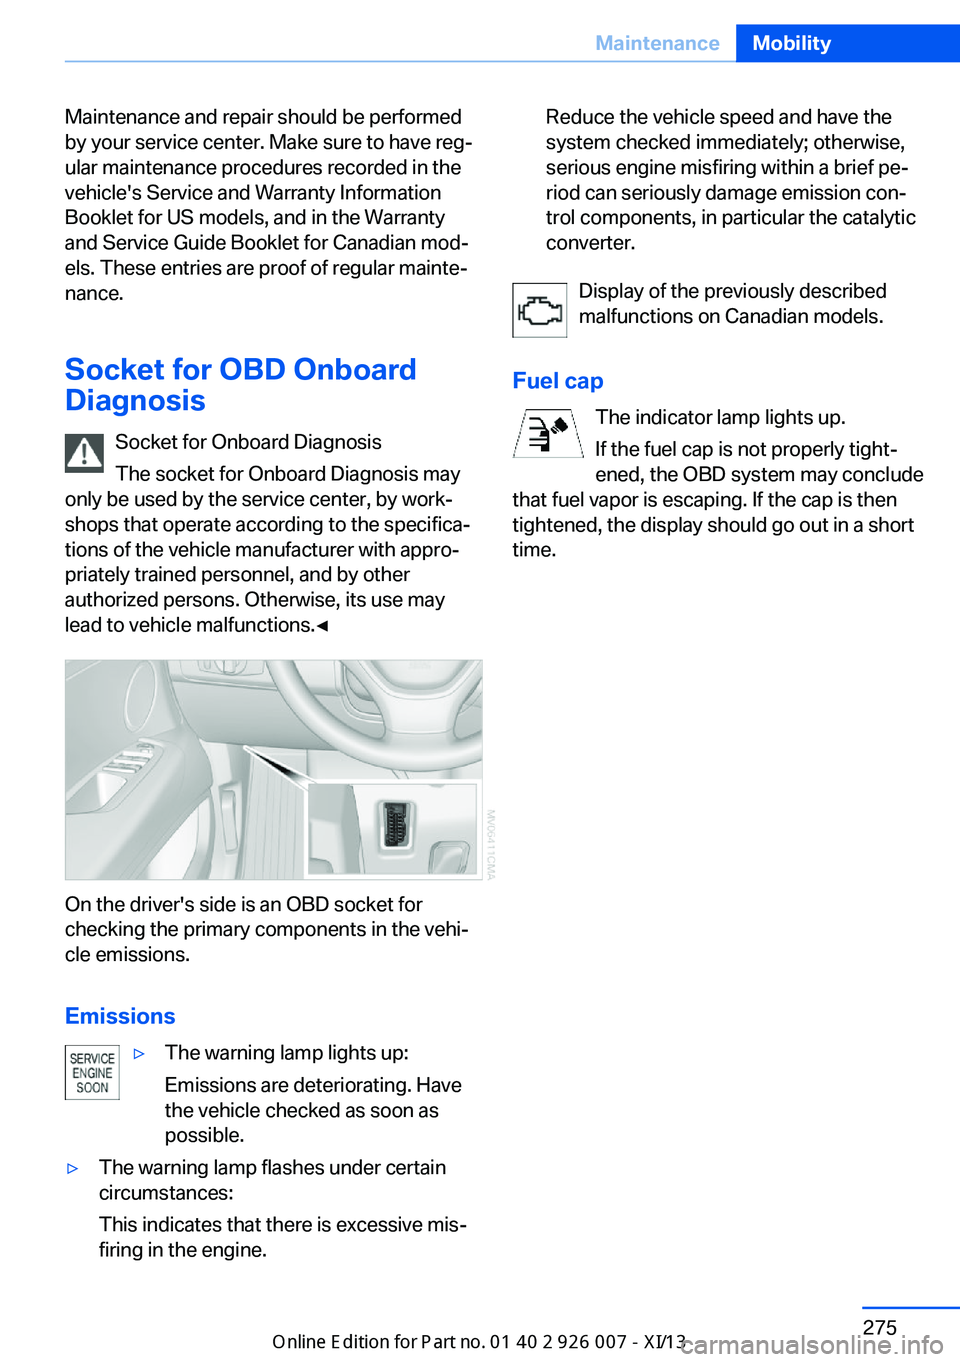
On the driver's side is an OBD socket for
checking the primary components in the vehi‐
cle emissions.
Emissions
▷The warning lamp lights up:
Emissions are deteriorating. Have
the vehicle checked as soon as
possible.▷The warning lamp flashes under certain
circumstances:
This indicates that there is excessive mis‐
firing in the engine.Reduce the vehicle speed and have the
system checked immediately; otherwise,
serious engine misfiring within a brief pe‐
riod can seriously damage emission con‐
trol components, in particular the catalytic
converter.
Display of the previously described
malfunctions on Canadian models.
Fuel cap The indicator lamp lights up.
If the fuel cap is not properly tight‐
ened, the OBD system may conclude
that fuel vapor is escaping. If the cap is then
tightened, the display should go out in a short
time.
Seite 275MaintenanceMobility275
Online Edition for Part no. 01 40 2 910 876 - VII/13
Page 290 of 327

Breakdown assistanceVehicle equipment
This chapter describes all series equipment as
well as country-specific and special equipment
offered for this model series.Therefore, it also
describes equipment that may not be found in
your vehicle, for instance due to the selected
special equipment or the country version. This
also applies to safety-related functions and
systems.
Hazard warning flashers
The button for the hazard warning system is
located on the center console.
Emergency RequestRequirements
▷Equipment version with full preparation
package mobile phone.
An Emergency Request can be made, even
if no mobile phones are paired with the ve‐
hicle.▷BMW Assist is activated.▷Radio readiness is switched on.▷The BMW Assist system is logged in to a
wireless communications network sup‐
ported by BMW Assist.▷The Assist system is operable.Only press the SOS button in an emergency.
Emergency Request not guaranteed
For technical reasons, the Emergency
Request cannot be guaranteed under unfavor‐
able conditions.◀
Service contract▷After your contract with BMW Assist has
expired, the BMW Assist system can be
deactivated by the service center without
you having to visit a workshop.
After deactivation, an Emergency Request
is no longer possible.▷Under certain circumstances, the system
can be reactivated by a service center after
you sign a new contract.
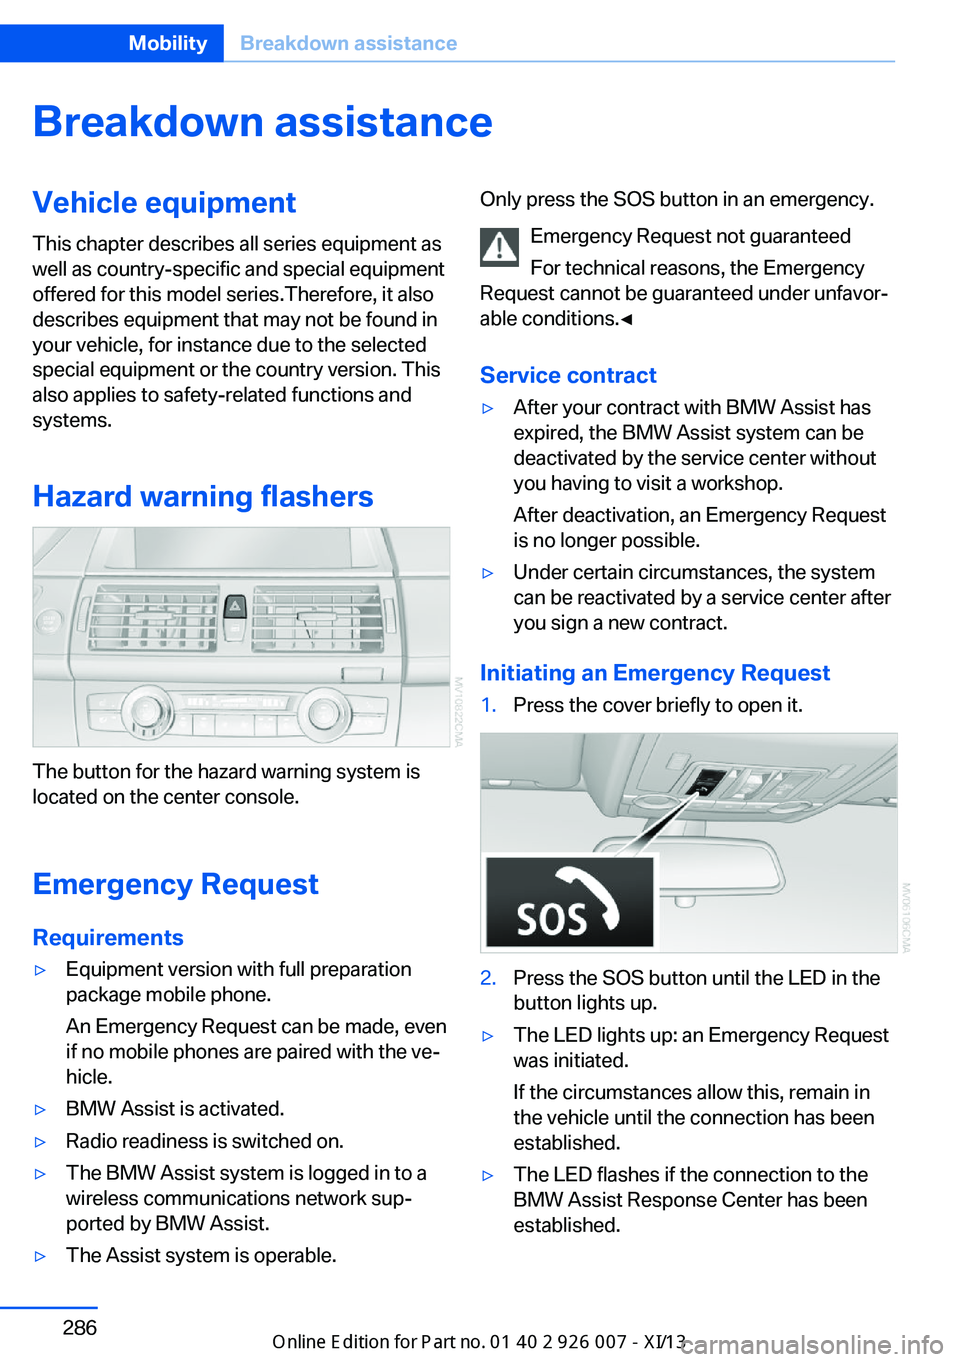
Initiating an Emergency Request
1.Press the cover briefly to open it.2.Press the SOS button until the LED in the
button lights up.▷The LED lights up: an Emergency Request
was initiated.
If the circumstances allow this, remain in
the vehicle until the connection has been
established.▷The LED flashes if the connection to the
BMW Assist Response Center has been
established.Seite 286MobilityBreakdown assistance286
Online Edition for Part no. 01 40 2 910 876 - VII/13
Page 312 of 327

Everything from A to Z
IndexA ABS, Antilock Brake Sys‐ tem 96
ACC Active Cruise Con‐ trol 102
Accident, refer to Emergency Request, initiating 286
Acoustic signal, refer to Check Control 76
Activated-charcoal filter 126
Active Cruise Control ACC 102
Active cruise control, indica‐ tor lamp 106
Active Cruise Control, radar sensor 106
Active Cruise Control, select‐ ing the distance 104
Active Cruise Control, warn‐ ing lamps 106
Active seat 47
Active seat ventilation 46
Active steering 101
Adaptive brake lights, refer to Brake force display 95
Adaptive Drive 100
Adaptive fixing system 140
Adaptive Light Control 82
Additional telephone 226
Additives, coolant 273
Additives, engine oil 272
After washing vehicle 292
Airbags 86
Airbags, indicator/warning light 88
Air circulation, refer to Recir‐ culated air mode 124
Air distribution, auto‐ matic 122, 127
Air distribution, manual 124 Air drying, refer to Cooling
function 124
Air flow rate 123
Air flow rate, blower, refer to Air volume 127
Airing, refer to Ventila‐ tion 125
Air pressure, refer to Tire in‐ flation pressure 262
Air vents 121
Air vents, refer to Ventila‐ tion 125
Alarm system 39
Alarm system– Avoiding unintentional
alarms 40– Ending an alarm 40– Interior motion sensor 40– Tilt alarm sensor 40
All around the headliner 17
All-season tires, refer to Win‐ ter tires 268
All-wheel drive, refer to
xDrive 98
Alternating-code hand-held transmitter 130
AM/FM station 182
Announcement, navigation, refer to Spoken instruc‐
tions 171
Antifreeze, coolant 273
Antifreeze, washer fluid 66
Antilock Brake System, ABS 96
Anti-slip control, refer to Dy‐ namic Stability Control
DSC 96
Anti-theft protection 32
Appointments 244
Approved axle loads, refer to Weights 298
Approved engine oils 272
Approved gross vehicle weight, refer to
Weights 298
Armrest, refer to Center arm‐ rest 138
Arrival time, refer to Com‐ puter 73
Ashtray 133
Ashtray, front 133
Ashtray, rear 133
Assistance, Roadside Assis‐ tance 287
Assistance with driving off, refer to Drive-off assis‐
tant 100
Assistance with starting en‐ gine, refer to Jump-start‐
ing 287
Audio CD with rear DVD sys‐ tem 216
Audio device, external 138
Audio playback 191
Audio playback, Blue‐ tooth 205
Automatic, air distribu‐ tion 122, 127
Automatic air distribu‐ tion 127
Automatic, air flow rate 122
Automatic car wash 291
Automatic climate con‐ trol 121
Automatic climate control, automatic air distribu‐
tion 122, 127
Automatic climate control, in rear 126
Automatic climate control in rear, activating on Control
Display 126 Seite 308ReferenceEverything from A to Z308
Online Edition for Part no. 01 40 2 910 876 - VII/13
Page 315 of 327

Concierge service 251
Condensation on windows, removing 123
Condensation under the vehi‐ cle 148
Condition Based Service CBS 274
Confirmation signals for lock‐ ing/unlocking the vehicle 33
Connecting, mobile phone, refer to Pairing the mobile
phone 227
Consumption, refer to Aver‐ age fuel consumption 73
Contacts 240, 248
Control Display 19
Control Display, care 294
Control Display, setting the brightness 79
Controller, refer to Con‐ trols 18
Controls and displays 12
Controls, rear DVD sys‐ tem 210
Control systems, driving sta‐ bility 96
Convenient operation– Glass sunroof 33– Window 33
Coolant 273
Coolant, checking the level 273
Coolant temperature 71
Cooling function, switching on and off 124
Cooling, maximum 124
Cooling system, refer to Cool‐ ant 273
Cornering Brake Control CBC 96
Corrosion on brake discs 148
Courtesy lamps, refer to Inte‐ rior lamps 85
Cradle for telephone or mo‐ bile phone, refer to Snap-in
adapter 237
Cruise control 109
Cruise control– Malfunction 110
Cruise control, active 102
Cupholder 139
Curb weight, refer to Weights 298
Current fuel consumption 71
Current location, storing 162
Curve lights, refer to Adaptive Light Control 82
D
Dashboard lighting, refer to Instrument lighting 85
Dashboard, refer to Cock‐ pit 12
Data, technical 298
Date 70
Date, display format 79
Date, retrieving 70
Date, setting 78
Daytime running lights 82
Defroster, rear window 123
Defrosting windows 123
Defrost setting, refer to De‐ frosting windows 123
Destination entry via the ad‐ dress book 162
Destination guidance 169
Destination guidance with in‐ termediate destinations 167
Destination input, naviga‐ tion 160
Digital clock 70
Digital compass 131
Digital radio 183
Dimming mirrors 52
Directional indicators, refer to Turn signals 64
Display in front wind‐ shield 118
Display lighting, refer to In‐ strument lighting 85
Displays and controls 12
Displays, care 294
Displays, cleaning 294
Displays, refer to Instrument
cluster 14
Disposal, coolant 273
Disposal, vehicle battery 284
Distance control, refer to Ac‐ tive Cruise Control 102
Distance, selecting, with Ac‐ tive Cruise Control 104
Distance warning, refer to Park Distance Control
PDC 111
Divided screen view, split screen 22
Door key, refer to Remote control with integrated
key 30
Door lock 34
Doors, manual operation 34
Doors, unlocking and locking– Confirmation signals 33– From the inside 35– From the outside 32
DOT Quality Grades 265
Downhill control 99
Draft-free ventilation 125
Drive-off assistant 100
Driver's seat, calibrating 49
Driving away on inclines, refer to Drive-off assistant 100
Driving notes, breaking in 146
Driving notes, general 146
Driving on poor roads 148
Driving stability control sys‐ tems 96
Driving through water 147
Driving tips, refer to Driving notes 146
Dry air, refer to Cooling func‐ tion 124
DSC Dynamic Stability Con‐ trol 96
DTC Dynamic Traction Con‐ trol 97
DTMF suffix dialing 232
DVD/CD 190
DVDs, storing 197
Seite 311Everything from A to ZReference311
Online Edition for Part no. 01 40 2 910 876 - VII/13