2013 BMW X6M interior lights
[x] Cancel search: interior lightsPage 134 of 327

on the interior rearview mirror. The re‐
quired distance depends on the particular
hand-held transmitter.4.Press the button of the desired function on
the hand-held transmitter and the button
being programmed on the interior rearview
mirror simultaneously and hold. The LED
on the interior rearview mirror flashes
slowly at first.5.When the LED flashes more rapidly, re‐
lease both buttons. Rapid flashing indi‐
cates that the button on the interior rear‐
view mirror has been programmed.
If the LED does not flash faster after
60 seconds, change the distance between
the interior rearview mirror and the hand-
held transmitter and repeat the step. Multi‐
ple trials at different distances may be nec‐
essary. Wait at least 15 seconds between
trials.6.To program additional functions on other
buttons, repeat steps 3 to 5.
The systems can be operated with the buttons
on the interior rearview mirror.
Special characteristics of alternating-
code radio systems
If the system cannot be operated after re‐
peated programming, check whether the sys‐
tem to be operated uses an alternating-code
system.
Read the operating instructions of the system
or press and hold the programmed button on
the interior rearview mirror. If the LED on the
interior rearview mirror flashes rapidly at first
and then lights up continuously for 2 seconds,
the system is equipped with an alternating-
code system. This flashing LED pattern re‐
peats itself for approx. 20 seconds.
In systems with an alternating-code system,
the Universal Garage Door Opener and the
system must be additionally synchronized.
Please obtain additional information on syn‐
chronization in the operating instructions of
the system being set up.
The systems will be easier to synchronize with
the aid of a second person.
Synchronization:1.Park the vehicle within range of the re‐
mote-controlled system.2.Program the corresponding button on the
interior rearview mirror as described.3.Identify and press the synchronization but‐
ton on the system being set up. You have
approx. 30 seconds for the next step.4.Press and hold the button on the interior
rearview mirror for approx. 3 seconds and
then release it. Repeat this step up to three
times if necessary to complete the syn‐
chronization procedure. When synchroni‐
zation is completed, the programmed func‐
tion is executed.
Reprogramming individual buttons
1.Switch on the ignition.2.Hold the hand-held transmitter at a dis‐
tance of approx. 1 to 3 in/2.5 to 8 cm from
the memory buttons.
The required distance depends on the par‐
ticular hand-held transmitter.3.Press the memory button of the Universal
Garage Door Opener.4.If the LED flashes slowly after approx.
20 seconds, press the transmit button on
the hand-held transmitter.5.Release both buttons when the LED
flashes rapidly.
If the LED does not flash rapidly after ap‐
prox. 60 seconds, change the distance and
repeat the step.
Canada: if the LED does not flash rapidly
after approx. 60 seconds, change the dis‐
tance and repeat the step. If programmingSeite 130ControlsInterior equipment130
Online Edition for Part no. 01 40 2 910 876 - VII/13
Page 135 of 327

was aborted by the hand-held transmitter,
hold down the memory button and press
and release the button on the hand-held
transmitter several times for 2 seconds.
Controls
Prior to operation
Before operating a unit with the Universal
Garage Door Opener, ensure that there are no
people, animals, or objects in the range of
movement of the system; otherwise, there is a
risk of injury or damage.
Also follow the safety instructions of the hand-
held transmitter.◀
The system, such as the garage door, can be
operated using the button on the interior rear‐
view mirror with the engine running or the igni‐
tion switched on. When you are within the re‐
ception range of the system, press and hold
the button until the function is initiated. The
LED on the interior rearview mirror lights up
continuously while the radio signal is being
transmitted.
Deleting stored functions Press the right and left buttons on the interior
rearview mirror simultaneously for approx.
20 seconds until the LED flashes rapidly. All
stored functions are deleted. The functions
cannot be deleted individually.
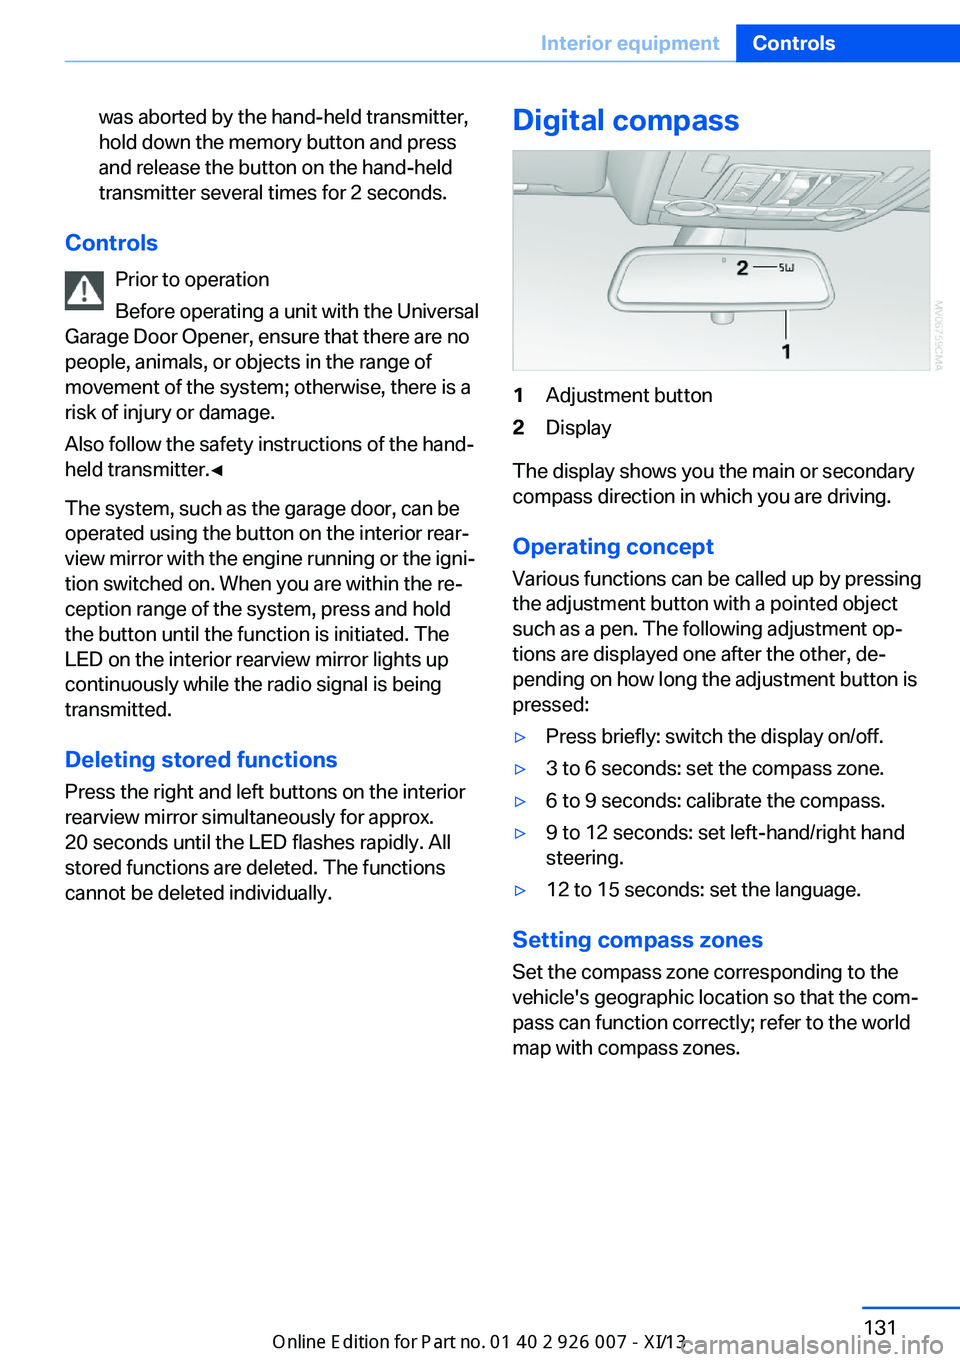
Digital compass1Adjustment button2Display
The display shows you the main or secondary
compass direction in which you are driving.
Operating concept
Various functions can be called up by pressing
the adjustment button with a pointed object
such as a pen. The following adjustment op‐
tions are displayed one after the other, de‐
pending on how long the adjustment button is
pressed:
▷Press briefly: switch the display on/off.▷3 to 6 seconds: set the compass zone.▷6 to 9 seconds: calibrate the compass.▷9 to 12 seconds: set left-hand/right hand
steering.▷12 to 15 seconds: set the language.
Setting compass zones
Set the compass zone corresponding to the
vehicle's geographic location so that the com‐
pass can function correctly; refer to the world
map with compass zones.
Seite 131Interior equipmentControls131
Online Edition for Part no. 01 40 2 910 876 - VII/13
Page 312 of 327

Everything from A to Z
IndexA ABS, Antilock Brake Sys‐ tem 96
ACC Active Cruise Con‐ trol 102
Accident, refer to Emergency Request, initiating 286
Acoustic signal, refer to Check Control 76
Activated-charcoal filter 126
Active Cruise Control ACC 102
Active cruise control, indica‐ tor lamp 106
Active Cruise Control, radar sensor 106
Active Cruise Control, select‐ ing the distance 104
Active Cruise Control, warn‐ ing lamps 106
Active seat 47
Active seat ventilation 46
Active steering 101
Adaptive brake lights, refer to Brake force display 95
Adaptive Drive 100
Adaptive fixing system 140
Adaptive Light Control 82
Additional telephone 226
Additives, coolant 273
Additives, engine oil 272
After washing vehicle 292
Airbags 86
Airbags, indicator/warning light 88
Air circulation, refer to Recir‐ culated air mode 124
Air distribution, auto‐ matic 122, 127
Air distribution, manual 124 Air drying, refer to Cooling
function 124
Air flow rate 123
Air flow rate, blower, refer to Air volume 127
Airing, refer to Ventila‐ tion 125
Air pressure, refer to Tire in‐ flation pressure 262
Air vents 121
Air vents, refer to Ventila‐ tion 125
Alarm system 39
Alarm system– Avoiding unintentional
alarms 40– Ending an alarm 40– Interior motion sensor 40– Tilt alarm sensor 40
All around the headliner 17
All-season tires, refer to Win‐ ter tires 268
All-wheel drive, refer to
xDrive 98
Alternating-code hand-held transmitter 130
AM/FM station 182
Announcement, navigation, refer to Spoken instruc‐
tions 171
Antifreeze, coolant 273
Antifreeze, washer fluid 66
Antilock Brake System, ABS 96
Anti-slip control, refer to Dy‐ namic Stability Control
DSC 96
Anti-theft protection 32
Appointments 244
Approved axle loads, refer to Weights 298
Approved engine oils 272
Approved gross vehicle weight, refer to
Weights 298
Armrest, refer to Center arm‐ rest 138
Arrival time, refer to Com‐ puter 73
Ashtray 133
Ashtray, front 133
Ashtray, rear 133
Assistance, Roadside Assis‐ tance 287
Assistance with driving off, refer to Drive-off assis‐
tant 100
Assistance with starting en‐ gine, refer to Jump-start‐
ing 287
Audio CD with rear DVD sys‐ tem 216
Audio device, external 138
Audio playback 191
Audio playback, Blue‐ tooth 205
Automatic, air distribu‐ tion 122, 127
Automatic air distribu‐ tion 127
Automatic, air flow rate 122
Automatic car wash 291
Automatic climate con‐ trol 121
Automatic climate control, automatic air distribu‐
tion 122, 127
Automatic climate control, in rear 126
Automatic climate control in rear, activating on Control
Display 126 Seite 308ReferenceEverything from A to Z308
Online Edition for Part no. 01 40 2 910 876 - VII/13