2013 BMW X6M height
[x] Cancel search: heightPage 124 of 327
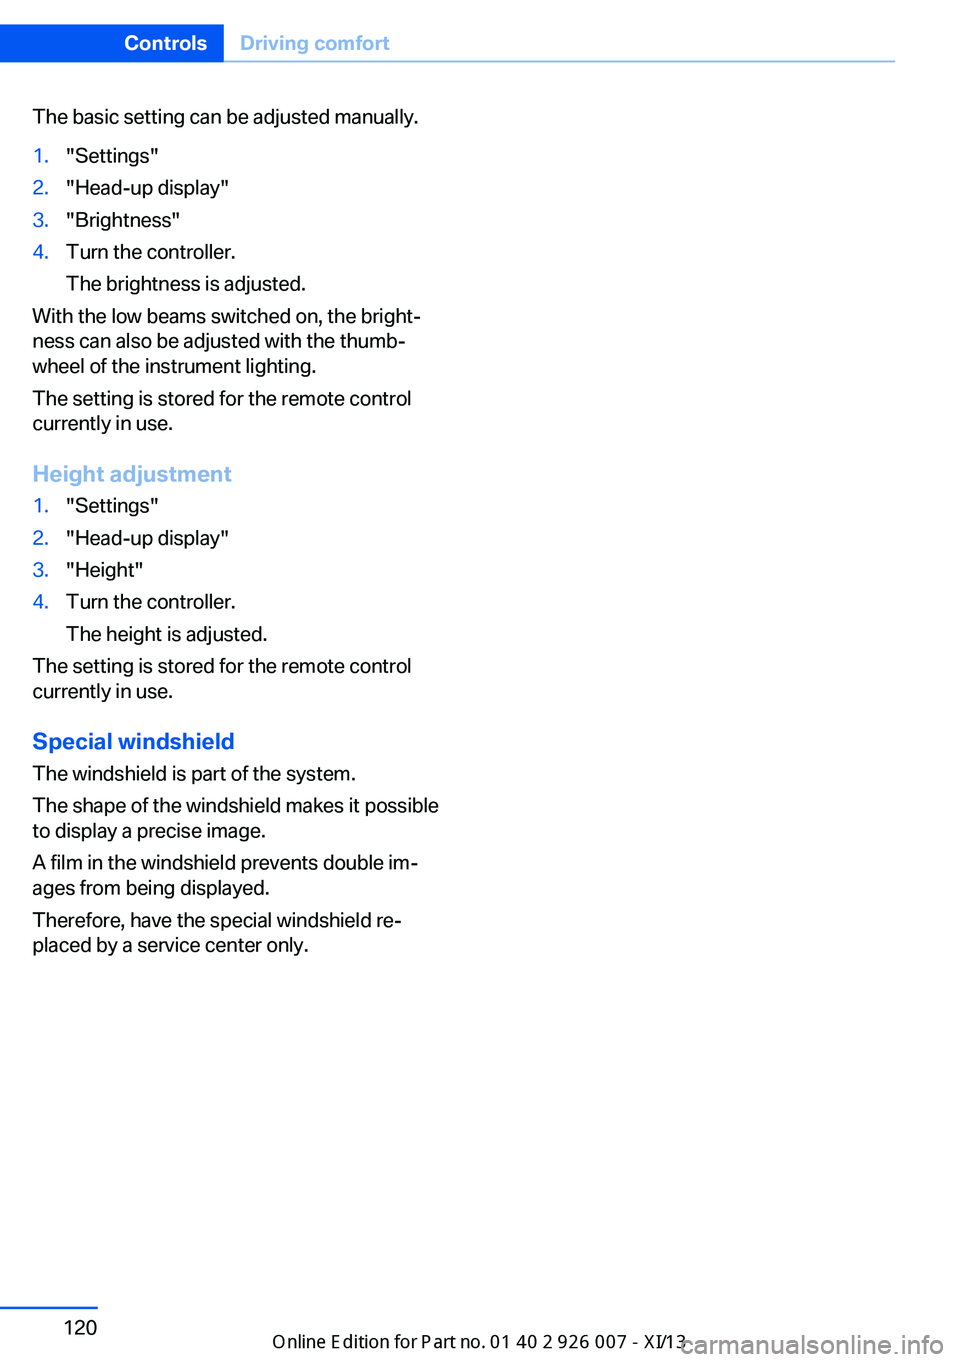
The basic setting can be adjusted manually.1."Settings"2."Head-up display"3."Brightness"4.Turn the controller.
The brightness is adjusted.
With the low beams switched on, the bright‐
ness can also be adjusted with the thumb‐
wheel of the instrument lighting.
The setting is stored for the remote control
currently in use.
Height adjustment
1."Settings"2."Head-up display"3."Height"4.Turn the controller.
The height is adjusted.
The setting is stored for the remote control
currently in use.
Special windshield
The windshield is part of the system.
The shape of the windshield makes it possible
to display a precise image.
A film in the windshield prevents double im‐
ages from being displayed.
Therefore, have the special windshield re‐
placed by a service center only.
Seite 120ControlsDriving comfort120
Online Edition for Part no. 01 40 2 910 876 - VII/13
Page 151 of 327
Do not remove the heat shields installed and
never apply undercoating to them. Make sure
that flammable materials, e. g. hay, leaves,
grass, etc. do not come in contact with the hot
exhaust system during driving, while in idle po‐
sition mode, or when parked. Such contact
could lead to a fire, and with it the risk of seri‐
ous personal injury as well as property dam‐
age.
Do not touch hot exhaust pipes; otherwise,
there is the danger of getting burned.◀
Mobile communication devices in the
vehicle
Mobile communication devices in the ve‐
hicle
It is not recommended to use mobile phones,
such as mobile phones without a direct con‐
nection to an external aerial in the vehicle's
passenger compartment. Otherwise, the vehi‐
cle electronics and mobile communication de‐ vices can interfere with each other. In addition,
there is no assurance that the radiation gener‐
ated during transmission will be discharged
from the vehicle interior.◀
Hydroplaning On wet or slushy roads, a wedge of water can
form between the tires and road surface.
This phenomenon is referred to as hydroplan‐
ing. It is characterized by a partial or complete loss of contact between the tires and the road
surface, ultimately undermining your ability to
steer and brake the vehicle.
Hydroplaning
When driving on wet or slushy roads, re‐
duce your speed to prevent hydroplaning.◀
The risk of hydroplaning increases as the tire
tread depth decreases. Minimum tread depth,
refer to page 266.
Driving through water
Maximum water height: 17 inches/45 cm.Adhere to water depth and speed limita‐
tions
Do not exceed this water depth and walking
speed; otherwise, the vehicle's engine, the
electrical systems and the transmission may
be damaged.◀
Braking safely
Your vehicle is equipped with ABS as a stand‐ ard feature.
Applying the brakes fully is the most effective
way of braking in situations when this is neces‐
sary.
The vehicle maintains steering responsive‐
ness. You can still avoid any obstacles with a
minimum of steering effort.
Pulsation of the brake pedal and sounds from
the hydraulic circuits indicate that ABS is in its
active mode.
Do not let your foot rest on the brake
pedal
Do not drive with your foot resting on the brake
pedal. Even light but consistent pedal pressure
can lead to high temperatures, brake wear and
possibly even brake failure.◀
Objects in the area around the pedals No objects in the area around the pedals
Keep floor mats, carpets, and any other
objects out of the area of motion of the pedals;
otherwise, the function of the pedals could be
impeded while driving
Do not place additional floor mats over existing
mats or other objects.
Only use floor mats that have been approved
for the vehicle and can be properly fixed in
place.
Ensure that the floor mats are securely fas‐
tened again when they are returned after being
removed, such as for cleaning.◀Seite 147Things to remember when drivingDriving tips147
Online Edition for Part no. 01 40 2 910 876 - VII/13
Page 153 of 327
▷When driving through water, do not exceed
the maximum water height of 17 in‐
ches/45 cm.
Drive at walking speed only and do not
stop the vehicle.▷After driving through water, press on the
brake pedal several times at low speeds to
dry the brakes.▷Depending on the prevailing terrain, acti‐
vate Dynamic Traction Control DTC, refer
to page 97, briefly.▷When the wheels spin, accelerate to ena‐
ble the driving stability control systems to
distribute the drive force to the individual
wheels.▷The stone chip guard reduces the risk of
damage to painted vehicle components,
such as in the area of the side skirts and
wheel arches. Your service center will be
glad to advise you.
After driving on poor roads
Adhere to the following points to ensure vehi‐
cle safety:
▷Remove excessive accumulations of dirt
and mud from the vehicle body.▷Clear mud, snow, ice, etc., from the wheels
and tires and check for damage.Seite 149Things to remember when drivingDriving tips149
Online Edition for Part no. 01 40 2 910 876 - VII/13
Page 270 of 327

Temperature
The temperature grades are A, the highest, B,
and C, representing the tire's resistance to the
generation of heat and its ability to dissipate
heat when tested under controlled conditions
on a specified indoor laboratory test wheel.
Sustained high temperature can cause the ma‐
terial of the tire to degenerate and reduce tire
life, and excessive temperature can lead to
sudden tire failure. The grade C corresponds
to a level of performance which all passenger
car tires must meet under the Federal Motor
Vehicle Safety Standard No. 109. Grades B
and A represent higher levels of performance
on the laboratory test wheel than the minimum
required by law.
Temperature grade for this tire
The temperature grade for this tire is es‐
tablished for a tire that is properly inflated and
not overloaded. Excessive speed, underinfla‐
tion, or excessive loading, either separately or
in combination, can cause heat buildup and
possible tire failure.◀
RSC – Run-flat tires
The symbol identifying run-flat tires is a circle
with the letters RSC on the sidewall, refer to
page 268.
M+S
Winter and all-season tires.
These have better winter properties than
summer tires.
XL
Designation for specially reinforced tires.
Tire treadSummer tires
Do not drive with a tire tread depth of less than
0.12 in/3 mm.There is an increased danger of hydroplaning if
the tread depth is less than 0.12 in/3 mm.
Winter tires Do not drive with a tire tread depth of less than
0.16 in/4 mm.
Below a tread depth of 0.16 in/4 mm, tires are
less suitable for winter operation.
Minimum tread depth
Wear indicators are distributed around the
tire's circumference and have the legally re‐
quired minimum height of 0.063 in/1.6 mm.
They are marked on the side of the tire with
TWI, Tread Wear Indicator.
Tire damage
General information
Inspect your tires often for damage, foreign
objects lodged in the tread, and tread wear.
Notes
Driving over rough or damaged road surfaces,
as well as debris, curbs and other obstacles can cause serious damage to wheels, tires and
suspension parts. This is more likely to occur
with low-profile tires, which provide less cush‐
ioning between the wheel and the road. Be
careful to avoid road hazards and reduce your
speed, especially if your vehicle is equipped
with low-profile tires.
Seite 266MobilityWheels and tires266
Online Edition for Part no. 01 40 2 910 876 - VII/13
Page 275 of 327
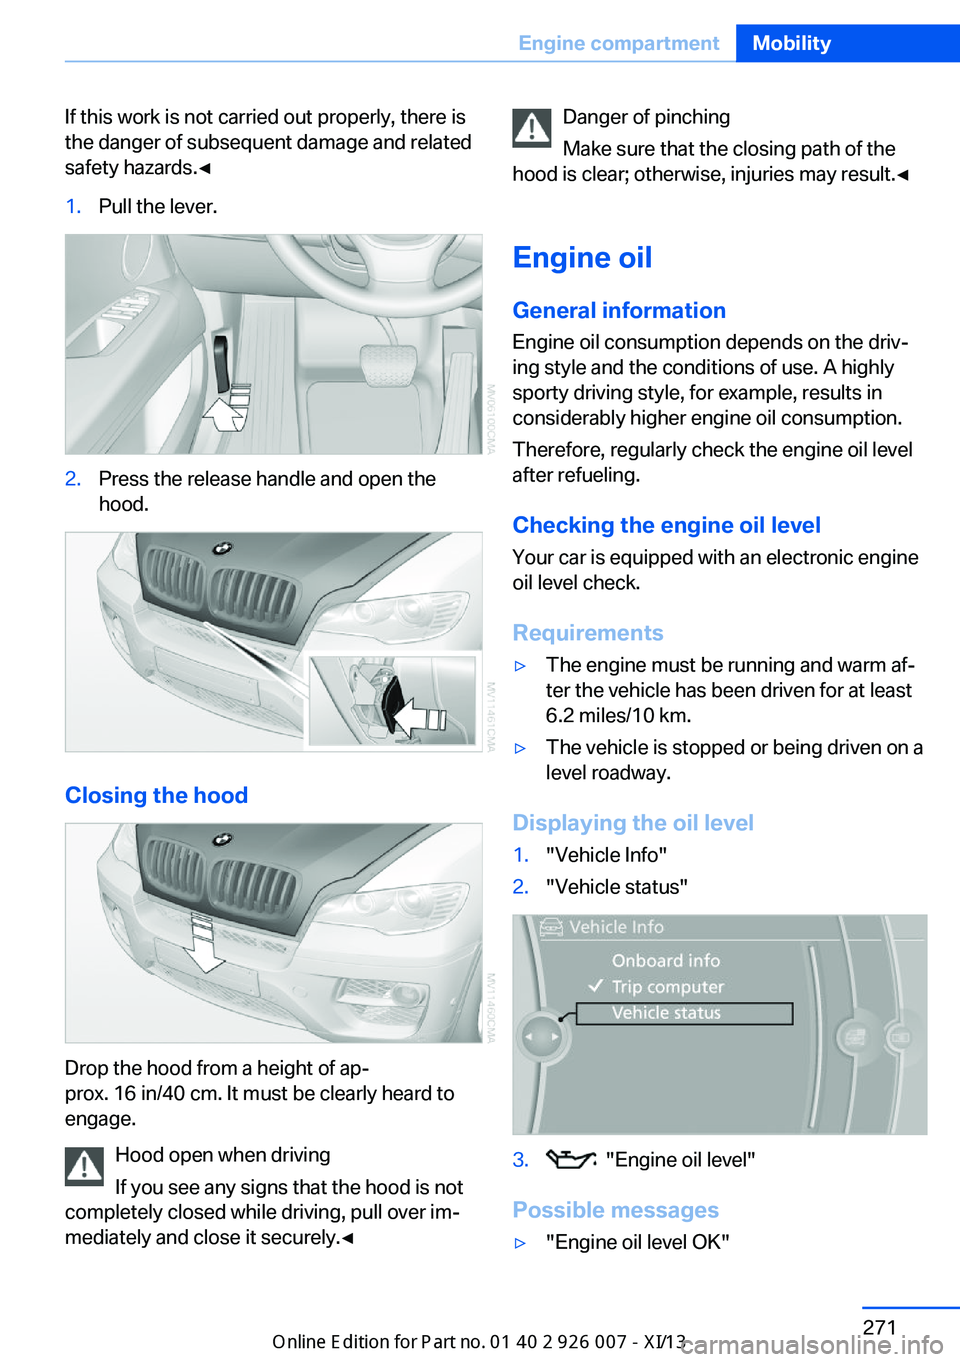
If this work is not carried out properly, there is
the danger of subsequent damage and related
safety hazards.◀1.Pull the lever.2.Press the release handle and open the
hood.
Closing the hood
Drop the hood from a height of ap‐
prox. 16 in/40 cm. It must be clearly heard to
engage.
Hood open when driving
If you see any signs that the hood is not
completely closed while driving, pull over im‐
mediately and close it securely.◀
Danger of pinching
Make sure that the closing path of the
hood is clear; otherwise, injuries may result.◀
Engine oil
General information Engine oil consumption depends on the driv‐
ing style and the conditions of use. A highly
sporty driving style, for example, results in
considerably higher engine oil consumption.
Therefore, regularly check the engine oil level
after refueling.
Checking the engine oil level Your car is equipped with an electronic engine
oil level check.
Requirements▷The engine must be running and warm af‐
ter the vehicle has been driven for at least
6.2 miles/10 km.▷The vehicle is stopped or being driven on a
level roadway.
Displaying the oil level
1."Vehicle Info"2."Vehicle status"3. "Engine oil level"
Possible messages
▷"Engine oil level OK"Seite 271Engine compartmentMobility271
Online Edition for Part no. 01 40 2 910 876 - VII/13
Page 285 of 327
Jacking points for the vehicle jack
The jacking points for the vehicle jack are lo‐
cated in the positions shown.
Compact wheel Safety precautions in the event of a flat
tire or wheel change
Park the vehicle as far as possible from pass‐
ing traffic and on solid ground. Switch on the
hazard warning system.
Set the parking brake and engage transmis‐
sion position P.
Have all vehicle occupants get out of the vehi‐
cle and ensure that they remain outside the
immediate area in a safe place, such as behind
a guardrail.
If a warning triangle or portable hazard warning
lamp is required, set it up on the roadside at an
appropriate distance from the rear of the vehi‐
cle. Comply with all safety guidelines and regu‐
lations.
Change the wheel only on a level, firm surface
which is not slippery. The vehicle or the jack
could slip to the side if you attempt to raise the
vehicle on a soft or slippery surface such as
snow, ice, tiles, etc.
Position the jack on a firm support surface.
Do not use a wooden block or similar object as a support base for the jack, as this would pre‐
vent it from extending to its full support height
and reduce its load-carrying capacity.
To avoid serious or fatal injury: never lie under
the vehicle, and never start the engine while it
is supported by the jack.◀
What you will need
To avoid rattling noises later on, note the posi‐
tions of the tools before removing them, then
return them to their initial positions after com‐
pleting work.
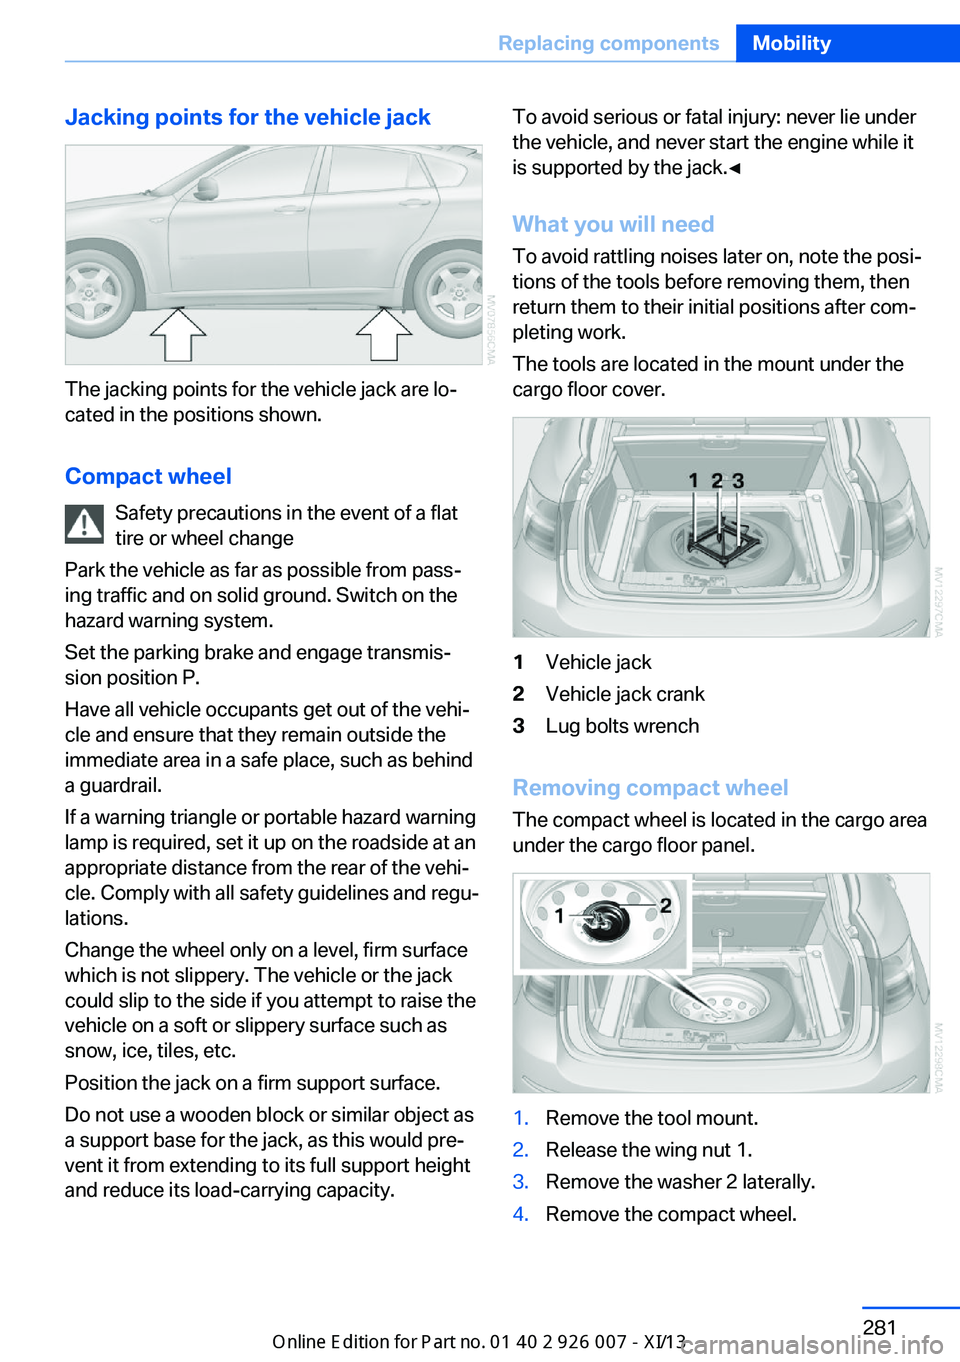
The tools are located in the mount under the
cargo floor cover.1Vehicle jack2Vehicle jack crank3Lug bolts wrench
Removing compact wheel
The compact wheel is located in the cargo area
under the cargo floor panel.
1.Remove the tool mount.2.Release the wing nut 1.3.Remove the washer 2 laterally.4.Remove the compact wheel.Seite 281Replacing componentsMobility281
Online Edition for Part no. 01 40 2 910 876 - VII/13
Page 302 of 327

Technical dataVehicle equipment
This chapter describes all series equipment as
well as country-specific and special equipment
offered for this model series.Therefore, it alsodescribes equipment that may not be found in
your vehicle, for instance due to the selected
special equipment or the country version. This
also applies to safety-related functions and
systems.
Dimensions
BMW X6Width with mirrorsinches/mm86.4/2,195Width without mirrorsinches/mm78.1/1,930Heightinches/mm66.5/1,690Opening height of tailgateinches/mm90.0/2,287Lengthinches/mm192.0/4,877Wheelbaseinches/mm115.5/2,933Smallest turning circle dia.ft/m42.0/12.8With mixed tires, the vehicle width may exceed the specified dimensions.
Weights
X6 xDrive35iX6 xDrive50iApproved gross vehicle
weightlbs/kg6,008/2,7256,250/2,835Loadlbs/kg937/425937/425Approved front axle loadlbs/kg2,800/1,2703,020/1,370Approved rear axle loadlbs/kg3,263/1,4803,351/1,520Approved roof load ca‐
pacitylbs/kg220/100220/100Cargo area capacitycu ft/
liter25.6-59.7/570‐
1,45025.6-59.7/570-1,
450Seite 298ReferenceTechnical data298
Online Edition for Part no. 01 40 2 910 876 - VII/13
Page 317 of 327

Flat tire, warning lamp 89, 91
Flat tire, wheel change 280
Flooding, refer to Driving through water 147
Floor carpet, care 293
Floor mats, care 293
FM/AM station 182
Fog on windows, remov‐ ing 123
Foldable rear seat back‐ rest 135
Foot brake 147
Footwell lamps, refer to Inte‐ rior lamps 85
For your own safety 6
Four-wheel drive, refer to xDrive 98
Front airbags 86
Front fog lamps 84
Front fog lamps, bulb replace‐ ment 278
Front fog lamps, indicator lamp 84
FTM Flat Tire Monitor 88
Fuel 260
Fuel– Refer to Average fuel con‐
sumption 73
Fuel, additives 260
Fuel, average consump‐ tion 73
Fuel cap 258
Fuel cap, closing 258
Fuel consumption display
– Average fuel consump‐
tion 73
Fuel consumption display,
current fuel consump‐
tion 71
Fuel-efficient driving, refer to Current fuel consump‐
tion 71
Fuel filler flap, closing 258
Fuel filler flap, opening 258
Fuel filler flap, unlocking in case of an electrical mal‐
function 258
Fuel gauge 72
Fuel, saving 153
Fuel tank capacity, refer to Filling capacities 299
Fuel tank contents, refer to Filling capacities 299
Fuel tank, refer to Filling ca‐ pacities 299
Fuse 284
G
Garage door opener, refer to Universal Garage Door
Opener 129
Gasoline 260
Gasoline gauge, refer to Fuel gauge 72
Gasoline quality 260
Gas station recommenda‐ tion 171
Gear change, automatic transmission with Step‐
tronic 68
Gear change, via shift pad‐ dles 69
General driving notes 146
Glass sunroof, closing 43
Glass sunroof, electric– Convenient operation 33– Remote control 33
Glass sunroof, initializing 43
Glass sunroof, opening 43
Glass sunroof, pinch protec‐ tion 43
Glass sunroof, power fail‐ ure 43
Glass sunroof, tilting 42
Glove compartment 137
Glove compartment, light‐ ing 137
GPS navigation, refer to Navi‐ gation system 158
Gross vehicle weight, refer to Weights 298
H
Handbrake, refer to Parking brake 61
Hand-held transmitter, alter‐ nating code 130
Hands-free microphone 16
Hazard warning sys‐ tem 16, 286
HDC Hill Descent Control 99
HD Radio 183
Head airbags 86
Headlamp control, auto‐ matic 81, 82
Headlamp courtesy delay fea‐ ture 82
Headlamp flasher 64, 83
Headlamp flasher, indicator lamp 15
Headlamps 81
Headlamps, care 292
Headlamps, cleaning 66
Headlamps, cleaning, washer fluid 67
Headliner 17
Headphones, connecting, rear DVD system 211
Head restraints 49
Head-up Display 118
Head-up Display, care 294
Heatable rear window 123
Heating 121
Heating– Seats 46
Heating, interior 121
Heating, mirrors 52
Heating, residual heat 125
Heating with the engine switched off, refer to Resid‐
ual heat 125
Heavy cargo, refer to Stowing cargo 151
Height, refer to Dimen‐ sions 298
High-beam Assistant 83
High beams 83
Seite 313Everything from A to ZReference313
Online Edition for Part no. 01 40 2 910 876 - VII/13