2013 BMW X5M four
[x] Cancel search: fourPage 19 of 345
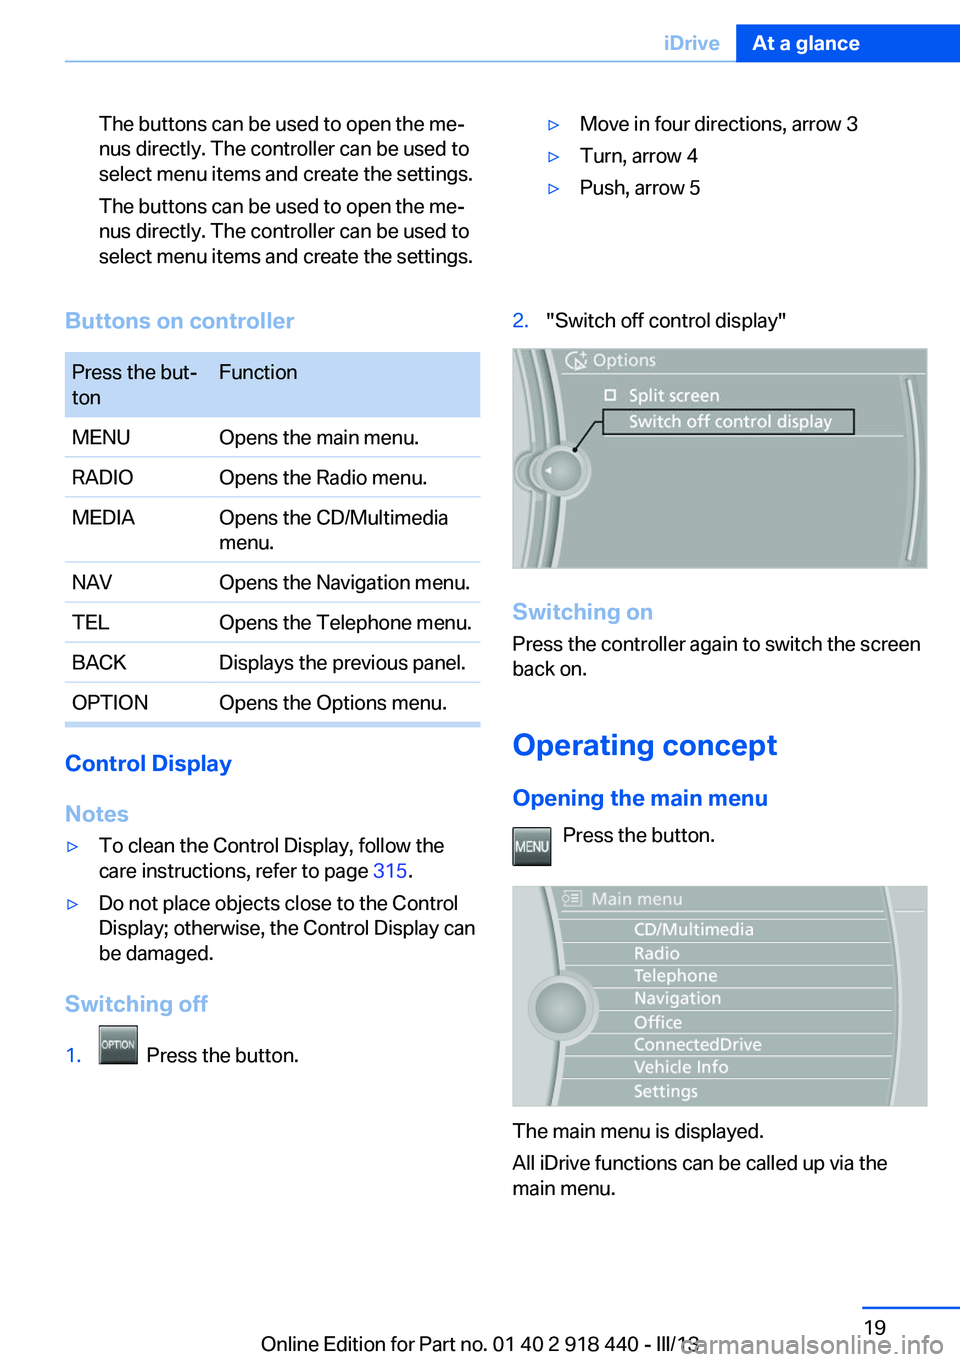
The buttons can be used to open the me‐
nus directly. The controller can be used to
select menu items and create the settings.
The buttons can be used to open the me‐
nus directly. The controller can be used to
select menu items and create the settings.▷Move in four directions, arrow 3▷Turn, arrow 4▷Push, arrow 5Buttons on controllerPress the but‐
tonFunctionMENUOpens the main menu.RADIOOpens the Radio menu.MEDIAOpens the CD/Multimedia
menu.NAVOpens the Navigation menu.TELOpens the Telephone menu.BACKDisplays the previous panel.OPTIONOpens the Options menu.
Control Display
Notes
▷To clean the Control Display, follow the
care instructions, refer to page 315.▷Do not place objects close to the Control
Display; otherwise, the Control Display can
be damaged.
Switching off
1. Press the button.2."Switch off control display"
Switching on
Press the controller again to switch the screen
back on.
Operating concept
Opening the main menu Press the button.
The main menu is displayed.
All iDrive functions can be called up via the
main menu.
Seite 19iDriveAt a glance19
Online Edition for Part no. 01 40 2 918 440 - III/13
Page 31 of 345

▷The settings are automatically saved in the
profile currently activated in the remote
control.▷The remote control used is detected when
the vehicle is unlocked and the stored pro‐
file is called up.▷Your personal settings will be recognized
and called up again even if the vehicle has
been used in the meantime by someone
else with another remote control.
The individual settings are stored for a maxi‐
mum of four remote controls. They are stored
for two remote controls if Comfort Access is in
use.
Personal Profile settingsThe following functions and settings can be
stored in a profile.
More information on the settings can be found
under:
▷Assigning the programmable memory but‐
tons, refer to page 23.▷Response of the central locking system
when the car is being unlocked, refer to
page 32.▷Automatic locking of the vehicle, refer to
page 35.▷Driver's seat, exterior mirror and steering
wheel positions, refer to page 57.▷Settings for the display on the Control Dis‐
play and in the instrument cluster:▷12h/24h clock format, refer to
page 87.▷Date format, refer to page 88.▷Brightness of the Control Display, refer
to page 88.▷Language on the Control Display, refer
to page 88.▷Units of measure for fuel consumption,
distance covered/remaining distances,
and temperature, refer to page 88.▷Show visual warning for the Park Distance
Control PDC, refer to page 121.▷Show visual warning for Top View, refer to
page 124.▷Show Side View, refer to page 126.▷Backup camera:▷Function selection, refer to page 123.▷Type of display, refer to page 124.▷Lane departure warning: last setting, on/
off, refer to page 102.▷Head-up Display: selection, brightness and
position of the display, refer to page 127.▷Adaptive Drive: selected chassis and sus‐
pension tuning, refer to page 109.▷Light settings:▷Triple turn signal activation, refer to
page 73.▷Welcome lamps, refer to page 90.▷Headlamp courtesy delay feature, refer
to page 91.▷Daytime running lights, refer to
page 91.▷High-beam Assistant, refer to
page 92.▷Automatic climate control with 2-zone con‐
trol: settings, refer to page 131.▷Navigation:▷Voice activation, refer to page 181.▷Route criteria, refer to page 179.▷Map view settings, refer to page 183.▷Entertainment:▷Tone control, refer to page 190.▷Radio, stored stations, refer to
page 198.▷CD/multimedia, audio source listened
to last, refer to page 200.▷Telephone: volume, refer to page 240.Seite 31Opening and closingControls31
Online Edition for Part no. 01 40 2 918 440 - III/13
Page 51 of 345
▷Increase or decrease curvature:
Press front or rear section of switch.▷Shift curvature up or down:
Press upper or lower section of switch.
BMW X5: rear seats
2nd row seats If the row of seats is divided, each side can be
adjusted separately.
Do not adjust the seat while driving
Never adjust the 2nd row seats while the
vehicle is moving, as otherwise the passengers
on the 3rd row seats could be injured.
Make sure that the locking devices of the 2nd
row seats engage properly. Otherwise the re‐
straining effect of the safety belts during an ac‐
cident could be reduced.◀
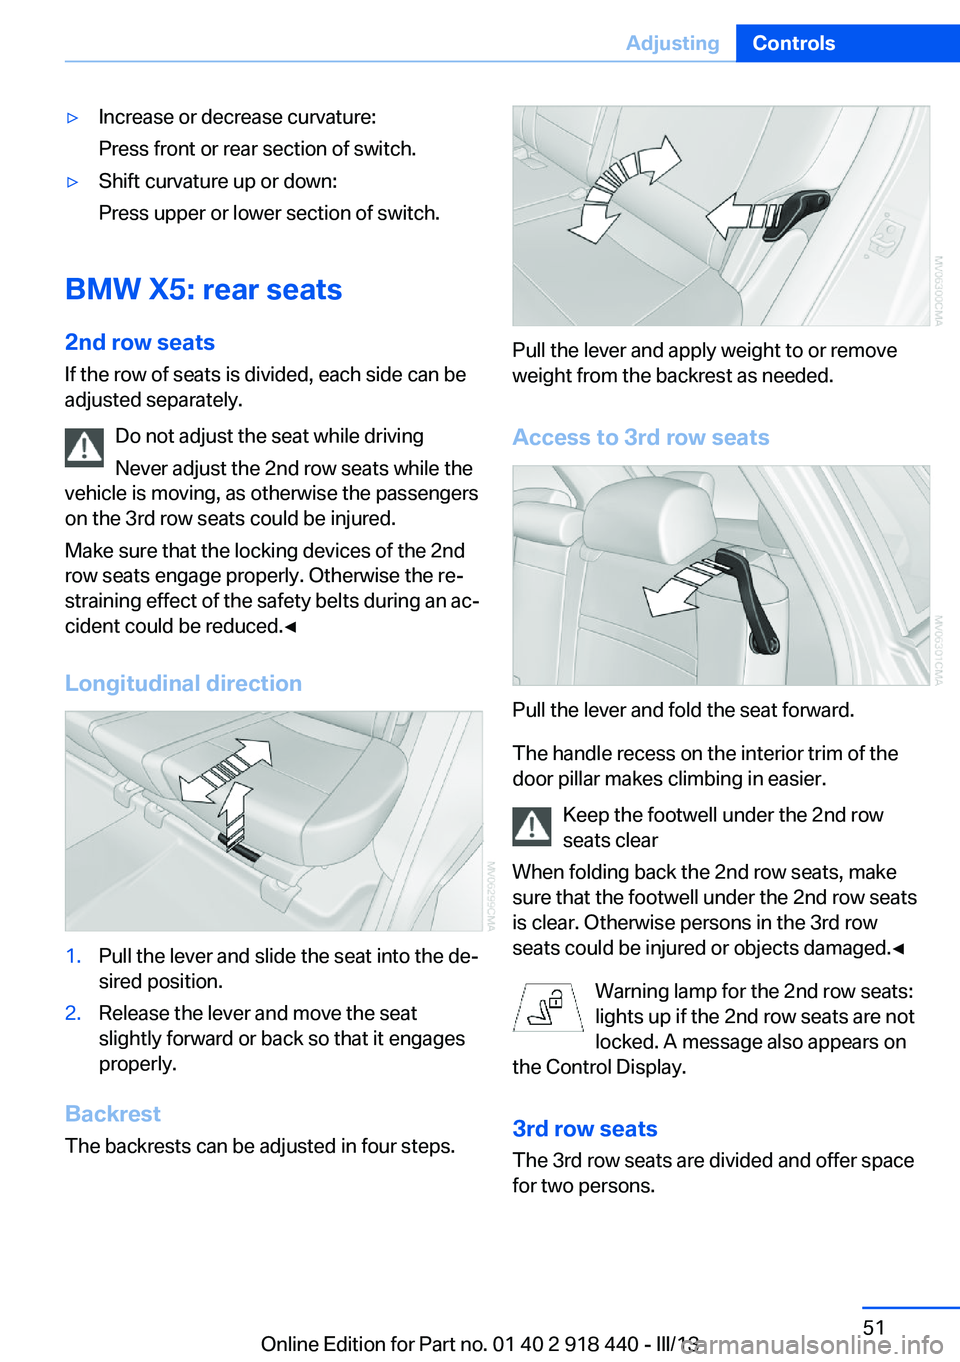
Longitudinal direction
1.Pull the lever and slide the seat into the de‐
sired position.2.Release the lever and move the seat
slightly forward or back so that it engages
properly.
Backrest
The backrests can be adjusted in four steps.
Pull the lever and apply weight to or remove
weight from the backrest as needed.
Access to 3rd row seats
Pull the lever and fold the seat forward.
The handle recess on the interior trim of the
door pillar makes climbing in easier.
Keep the footwell under the 2nd row
seats clear
When folding back the 2nd row seats, make
sure that the footwell under the 2nd row seats
is clear. Otherwise persons in the 3rd row
seats could be injured or objects damaged.◀
Warning lamp for the 2nd row seats:
lights up if the 2nd row seats are not
locked. A message also appears on
the Control Display.
3rd row seats
The 3rd row seats are divided and offer space
for two persons.
Seite 51AdjustingControls51
Online Edition for Part no. 01 40 2 918 440 - III/13
Page 54 of 345
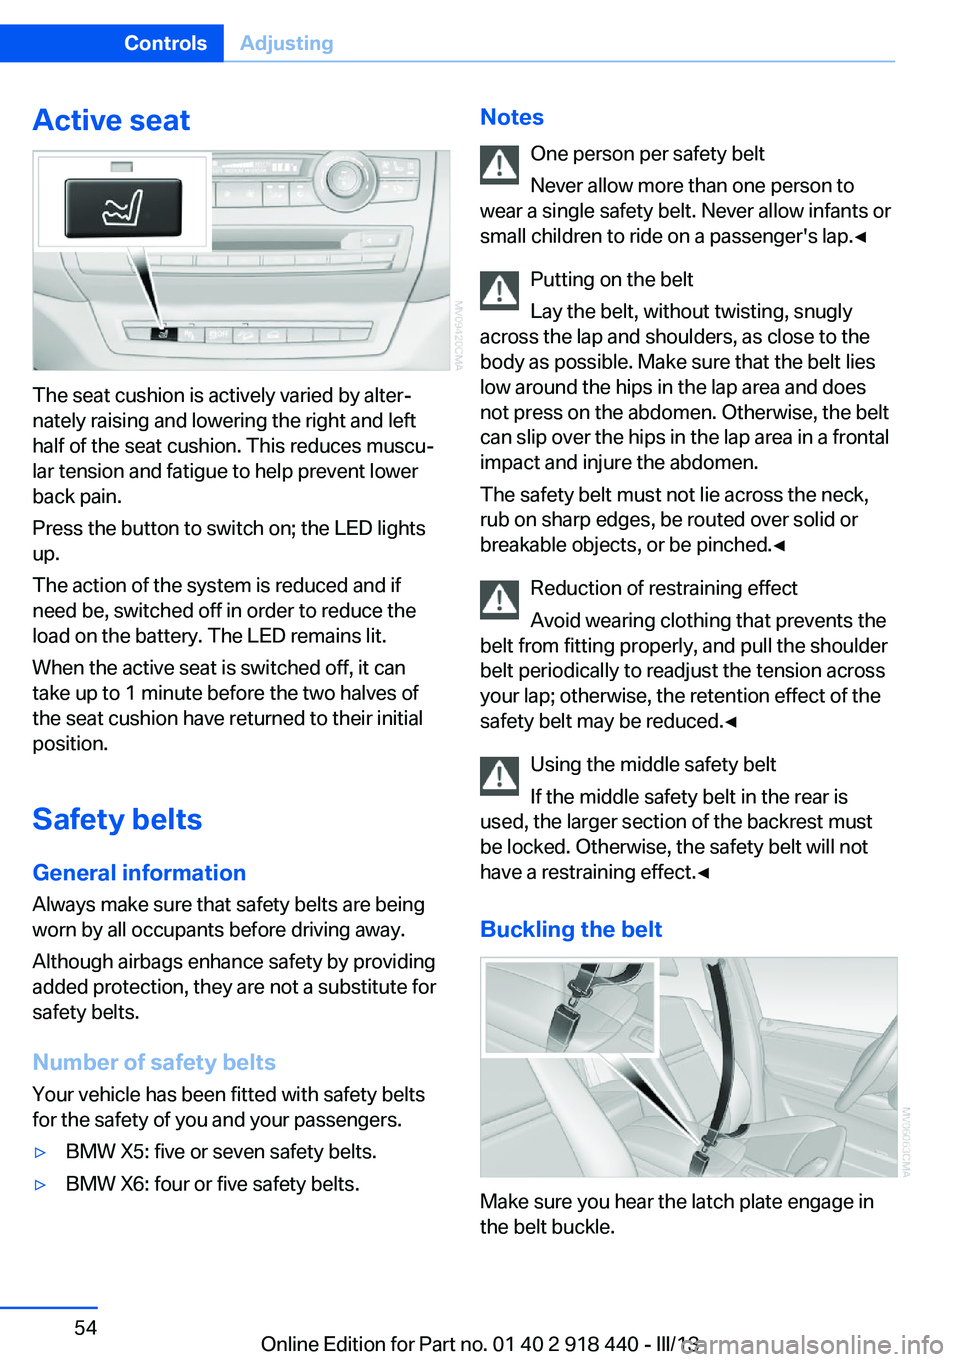
Active seat
The seat cushion is actively varied by alter‐
nately raising and lowering the right and left
half of the seat cushion. This reduces muscu‐
lar tension and fatigue to help prevent lower
back pain.
Press the button to switch on; the LED lights
up.
The action of the system is reduced and if
need be, switched off in order to reduce the
load on the battery. The LED remains lit.
When the active seat is switched off, it can
take up to 1 minute before the two halves of
the seat cushion have returned to their initial
position.
Safety belts
General information
Always make sure that safety belts are being
worn by all occupants before driving away.
Although airbags enhance safety by providing
added protection, they are not a substitute for
safety belts.
Number of safety belts
Your vehicle has been fitted with safety belts
for the safety of you and your passengers.
▷BMW X5: five or seven safety belts.▷BMW X6: four or five safety belts.Notes
One person per safety belt
Never allow more than one person to
wear a single safety belt. Never allow infants or
small children to ride on a passenger's lap.◀
Putting on the belt
Lay the belt, without twisting, snugly
across the lap and shoulders, as close to the
body as possible. Make sure that the belt lies
low around the hips in the lap area and does
not press on the abdomen. Otherwise, the belt
can slip over the hips in the lap area in a frontal
impact and injure the abdomen.
The safety belt must not lie across the neck,
rub on sharp edges, be routed over solid or
breakable objects, or be pinched.◀
Reduction of restraining effect
Avoid wearing clothing that prevents the
belt from fitting properly, and pull the shoulder
belt periodically to readjust the tension across
your lap; otherwise, the retention effect of the
safety belt may be reduced.◀
Using the middle safety belt
If the middle safety belt in the rear is
used, the larger section of the backrest must
be locked. Otherwise, the safety belt will not
have a restraining effect.◀
Buckling the belt
Make sure you hear the latch plate engage in
the belt buckle.
Seite 54ControlsAdjusting54
Online Edition for Part no. 01 40 2 918 440 - III/13
Page 60 of 345
Steering wheel
General information Do not adjust while driving
Do not adjust the steering wheel while
driving; otherwise, an unexpected movement
could result in an accident.◀
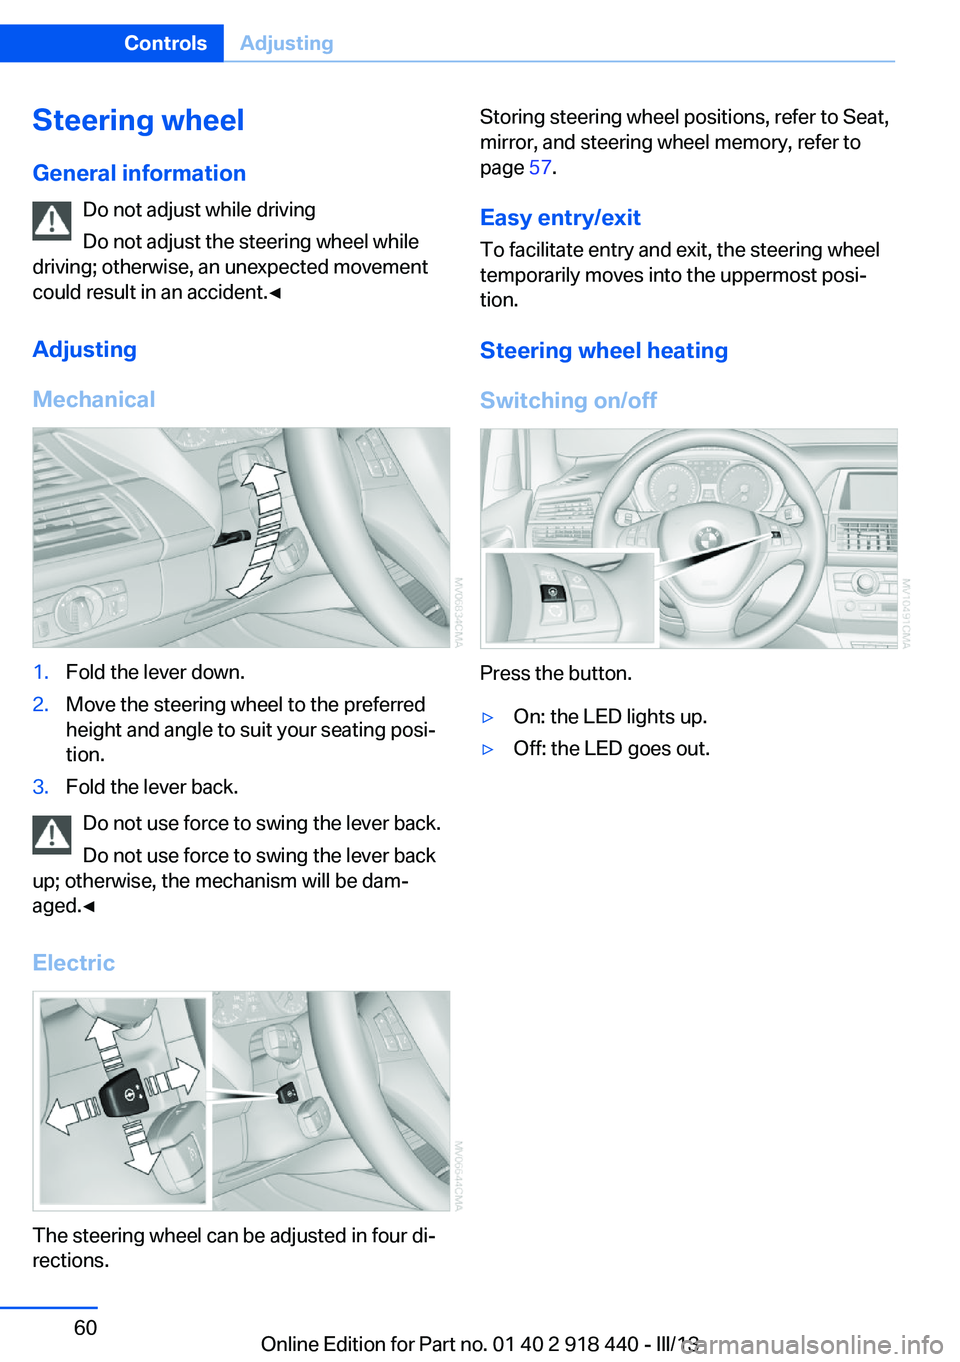
Adjusting
Mechanical1.Fold the lever down.2.Move the steering wheel to the preferred
height and angle to suit your seating posi‐
tion.3.Fold the lever back.
Do not use force to swing the lever back.
Do not use force to swing the lever back
up; otherwise, the mechanism will be dam‐
aged.◀
Electric
The steering wheel can be adjusted in four di‐
rections.
Storing steering wheel positions, refer to Seat,
mirror, and steering wheel memory, refer to
page 57.
Easy entry/exit To facilitate entry and exit, the steering wheel
temporarily moves into the uppermost posi‐
tion.
Steering wheel heating
Switching on/off
Press the button.
▷On: the LED lights up.▷Off: the LED goes out.Seite 60ControlsAdjusting60
Online Edition for Part no. 01 40 2 918 440 - III/13
Page 98 of 345
It detects a pressure loss in a tire by comparing
the rotational speeds of the individual wheels
while moving.
In the event of a pressure loss, the diameter
and therefore the rotational speed of the corre‐
sponding wheel change. This is detected and
reported as a flat tire.
Functional requirements
The system must have been initialized when
the tire inflation pressure was correct; other‐
wise, reliable signaling of a flat tire is not en‐
sured. Initialize the system after each correc‐ tion of the tire inflation pressure and afterevery tire or wheel change.
System limits Sudden tire damage
Sudden serious tire damage caused by
external influences cannot be indicated in ad‐
vance.◀
A natural, even pressure loss in all four tires
cannot be detected. Therefore, check the tire
inflation pressure regularly.
The system could be delayed or malfunction in
the following situations:▷When the system has not been initialized.▷When driving on a snowy or slippery road
surface.▷Sporty driving style: slip in the drive
wheels, high lateral acceleration.▷When driving with snow chains.
When driving with a compact wheel, the Flat
Tire Monitor is unable to function.
Status display The current status of the Flat Tire Monitor can
be displayed on the Control Display, e.g.,
whether or not the FTM is active.
1."Vehicle Info"2."Vehicle status"3. "Flat Tire Monitor"The status is displayed.
Initialization
The initialization process adopts the set infla‐
tion tire pressures as reference values for the
detection of a flat tire. Initialization is started by
confirming the inflation pressures.
Do not initialize the system when driving with
snow chains or with a compact wheel.1."Vehicle Info"2."Vehicle status"3. "Reset"4.Start the engine - do not drive away.5.Start the initialization with "Reset".6.Drive away.
The initialization is completed while driving,
which can be interrupted at any time.
The initialization automatically continues when
driving resumes.
Indication of a flat tire The warning lamp lights up red. A
message appears on the Control Dis‐
play. In addition, a signal sounds.
There is a flat tire or a major loss in tire inflation
pressure.
Reduce your speed and stop cautiously. Avoid
sudden braking and steering maneuvers.
Do not continue driving without run-flat
tires
If the vehicle is not equipped with run-flat tires
as provided at the factory, do not continue
driving. Continuing to drive could cause severe
accidents.◀
When a flat tire is indicated, DSC Dynamic Sta‐
bility Control is switched on if necessary.
Seite 98ControlsSafety98
Online Edition for Part no. 01 40 2 918 440 - III/13
Page 99 of 345
Actions in the event of a flat tire
Run-flat tires Maximum speed
You can continue driving with a damaged tire
at speeds up to 50 mph/80 km/h.
Continued driving with a flat tire
If continuing to drive with a damaged tire:1.Avoid sudden braking and steering maneu‐
vers.2.Do not exceed a speed of 50 mph/80 km/h.
If the defective tire continues to lose pres‐
sure, its position will be indicated to you on
the Control Display.3.At the next opportunity, check the inflation
pressure in all four tires.
If the tire inflation pressure in all four tires
is correct, the Flat Tire Monitor may not
have been initialized. In this case, initialize
the system.
Possible driving distance with complete loss of
tire inflation pressure:
The possible driving distance after a loss of tire
inflation pressure depends on the cargo load
and the driving style and conditions.
For a vehicle containing an average load, the
possible driving distance is ap‐
prox. 50 miles/80 km.
When the vehicle is driven with a damaged tire,
its handling characteristics change, e.g., re‐
duced lane stability during braking, a longer
braking distance, and altered self-steering
properties. Adjust your driving style accord‐
ingly. Avoid abrupt steering maneuvers or driv‐
ing over obstacles, e. g., curbs, potholes, etc.
Because the possible driving distance de‐
pends on how the vehicle is used during the
trip, the actual distance may be smaller or
greater depending on the driving speed, road
conditions, external temperature, cargo load,
etc.
Continued driving with a flat tire
Drive moderately and do not exceed a
speed of 50 mph/80 km/h.
A loss of tire inflation pressure results in a
change in the handling characteristics, e.g., re‐
duced lane stability during braking, a longer
braking distance and altered self-steering
properties.◀
Final tire failure
Vibrations or loud noises while driving
can indicate the final failure of the tire. Reduce
speed and stop; otherwise, pieces of the tire
could come loose and cause an accident. Do
not continue driving, and contact your service
center.◀
Tire Pressure Monitor TPMThe concept
The tire inflation pressure is measured in the
four mounted tires. The system notifies you if
there is a significant loss of pressure in one or
more tires.
Functional requirements The system must have been reset while the in‐
flation pressure was correct; otherwise, reliable
signaling of a flat tire is not ensured.
Always use wheels with TPM electronics to
ensure that the system will operate properly.
Reset the system after each correction of the
tire inflation pressure and after every tire or
wheel change.
System limits Sudden tire damage
Sudden serious tire damage caused by
external influences cannot be indicated in ad‐
vance.◀
The system does not operate correctly if it has
not been reset. For example, a flat tire may beSeite 99SafetyControls99
Online Edition for Part no. 01 40 2 918 440 - III/13
Page 101 of 345
▷There is a flat tire or a major loss in tire in‐
flation pressure.▷The system was not reset after a wheel
change and thus issues warnings based on
the inflation pressures initialized last.
Reduce your speed and stop cautiously. Avoid
sudden braking and steering maneuvers.
Do not continue driving without run-flat
tires
If the vehicle is not equipped with run-flat tires
as provided at the factory, do not continue
driving. Continuing to drive could cause severe
accidents.◀
When a low inflation pressure is indicated,
DSC Dynamic Stability Control is switched on
if necessary.
Actions in the event of a flat tire Run-flat tires Maximum speed
You can continue driving with a damaged tire
at speeds up to 50 mph/80 km/h.
Continued driving with a flat tire
If continuing to drive with a damaged tire:
1.Avoid sudden braking and steering maneu‐
vers.2.Do not exceed a speed of 50 mph/80 km/h.3.Check the air pressure in all four tires at
the next opportunity.
If the tire inflation pressure in all four tires
is correct, the Tire Pressure Monitor may
not have been reset. Reset the system.
Possible driving distance with complete loss of
tire inflation pressure:
The possible driving distance after a loss of tire
inflation pressure depends on the cargo load
and the driving style and conditions.
For a vehicle containing an average load, the
possible driving distance is ap‐
prox. 50 miles/80 km.
When the vehicle is driven with a damaged tire,
its handling characteristics change, e.g., re‐
duced lane stability during braking, a longer
braking distance, and altered self-steering
properties. Adjust your driving style accord‐
ingly. Avoid abrupt steering maneuvers or driv‐
ing over obstacles, e. g., curbs, potholes, etc.
Because the possible driving distance de‐
pends on how the vehicle is used during the
trip, the actual distance may be smaller or
greater depending on the driving speed, road
conditions, external temperature, cargo load,
etc.
Continued driving with a flat tire
Drive moderately and do not exceed a
speed of 50 mph/80 km/h.
A loss of tire inflation pressure results in a
change in the handling characteristics, e.g., re‐
duced lane stability during braking, a longer
braking distance and altered self-steering
properties.◀
Final tire failure
Vibrations or loud noises while driving
can indicate the final failure of the tire. Reduce
speed and stop; otherwise, pieces of the tire
could come loose and cause an accident. Do
not continue driving, and contact your service
center.◀
Message when the system was not
reset
The yellow warning lamp lights up. A
message appears on the Control Dis‐
play.
The system detected a wheel change but was
not reset.
Warnings regarding the current tire inflation
pressure are not reliable.Seite 101SafetyControls101
Online Edition for Part no. 01 40 2 918 440 - III/13