2013 BMW X5 XDRIVE 35I SPORT ACTIVITY lock
[x] Cancel search: lockPage 134 of 345
▷Right LED on, recirculated air mode: the
supply of outside air into the vehicle is per‐
manently blocked.
If the windows are fogged over, switch off the
recirculated-air mode and press the AUTO
button to utilize the condensation sensor.
Make sure that air can flow onto the wind‐
shield.
Continuous recirculated-air mode
The recirculated air mode should not be
used for an extended period of time, as the air
quality inside the vehicle deteriorates stead‐
ily.◀
Residual heat
The heat stored in the engine is used to heat
the interior.
Functional requirement
▷Up to 15 minutes after the engine has been
switched off.▷Warm engine.▷The battery is sufficiently charged.▷External temperature below 77 ℉/25 ℃.
Switching on
1.Switch off the ignition.2.Press the right-hand button.
REST appears on the display of the automatic
climate control when the residual heat utiliza‐
tion is switched on.
From radio readiness the interior temperature,
the air volume and the air distribution can be
set.
Switching off
You can select the lowest blower speed by
pressing and holding the left side. Pressing
again switches off the residual heat utilization.
REST disappears from the display of the auto‐
matic climate control.
Switching on/off the automatic
climate control
Switching off With the blower at its lowest setting,
press the left side of the button to
switch off the automatic climate control.
Switching on Press any button to switch the automatic cli‐mate control back on.
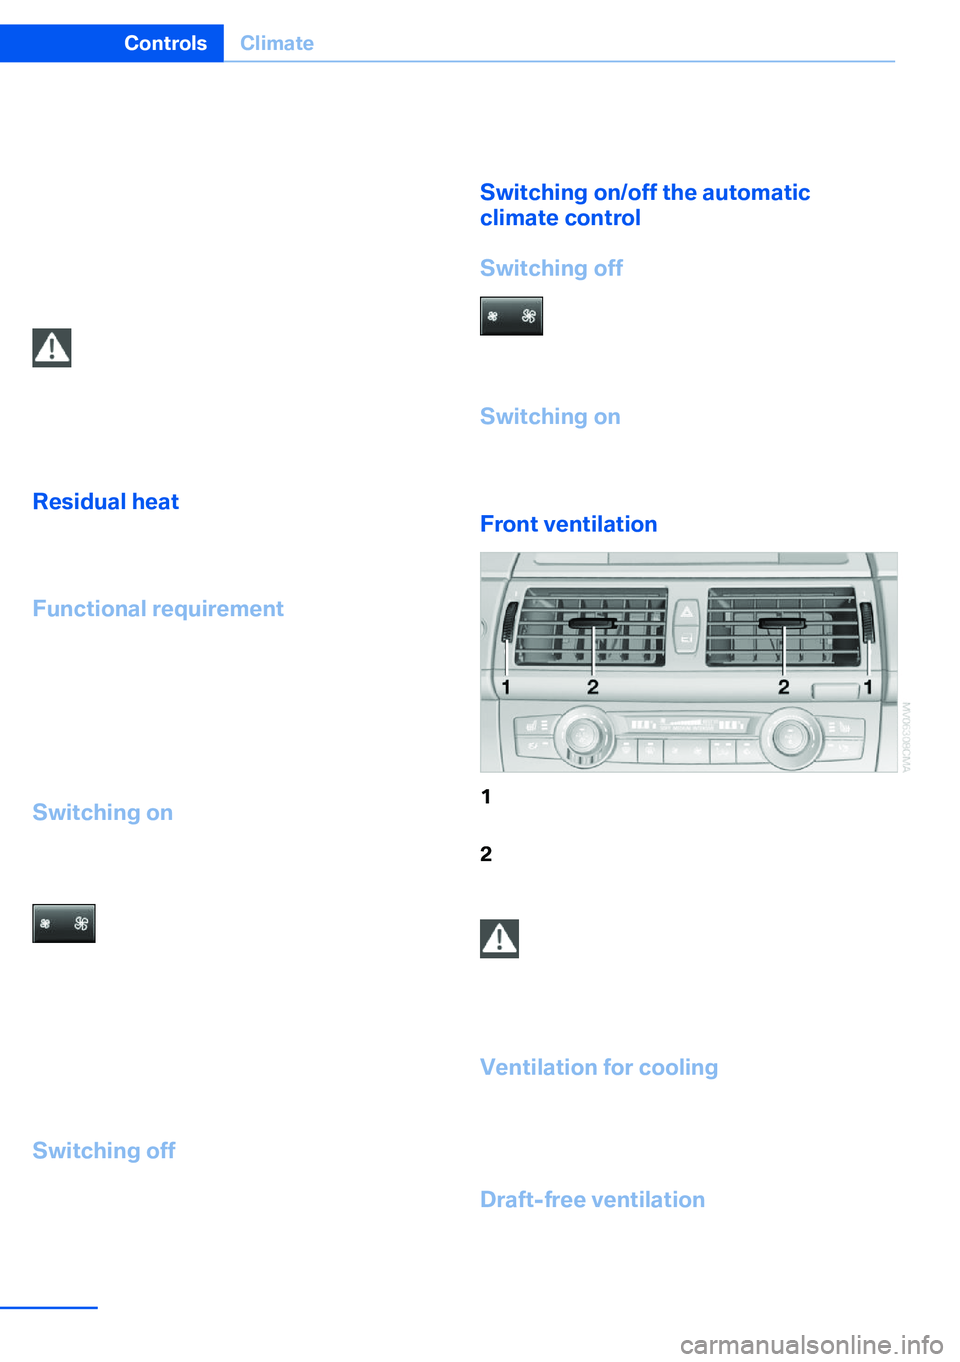
Front ventilation1Use the thumbwheels to smoothly open
and close the air vents2Use the lever to change the direction of the
air flow
Avoiding injury
Do not drop any foreign objects into the
air vents, otherwise these could be catapulted
outwards and lead to injuries.◀
Ventilation for cooling
Adjust the vents to direct the flow of cool air in
your direction, for instance if the interior has
become too warm.
Draft-free ventilation Set the air vents so that the air flows past you
and is not directed straight at you.
Seite 134ControlsClimate134
Online Edition for Part no. 01 40 2 918 395 - III/13
Page 145 of 345
Cargo area
BMW X5: luggage compartment roller
cover
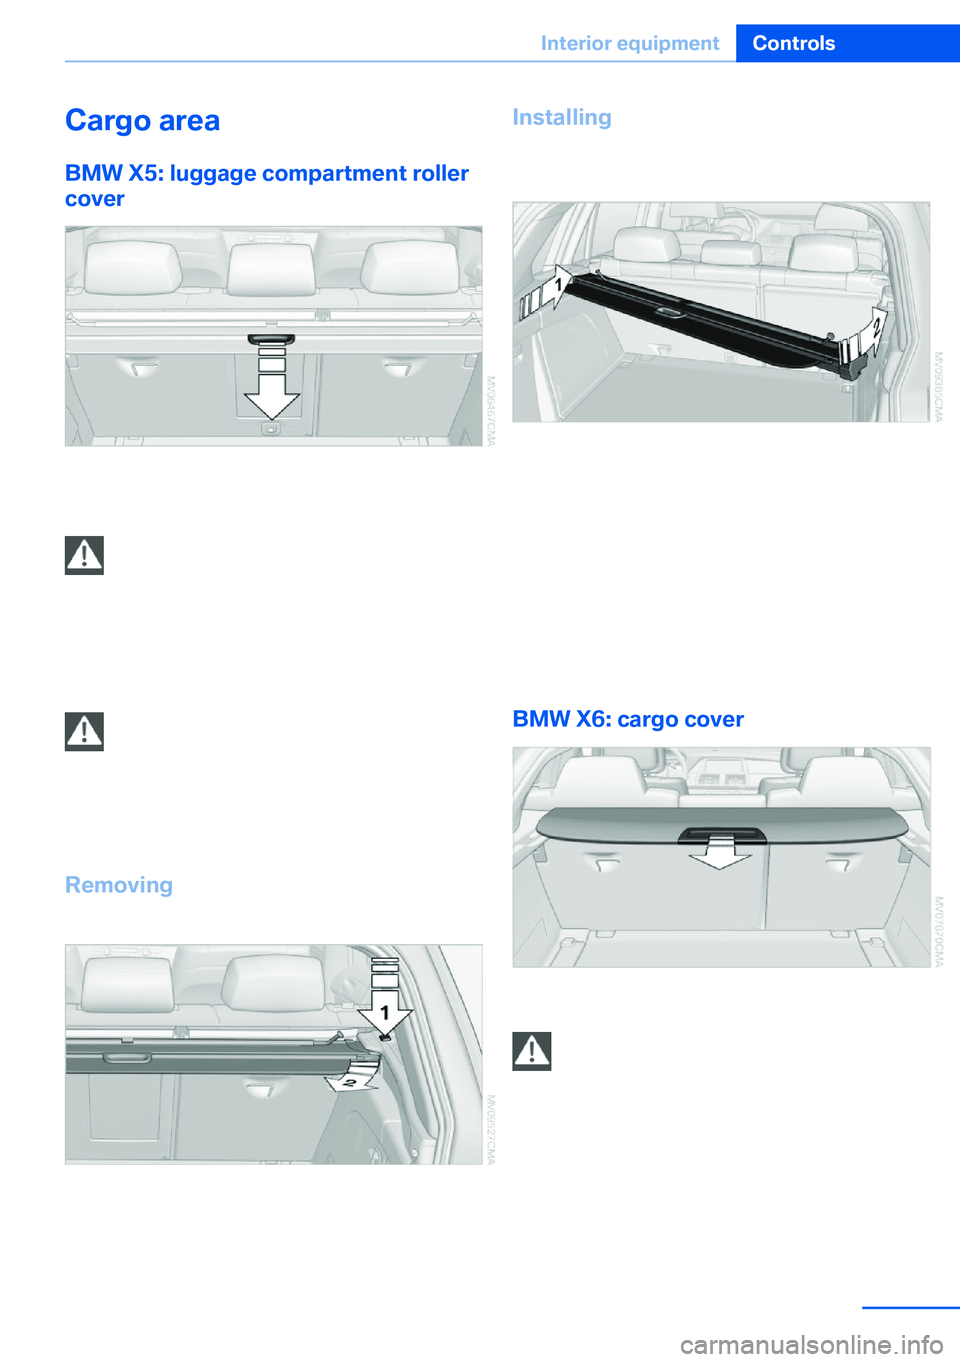
Pull out the luggage compartment roller cover
and hook it into the brackets.
Do not deposit heavy objects
Do not deposit heavy or hard objects on
the luggage compartment roller cover. Other‐
wise, they may present a danger to occupants,
for instance during braking and evasive maneu‐ vers.◀
Do not let the luggage area retractable
cover snap back
Do not let the luggage compartment retracta‐
ble cover snap back as this could damage the
cover.◀
Removing
1.Unlock the case with the button, arrow 1.2.Swing the case somewhat to the left, ar‐
row 2, and remove it.Installing
When installing, proceed in the opposite order
of removal.1.Lay the case on the left-hand side and
push it forward, arrow 1.2.Swing the case toward the inside, see ar‐
row 2.3.Push the case forward at the ends until it
engages in the two side brackets.4.Check whether the case is properly locked
in place by pulling it with a sudden move‐
ment.
BMW X6: cargo cover
Deploy cargo cover by pulling back.
Do not deposit heavy objects
Do not deposit heavy or hard objects on
the cargo cover. Otherwise, they may present
a danger to occupants, for instance during
braking and evasive maneuvers.◀
Seite 145Interior equipmentControls145
Online Edition for Part no. 01 40 2 918 395 - III/13
Page 146 of 345
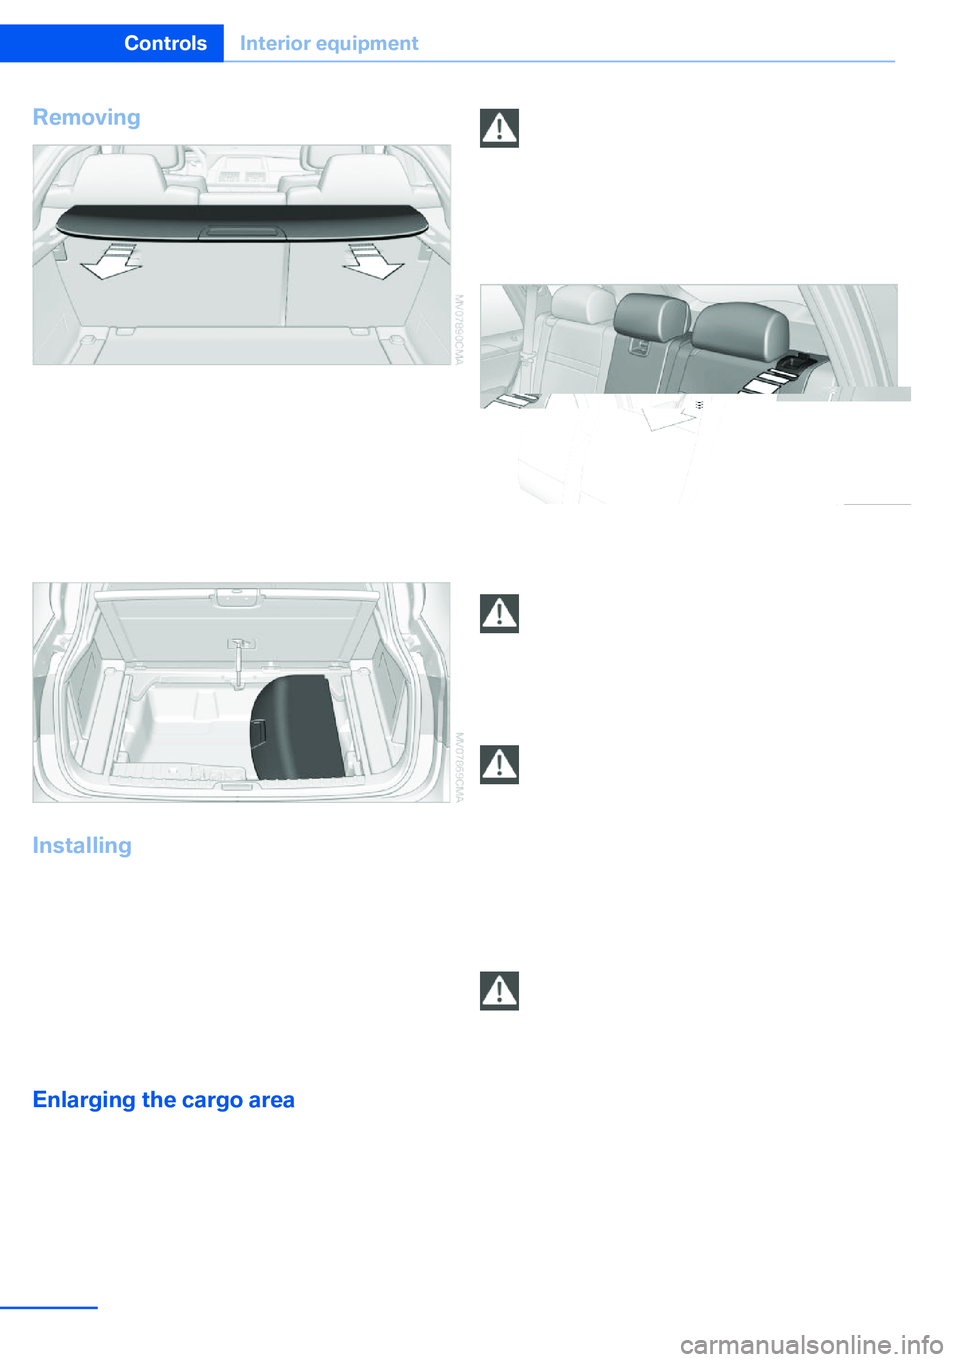
Removing1.Grasp retracted cargo cover underneath
the upper fold on both sides.2.Pull the cover back out of the side brack‐
ets.3.Depending on your vehicle's equipment
package, you can store the cover under the
floor panel in the cargo area.
Installing
When installing, proceed in the opposite order
of removal.
1.Set the cargo cover into place on the left
and right sides.2.Lift the back of the cover slightly and slide
forward until it snaps into the two side
brackets.
Enlarging the cargo area
The rear seat backrest is divided. You can fold
down both sides separately in order to expand
the cargo area.
BMW X6: before folding the rear seat
backrest forward
Before folding the rear seat backrest forward
or using the ski bag, remove beverage contain‐
ers from the cupholder and close the cu‐
pholder.◀
Reach into the recess and pull toward the
front.
Locking the backrest
Before letting passengers ride in the rear,
engage the seat backrests, locking them in
place. Otherwise, there is the danger of an ac‐
cident due to unexpected seat movement.◀
Ensure that the lock is securely engaged
When folding back the backrest, be sure
that it locks in place securely. The red warning
field in the control display disappears. If it is
not properly engaged, transported cargo could
enter the passenger compartment during brak‐
ing or evasive maneuvers and endanger the
vehicle occupants.◀
Observe the instructions concerning the
safety belt
Observe the instructions concerning the safety
belt, refer to page 54. Otherwise, personal pro‐
tection may be compromised.◀
Seite 146ControlsInterior equipment146
Online Edition for Part no. 01 40 2 918 395 - III/13
Page 148 of 345
▷Do not use force when plugging the con‐
nector into the USB interface.▷Do not connect devices such as fans or
lamps to the USB interface.▷Do not connect a USB hard drive.▷Do not use the USB interface to recharge
external devices.
Center armrest front
Storage compartment A storage compartment is located under the
armrest between the front seats and, depend‐
ing on the vehicle's equipment, also a cover for
the mobile phone cradle or the snap-in
adapter.
Details on this mobile phone cradle, refer to
page 247.
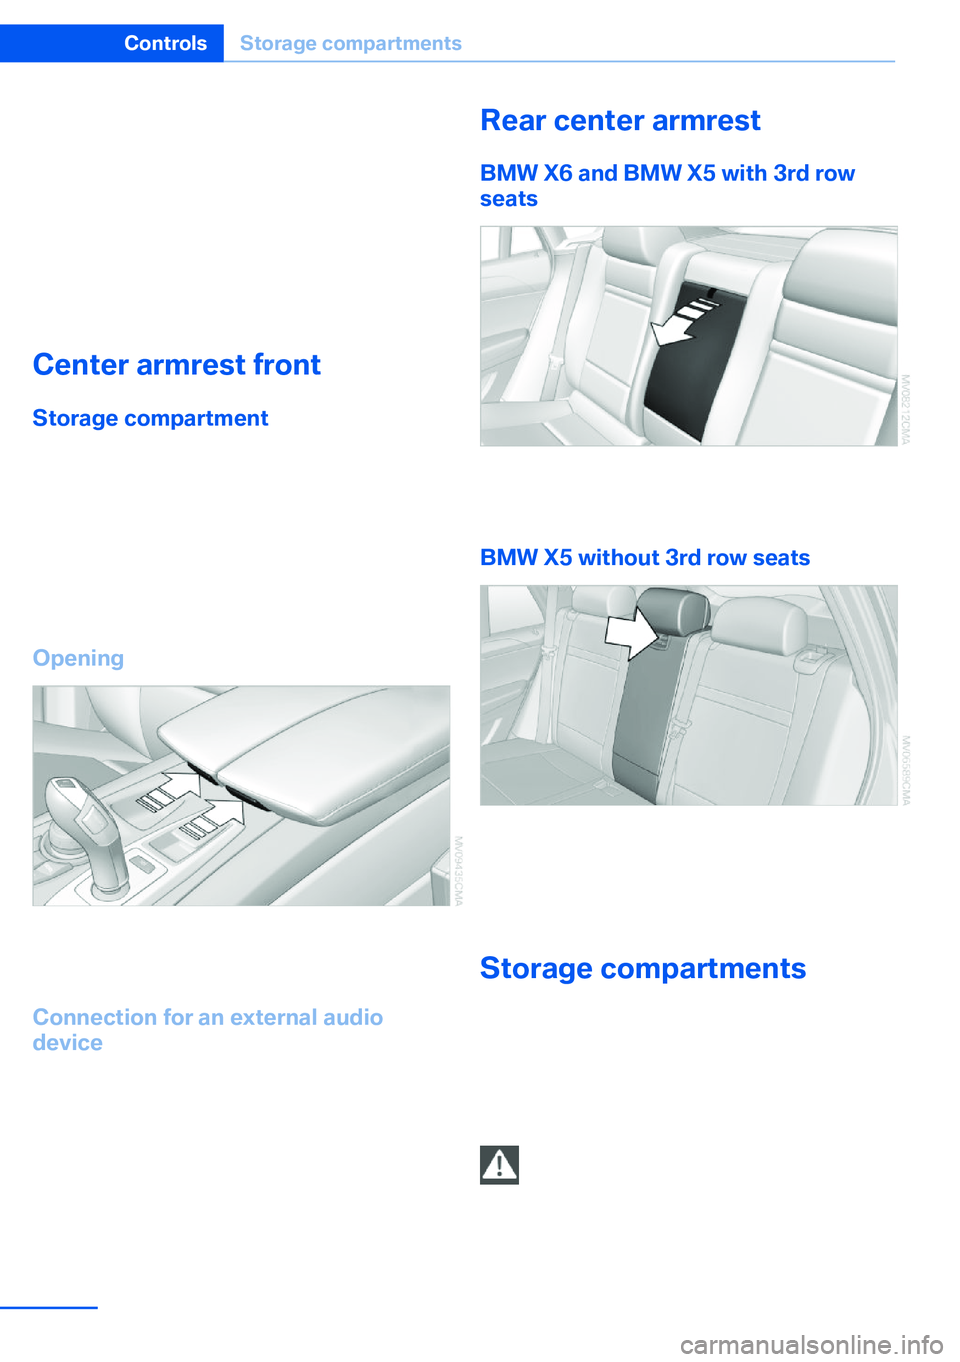
Opening
Push cover down slightly and press the button.
The cover folds upward.
Connection for an external audio
device
You can connect an external audio device such
as a CD or MP3 player and play audio tracks over the car's loudspeaker system:
▷AUX-IN port, refer to page 212.▷USB audio interface, refer to page 212.Rear center armrest
BMW X6 and BMW X5 with 3rd row
seats
Pull on the loop and fold down the center arm‐
rest.
BMW X5 without 3rd row seats
Unlock the center armrest with the button in
the lower section of the opening and fold
down.
Storage compartments Compartments are located in the doors, in the
center console in the front and rear as well as
in the rear console in the BMW X6.
Storage nets are located on the backrests of
the front seats.
Items in the storage nets
Do not stow hard or sharp-edged objects
in the storage nets; otherwise there is an in‐
creased risk of injury in the event of an acci‐ dent.◀
Seite 148ControlsStorage compartments148
Online Edition for Part no. 01 40 2 918 395 - III/13
Page 149 of 345
Clothes hooksBMW X5
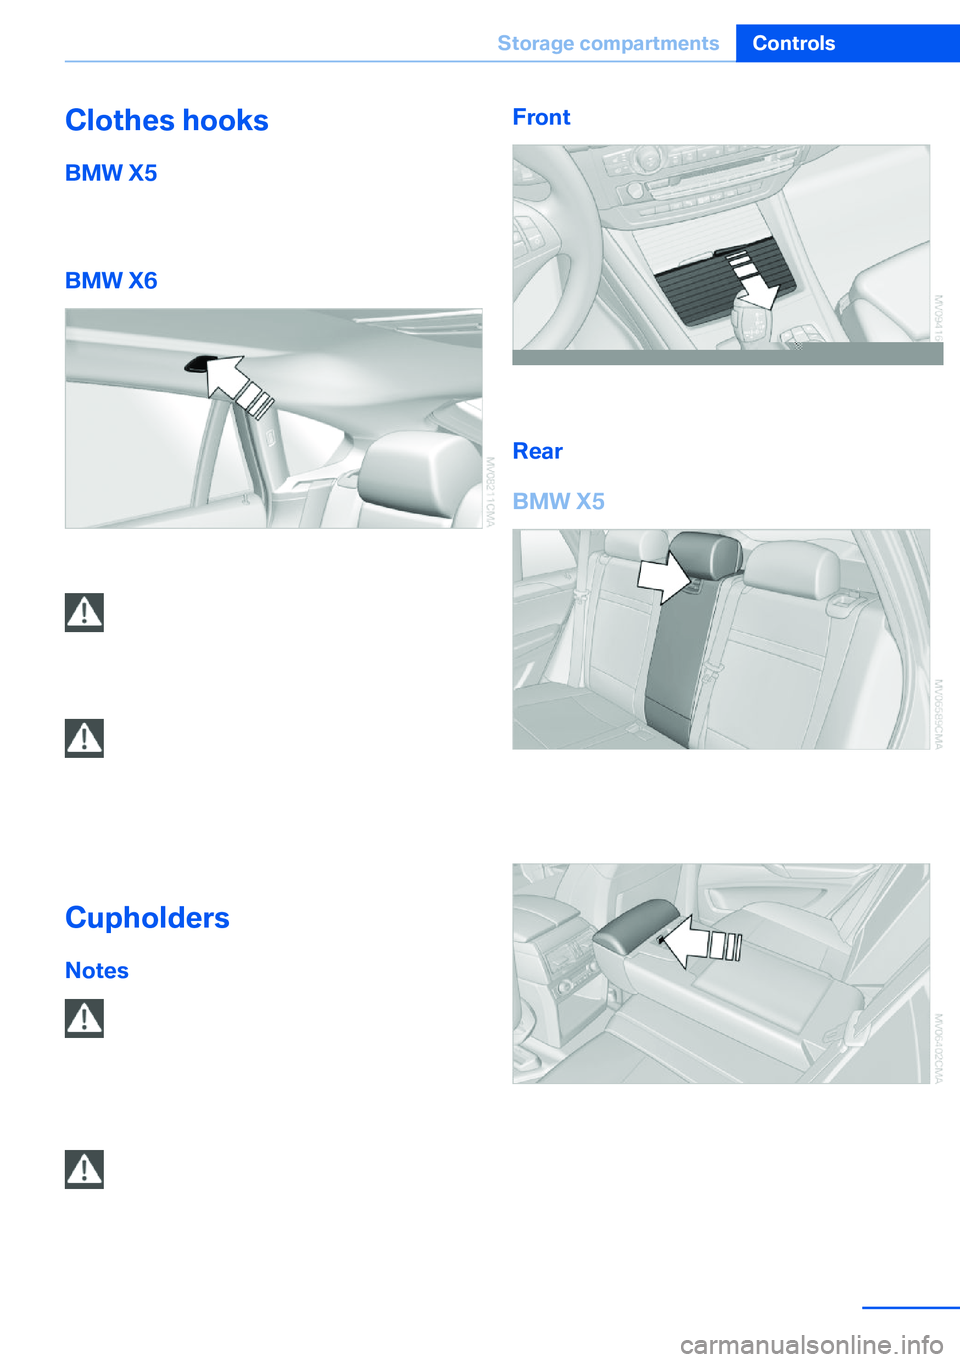
The clothes hooks are located at the grab han‐
dles in the rear.
BMW X6
To fold out, press against upper edge. Do not obstruct view
When suspending clothing from the
hooks, ensure that it will not obstruct the driv‐
er's vision.◀
No heavy objects
Do not hang heavy objects from the
hooks; otherwise, they may present a danger
to passengers during braking and evasive ma‐
neuvers.◀
Cupholders
Notes Shatter-proof containers and no hot
drinks
Use light and shatter-proof containers and do
not transport hot drinks. Otherwise, there is
the increased danger of injury in an accident.◀
Unsuitable containers
Do not forcefully push unsuitable con‐
tainers into the cupholders. This may result in
damage.◀
Front
Slide the cover back.
Rear
BMW X5
Unlock the center armrest with the button in
the lower section of the opening and fold
down.
Press the button; the cover folds forward.
With 3rd row seats:
Seite 149Storage compartmentsControls149
Online Edition for Part no. 01 40 2 918 395 - III/13
Page 150 of 345
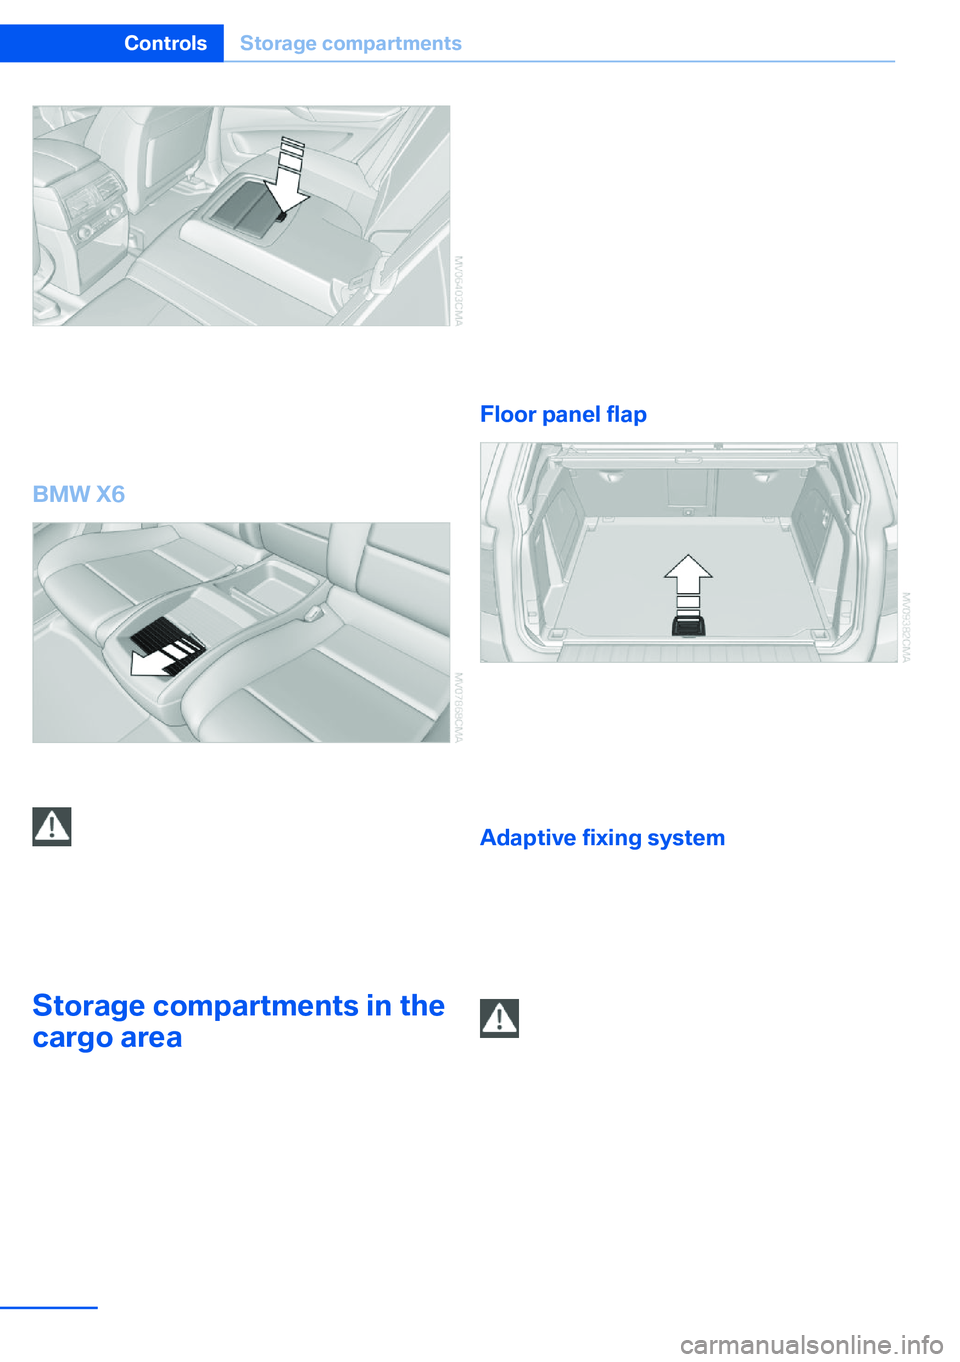
Fold down the center armrest. Press the but‐
ton; the cupholders are opened.
The cupholders of the 3rd row seats are lo‐
cated in the center console between the seats.
BMW X6
Slide the cover forward. Folding down the rear seat backrest and
using the ski bag
Remove the beverage container before folding
the rear seat backrest forward or using the ski
bag; otherwise it may cause damage.◀
Storage compartments in the
cargo area
Depending on the vehicle's equipment, the fol‐
lowing storage compartments can be found in
the cargo area:
▷Storage compartments behind the remov‐
able side panels on the right and left in the
cargo area and under the cargo floor cover,
storage compartment on the right in the
cargo area.▷Storage well under the cargo floor cover.▷Retaining straps on the left and right side
trim for fastening small objects.▷Lashing rail with lashing eyes. You can se‐
cure heavy-duty cargo straps on the lash‐
ing eyes. They can be removed at the
notches in the rails. To move the lashing
eyes, press the button.
Read and comply with the information en‐
closed with the heavy-duty cargo straps.
Floor panel flap
To access the onboard vehicle tool kit etc.
To open, swing up the flap by the handle, refer
to arrow.
The cargo floor cover is lockable.
Adaptive fixing system The adaptive fixing system is used to divide up
the cargo area. It consists of two brackets with
a telescopic rail and retaining straps. These are
guided into the two rails on the cargo area
floor.
Securing cargo
Before using the adaptive fixing system,
fold up and lock the rear seat backrest; other‐
wise, the cargo could be thrown into the vehi‐
cle interior in an accident.◀
Seite 150ControlsStorage compartments150
Online Edition for Part no. 01 40 2 918 395 - III/13
Page 151 of 345
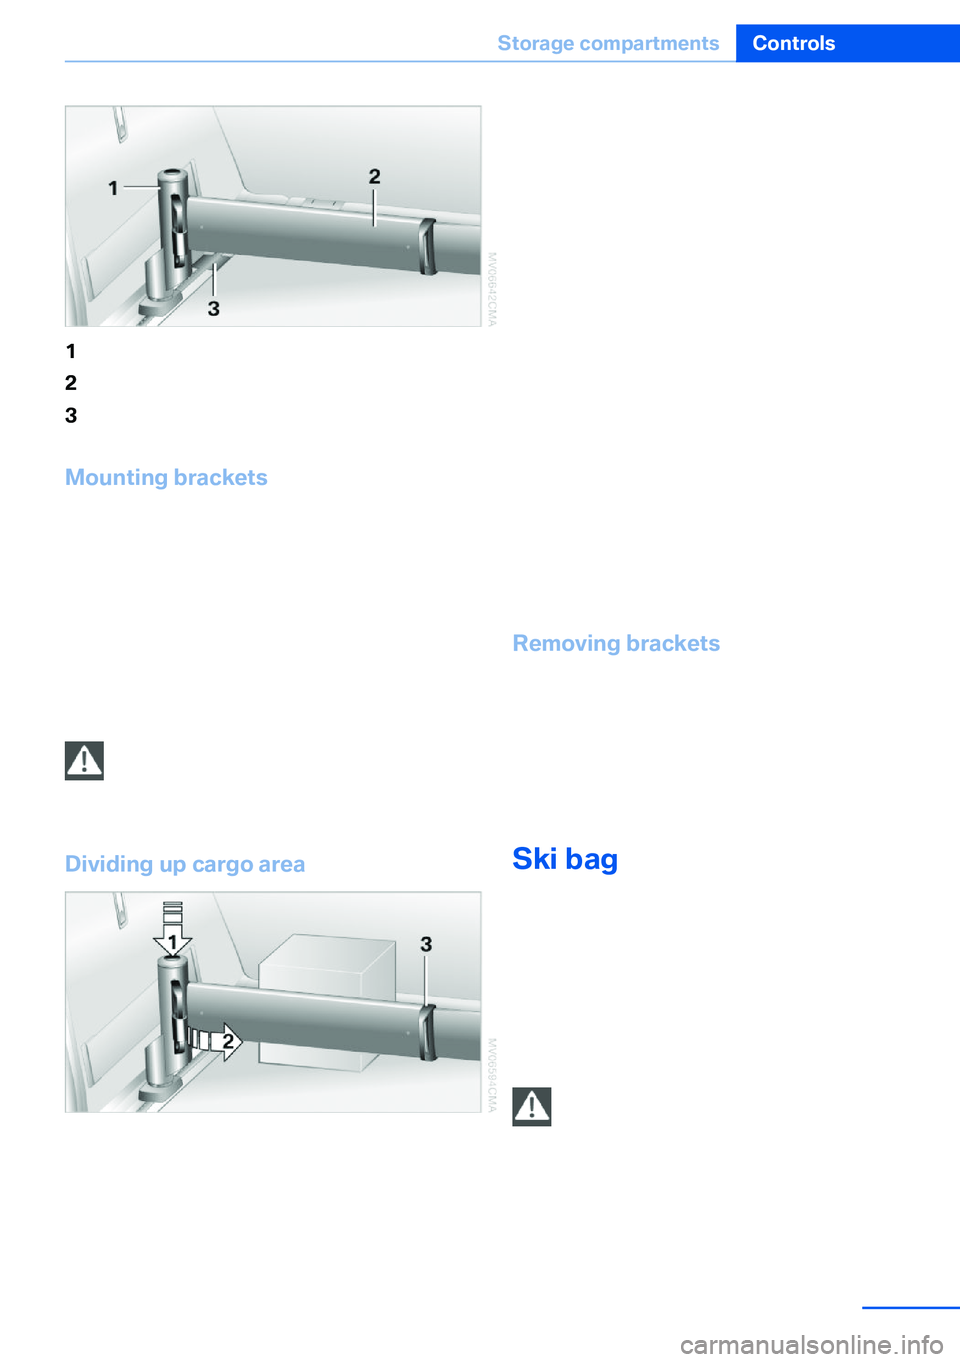
1Brackets2Telescopic rail3Notch in the cargo area rail
Mounting brackets
The two brackets are connected with a tele‐
scopic rail.
1.Insert the brackets at the respective notch
in the rail on the cargo area floor.2.Press down the brackets to push them into
the desired position.3.Check the firm seating of the brackets.
They must be clearly heard to engage.
No cargo on brackets
Do not lay cargo on the brackets, as oth‐
erwise they could be unlocked.◀
Dividing up cargo area
The cargo can be positioned as follows:
▷Between the rear seat backrest and the
telescopic rail▷Between the telescopic rail and the retain‐
ing strapPositioning cargo between telescopic rail and
retaining strap:1.Lay the cargo on the telescopic rail. Press
the button, arrow 1, and route the retaining
strap around the cargo, arrow 2.2.Hook the retaining strap into the mount 3
on the telescopic rail.3.Press the button of the bracket, arrow 1.
The retaining strap is tensioned.
It is also possible to hook the two retaining
straps onto each other.
When the adaptive fixing system is no longer
needed, unhook the retaining strap and guide
it back into the bracket holding the hook to
prevent damage and injury.
Then slide the fastening system toward the
front in order to permit the best possible use of
the cargo area.
Removing brackets Press down the brackets, slide them up to the
notches of the rails and remove them.
Depending on the vehicle's equipment, the adaptive fixing system can be stored under thecargo floor panel in the cargo area.
Ski bag
The ski bag is designed for safe, clean trans‐
port of up to 4 pairs of standard skis or up to
2 snowboards.
Skis with a length of up to 6 ft/2.10 m can be
stowed using the ski bag. When stowing skis
with a length of 6 ft/2.10 m, the capacity of the
ski bag is reduced as the bag narrows.
Folding in display screen
Before loading the ski bag, fold in the
display screen of the DVD systems in the rear;
otherwise, the display screen could be dam‐
aged.◀
Seite 151Storage compartmentsControls151
Online Edition for Part no. 01 40 2 918 395 - III/13
Page 181 of 345
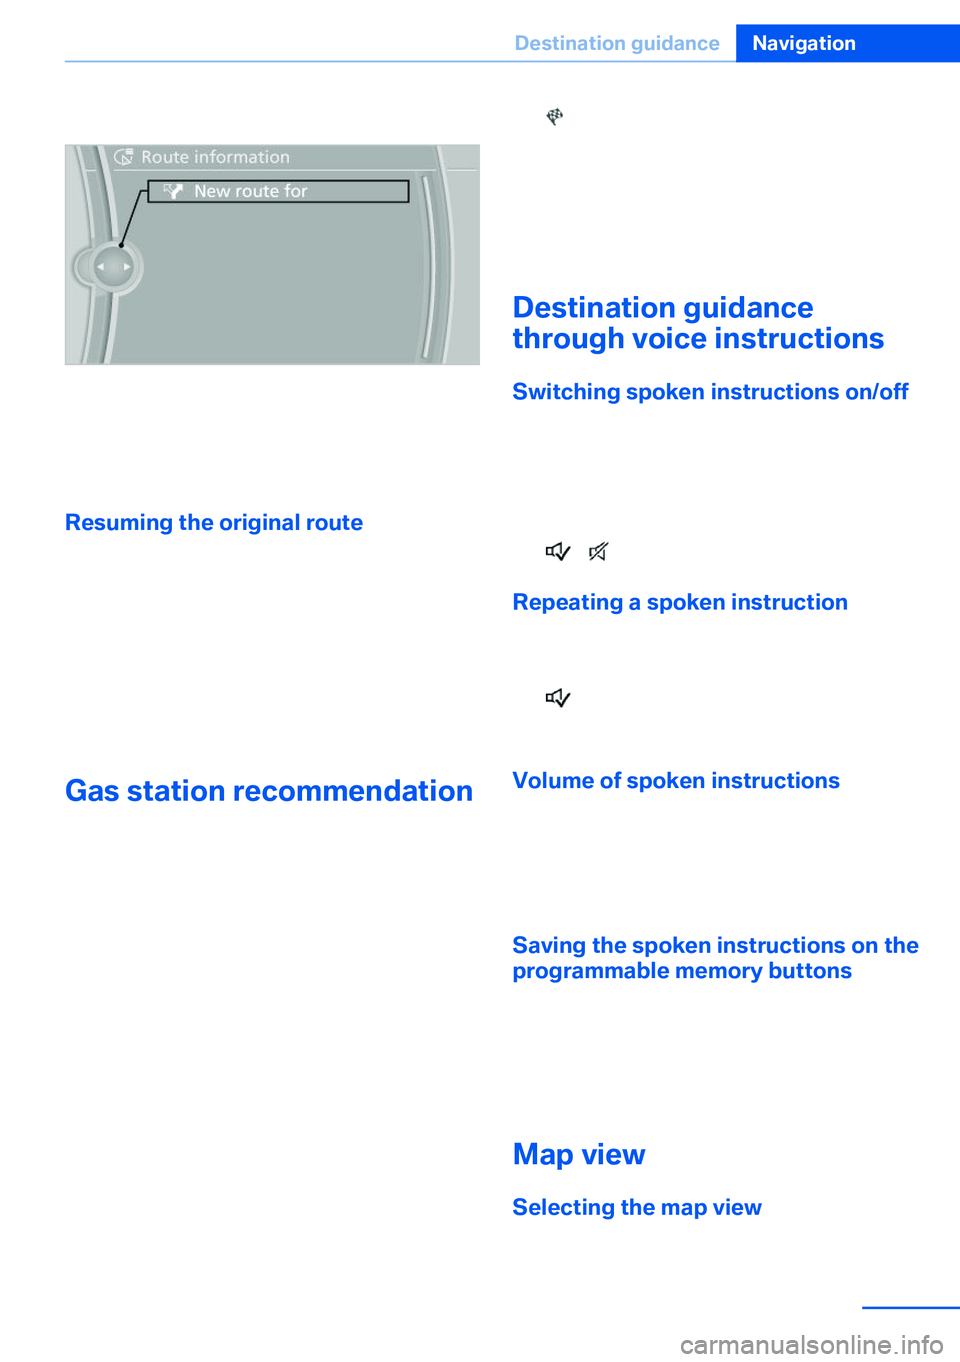
3."New route for"4.Turn the controller. Enter the number of
kilometers within which you would like to
return to the original route.5.Press the controller.
Resuming the original route
If the route section should no longer be by‐
passed:
1."Navigation"2."Route information"3."New route for:"4."Remove blocking"
Gas station recommendation
The remaining range is calculated and gas sta‐
tions along the route are displayed if needed.
Even with the latest navigation data, informa‐
tion on individual special destinations may
have changed; for example, gas stations might
not be in operation.
1."Navigation"2."Route information"3."Recommended refuel"
A list of the gas stations is displayed.4.Highlight a gas station.
The position of the gas station is shown on
the split screen.5.Select the gas station.6. Select the symbol.7."Start guidance": destination guidance to
the selected gas station is started.
"Add as another destination": the gas sta‐
tion is added to the route.
Destination guidance
through voice instructions
Switching spoken instructions on/off The setting is stored for the remote control
currently in use.
1."Navigation"2."Map"3. "Voice instructions"
Repeating a spoken instruction
1."Navigation"2."Map"3. Highlight the symbol.4.Press the controller twice.
Volume of spoken instructions
Turn the volume knob while giving an instruc‐
tion until the desired volume is set.
The setting is stored for the remote control
currently in use.
Saving the spoken instructions on the
programmable memory buttons
The function for switching the spoken instruc‐
tions on/off can be stored on a programmable
memory button, refer to page 23, for quick ac‐
cess.
Map view
Selecting the map view
1."Navigation"2."Map"Seite 181Destination guidanceNavigation181
Online Edition for Part no. 01 40 2 918 395 - III/13