2013 BMW X5 XDRIVE 35I buttons
[x] Cancel search: buttonsPage 223 of 345
Playing videos from CDs/
DVDs
Country codes of DVDs
Your DVD player only plays DVDs with the
coding of your home region, e.g., Europe=2.
The country codes supported by your DVD are
contained in the information on your DVD.
An overview of the coding zones:CodeRegion1USA, Canada2Japan, Europe, Middle East, South Af‐
rica3Southeast Asia4Australia, Central and South America,
New Zealand5Northwest Asia, North Africa6China
DVDs with the code 0 can be played on all de‐
vices.
Starting playback
1.Push the CD/DVD into the drive with the la‐
beled side facing upward. The CD/DVD is
automatically pulled in.▷Playback begins automatically after a
few seconds.▷Otherwise: select "DVD".2.If the DVD control or the DVD-specific
menu is displayed when a DVD is inserted,
use the remote control buttons for menu
navigation to select the desired option.
Or:
Press the button on the CD/DVD
player.
You can control the playback with the buttons
on the CD/DVD player or the DVD control.
Video CDs (VCDs) and Super Video CDs
(SVCDs) can only be played if they do not have
a DVD-specific menu.
Eject CD/DVD
Press the button on the CD/DVD player.
The DVD emerges slightly from the drive.
DVD control With the DVD control, you can select the title
and chapter, open the DVD-specific menu, and
operate functions such as Language, Fast for‐
ward and Reverse or Freeze frame.
A DVD can briefly deactivate functions of the
DVD control, under certain circumstances
while the entire DVD is being played. It is not
possible to operate the DVD control under
these circumstances. In this case, try to make
the selection using the DVD-specific menu.
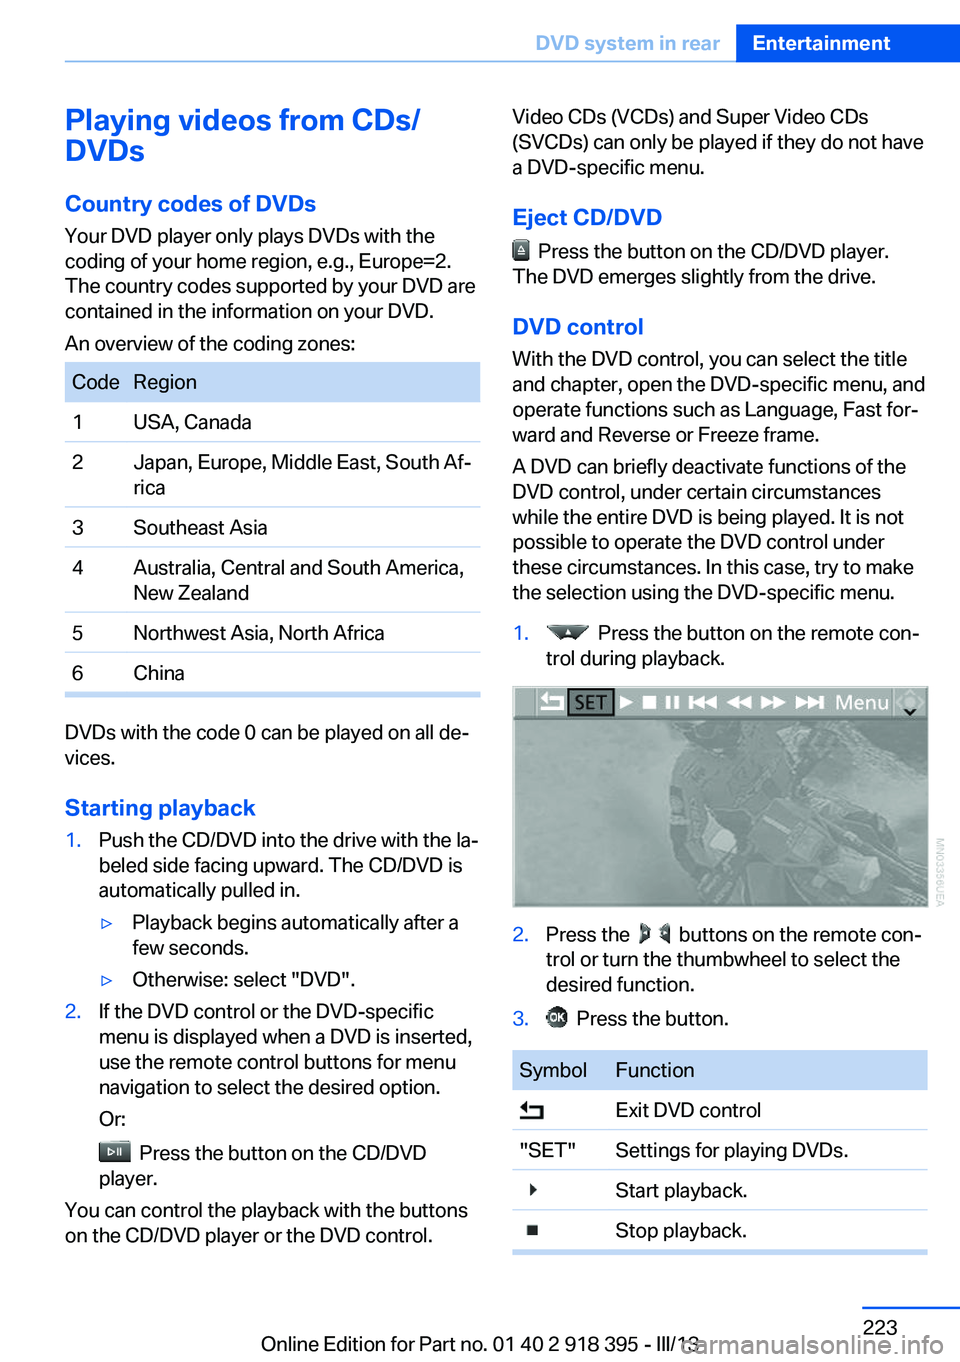
1. Press the button on the remote con‐
trol during playback.2.Press the buttons on the remote con‐
trol or turn the thumbwheel to select the
desired function.3. Press the button.SymbolFunction Exit DVD control"SET"Settings for playing DVDs. Start playback. Stop playback.Seite 223DVD system in rearEntertainment223
Online Edition for Part no. 01 40 2 918 395 - III/13
Page 225 of 345

Making settings for DVD1. Press the button during playback.2.Make the settings with the remote control:▷"Video settings":▷"Brightness", "Color", and "Contrast"
on the screen.▷After switching to the top window, you
can change other settings.
"Language": the system language of
the DVD system
"Display": background brightness of
the screen.▷"Tone":▷"Treble / Bass" and "Balance": sepa‐
rately adjustable for the left and right
headphones and the infrared head‐
phones.▷"Reset": the settings are reset to the
default values.▷"DVD format":▷"Standard"▷"Zoom": full-screen playback.▷"Language": language of the DVD play‐
back. The language advances one setting
each time the menu item is selected.▷"Subtitles": language of the subtitles or
turn off the subtitles.▷"Title": select individual tracks on the DVD.▷"Angle of view": camera angle.
Information or symbols that appear during
the playback of a film generally point outdifferent camera angles. These are usually
only briefly available.▷"Menu": open the DVD-specific menu.▷"Return": exit the menu, or:
Press the buttons on the remote con‐
trol.
Many DVDs offer dialogs and subtitles in vari‐
ous languages or scene descriptions for the
hearing impaired. These functions are stored
on the DVD.
With some DVDs, it is only possible to select
language, subtitles, camera angle, or title by
using the DVD-specific menu. Consult the in‐
formation accompanying your DVD.
Opening the DVD-specific menu
Additional functions may be available on DVDs.
It is thus possible, for example, to select from
among several possible actions or to access
information about the film.
1. Press the button on the remote con‐
trol during playback.2.Select "Menu".3. Press the button.
On some DVDs, you can use "Main menu"
and "Title" to access additional menus in
which you can select music scenes, for ex‐
ample.
To make a selection:
1. Select the symbol.2. Press the button until the desired func‐
tion is selected.3.Select the arrow.4. Press the button.
To return to the start menu:
1.Select the arrow.2. Press the button.
You can also select language, subtitles, cam‐
era angle, or title in the DVD-specific menu.
Seite 225DVD system in rearEntertainment225
Online Edition for Part no. 01 40 2 918 395 - III/13
Page 227 of 345
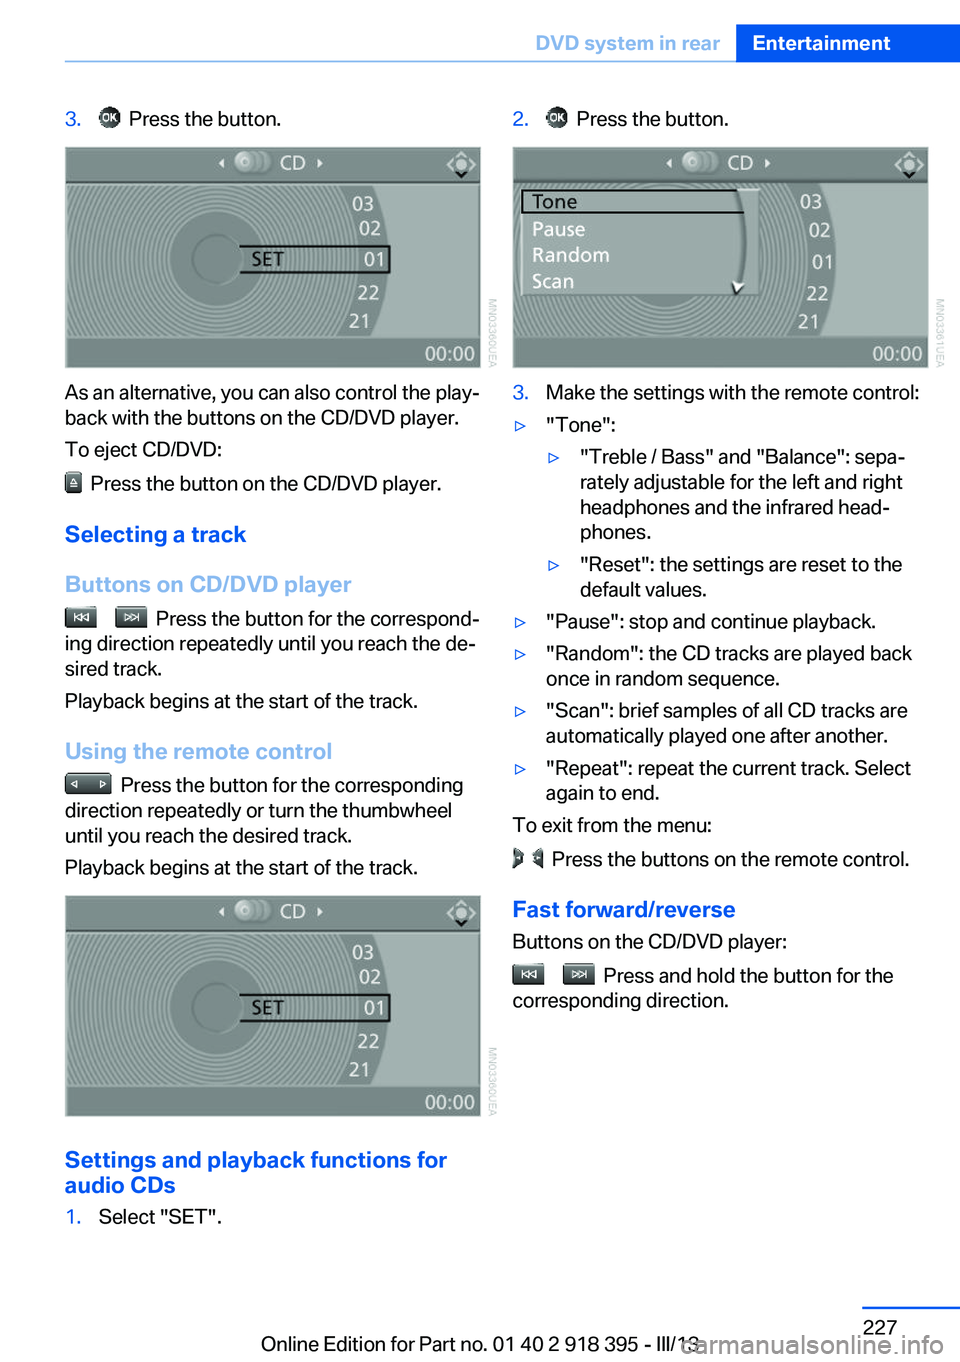
3. Press the button.
As an alternative, you can also control the play‐
back with the buttons on the CD/DVD player.
To eject CD/DVD:
Press the button on the CD/DVD player.
Selecting a track
Buttons on CD/DVD player
Press the button for the correspond‐
ing direction repeatedly until you reach the de‐
sired track.
Playback begins at the start of the track.
Using the remote control
Press the button for the corresponding
direction repeatedly or turn the thumbwheel
until you reach the desired track.
Playback begins at the start of the track.
Settings and playback functions for
audio CDs
1.Select "SET".2. Press the button.3.Make the settings with the remote control:▷"Tone":▷"Treble / Bass" and "Balance": sepa‐
rately adjustable for the left and right
headphones and the infrared head‐
phones.▷"Reset": the settings are reset to the
default values.▷"Pause": stop and continue playback.▷"Random": the CD tracks are played back
once in random sequence.▷"Scan": brief samples of all CD tracks are
automatically played one after another.▷"Repeat": repeat the current track. Select
again to end.
To exit from the menu:
Press the buttons on the remote control.
Fast forward/reverse Buttons on the CD/DVD player:
Press and hold the button for the
corresponding direction.
Seite 227DVD system in rearEntertainment227
Online Edition for Part no. 01 40 2 918 395 - III/13
Page 228 of 345
Compressed audio files
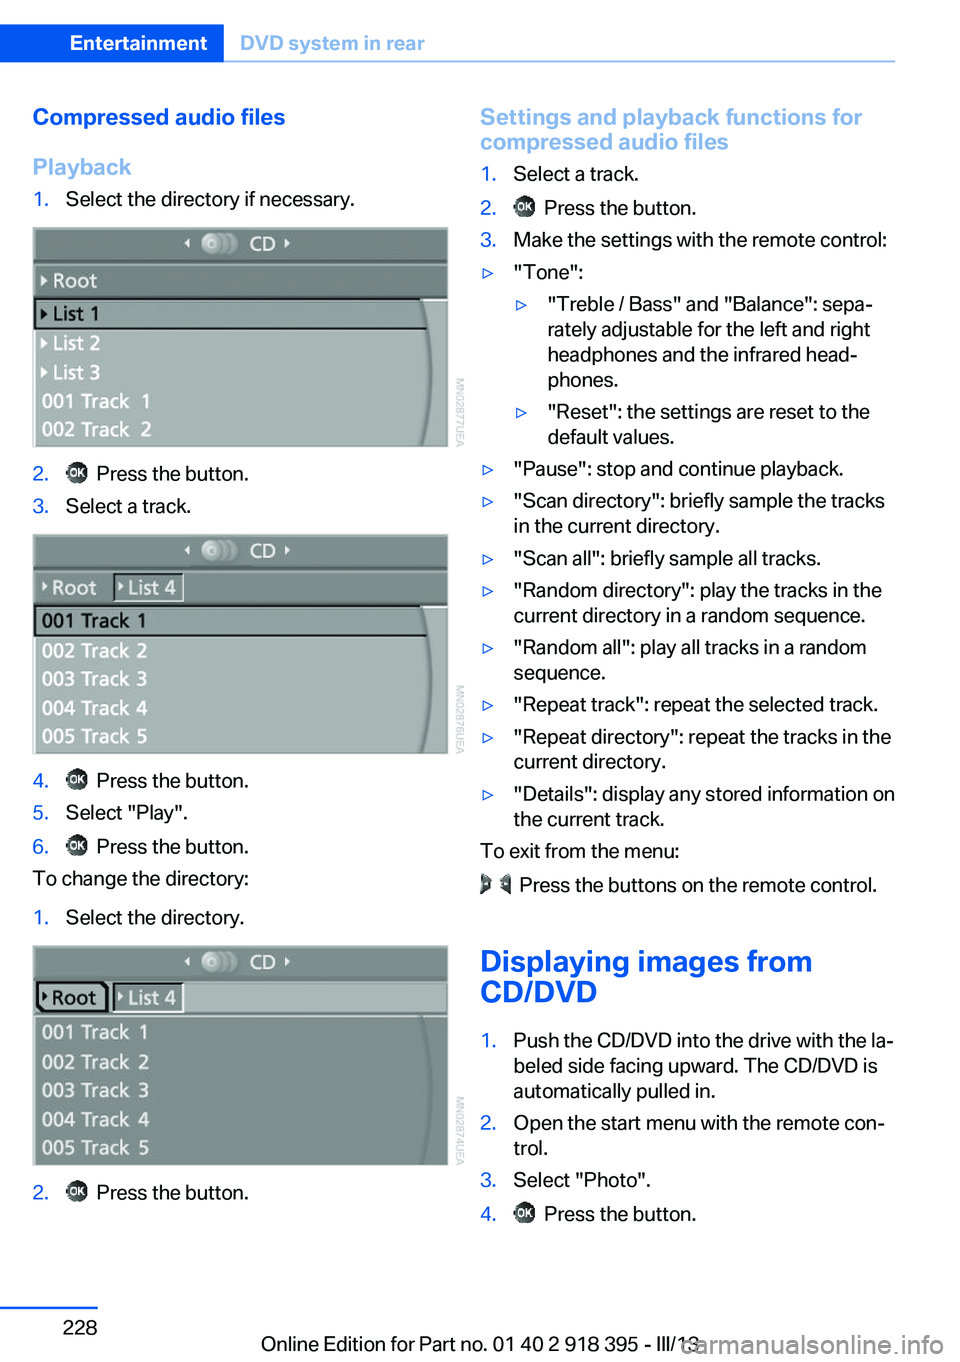
Playback1.Select the directory if necessary.2. Press the button.3.Select a track.4. Press the button.5.Select "Play".6. Press the button.
To change the directory:
1.Select the directory.2. Press the button.Settings and playback functions for
compressed audio files1.Select a track.2. Press the button.3.Make the settings with the remote control:▷"Tone":▷"Treble / Bass" and "Balance": sepa‐
rately adjustable for the left and right
headphones and the infrared head‐
phones.▷"Reset": the settings are reset to the
default values.▷"Pause": stop and continue playback.▷"Scan directory": briefly sample the tracks
in the current directory.▷"Scan all": briefly sample all tracks.▷"Random directory": play the tracks in the
current directory in a random sequence.▷"Random all": play all tracks in a random
sequence.▷"Repeat track": repeat the selected track.▷"Repeat directory": repeat the tracks in the
current directory.▷"Details": display any stored information on
the current track.
To exit from the menu:
Press the buttons on the remote control.
Displaying images from
CD/DVD
1.Push the CD/DVD into the drive with the la‐
beled side facing upward. The CD/DVD is
automatically pulled in.2.Open the start menu with the remote con‐
trol.3.Select "Photo".4. Press the button.Seite 228EntertainmentDVD system in rear228
Online Edition for Part no. 01 40 2 918 395 - III/13
Page 229 of 345

Displaying overview1.Select the subdirectory if necessary.2.Select "Overview".3. Press the button.
It may take some time until the overview is
completely displayed.
If a symbol appears instead of an image, the
image cannot be displayed in the overview.
Displaying images
1.Use the buttons or the thumbwheel of the
remote control to select an image.2. Press the button.3.Displaying images:▷Scroll using the menu navigation but‐
tons of the remote control.▷Display the slide show: turn the thumb‐
wheel to set the display duration of the
images.
Stop the slide show: select "Stop".Adjusting1. Press the button.2.Select a menu item:SymbolFunction Return to the photo menu."SET"Adjust the "Display".
"Language": after switching to
the top window, the system lan‐
guage can be changed. Start the slide show. Display the first/last image of
the current directory. Rotate the image by 90°."Overview"Change to the image overview.
Ending display
1. Press the button.2. Select the symbol.3. Press the button.
Eject CD/DVD
Press the button on the CD/DVD player.
Seite 229DVD system in rearEntertainment229
Online Edition for Part no. 01 40 2 918 395 - III/13
Page 232 of 345
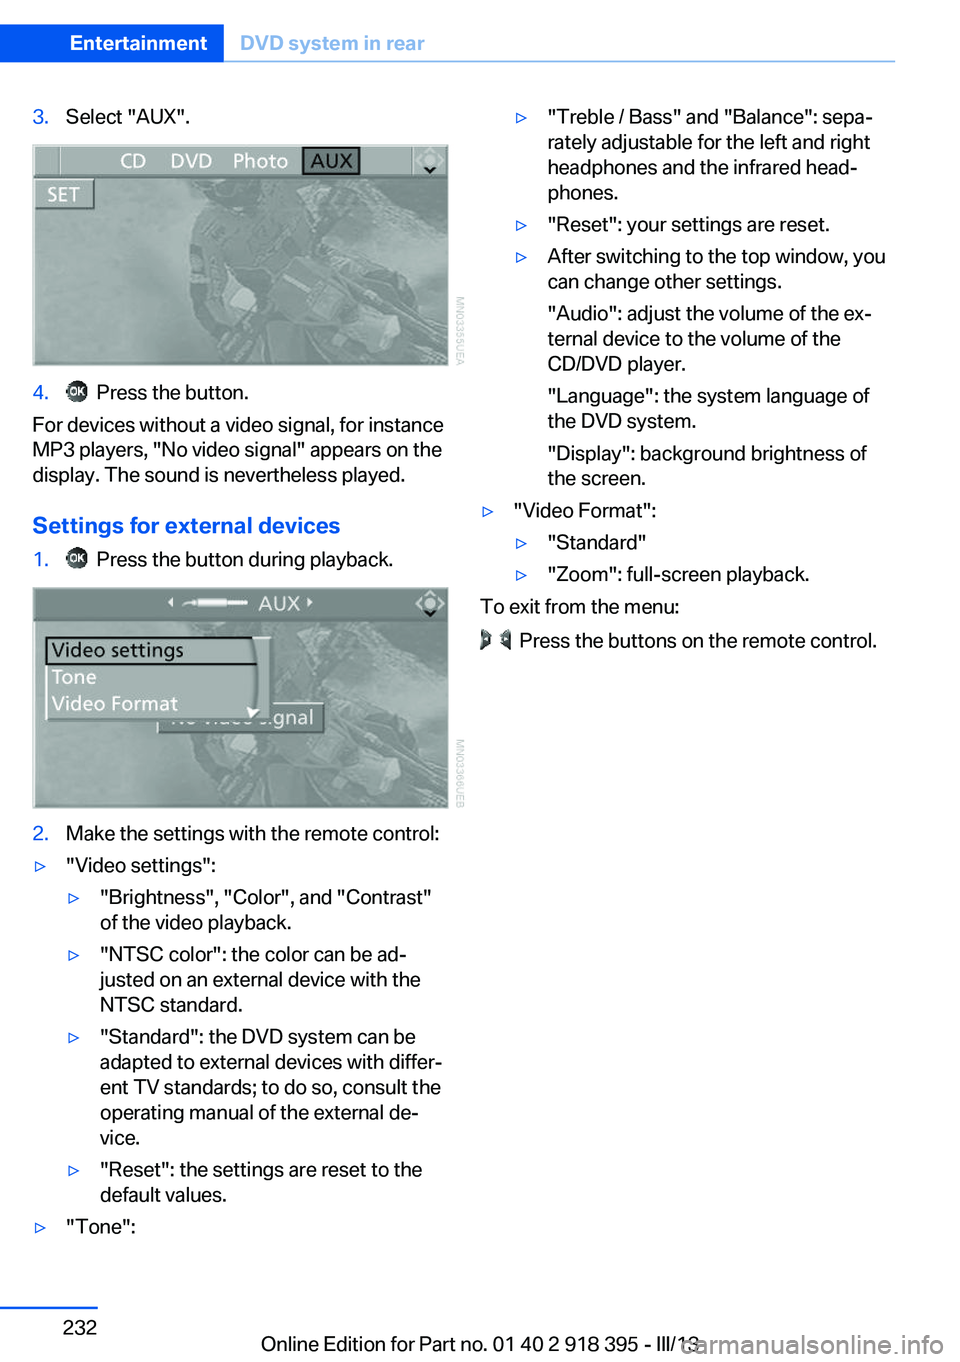
3.Select "AUX".4. Press the button.
For devices without a video signal, for instance
MP3 players, "No video signal" appears on the
display. The sound is nevertheless played.
Settings for external devices
1. Press the button during playback.2.Make the settings with the remote control:▷"Video settings":▷"Brightness", "Color", and "Contrast"
of the video playback.▷"NTSC color": the color can be ad‐
justed on an external device with the
NTSC standard.▷"Standard": the DVD system can be
adapted to external devices with differ‐
ent TV standards; to do so, consult the
operating manual of the external de‐
vice.▷"Reset": the settings are reset to the
default values.▷"Tone":▷"Treble / Bass" and "Balance": sepa‐
rately adjustable for the left and right
headphones and the infrared head‐
phones.▷"Reset": your settings are reset.▷After switching to the top window, you
can change other settings.
"Audio": adjust the volume of the ex‐
ternal device to the volume of the
CD/DVD player.
"Language": the system language of
the DVD system.
"Display": background brightness of
the screen.▷"Video Format":▷"Standard"▷"Zoom": full-screen playback.
To exit from the menu:
Press the buttons on the remote control.
Seite 232EntertainmentDVD system in rear232
Online Edition for Part no. 01 40 2 918 395 - III/13
Page 247 of 345
Snap-in adapter
General information More information on compatible snap-in
adapters that support the functions of the mo‐
bile phone is available at the service center.
Notes At high temperatures, the charging function of
the mobile phone may be limited and functions
may not be executed.
When using the mobile phone via the vehicle,
note the operating instructions of the mobile
phone.
Installation position
In the center armrest.
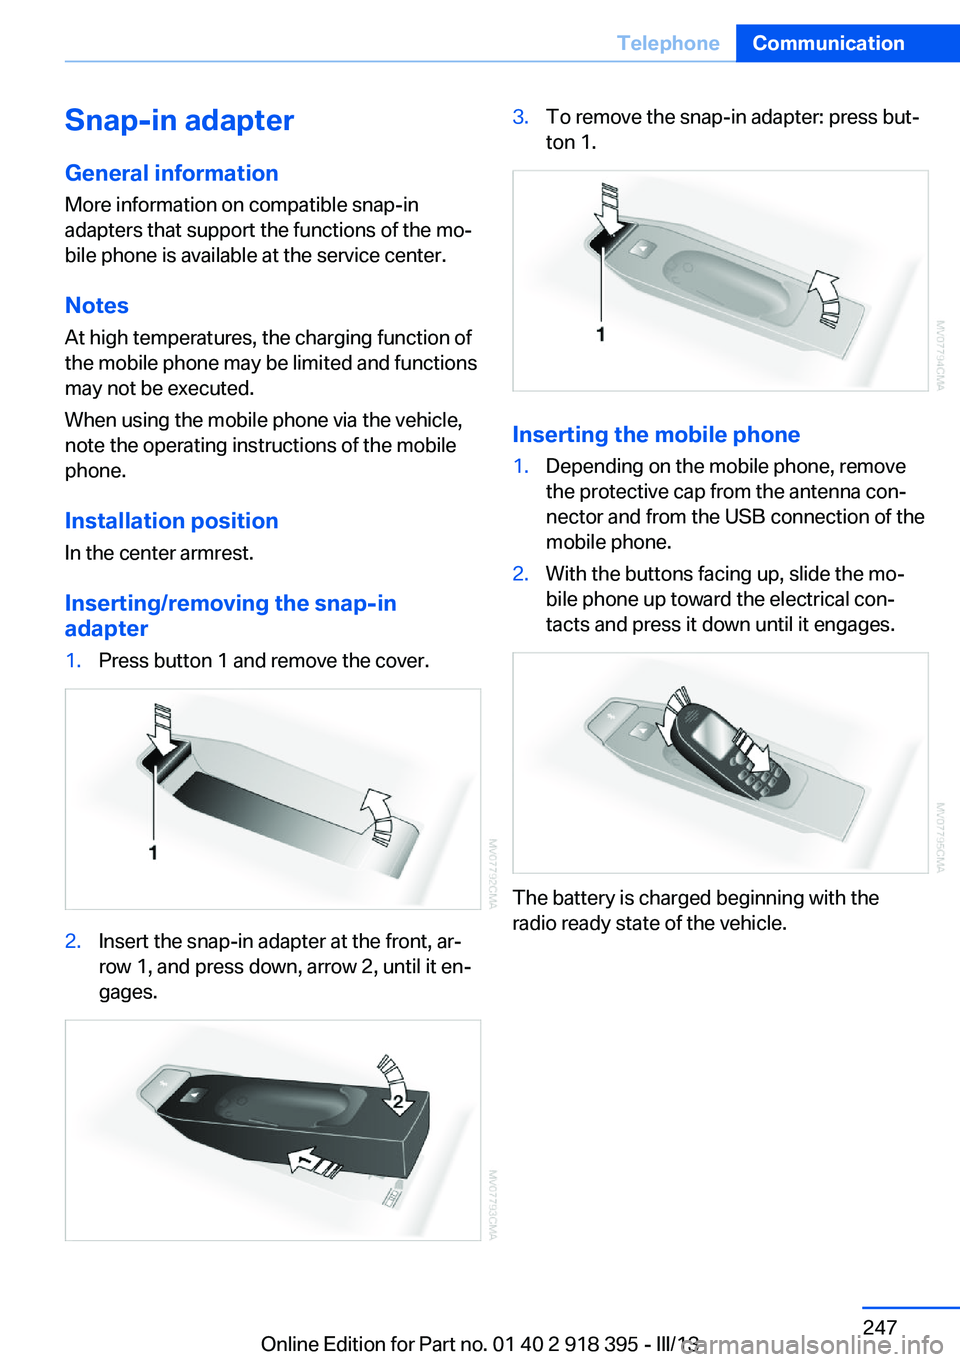
Inserting/removing the snap-in
adapter1.Press button 1 and remove the cover.2.Insert the snap-in adapter at the front, ar‐
row 1, and press down, arrow 2, until it en‐
gages.3.To remove the snap-in adapter: press but‐
ton 1.
Inserting the mobile phone
1.Depending on the mobile phone, remove
the protective cap from the antenna con‐
nector and from the USB connection of the
mobile phone.2.With the buttons facing up, slide the mo‐
bile phone up toward the electrical con‐
tacts and press it down until it engages.
The battery is charged beginning with the
radio ready state of the vehicle.
Seite 247TelephoneCommunication247
Online Edition for Part no. 01 40 2 918 395 - III/13
Page 337 of 345
Interior rearview mirror, auto‐matic dimming 59
Interior rearview mirror, com‐ pass 141
Interior temperature, setting, automatic climate con‐
trol 130
Intermediate destina‐ tions 177
Internet page 6
Intersection, entering for navi‐ gation 171
iPod/iPhone 212
J
Jacking points for the vehicle jack 302
Jack, refer to Vehicle jack 302
Joystick, refer to Selector lever 76
Jump-starting 308
K
Keyless Go, refer to Comfort Access 40
Keyless opening and closing, refer to Comfort Access 40
Key Memory, refer to Per‐ sonal Profile 30
Key, refer to Integrated key/ remote control 30
Kickdown– Automatic transmission with
Steptronic 75
Knocking control 270
L
Label, run-flat tire 286
Lamp and bulb replacement, lamp replacement 295
Lamps 90
Lamps, automatic headlamp control 90, 91
Lamps, High-beam Assis‐
tant 92
Lamps, parking lamps/low beams 90
Lamps, replacing, refer to Lamp and bulb replace‐
ment 295
Lane departure warning 102
Lane margin, warning 102
Language, changing on Con‐ trol Display 88
Lap-and-shoulder belt, refer to Safety belts 54
Lashing eyes, securing cargo 162
LATCH child restraint fixing system 62
Leather, care 313
LEDs, light-emitting di‐ odes 296
Length, refer to Dimen‐ sions 318
Letters and numbers, enter‐ ing 23
License plate lamps, replac‐ ing bulbs 298, 301
Light-alloy wheels, care 314
Light-emitting diodes, LEDs 296
Lighter 143
Lighting– Instruments 94
Lighting, vehicle, refer to
Lamps 90
Light switch 90
Limit, refer to Speed limit 86
Load 160
Loading 160
Lock buttons, doors, refer to Locking 35
Locking
– From the inside 35– From the outside 33– Setting the confirmation
signals 33– Without remote control, re‐
fer to Comfort Access 40Locking the vehicle– From the inside 35– From the outside 32
Locks, doors, and win‐
dows 66
Longlife oils, alternative oil types 292
Longlife oils, refer to Ap‐ proved engine oils 291
Low beams 90
Low beams
– Automatic 91
Low beams, automatic 90
Low beams, automatic, refer to High-beam Assistant 92
Lower back support, refer to Lumbar support 50
Lower tailgate 38
Low-sulfur diesel 270
Luggage compartment roller cover 145
Luggage rack, refer to Roof- mounted luggage rack 162
Lumbar support 50
M
Main inspection, refer to Service requirements 83
Maintenance 293
Maintenance, refer to Service booklet
Maintenance, refer to Service requirements 83
Maintenance require‐ ments 293
Maintenance system BMW 293
Malfunction
– Door lock 34– Fuel filler flap 268
Malfunction of upper tail‐
gate 36
Malfunction, parking brake 71
Malfunction warnings, refer to Check Control 85
Seite 337Everything from A to ZReference337
Online Edition for Part no. 01 40 2 918 395 - III/13