2013 BMW X5 XDRIVE 35I door lock
[x] Cancel search: door lockPage 67 of 345

DrivingVehicle equipment
This chapter describes all series equipment as
well as country-specific and special equipment
offered for this model series.Therefore, it also
describes equipment that may not be found in
your vehicle, for instance due to the selected
special equipment or the country version. This
also applies to safety-related functions and
systems.
Ignition lock
Insert the remote control into the
ignition lock
Insert the remote control all the way into the
ignition lock.
Radio ready state is switched on. Individual
electrical consumers can operate.
Comfort Access
If the car is equipped with Comfort Access,
only insert the remote control into the ignition
lock, refer to page 40, under special circum‐
stances.
Removing the remote control from the
ignition lock
Do not forcibly pull the remote control
out of the ignition lock
Do not forcibly pull the remote control out of
the ignition lock as this may cause damage.◀
Before removing the remote control, push it all
the way in to release the locking mechanism.
The ignition is switched off if it was on.
Start/Stop button
Pressing the Start/Stop button switches the
ignition on or off and starts the engine.
The engine starts if the brake pedal is pressed
when you press the Start/Stop button.
Radio ready state Individual electrical consumers can operate.
The time and the external temperature are dis‐
played in the instrument cluster.
Radio ready state is switched off automatically:
▷When the remote control is removed from
the ignition lock.▷In cars with Comfort Access, refer to
page 40, by touching the surface above the
door lock.Seite 67DrivingControls67
Online Edition for Part no. 01 40 2 918 395 - III/13
Page 76 of 345

P ParkThe drive wheels are blocked.
P is engaged automatically when the following
conditions are met:▷The driver's door is opened while the en‐
gine is running, the safety belt is not fas‐
tened and neither the brake pedal nor the
accelerator is activated.▷The engine is switched off unless N is en‐
gaged and the remote control is in the igni‐
tion lock.▷The remote control is removed from the ig‐
nition lock.
Before leaving the vehicle, ensure that the
transmission position P is engaged; otherwise,
the vehicle may begin to roll.
Engaging transmission position
▷Transmission position P can only be disen‐
gaged if the engine is running and the
brake pedal is pressed.▷With the vehicle stationary, press on the
brake pedal before shifting out of P or N;
otherwise, the shift command will not be
executed: shift lock.
Press on the brake pedal until you start
driving
To prevent the vehicle from creeping after you
select a driving position, maintain pressure on
the brake pedal until you are ready to start.◀
Engaging transmission positions D, R,
N
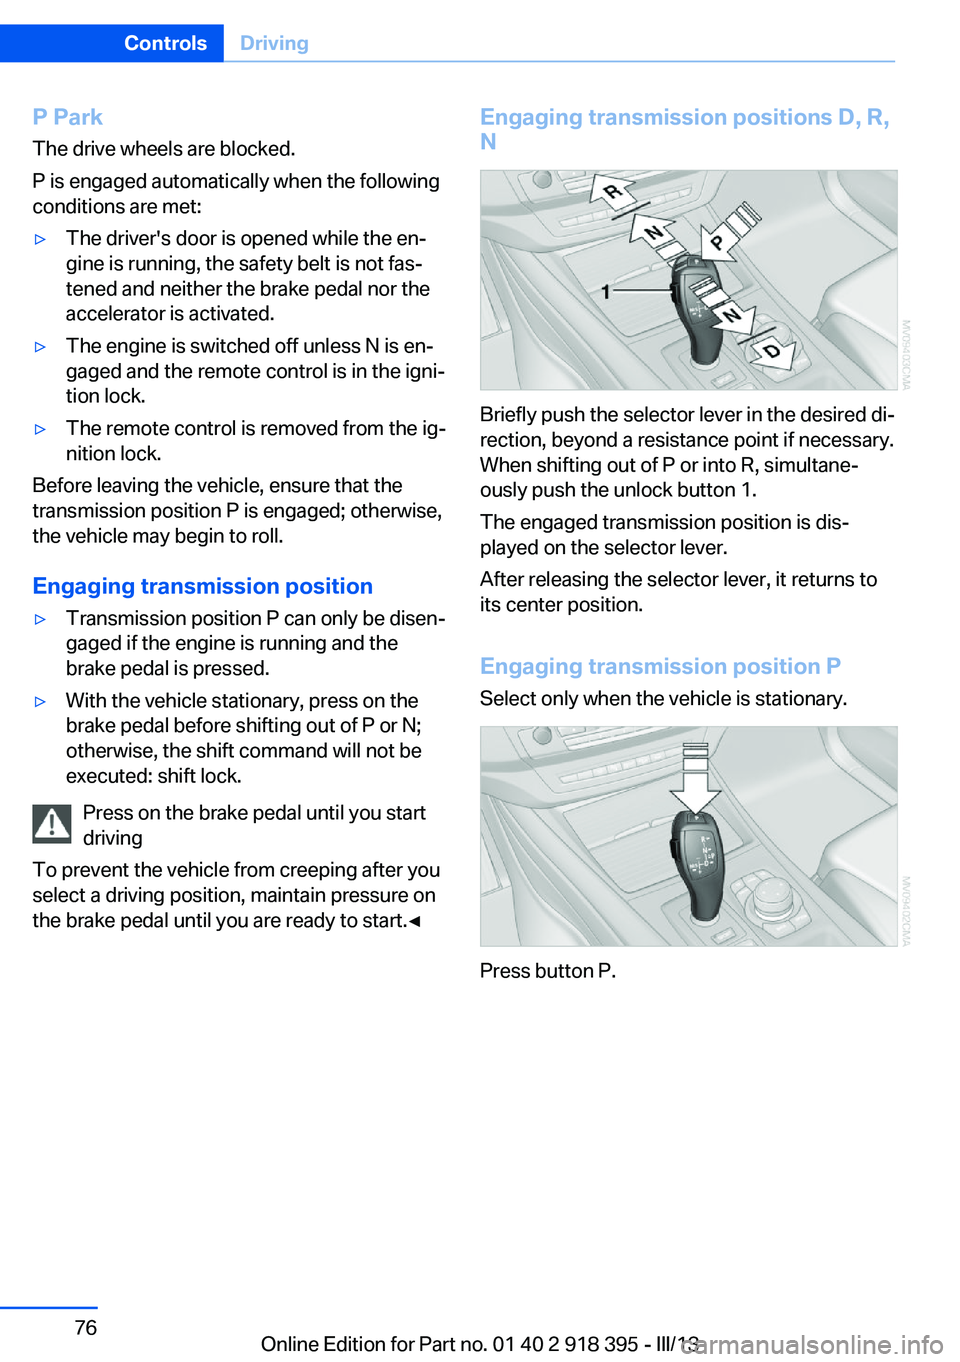
Briefly push the selector lever in the desired di‐
rection, beyond a resistance point if necessary.
When shifting out of P or into R, simultane‐
ously push the unlock button 1.
The engaged transmission position is dis‐
played on the selector lever.
After releasing the selector lever, it returns to
its center position.
Engaging transmission position P Select only when the vehicle is stationary.
Press button P.
Seite 76ControlsDriving76
Online Edition for Part no. 01 40 2 918 395 - III/13
Page 90 of 345

LampsVehicle equipment
This chapter describes all series equipment as
well as country-specific and special equipment
offered for this model series.Therefore, it also
describes equipment that may not be found in
your vehicle, for instance due to the selected
special equipment or the country version. This
also applies to safety-related functions and
systems.
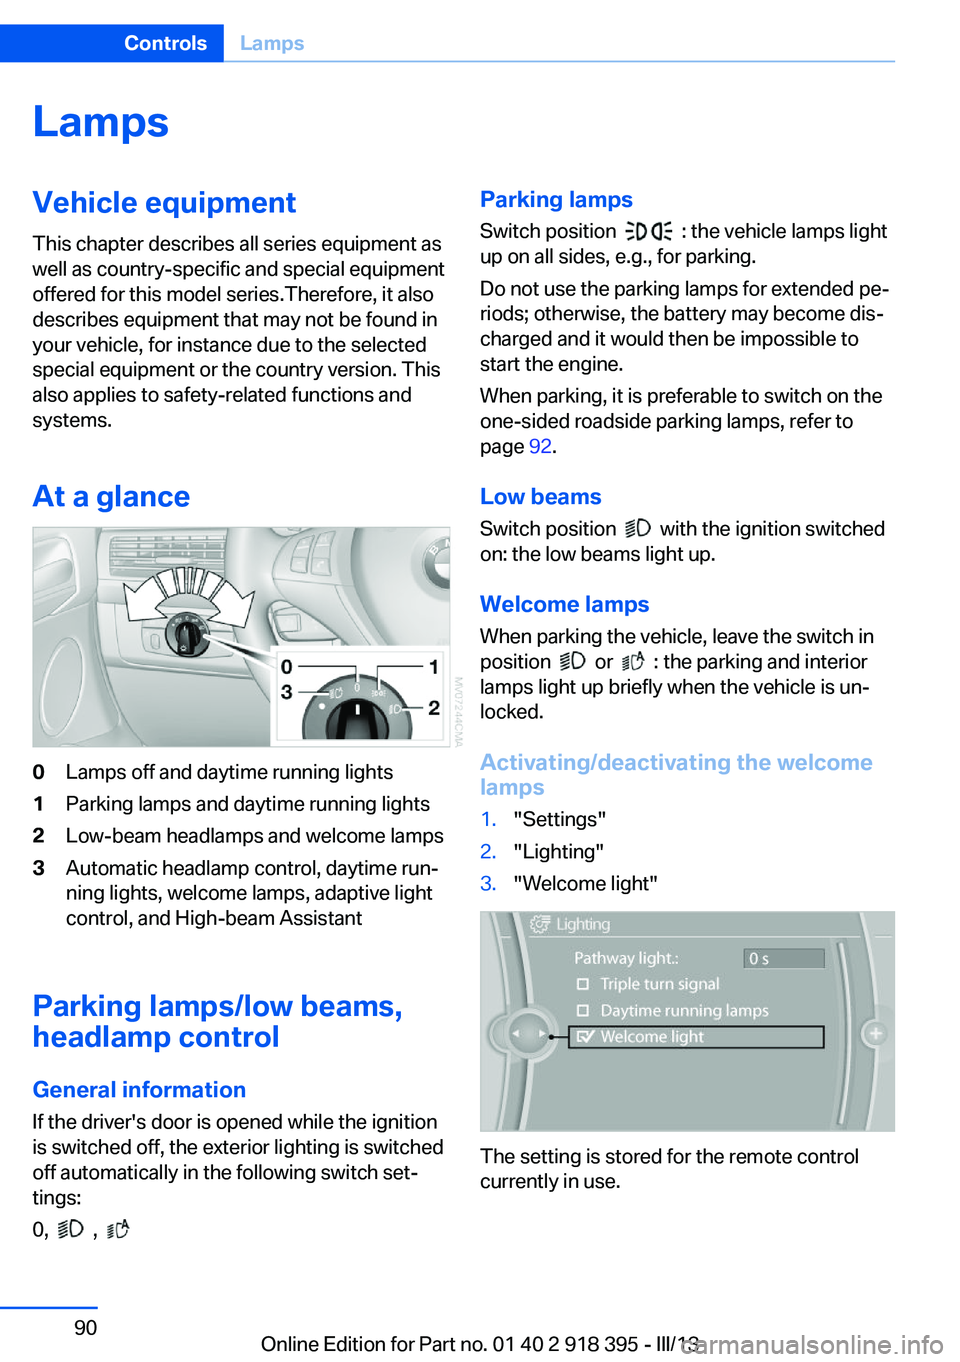
At a glance0Lamps off and daytime running lights1Parking lamps and daytime running lights2Low-beam headlamps and welcome lamps3Automatic headlamp control, daytime run‐
ning lights, welcome lamps, adaptive light
control, and High-beam Assistant
Parking lamps/low beams,
headlamp control
General information If the driver's door is opened while the ignition
is switched off, the exterior lighting is switched
off automatically in the following switch set‐
tings:
0,
,
Parking lamps
Switch position
: the vehicle lamps light
up on all sides, e.g., for parking.
Do not use the parking lamps for extended pe‐
riods; otherwise, the battery may become dis‐
charged and it would then be impossible to
start the engine.
When parking, it is preferable to switch on the
one-sided roadside parking lamps, refer to
page 92.
Low beams Switch position
with the ignition switched
on: the low beams light up.
Welcome lamps When parking the vehicle, leave the switch in
position
or : the parking and interior
lamps light up briefly when the vehicle is un‐
locked.
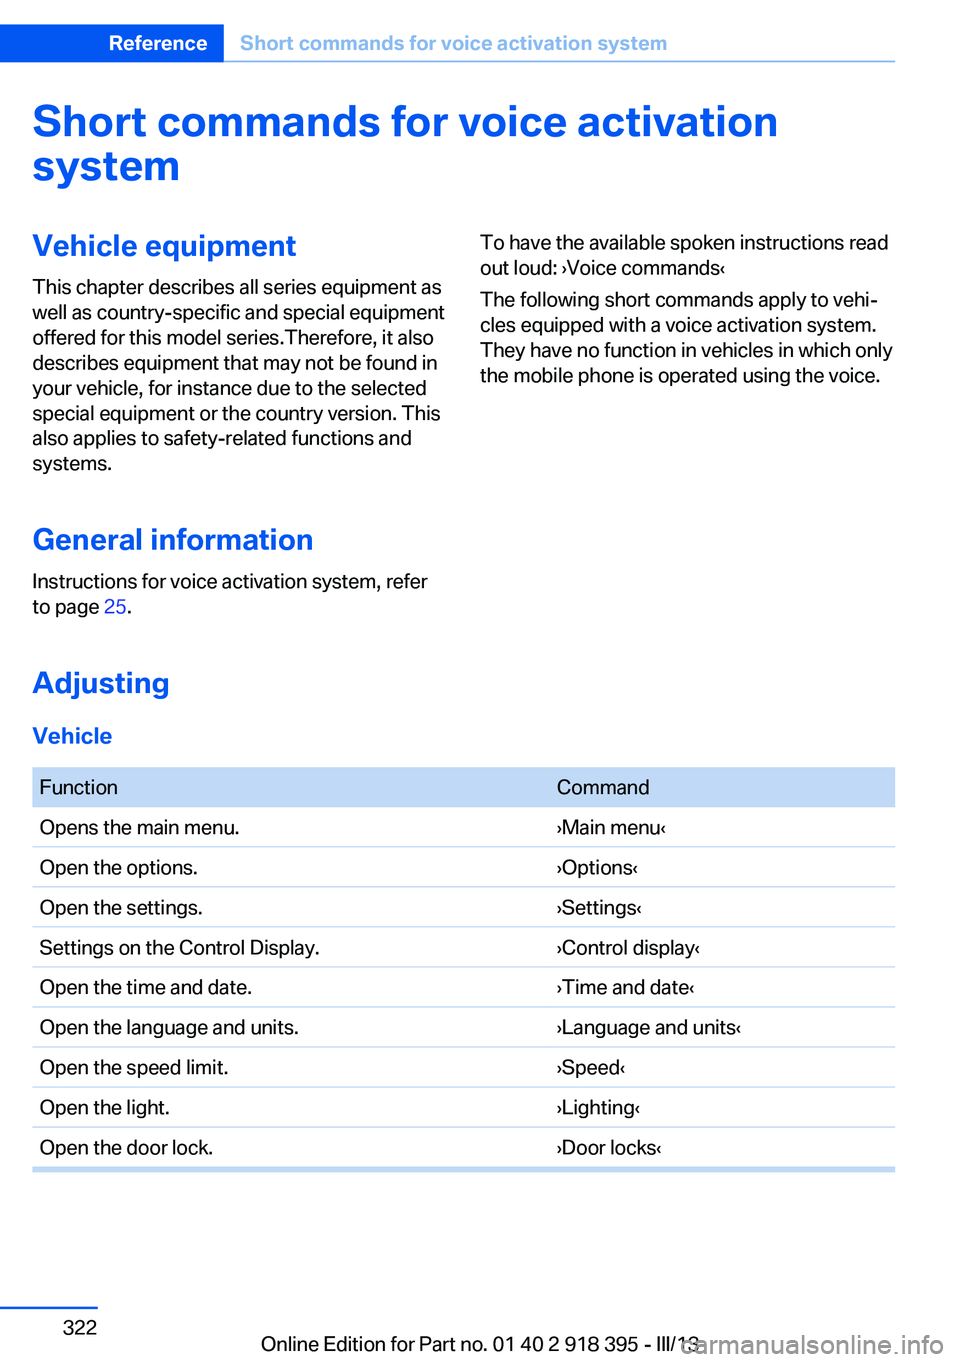
Activating/deactivating the welcome
lamps
1."Settings"2."Lighting"3."Welcome light"
The setting is stored for the remote control
currently in use.
Seite 90ControlsLamps90
Online Edition for Part no. 01 40 2 918 395 - III/13
Page 148 of 345

▷Do not use force when plugging the con‐
nector into the USB interface.▷Do not connect devices such as fans or
lamps to the USB interface.▷Do not connect a USB hard drive.▷Do not use the USB interface to recharge
external devices.
Center armrest front
Storage compartment A storage compartment is located under the
armrest between the front seats and, depend‐
ing on the vehicle's equipment, also a cover for
the mobile phone cradle or the snap-in
adapter.
Details on this mobile phone cradle, refer to
page 247.
Opening
Push cover down slightly and press the button.
The cover folds upward.
Connection for an external audio
device
You can connect an external audio device such
as a CD or MP3 player and play audio tracks over the car's loudspeaker system:
▷AUX-IN port, refer to page 212.▷USB audio interface, refer to page 212.Rear center armrest
BMW X6 and BMW X5 with 3rd row
seats
Pull on the loop and fold down the center arm‐
rest.
BMW X5 without 3rd row seats
Unlock the center armrest with the button in
the lower section of the opening and fold
down.
Storage compartments Compartments are located in the doors, in the
center console in the front and rear as well as
in the rear console in the BMW X6.
Storage nets are located on the backrests of
the front seats.
Items in the storage nets
Do not stow hard or sharp-edged objects
in the storage nets; otherwise there is an in‐
creased risk of injury in the event of an acci‐ dent.◀
Seite 148ControlsStorage compartments148
Online Edition for Part no. 01 40 2 918 395 - III/13
Page 313 of 345

Transmission position P will be engaged:▷Automatically after approx. 30 minutes.▷When the remote control is removed from
the ignition lock.
Mixed tires
Note the vehicle width
Before driving into a car wash, make sure
that the vehicle width is not too large for the
car wash, as otherwise the vehicle and the car
wash could be damaged.◀
Headlamps
▷Do not rub dry and do not use abrasive or
caustic cleansers.▷Soak areas that have been soiled e.g. due
to insects, with shampoo and wash off with
water.▷Thaw ice with de-icing spray; do not use an
ice scraper.
After washing the vehicle
After washing the vehicle, apply the brakes
briefly to dry them; otherwise, braking action
can be reduced and corrosion of the brake
discs can occur.
Fully remove any residue from the windows to
prevent obstruction of view from streaking,
wiping noises, and wiper wear.
Vehicle careCar care productsBMW recommends using cleaning and care
products from BMW, since these have been
tested and approved.
Car care and cleaning products
Follow the instructions on the container.
When cleaning the interior, open the doors or
windows.
Only use products intended for cleaning vehi‐
cles.
Cleansers can contain substances that are
dangerous and harmful to your health.◀
Vehicle paint
Regular care contributes to driving safety and value retention. Environmental influences in
areas with high air pollution or natural contami‐
nants, such as tree resin or pollen, can have an
impact on the vehicle paint. Tailor the fre‐
quency and extent of your car care to these in‐
fluences.
Immediately remove aggressive substances,
such as spilled fuel, oil, grease, or bird drop‐
pings, to prevent damage to or discoloration of
the paintwork.
Leather care
Remove dust from the leather often, using a
cloth or vacuum cleaner.
Otherwise, particles of dust and road grime
chafe in pores and folds, and lead to increased
wear and premature degradation of the leather
surface.
To guard against discoloration, such as from
clothing, provide leather care roughly every
two months.
Clean light-colored leather more frequently as
dust and dirt are more noticeable.
Use leather care products; otherwise, dirt and
grease will gradually break down the protective
layer of the leather surface.
Suitable care products are available from the
service center.
Upholstery material care Vacuum regularly with a vacuum cleaner.
If they are very dirty, e.g., beverage stains, use
a soft sponge or microfiber cloth with a suita‐
ble interior cleaner.Seite 313CareMobility313
Online Edition for Part no. 01 40 2 918 395 - III/13
Page 322 of 345

Short commands for voice activationsystemVehicle equipment
This chapter describes all series equipment as
well as country-specific and special equipment
offered for this model series.Therefore, it also
describes equipment that may not be found in
your vehicle, for instance due to the selected
special equipment or the country version. This
also applies to safety-related functions and
systems.
General information
Instructions for voice activation system, refer
to page 25.To have the available spoken instructions read
out loud: ›Voice commands‹
The following short commands apply to vehi‐
cles equipped with a voice activation system.
They have no function in vehicles in which only
the mobile phone is operated using the voice.
Adjusting
Vehicle
FunctionCommandOpens the main menu.›Main menu‹Open the options.›Options‹Open the settings.›Settings‹Settings on the Control Display.›Control display‹Open the time and date.›Time and date‹Open the language and units.›Language and units‹Open the speed limit.›Speed‹Open the light.›Lighting‹Open the door lock.›Door locks‹Seite 322ReferenceShort commands for voice activation system322
Online Edition for Part no. 01 40 2 918 395 - III/13
Page 334 of 345

Divided screen view, splitscreen 22
Door key, refer to Remote control with integrated
key 30
Door lock 34
Doors, manual operation 34
Doors, unlocking and locking– Confirmation signals 33– From the inside 35– From the outside 32
DOT Quality Grades 283
Downhill control 108
Draft-free ventilation 134
Drive-off assistant 109
Driver's seat, calibrating 55
Driving away on inclines, refer to Drive-off assistant 109
Driving notes, breaking in 156
Driving notes, general 156
Driving on poor roads 158
Driving stability control sys‐ tems 105
Driving through water 157
Driving tips, refer to Driving notes 156
Dry air, refer to Cooling func‐ tion 133
DSC Dynamic Stability Con‐ trol 105
DTC Dynamic Traction Con‐ trol 106
DTMF suffix dialing 242
DVD/CD 200
DVDs, storing 207
DVD system in rear 220
DVD, video 202
Dynamic destination guid‐ ance 186
Dynamic Performance Con‐ trol 107
Dynamic Stability Control DSC 105
Dynamic Traction Control DTC 106
E
Easy entry/exit 60
EfficientDynamics, refer to Saving fuel 164
Electrical malfunction– Door lock 34– Driver's door 34– Fuel filler flap 268
Electrical malfunction of up‐
per tailgate 36
Electrical malfunction, park‐ ing brake 71
Electric seat adjustment 50
Electric steering wheel ad‐ justment 60
Electronic brake-force distri‐ bution 105
Electronic engine oil level check 290
Electronic Stability Program ESP, refer to Dynamic Sta‐
bility Control DSC 105
Emergency operation
– Door lock, refer to Manual
operation 34
Emergency operation, fuel
filler flap, unlocking man‐
ually 268
Emergency Request 307
Emergency service, refer to Roadside Assistance 308
Energy-conscious driving, re‐ fer to Current fuel consump‐
tion 80
Energy, saving, refer to Sav‐ ing fuel 164
Engine, breaking in 156
Engine compartment 288
Engine coolant, refer to Cool‐ ant 292
Engine oil, adding 291
Engine oil, additives, refer to Approved engine oils 291
Engine oil, alternative oil types 292
Engine oil, BMW maintenance
system 293
Engine oil change intervals, refer to Service require‐
ments 83
Engine oil, checking the level 290
Engine oil, filling ca‐ pacity 321
Engine oil temperature 80
Engine oil types, alterna‐ tive 291
Engine oil types, ap‐ proved 291
Engine, overheating, refer to Coolant temperature 80
Engine start, assistance 308
Engine, starting 68
Engine, starting– Comfort Access 40
Engine, starting, Start/Stop
button 67
Engine, stopping, Start/Stop
button 67
Engine, switching off 69
Environmentally friendly driv‐ ing, refer to Current fuel
consumption 80
Equalizer 190
Equipment, interior 139
ESP Electronic Stability Pro‐ gram, refer to Dynamic Sta‐
bility Control DSC 105
Exchanging wheels/tires 285
Exhaust system 157
Exterior mirrors 58
Exterior mirrors, adjusting 58
Exterior mirrors, automatic dimming 59
Exterior mirrors, automatic heating 59
Exterior mirrors, folding in and out 59
External audio device 148
External devices 212
External temperature dis‐ play 79
Seite 334ReferenceEverything from A to Z334
Online Edition for Part no. 01 40 2 918 395 - III/13
Page 335 of 345

External temperature display,changing the units of meas‐
ure, changing the units of
measure on the Control Dis‐
play 88
External temperature warn‐ ing 79
Externel temperature dis‐ play 79
Eyes for securing cargo 162
F
Fader 190
Failure messages, refer to Check Control 85
False alarm– Avoiding unintentional
alarms 43– Ending an alarm 43
Fastening safety belts, refer
to Safety belts 54
Fault messages, refer to Check Control 85
Filling capacities 321
Filter, refer to Microfilter/acti‐ vated-charcoal filter 135
Fine wood, care 314
First aid kit 308
Fitting for towing 310
Fixing system, adaptive 150
Flashing when locking/ unlocking 33
Flat Tire Monitor FTM 97
Flat Tire Monitor FTM, snow chains 287
Flat tire, run-flat tires 286
Flat tire, Tire Pressure Moni‐ tor TPM 99
Flat tire, warning lamp 98, 100
Flat tire, wheel change 302
Flooding, refer to Driving through water 157
Floor carpet, care 315
Floor mats, care 315
FM/AM station 192
Fog on windows, remov‐
ing 132
Foldable rear seat back‐ rest 146
Foot brake 157
Footwell lamps, refer to Inte‐ rior lamps 94
For your own safety 6
Four-wheel drive, refer to xDrive 107
Front airbags 95
Front fog lamps 93
Front fog lamps, bulb replace‐ ment 297, 300
Front fog lamps, indicator lamp 93
FTM Flat Tire Monitor 97
Fuel 270
Fuel– Refer to Average fuel con‐
sumption 82
Fuel, additives 270
Fuel, average consump‐ tion 82
Fuel cap 268
Fuel cap, closing 268
Fuel consumption display
– Average fuel consump‐
tion 82
Fuel consumption display,
current fuel consump‐
tion 80
Fuel-efficient driving, refer to Current fuel consump‐
tion 80
Fuel filler flap, closing 268
Fuel filler flap, opening 268
Fuel filler flap, unlocking in case of an electrical mal‐
function 268
Fuel gauge 81
Fuel, saving 164
Fuel tank capacity, refer to Filling capacities 321
Fuel tank contents, refer to Filling capacities 321
Fuel tank, refer to Filling ca‐
pacities 321
Fuse 305
G
Garage door opener, refer to Universal Garage Door
Opener 139
Gasoline 270
Gasoline gauge, refer to Fuel gauge 81
Gasoline quality 270
Gas station recommenda‐ tion 181
Gear change, automatic transmission with Step‐
tronic 77
Gear change, via shift pad‐ dles 77
General driving notes 156
Glass sunroof, closing 47
Glass sunroof, electric– Convenient operation 33– Remote control 33
Glass sunroof, initializing 48
Glass sunroof, opening 47
Glass sunroof, pinch protec‐ tion 47
Glass sunroof, power fail‐ ure 48
Glass sunroof, refer to Panor‐ amic glass sunroof 45
Glass sunroof, tilting 47
Glove compartment 147
Glove compartment, light‐ ing 147
GPS navigation, refer to Navi‐ gation system 168
Gross vehicle weight, refer to Weights 320
H
Handbrake, refer to Parking brake 69
Seite 335Everything from A to ZReference335
Online Edition for Part no. 01 40 2 918 395 - III/13