2013 BMW X3 XDRIVE 28I engine
[x] Cancel search: enginePage 112 of 211

PDC Park Distance Control
The concept
PDC supports you when parking. Objects that
you are approaching slowly in front of or behind
your vehicle are indicated with:▷Signal tones.▷Visual display.
General information
Measurements are made by ultrasound sensors
in the bumpers.
The range is approx. 6 ft/2 m.
An acoustic warning is first given:
▷By the front sensors and two rear corner
sensors at approx. 24 in/60 cm.▷By the rear middle sensors at approx.
5 ft/1.50 m.
Notes
Check the traffic situation as well
PDC cannot serve as a substitute for the
driver's personal judgment of the traffic situa‐
tion. Check the traffic situation around the vehi‐
cle with your own eyes. Otherwise, an accident
could result from road users or objects located
outside of the PDC detection range.
Loud noises from outside and inside the vehicle
may prevent you from hearing the PDC's signal
tone.◀
Avoid driving quickly with PDC
Avoid approaching an object quickly.
Avoid driving away quickly while PDC is not yet
active.
For technical reasons, the system may other‐
wise be too late in issuing a warning.◀
At a glance
Button in the vehicle
PDC Park Distance Control
Switching on/off
Switching on automatically
Select transmission position R with the engine
running.
Automatic deactivation during forward
travel
The system switches off when a certain driving
distance or speed is exceeded.
Switch the system back on if necessary.
Switching on/off manually Press the button.
▷On: the LED lights up.▷Off: the LED goes out.
In addition to the PDC Park Distance Control, the
backup camera, refer to page 114, can be
switched on.
Switching on the backup camera via the
iDrive
With PDC activated:
"Rear view camera"
The backup camera image is displayed. The set‐
ting is stored for the remote control currently in
use.
Seite 112ControlsDriving comfort112
Online Edition for Part no. 01 40 2 903 813 - 07 12 490
Page 114 of 211

Malfunction
A Check Control message, refer to page 74, is
displayed in the instrument cluster.
On the Control Display, the areas in front of and
behind the vehicle are shaded. PDC has failed.
Have the system checked.
To ensure full operability:▷Keep the sensors clean and free of ice.▷When using high-pressure washers, do not
spray the sensors for long periods and main‐
tain a distance of at least 12 in/30 cm.
Backup camera
The concept
The backup camera provides assistance in park‐
ing and maneuvering backwards. The area be‐
hind the vehicle is shown on the Control Display.
Notes Check the traffic situation as well
Check the traffic situation around the ve‐
hicle with your own eyes. Otherwise, an accident
could result from road users or objects located
outside the picture area of the backup camera. ◀
At a glance
Button in the vehicle
Backup camera
Camera
The camera lens is located in the handle of the
tailgate. The image quality may be impaired by
dirt.
Clean the lens, refer to page 186.
Switching on/off
Switching on automatically
Select transmission position R with the engine
running.
The backup camera image is displayed if the
system was switched on via the iDrive.
Automatic deactivation during forward
travel
The system switches off when a certain driving
distance or speed is exceeded.
Switch the system back on if necessary.
Switching on/off manually Press the button.
▷On: the LED lights up.▷Off: the LED goes out.
The PDC is shown on the Control Display.
Switch on the backup camera via the iDrive, refer
to page 112.
Switching on the backup camera via the
iDrive
With PDC activated:
"Rear view camera"
Seite 114ControlsDriving comfort114
Online Edition for Part no. 01 40 2 903 813 - 07 12 490
Page 117 of 211

Top View
Cameras
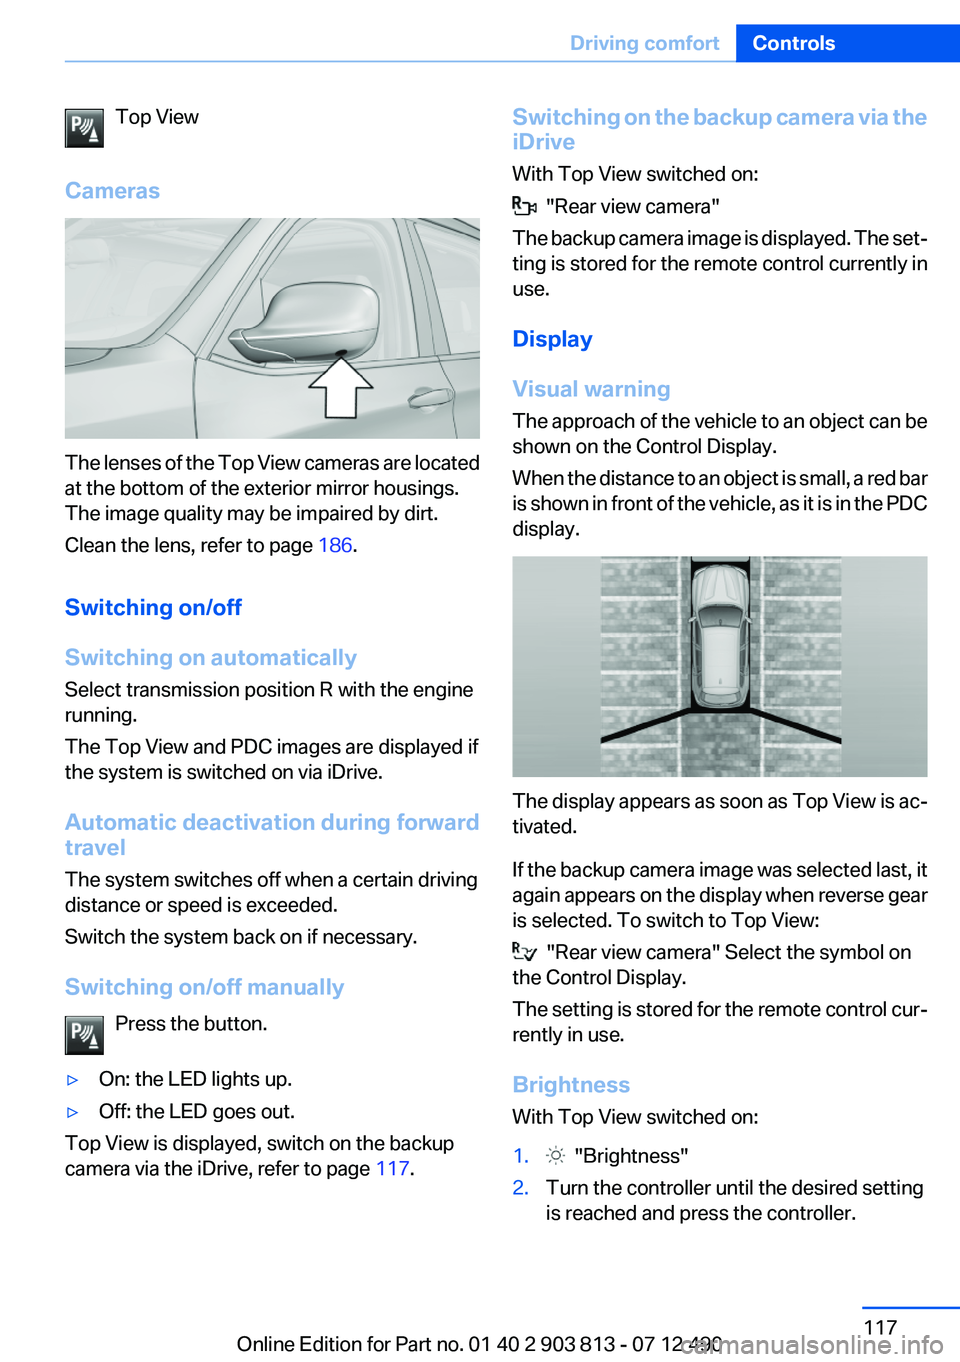
The lenses of the Top View cameras are located
at the bottom of the exterior mirror housings.
The image quality may be impaired by dirt.
Clean the lens, refer to page 186.
Switching on/off
Switching on automatically
Select transmission position R with the engine
running.
The Top View and PDC images are displayed if
the system is switched on via iDrive.
Automatic deactivation during forward
travel
The system switches off when a certain driving
distance or speed is exceeded.
Switch the system back on if necessary.
Switching on/off manually Press the button.
▷On: the LED lights up.▷Off: the LED goes out.
Top View is displayed, switch on the backup
camera via the iDrive, refer to page 117.
Switching on the backup camera via the
iDrive
With Top View switched on:
"Rear view camera"
The backup camera image is displayed. The set‐
ting is stored for the remote control currently in
use.
Display
Visual warning
The approach of the vehicle to an object can be
shown on the Control Display.
When the distance to an object is small, a red bar
is shown in front of the vehicle, as it is in the PDC
display.
The display appears as soon as Top View is ac‐
tivated.
If the backup camera image was selected last, it
again appears on the display when reverse gear
is selected. To switch to Top View:
"Rear view camera" Select the symbol on
the Control Display.
The setting is stored for the remote control cur‐
rently in use.
Brightness
With Top View switched on:
1. "Brightness"2.Turn the controller until the desired setting
is reached and press the controller.Seite 117Driving comfortControls117
Online Edition for Part no. 01 40 2 903 813 - 07 12 490
Page 121 of 211

The programs can be combined as necessary.
Air volume, manual Turn the wheel to set the desired
air volume.
The higher the rate, the more ef‐
fective the heating or cooling will
be.
The air volume of the automatic climate control
may be reduced automatically to save battery
power.
AUTO program Press the button.
Air flow, air distribution, and tempera‐
ture are controlled automatically.
Depending on the selected temperature and
outside influences, the air is directed to the
windshield, side windows, upper body, and into
the footwell.
The cooling function, refer to page 121, is
switched on automatically with the AUTO pro‐
gram.
Recirculated-air mode
You can respond to unpleasant odors or pollu‐
tants in the immediate environment by tempo‐
rarily suspending the supply of outside air. The
system then recirculates the air currently within
the vehicle.
Press the button repeatedly to select
an operating mode:▷LED off: outside air flows in continuously.▷LED on, recirculated-air mode: the supply of
outside air into the vehicle is permanently
blocked.
If the windows fog over, switch off recirculated-
air mode and increase the air volume, if neces‐
sary.
Continuous recirculated-air mode
The recirculated-air mode should not be
used for an extended period of time, as the air
quality inside the vehicle deteriorates steadily. ◀
Temperature Turn the wheel to set the desired
temperature.
The automatic climate control reaches this tem‐
perature as quickly as possible, if necessary by
increasing the cooling or heating output, and
then keeps it constant.
Avoid rapidly switching between different tem‐
perature settings. The automatic climate control
will not have sufficient time to adjust the set
temperature.
Defrosting windows and removing
condensation
Press the button.
Ice and condensation are quickly re‐
moved from the windshield and the front side
windows.
The air volume can be adjusted when the pro‐
gram is active.
If the windows fog over, also switch on the cool‐
ing function.
Cooling function
The passenger compartment can only be
cooled with the engine running.
Press the button.
The air is cooled and dehumidified and,
depending on the temperature setting, warmed
again.
Depending on the weather, the windshield may
fog up briefly when the engine is started.Seite 121Climate controlControls121
Online Edition for Part no. 01 40 2 903 813 - 07 12 490
Page 123 of 211

8Automatic recirculated-air control/recircu‐
lated-air mode9ALL program10Temperature, right11Defrosting windows and removing conden‐
sation12Cooling function13Rear window defroster14Seat heating 49Climate control functions in detail
Manual air distribution
Press the buttons repeatedly to select a pro‐
gram:▷Windows.▷Upper body region.▷Footwell.
The programs can be combined as necessary.
Temperature Turn the wheel to set the desired
temperature.
The automatic climate control reaches this tem‐
perature as quickly as possible, if necessary by
increasing the cooling or heating output, and
then keeps it constant.
Avoid rapidly switching between different tem‐
perature settings. The automatic climate control
will not have sufficient time to adjust the set
temperature.
Maximum cooling Press the button.
The system is set to the lowest tem‐
perature, maximum air flow and recirculated-air
mode.
Air flows out of the vents for the upper body re‐
gion. Open them for this purpose.
The air is cooled fastest when the engine is run‐
ning.
The air flow can be adjusted when the program
is active.
AUTO program Press the button.
Air flow, air distribution, and tempera‐
ture are controlled automatically.
Depending on the selected temperature, AUTO
intensity, and outside influences, the air is di‐
rected to the windshield, side windows, upper
body, and into the footwell.
The cooling function, refer to page 124, is
switched on automatically with the AUTO pro‐
gram.
At the same time, a condensation sensor con‐
trols the program so as to prevent window con‐
densation as much as possible.
To switch off the program: press the button
again or manually adjust the air distribution.
Intensity of the AUTO program
With the AUTO program switched on, automatic
control of the air flow and air distribution can be
adjusted.
Press the left or right side of the button:
decrease or increase the intensity.
The selected intensity is shown on the display
of the automatic climate control.Seite 123Climate controlControls123
Online Edition for Part no. 01 40 2 903 813 - 07 12 490
Page 124 of 211

Air flow, manual
To be able to manually adjust the air flow, switch
off the AUTO program first.
Press the left or right side of the button:
decrease or increase air flow.
The selected air flow is shown on the display of
the automatic climate control.
The air flow of the automatic climate control may
be reduced automatically to save battery power.
Automatic recirculated-air control/
recirculated-air mode
You can respond to unpleasant odors or pollu‐
tants in the immediate environment by tempo‐
rarily suspending the supply of outside air. The
system then recirculates the air currently within
the vehicle.
Press the button repeatedly to select
an operating mode:▷LEDs off: outside air flows in continuously.▷Left LED on, automatic recirculated-air con‐
trol: a sensor detects pollutants in the out‐
side air and controls the shutoff automati‐
cally.▷Right LED on, recirculated-air mode: the
supply of outside air into the vehicle is per‐
manently blocked.
If the windows are fogged over, switch off the
recirculated-air mode and press the AUTO but‐
ton to utilize the condensation sensor. Make
sure that air can flow onto the windshield.
Continuous recirculated-air mode
The recirculated-air mode should not be
used for an extended period of time, as the air
quality inside the vehicle deteriorates steadily. ◀
ALL program Press the button.
The current setting or later settings of
the temperature on the driver's side are trans‐
ferred to the front passenger side.
The program is switched off if the settings on
the front passenger side are changed.
Defrosting windows and removing
condensation
Press the button.
Ice and condensation are quickly re‐
moved from the windshield and the front side
windows.
The air flow can be adjusted when the program
is active.
If the windows are fogged over, you can also
switch on the cooling function or press the
AUTO button to utilize the condensation sensor.
Cooling function
The passenger compartment can only be
cooled with the engine running.
Press the button.
The air is cooled and dehumidified and,
depending on the temperature setting, warmed
again.
Depending on the weather, the windshield may
fog up briefly when the engine is started.
The cooling function is switched on automati‐
cally with the AUTO program.
When using the automatic climate control, con‐
densation water, refer to page 142, develops
that exits underneath the vehicle.
Rear window defroster Press the button.
The rear window defroster switches off
automatically after a certain period of time.
Switching the system on/off
Switching off Press and hold the left button until the
control switches off.Seite 124ControlsClimate control124
Online Edition for Part no. 01 40 2 903 813 - 07 12 490
Page 129 of 211

can then be controlled by the button on the
interior rearview mirror.
If the LED does not flash faster after at least
60 seconds, change the distance and repeat
the step. Several more attempts at different
distances may be necessary. Wait at least
15 seconds between attempts.
Canada: if programming with the hand-held
transmitter was interrupted, hold down the
interior rearview mirror button and repeat‐
edly press and release the hand-held trans‐
mitter button for 2 seconds.
Controls
Before operation
Before operating a system using the
integrated universal remote control, ensure that
there are no people, animals, or objects within
the range of movement of the remote-controlled
system; otherwise, there is a risk of injury or
damage.
Also follow the safety instructions of the hand-
held transmitter.◀
The system, such as the garage door, can be
operated using the button on the interior rear‐
view mirror while the engine is running or when
the ignition is started. To do this, hold down the
button within receiving range of the system until
the function is activated. The interior rearview
mirror LED stays lit while the wireless signal is
being transmitted.
Deleting stored functions
Press and hold the left and right button on the
interior rearview mirror simultaneously for ap‐
proximately 20 seconds until the LED flashes
rapidly. All stored functions are deleted. The
functions cannot be deleted individually.
Connecting electrical devices
Note Do not plug the charger into the socket
Do not connect battery chargers to the
factory-installed sockets in the vehicle. Doing so
may result in damage to the vehicle.◀
Sockets
Sockets can be used for the operation of elec‐
trical devices with the engine running or with the
ignition switched on. The total load of all sockets
must not exceed 140 watts at 12 volts.
Do not damage the socket by using unsuitable
connectors.
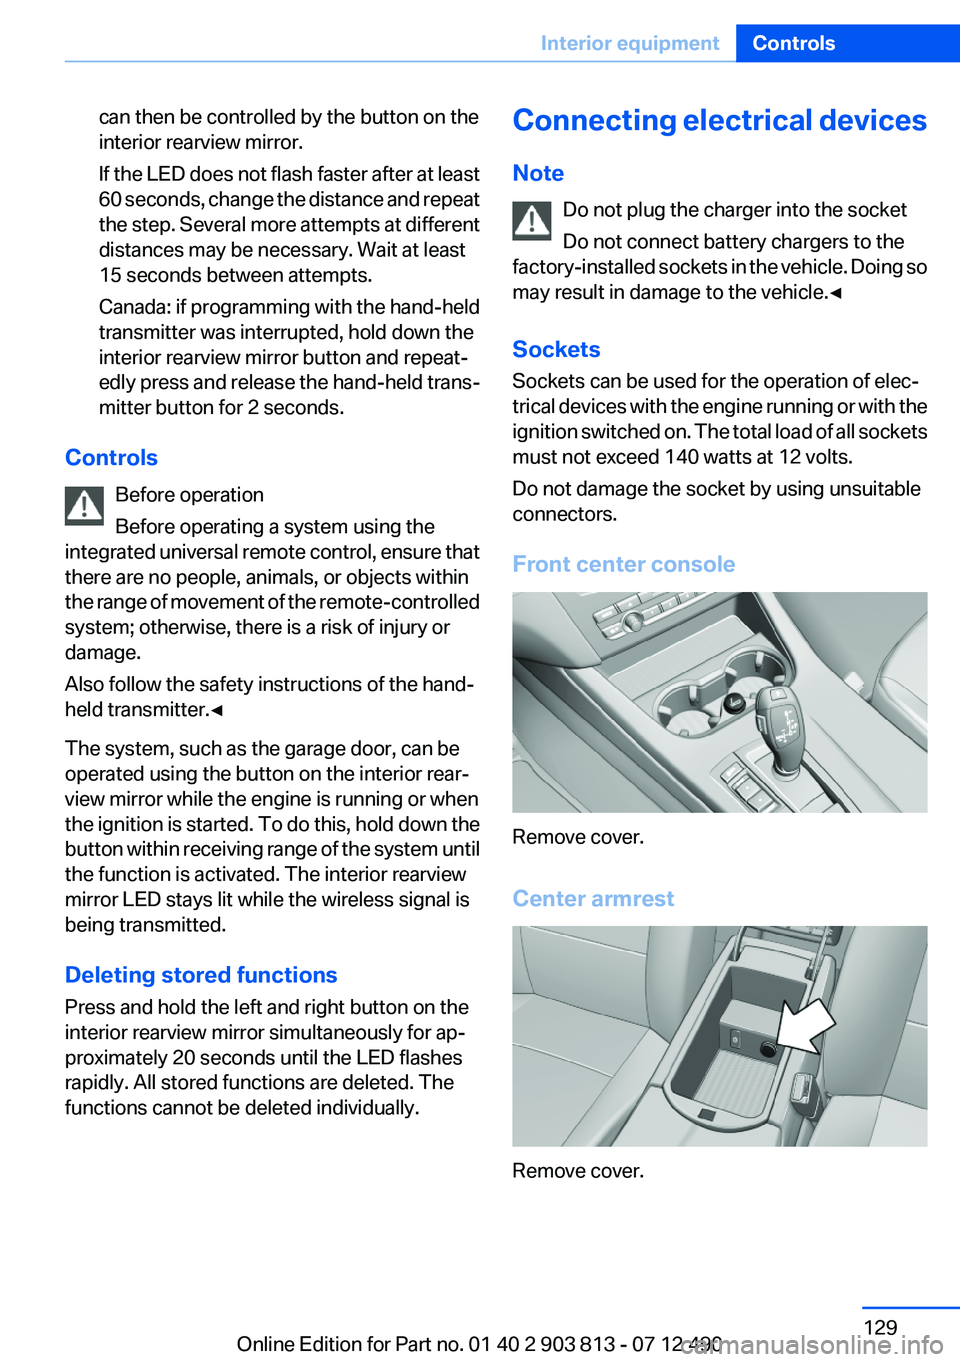
Front center console
Remove cover.
Center armrest
Remove cover.
Seite 129Interior equipmentControls129
Online Edition for Part no. 01 40 2 903 813 - 07 12 490
Page 140 of 211

Things to remember when drivingVehicle equipment
All standard, country-specific and optional
equipment that is offered in the model series is
described in this chapter. Therefore, equipment
is also described that is not available in a vehicle,
e. g., because of the selected optional equip‐
ment or country variant. This also applies for
safety-related functions and systems.
Breaking-in period
General information
Moving parts need to be broken in to adjust to
each other.
The following instructions will help achieve a
long vehicle life and good economy.
Engine and differential
Always obey the official speed limit.
Up to 1,200 miles/2,000 km
Do not exceed the maximum engine and road
speed:▷For gasoline engine, 4,500 rpm and
100 mph/160 km/h.
Avoid full-throttle operation and use of the
transmission's kickdown mode for the initial
miles.
From 1,200 miles/2,000 km
The engine and vehicle speed can gradually be
increased.
Tires
Due to technical factors associated with their
manufacture, tires do not achieve their full trac‐
tion potential until after an initial breaking-in pe‐
riod.
Drive conservatively for the first
200 miles/300 km.
Brake system
Brakes require an initial break-in period of ap‐
prox. 300 miles/500 km to achieve optimized
contact and wear patterns between brake pads
and discs. Drive moderately during this break-in
period.
Following part replacement
The same breaking in procedures should be ob‐
served if any of the components mentioned
above have to be renewed in the course of the
vehicle's operating life.
General driving notes
Closing the tailgate Drive with the tailgate closed
Only drive with the tailgate closed; other‐
wise, in the event of an accident or braking or
evasive maneuvers, passengers or other road
users may be injured or the vehicle may be dam‐
aged. In addition, exhaust fumes may enter the
passenger compartment.◀
If driving with the tailgate open cannot be
avoided:▷Close all windows and the glass sunroof.▷Greatly increase the blower speed.▷Drive moderately.
Hot exhaust system
Hot exhaust system
High temperatures are generated in the
exhaust system.
Seite 140Driving tipsThings to remember when driving140
Online Edition for Part no. 01 40 2 903 813 - 07 12 490