2013 BMW X1 XDRIVE 35I mirror
[x] Cancel search: mirrorPage 202 of 291
2.Say the name after being prompted to do so.3.Confirm the prompt: ›Yes‹
Deleting all entries
1.›Delete phone book‹2.Confirm the prompt: ›Yes‹3.Confirm the prompt again: ›Yes‹
Reading and selecting entries
1.›Read phonebook‹2.When the desired entry is read aloud:
say ›Dial number‹
Selecting an entry
1.›Dial name‹2.Say the name after being prompted to do so.3.Confirm the prompt: ›Yes‹
Adjusting the volume
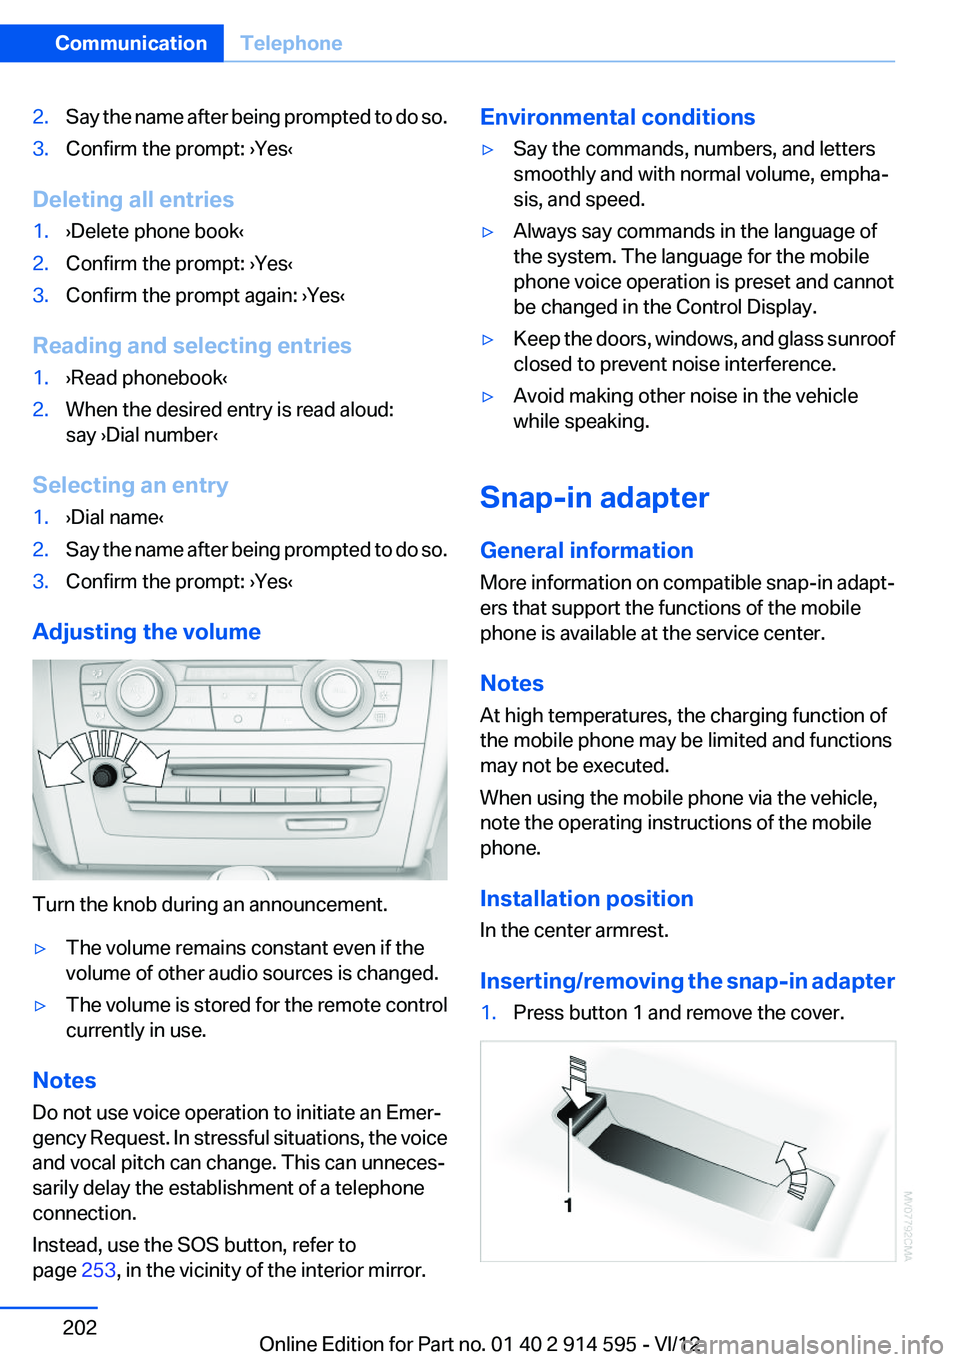
Turn the knob during an announcement.
▷The volume remains constant even if the
volume of other audio sources is changed.▷The volume is stored for the remote control
currently in use.
Notes
Do not use voice operation to initiate an Emer‐
gency Request. In stressful situations, the voice
and vocal pitch can change. This can unneces‐
sarily delay the establishment of a telephone
connection.
Instead, use the SOS button, refer to
page 253, in the vicinity of the interior mirror.
Environmental conditions▷Say the commands, numbers, and letters
smoothly and with normal volume, empha‐
sis, and speed.▷Always say commands in the language of
the system. The language for the mobile
phone voice operation is preset and cannot
be changed in the Control Display.▷Keep the doors, windows, and glass sunroof
closed to prevent noise interference.▷Avoid making other noise in the vehicle
while speaking.
Snap-in adapter
General information
More information on compatible snap-in adapt‐
ers that support the functions of the mobile
phone is available at the service center.
Notes
At high temperatures, the charging function of
the mobile phone may be limited and functions
may not be executed.
When using the mobile phone via the vehicle,
note the operating instructions of the mobile
phone.
Installation position
In the center armrest.
Inserting/removing the snap-in adapter
1.Press button 1 and remove the cover.Seite 202CommunicationTelephone202
Online Edition for Part no. 01 40 2 914 595 - VI/12
Page 249 of 291
Turn signals, front
21-watt bulb, PY21W1.Switch off the lamps and take the remote
control out of the ignition lock.2.Open the folding cover in the wheel arch, re‐
fer to page 247.3.Turn the turn signal bulb socket 1 to the left
and remove it.4.Apply gentle pressure to the bulb while turn‐
ing it to the left for removal and replacement.5.Insert the turn signal bulb socket 1 and turn
it all the way to the right.6.Attach the folding cover in the wheel arch.
Turn signal in exterior mirror
Follow the general instructions on lamps and
bulbs, refer to page 246.
The turn signals in the exterior mirrors use LED
technology.
Contact your service center in the event of a
malfunction.
Tail lamps
The tail lamps consist of two parts. One part is
in the tailgate and the other is in the fender.
P21W bulbs, 21 watt
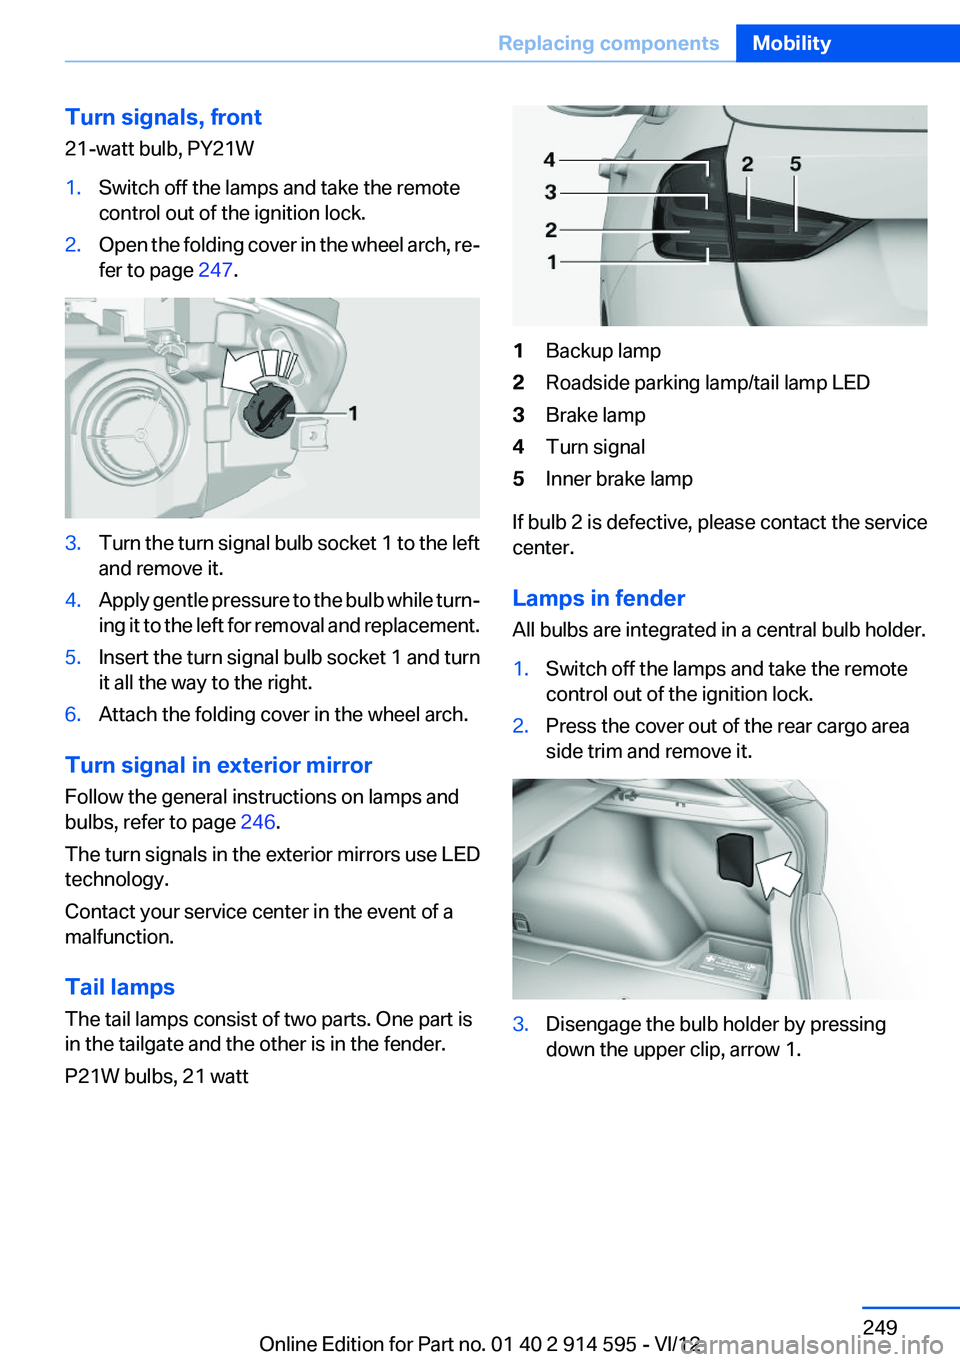
1Backup lamp2Roadside parking lamp/tail lamp LED3Brake lamp4Turn signal5Inner brake lamp
If bulb 2 is defective, please contact the service
center.
Lamps in fender
All bulbs are integrated in a central bulb holder.
1.Switch off the lamps and take the remote
control out of the ignition lock.2.Press the cover out of the rear cargo area
side trim and remove it.3.Disengage the bulb holder by pressing
down the upper clip, arrow 1.Seite 249Replacing componentsMobility249
Online Edition for Part no. 01 40 2 914 595 - VI/12
Page 251 of 291
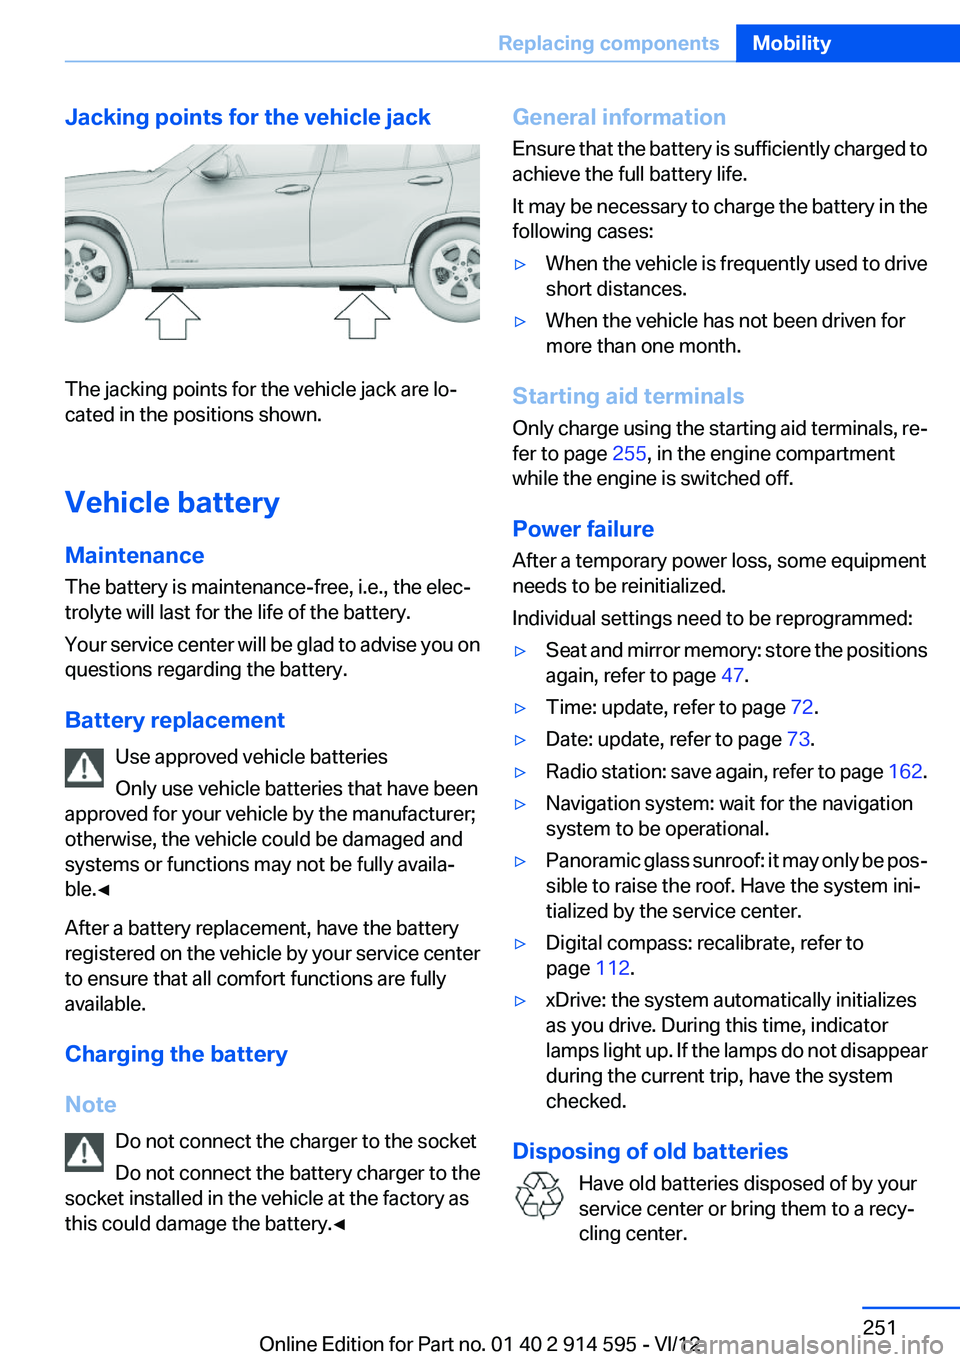
Jacking points for the vehicle jack
The jacking points for the vehicle jack are lo‐
cated in the positions shown.
Vehicle battery
Maintenance
The battery is maintenance-free, i.e., the elec‐
trolyte will last for the life of the battery.
Your service center will be glad to advise you on
questions regarding the battery.
Battery replacement Use approved vehicle batteries
Only use vehicle batteries that have been
approved for your vehicle by the manufacturer;
otherwise, the vehicle could be damaged and
systems or functions may not be fully availa‐
ble.◀
After a battery replacement, have the battery
registered on the vehicle by your service center
to ensure that all comfort functions are fully
available.
Charging the battery
Note Do not connect the charger to the socket
Do not connect the battery charger to the
socket installed in the vehicle at the factory as
this could damage the battery.◀
General information
Ensure that the battery is sufficiently charged to
achieve the full battery life.
It may be necessary to charge the battery in the
following cases:▷When the vehicle is frequently used to drive
short distances.▷When the vehicle has not been driven for
more than one month.
Starting aid terminals
Only charge using the starting aid terminals, re‐
fer to page 255, in the engine compartment
while the engine is switched off.
Power failure
After a temporary power loss, some equipment
needs to be reinitialized.
Individual settings need to be reprogrammed:
▷Seat and mirror memory: store the positions
again, refer to page 47.▷Time: update, refer to page 72.▷Date: update, refer to page 73.▷Radio station: save again, refer to page 162.▷Navigation system: wait for the navigation
system to be operational.▷Panoramic glass sunroof: it may only be pos‐
sible to raise the roof. Have the system ini‐
tialized by the service center.▷Digital compass: recalibrate, refer to
page 112.▷xDrive: the system automatically initializes
as you drive. During this time, indicator
lamps light up. If the lamps do not disappear
during the current trip, have the system
checked.
Disposing of old batteries
Have old batteries disposed of by your
service center or bring them to a recy‐
cling center.
Seite 251Replacing componentsMobility251
Online Edition for Part no. 01 40 2 914 595 - VI/12
Page 253 of 291
Breakdown assistanceVehicle equipment
This chapter describes all series equipment as
well as country-specific and special equipment
offered for this model series.Therefore, it also
describes equipment that may not be found in
your vehicle, for instance due to the selected
special equipment or the country version. This
also applies to safety-related functions and sys‐
tems.
Hazard warning flashers
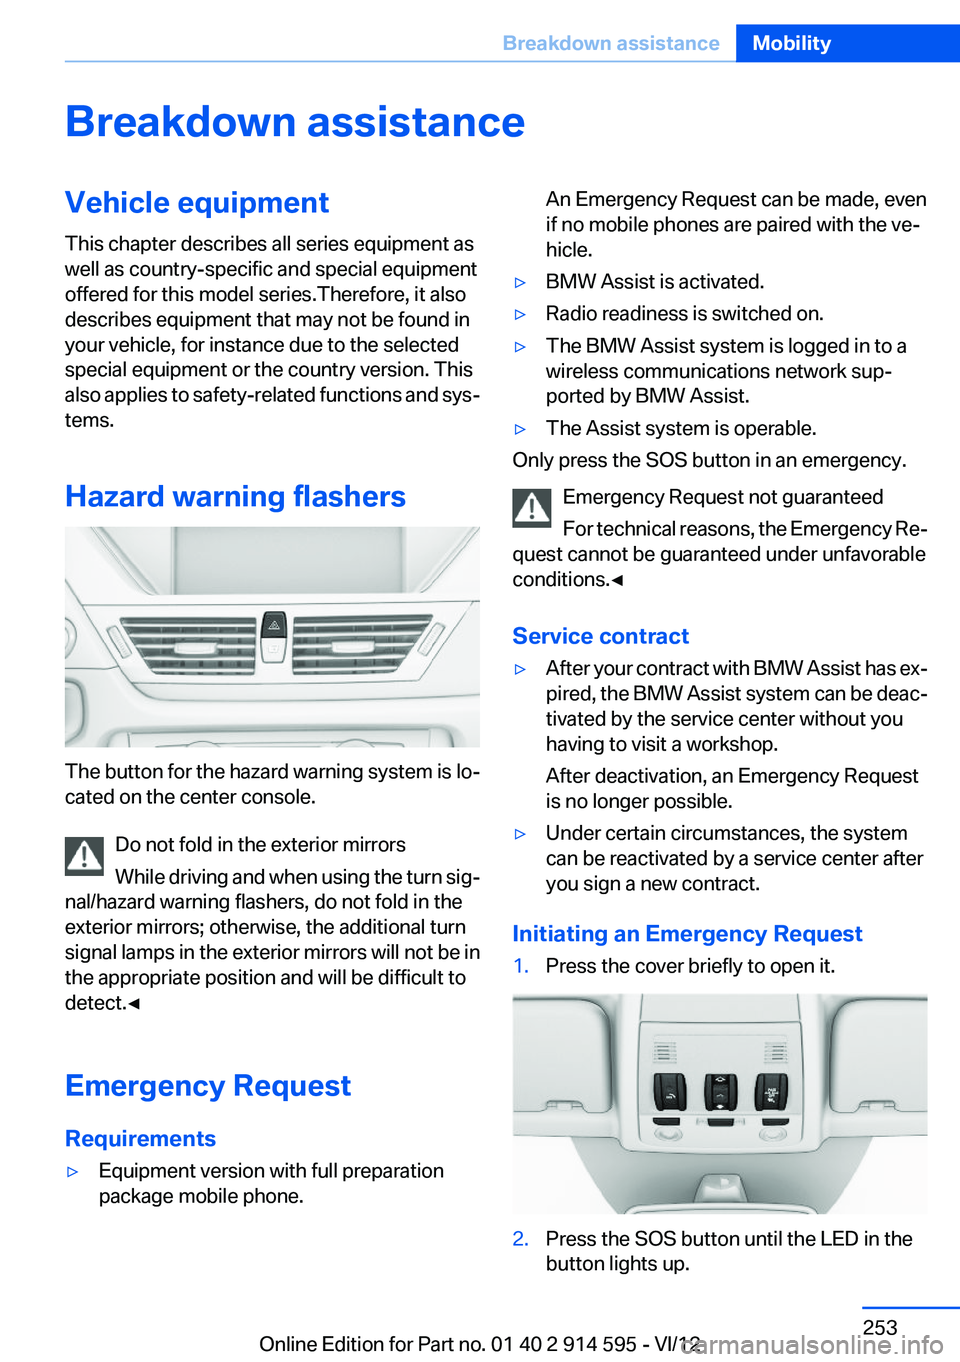
The button for the hazard warning system is lo‐
cated on the center console.
Do not fold in the exterior mirrors
While driving and when using the turn sig‐
nal/hazard warning flashers, do not fold in the
exterior mirrors; otherwise, the additional turn
signal lamps in the exterior mirrors will not be in
the appropriate position and will be difficult to
detect.◀
Emergency Request
Requirements
▷Equipment version with full preparation
package mobile phone.An Emergency Request can be made, even
if no mobile phones are paired with the ve‐
hicle.▷BMW Assist is activated.▷Radio readiness is switched on.▷The BMW Assist system is logged in to a
wireless communications network sup‐
ported by BMW Assist.▷The Assist system is operable.
Only press the SOS button in an emergency.
Emergency Request not guaranteed
For technical reasons, the Emergency Re‐
quest cannot be guaranteed under unfavorable
conditions.◀
Service contract
▷After your contract with BMW Assist has ex‐
pired, the BMW Assist system can be deac‐
tivated by the service center without you
having to visit a workshop.
After deactivation, an Emergency Request
is no longer possible.▷Under certain circumstances, the system
can be reactivated by a service center after
you sign a new contract.
Initiating an Emergency Request
1.Press the cover briefly to open it.2.Press the SOS button until the LED in the
button lights up.Seite 253Breakdown assistanceMobility253
Online Edition for Part no. 01 40 2 914 595 - VI/12
Page 259 of 291
CareVehicle equipment
This chapter describes all series equipment as
well as country-specific and special equipment
offered for this model series.Therefore, it also
describes equipment that may not be found in
your vehicle, for instance due to the selected
special equipment or the country version. This
also applies to safety-related functions and sys‐
tems.
Car washes
Notes Steam jets or high-pressure washers
When using steam jets or high-pressure
washers, hold them a sufficient distance away
and use a maximum temperature of
140 ℉/60 ℃.
Holding them too close or using excessively
high pressures or temperatures can cause dam‐
age or preliminary damage that may then lead to
long-term damage.
Follow the operating instructions for the high-
pressure washer.◀
Cleaning sensors/cameras with high-
pressure washers
When using high-pressure washers, do not
spray the exterior sensors and cameras, for Park
Distance Control or the backup camera, for in‐
stance, for extended periods of time and only
from a distance of at least 12 in/30 cm.◀
Wash your vehicle frequently, particularly in win‐
ter.
Intense soiling and road salt can damage the ve‐
hicle.Washing in automatic car washes
Give preference to cloth car washes or those
that use soft brushes in order to avoid paint
damage.
Notes
Note the following:▷Make sure that the wheels and tires are not
damaged by the transport mechanisms.▷Fold in the exterior mirrors; otherwise, they
may be damaged, depending on the width of
the vehicle.▷Deactivate the rain sensor, refer to page 60,
to avoid unintentional wiper activation.▷Move the rear window wiper to its resting
position, deactivate it, and protect it against
damage. Ask the car wash operator about
any necessary protective measures.▷Remove additional attachments, for in‐
stance a spoiler or telephone antenna, if
there is a risk that these may be damaged.
Guide rails in car washes
Avoid car washes with guide rails higher
than 4 in/10 cm; otherwise, the vehicle body
could be damaged.◀
Before driving into a car wash
The vehicle is able to roll if the following steps
are taken.
Automatic transmission
1.Insert the remote control into the ignition
lock, even with Comfort Access.2.Engage the selector lever or transmission
position N.3.Release the handbrake, refer to page 58.4.Switch the engine off.5.Leave the remote control in the ignition lock
so that the vehicle can roll.Seite 259CareMobility259
Online Edition for Part no. 01 40 2 914 595 - VI/12
Page 266 of 291

Technical dataVehicle equipment
This chapter describes all series equipment as
well as country-specific and special equipment
offered for this model series.Therefore, it alsodescribes equipment that may not be found in
your vehicle, for instance due to the selected
special equipment or the country version. This
also applies to safety-related functions and sys‐
tems.
Dimensions
1Vehicle width, without exterior mirrors:
70.8 inches/1,798 mm2Vehicle height: 60.8 inches/1,545 mm3Vehicle width, with exterior mirrors: 81 in‐
ches/2,058 mm4Wheelbase: 108.7 inches/2,760 mm5Vehicle length: 176.5 inches/4,484 mmSeite 266ReferenceTechnical data266
Online Edition for Part no. 01 40 2 914 595 - VI/12
Page 279 of 291

Cruise control 98
Cruise control– Malfunction 99
Cupholder 122
Curb weight, refer to Weights 267
Current fuel consumption 69
Current location, storing 142
Curve lights, refer to Adaptive light control 81
D
Dashboard lighting, refer to In‐ strument lighting 83
Dashboard, refer to Cock‐ pit 12
Data, technical 266
Date
– Date format 74– Setting 73
Daytime running lights 81
Daytime running lights, bulb replacement 248
Defroster
– Rear window 107
Destination entry via the ad‐
dress book 142
Destination guidance 149
Destination guidance with in‐ termediate destinations 147
Destination input, naviga‐ tion 140
Digital clock 68
Digital compass 112
Digital radio 163
Dimming mirrors 49
Directional indicators, refer to Turn signals 59
Display lighting, refer to Instru‐ ment lighting 83
Displays and controls 12
Displays, care 262
Displays, cleaning 262
Displays, refer to Instrument cluster 14
Disposal, coolant 242
Disposal, vehicle battery 251
Distance warning, refer to Park Distance Control PDC 100
Divided rear seat backrest, re‐ fer to Enlarging the cargo
area 115
Divided screen view, split screen 22
Door key, refer to Remote con‐ trol with integrated key 30
Door lock 34
Doors, manual operation 34
Doors, unlocking and locking– Confirmation signals 33– From the inside 34– From the outside 32
DOT Quality Grades 233
Downhill control 96
Draft-free ventilation 108
Drive-off assistant 97
Driving away on inclines, refer to Drive-off assistant 97
Driving notes, breaking in 126
Driving notes, general 126
Driving on poor roads 128
Driving stability control sys‐ tems 94
Driving through water 127
Driving tips, refer to Driving notes 126
Dry air, refer to Cooling func‐ tion 107
DSC Dynamic Stability Con‐ trol 94
DTC Dynamic Traction Con‐ trol 95
DTMF suffix dialing 198
DVD/CD 170
DVDs, storing 176
DVD, video 172
Dynamic destination guid‐ ance 156
Dynamic Stability Control DSC 94
Dynamic Traction Control DTC 95
E
ECO PRO 134
ECO PRO display 134
ECO PRO driving mode 134
ECO PRO mode 134
EfficientDynamics, refer to Saving fuel 133
Electrical malfunction– Door lock 34– Driver's door 34– Fuel filler flap 225– Tailgate 36
Electric seat adjustment 44
Electronic brake-force distri‐ bution 94
Electronic engine oil level check 239
Electronic Stability Program ESP, refer to Dynamic Stabil‐
ity Control DSC 94
Emergency activation
– Automatic transmission, re‐
fer to Overriding selector
lever lock 64
Emergency operation
– Door lock, refer to Manual
operation 34
Emergency operation, fuel
filler flap, unlocking man‐
ually 225
Emergency Request 253
Emergency service, refer to Roadside Assistance 254
Energy-conscious driving, re‐ fer to Current fuel consump‐
tion 69
Energy, saving
– Automatic Engine Start/Stop
Function 56
Energy, saving, refer to Saving
fuel 133
Engine, breaking in 126
Engine compartment 238
Engine coolant, refer to Cool‐ ant 242
Engine oil, adding 241
Seite 279Everything from A to ZReference279
Online Edition for Part no. 01 40 2 914 595 - VI/12
Page 280 of 291
Engine oil, additives, refer toApproved engine oils 241
Engine oil, alternative oil types 241
Engine oil, BMW maintenance system 243
Engine oil change intervals, re‐ fer to Service require‐
ments 75
Engine oil, checking the level 239
Engine oil, filling capacity 267
Engine oil temperature 69
Engine oil types, alterna‐ tive 241
Engine oil types, ap‐ proved 241
Engine, overheating, refer to Coolant temperature 69
Engine start, assistance 255
Engine, starting 55
Engine, starting– Comfort Access 36
Engine, starting, Start/Stop
button 54
Engine, stopping, Start/Stop button 54
Engine, switching off 55
Entry lamps, refer to Interior lamps 84
Environmentally friendly driv‐ ing, refer to Current fuel con‐
sumption 69
Equalizer 160
Equipment, interior 110
ESP Electronic Stability Pro‐ gram, refer to Dynamic Sta‐
bility Control DSC 94
Exchanging wheels/tires 235
Exhaust system 126
Exterior mirrors 48
Exterior mirrors, adjusting 48
Exterior mirrors, automatic dimming 49
Exterior mirrors, automatic heating 49
Exterior mirrors, folding in and
out 48
External audio device 121
External devices 181
External temperature dis‐ play 68
External temperature display– Changing the unit of meas‐
ure 72– On computer 72
External temperature warn‐
ing 68
Externel temperature dis‐ play 68
Eyes for securing cargo 131
F
Fader 160
Failure messages, refer to Check Control 77
False alarm
– Avoiding unintentional
alarms 39– Ending an alarm 39
Fastening safety belts, refer to
Safety belts 45
Fault messages, refer to Check Control 77
Filling capacities 267
Filter
– Refer to Microfilter/acti‐
vated-charcoal filter with au‐
tomatic climate control 108
Fine wood, care 261
First aid kit 254
Fitting for towing 258
Flashing when locking/unlock‐ ing 33
Flat Tire Monitor FTM 88
Flat Tire Monitor FTM, snow chains 237
Flat tire, run-flat tires 236
Flat tire, Tire Pressure Monitor TPM 90
Flat tire, warning lamp 89, 91
Flat tire, wheel change 250
Flooding, refer to Driving
through water 127
Floor carpet, care 261
Floor mats, care 261
FM/AM station 162
Fog lamps 83
Fog lamps, indicator lamp 83
Foldable rear seat back‐ rest 115
Foot brake 127
Footwell lamps, refer to Inte‐ rior lamps 84
For your own safety 6
Four-wheel drive, refer to xDrive 96
Front airbags 85
Front fog lamps 83
FTM Flat Tire Monitor 88
Fuel 226
Fuel– Refer to Average fuel con‐
sumption 70
Fuel, additives 226
Fuel, average consump‐ tion 70
Fuel cap 224
Fuel cap, closing 224
Fuel consumption display
– Average fuel consump‐
tion 70
Fuel consumption display,
current fuel consumption 69
Fuel-efficient driving, refer to Current fuel consumption 69
Fuel filler flap, closing 224
Fuel filler flap, opening 224
Fuel filler flap, unlocking in case of an electrical malfunc‐
tion 225
Fuel gauge 69
Fuel, saving 133
Fuel tank capacity, refer to Fill‐ ing capacities 267
Fuel tank contents, refer to Filling capacities 267
Fuel tank, refer to Filling ca‐ pacities 267
Seite 280ReferenceEverything from A to Z280
Online Edition for Part no. 01 40 2 914 595 - VI/12