2013 BMW X1 XDRIVE 35I interior lights
[x] Cancel search: interior lightsPage 83 of 291

▷High beams off/headlamp flasher, arrow 2.
To reactivate the High-beam Assistant, briefly
push the turn indicator lever toward the high
beams.
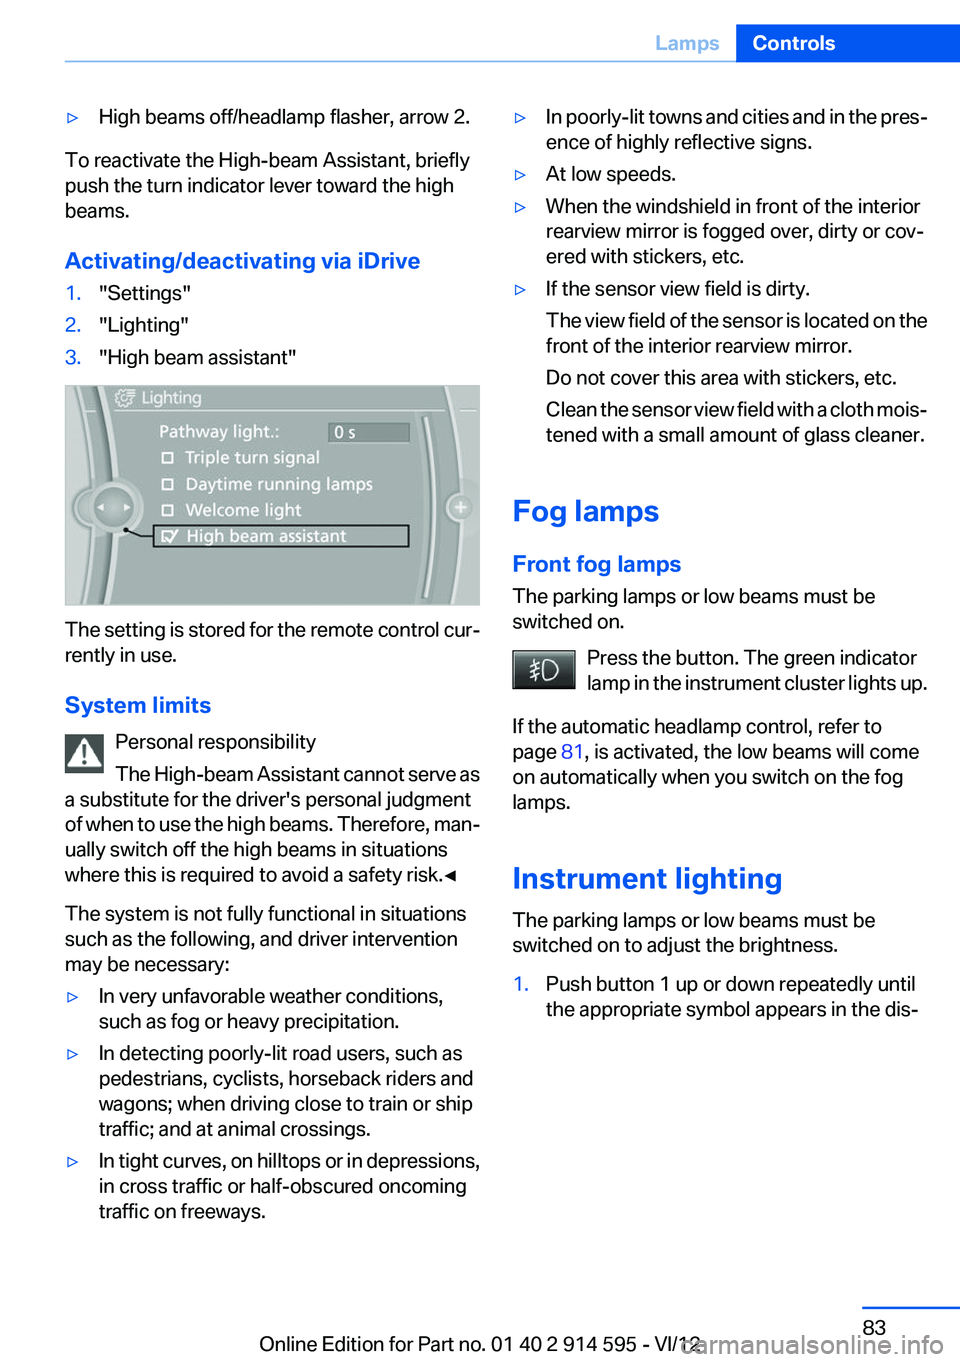
Activating/deactivating via iDrive
1."Settings"2."Lighting"3."High beam assistant"
The setting is stored for the remote control cur‐
rently in use.
System limits Personal responsibility
The High-beam Assistant cannot serve as
a substitute for the driver's personal judgment
of when to use the high beams. Therefore, man‐
ually switch off the high beams in situations
where this is required to avoid a safety risk.◀
The system is not fully functional in situations
such as the following, and driver intervention
may be necessary:
▷In very unfavorable weather conditions,
such as fog or heavy precipitation.▷In detecting poorly-lit road users, such as
pedestrians, cyclists, horseback riders and
wagons; when driving close to train or ship
traffic; and at animal crossings.▷In tight curves, on hilltops or in depressions,
in cross traffic or half-obscured oncoming
traffic on freeways.▷In poorly-lit towns and cities and in the pres‐
ence of highly reflective signs.▷At low speeds.▷When the windshield in front of the interior
rearview mirror is fogged over, dirty or cov‐
ered with stickers, etc.▷If the sensor view field is dirty.
The view field of the sensor is located on the
front of the interior rearview mirror.
Do not cover this area with stickers, etc.
Clean the sensor view field with a cloth mois‐
tened with a small amount of glass cleaner.
Fog lamps
Front fog lamps
The parking lamps or low beams must be
switched on.
Press the button. The green indicator
lamp in the instrument cluster lights up.
If the automatic headlamp control, refer to
page 81, is activated, the low beams will come
on automatically when you switch on the fog
lamps.
Instrument lighting
The parking lamps or low beams must be
switched on to adjust the brightness.
1.Push button 1 up or down repeatedly until
the appropriate symbol appears in the dis‐Seite 83LampsControls83
Online Edition for Part no. 01 40 2 914 595 - VI/12
Page 111 of 291

distance depends on the particular hand-
held transmitter.4.Press the button of the desired function on
the hand-held transmitter and the button
being programmed on the interior rearview
mirror simultaneously and hold. The LED on
the interior rearview mirror flashes slowly at
first.5.When the LED flashes more rapidly, release
both buttons. Rapid flashing indicates that
the button on the interior rearview mirror has
been programmed.
If the LED does not flash faster after 60 sec‐
onds, change the distance between the in‐
terior rearview mirror and the hand-held
transmitter and repeat the step. Multiple tri‐
als at different distances may be necessary.
Wait at least 15 seconds between trials.6.To program additional functions on other
buttons, repeat steps 3 to 5.
The systems can be operated with the buttons
on the interior rearview mirror.
Special characteristics of alternating-
code radio systems
If the system cannot be operated after repeated
programming, check whether the system to be
operated uses an alternating-code system.
Read the operating instructions of the system or
press and hold the programmed button on the
interior rearview mirror. If the LED on the interior
rearview mirror flashes rapidly at first and then
lights up continuously for 2 seconds, the system
is equipped with an alternating-code system.
This flashing LED pattern repeats itself for ap‐
prox. 20 seconds.
In systems with an alternating-code system, the
Universal Garage Door Opener and the system
must be additionally synchronized.
Please obtain additional information on syn‐
chronization in the operating instructions of the
system being set up.
The systems will be easier to synchronize with
the aid of a second person.
Synchronization:1.Park the vehicle within range of the remote-
controlled system.2.Program the corresponding button on the
interior rearview mirror as described.3.Identify and press the synchronization but‐
ton on the system being set up. You have
approx. 30 seconds for the next step.4.Press and hold the button on the interior
rearview mirror for approx. 3 seconds and
then release it. Repeat this step up to three
times if necessary to complete the synchro‐
nization procedure. When synchronization
is completed, the programmed function is
executed.
Reprogramming individual buttons
1.Switch on the ignition.2.Hold the hand-held transmitter at a distance
of approx. 1 to 3 in/2.5 to 8 cm from the
memory buttons.
The required distance depends on the par‐
ticular hand-held transmitter.3.Press the memory button of the Universal
Garage Door Opener.4.If the LED flashes slowly after approx.
20 seconds, press the transmit button on
the hand-held transmitter.5.Release both buttons when the LED flashes
rapidly.
If the LED does not flash rapidly after approx.
60 seconds, change the distance and repeat
the step.
Canada: if the LED does not flash rapidly af‐
ter approx. 60 seconds, change the distance
and repeat the step. If programming was
aborted by the hand-held transmitter, hold
down the memory button and press and re‐
lease the button on the hand-held transmit‐
ter several times for 2 seconds.Seite 111Interior equipmentControls111
Online Edition for Part no. 01 40 2 914 595 - VI/12
Page 112 of 291

ControlsPrior to operation
Before operating a unit with the Universal
Garage Door Opener, ensure that there are no
people, animals, or objects in the range of move‐
ment of the system; otherwise, there is a risk of
injury or damage.
Also follow the safety instructions of the hand-
held transmitter.◀
The system, such as the garage door, can be
operated using the button on the interior rear‐
view mirror with the engine running or the igni‐
tion switched on. When you are within the re‐
ception range of the system, press and hold the
button until the function is initiated. The LED on
the interior rearview mirror lights up continu‐
ously while the radio signal is being transmitted.
Deleting stored functions
Press the right and left buttons on the interior
rearview mirror simultaneously for approx.
20 seconds until the LED flashes rapidly. All
stored functions are deleted. The functions can‐
not be deleted individually.
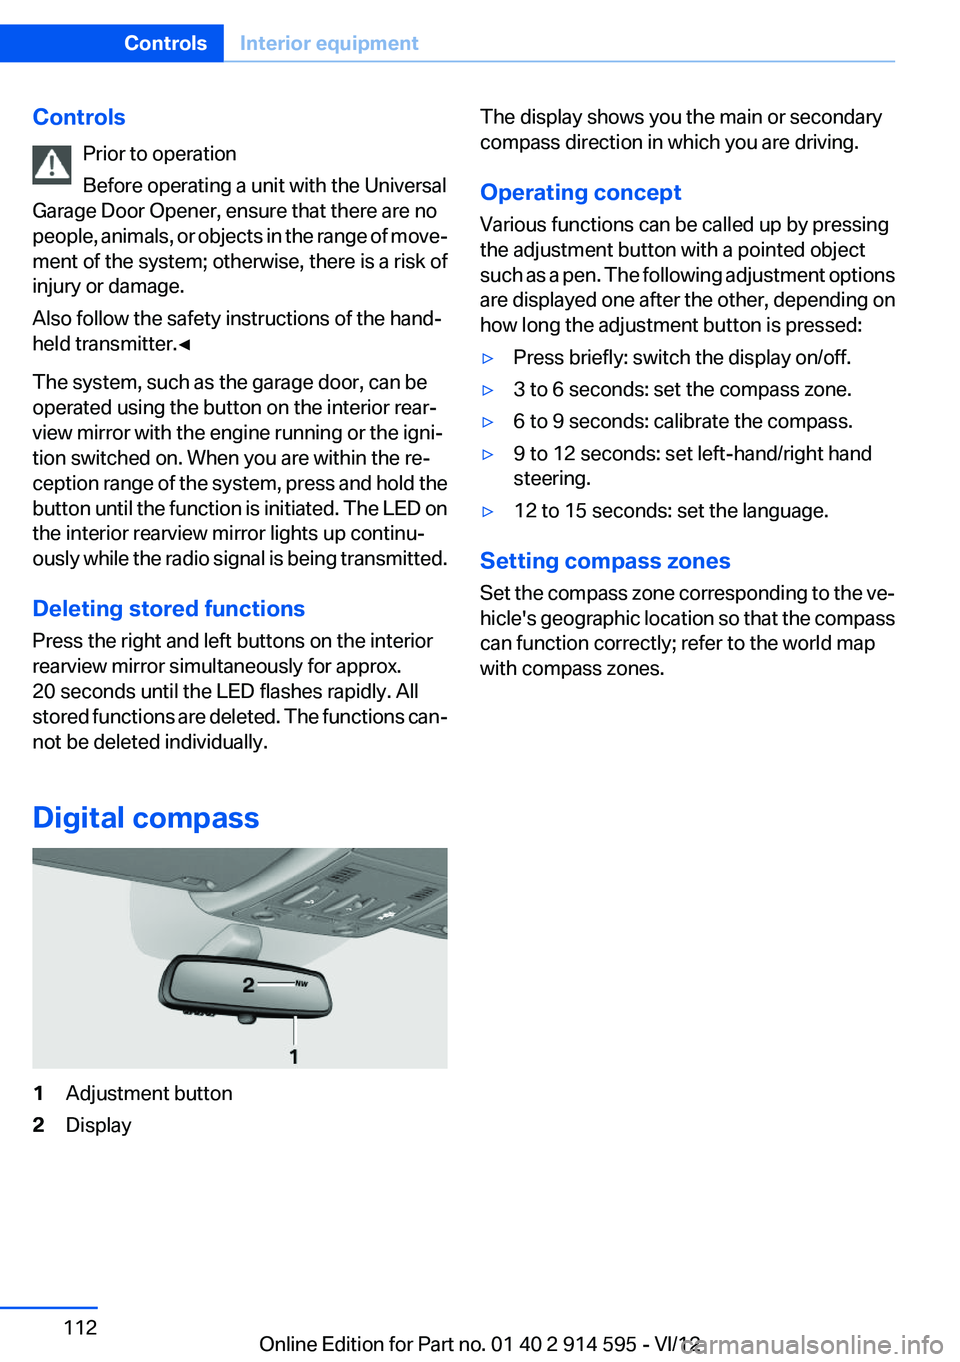
Digital compass1Adjustment button2DisplayThe display shows you the main or secondary
compass direction in which you are driving.
Operating concept
Various functions can be called up by pressing
the adjustment button with a pointed object
such as a pen. The following adjustment options
are displayed one after the other, depending on
how long the adjustment button is pressed:▷Press briefly: switch the display on/off.▷3 to 6 seconds: set the compass zone.▷6 to 9 seconds: calibrate the compass.▷9 to 12 seconds: set left-hand/right hand
steering.▷12 to 15 seconds: set the language.
Setting compass zones
Set the compass zone corresponding to the ve‐
hicle's geographic location so that the compass
can function correctly; refer to the world map
with compass zones.
Seite 112ControlsInterior equipment112
Online Edition for Part no. 01 40 2 914 595 - VI/12
Page 276 of 291

Everything from A to Z
IndexA
ABS, Antilock Brake Sys‐ tem 94
Accident, refer to Emergency Request, initiating 253
Acoustic signal, refer to Check Control 77
Activated charcoal filter with automatic climate con‐
trol 108
Adaptive brake lights, refer to Brake force display 93
Adaptive light control 81
Additional telephone 192
Additives, coolant 242
Additives, engine oil 241
After washing vehicle 260
Airbags 85
Airbags, indicator/warning light 88
Air circulation, refer to Recir‐ culated air mode 107
Air conditioning mode– Automatic climate con‐
trol 105– Ventilation 108
Air distribution
– Automatic 106– Manual 106
Air drying, refer to Cooling
function 107
Air flow rate 106
Airing, refer to Ventilation 108
Air pressure, refer to Tire infla‐ tion pressure 228
Air supply
– Automatic climate con‐
trol 105– Ventilation 108
Air vents
– Refer to Ventilation 108Alarm system 38
Alarm system– Avoiding unintentional
alarms 39– Ending an alarm 39– Interior motion sensor 39– Tilt alarm sensor 39
All around the headliner 17
ALL program 107
All-season tires, refer to Win‐ ter tires 236
All-wheel drive, refer to
xDrive 96
Alternating-code hand-held transmitter 111
AM/FM station 162
Announcement, navigation, refer to Spoken instruc‐
tions 151
Antifreeze, coolant 242
Antifreeze, washer fluid 61
Antilock Brake System, ABS 94
Anti-slip control, refer to Dy‐ namic Stability Control
DSC 94
Anti-theft protection 32
Appointments 209
Approved axle loads, refer to Weights 267
Approved engine oils 241
Approved gross vehicle weight, refer to Weights 267
Armrest, refer to Center arm‐ rest 120
Arrival time, refer to Com‐ puter 70
Ashtray 114
Assist 215
Assistance, Roadside Assis‐ tance 254
Assistance with driving off, re‐
fer to Drive-off assistant 97
Assistance with starting en‐ gine, refer to Jump-start‐
ing 255
Audio device, external 121
Audio playback 171
Audio playback, Blue‐ tooth 185
Automatic– Air distribution 106– Air flow rate 106
Automatic car wash 259
Automatic climate control
– Automatic air distribu‐
tion 106
Automatic, cruise control 98
Automatic Curb Monitor 48
Automatic Engine Start/Stop Function 56
Automatic headlamp con‐ trol 80, 81
Automatic recirculated air control 107
Automatic transmission with Steptronic 62, 64
Automatic transmission with
Steptronic
– Interlock 62– Kickdown 63, 64– Overriding selector lever
lock 64
AUTO program with automatic
climate control 106
AUX-IN port 121, 181
Average fuel consumption 70
Average fuel consumption
– Setting the units 72
Average speed 70
Average speed, refer to Com‐ puter 70
Seite 276ReferenceEverything from A to Z276
Online Edition for Part no. 01 40 2 914 595 - VI/12