2013 BMW X1 XDRIVE 35I check engine light
[x] Cancel search: check engine lightPage 100 of 291
Park Distance Control PDC
The concept
In addition to the PDC Park Distance Control, the
backup camera, refer to page 102, can be
switched on.
PDC supports you when parking. A slow ap‐
proach to an object in front of or behind your ve‐
hicle is announced by:▷Signal tones.▷Visual display.
Measurement
Measurements are made by ultrasound sensors
in the bumpers.
The range is approx. 6 ft/2 m.
An acoustic warning is first given:
▷By the front sensors and two rear corner
sensors at approx. 24 in/60 cm.▷By the rear middle sensors at approx.
5 ft/1.50 m.
System limits
Check the traffic situation as well
PDC cannot serve as a substitute for the
driver's personal judgment of the traffic situa‐
tion. Check the traffic situation around the vehi‐
cle with your own eyes. Otherwise, an accident
could result from road users or objects located
outside of the PDC detection range.
Loud noises from outside and inside the vehicle
may prevent you from hearing the PDC's signal
tone.◀
Avoid driving quickly with PDC
Avoid approaching an object quickly.
Avoid driving away quickly while PDC is not yet
active.
For technical reasons, the system may other‐
wise be too late in issuing a warning.◀
Limits of ultrasonic measurement
The detection of objects can reach the physical
limits of ultrasonic measurement, for instance:▷With tow bars and trailer hitches.▷With thin or wedge-shaped objects.▷With low objects.▷With objects with corners and sharp edges.
Low objects already displayed, e.g., curbs, can
move into the blind area of the sensors before or
after a continuous tone sounds.
High, protruding objects such as ledges may not
be detected.
False warnings
PDC may issue a warning under the following
conditions even though there is no obstacle
within the detection range:
▷In heavy rain.▷When sensors are very dirty or covered in
ice.▷When sensors are covered in snow.▷On rough road surfaces.▷In large buildings with right angles and
smooth walls, e.g., in underground garages.▷In heavy exhaust.▷Due to other ultrasound sources, e.g.,
sweeping machines, high pressure steam
cleaners or neon lights.
Switching on automatically
With the engine running or the ignition switched
on, shift the selector lever into position R.
Switching off automatically when
driving forward
The system switches off when a certain distance
or speed is exceeded.
Switch on the system again if necessary.
Seite 100ControlsDriving comfort100
Online Edition for Part no. 01 40 2 914 595 - VI/12
Page 102 of 291
Malfunction
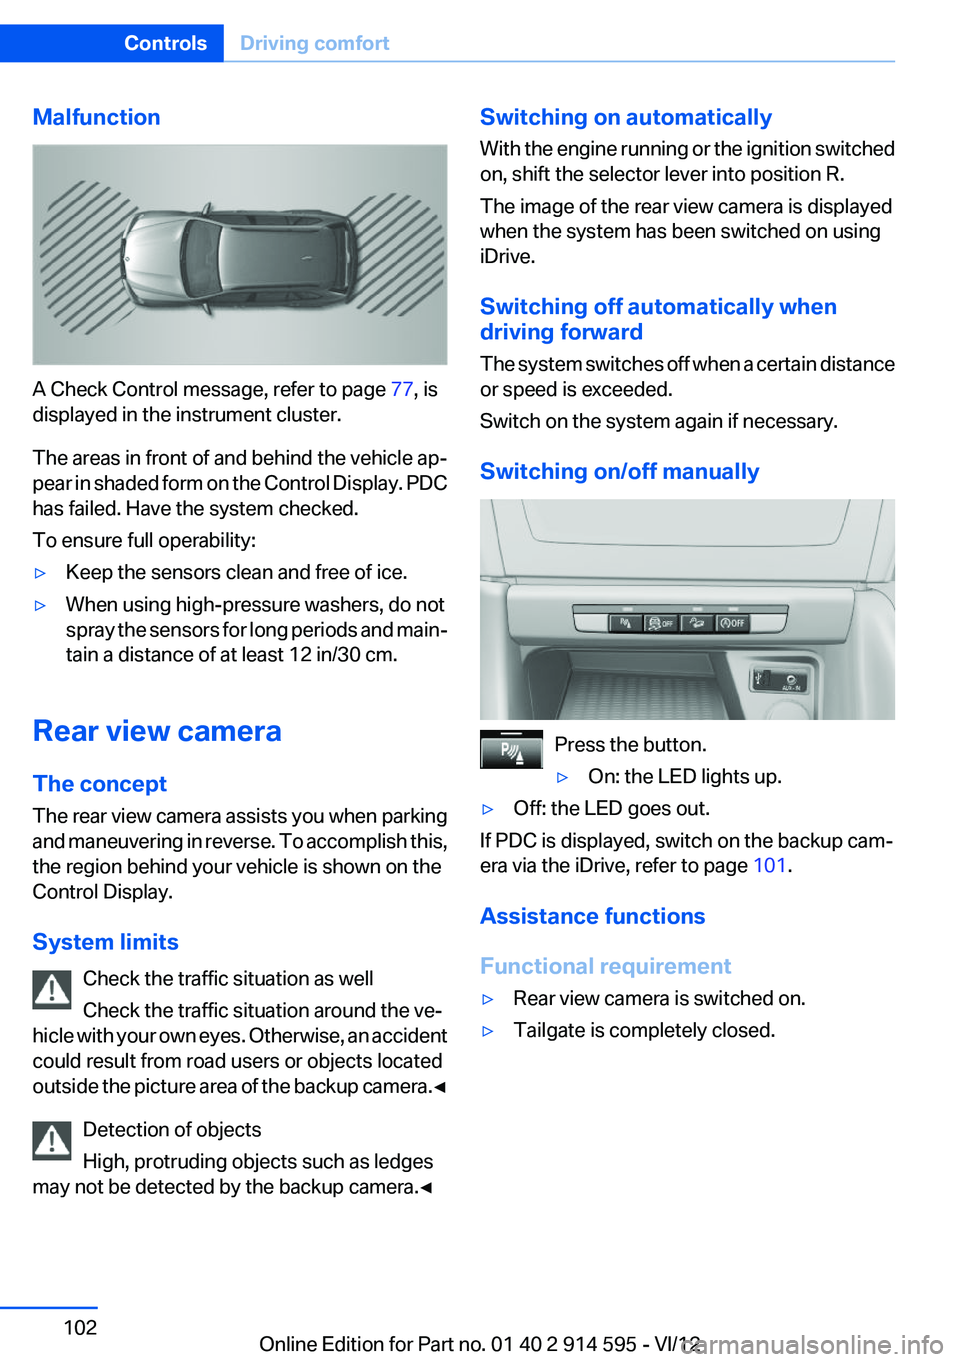
A Check Control message, refer to page 77, is
displayed in the instrument cluster.
The areas in front of and behind the vehicle ap‐
pear in shaded form on the Control Display. PDC
has failed. Have the system checked.
To ensure full operability:
▷Keep the sensors clean and free of ice.▷When using high-pressure washers, do not
spray the sensors for long periods and main‐
tain a distance of at least 12 in/30 cm.
Rear view camera
The concept
The rear view camera assists you when parking
and maneuvering in reverse. To accomplish this,
the region behind your vehicle is shown on the
Control Display.
System limits Check the traffic situation as well
Check the traffic situation around the ve‐
hicle with your own eyes. Otherwise, an accident
could result from road users or objects located
outside the picture area of the backup camera. ◀
Detection of objects
High, protruding objects such as ledges
may not be detected by the backup camera.◀
Switching on automatically
With the engine running or the ignition switched
on, shift the selector lever into position R.
The image of the rear view camera is displayed
when the system has been switched on using
iDrive.
Switching off automatically when
driving forward
The system switches off when a certain distance
or speed is exceeded.
Switch on the system again if necessary.
Switching on/off manually
Press the button.
▷On: the LED lights up.▷Off: the LED goes out.
If PDC is displayed, switch on the backup cam‐
era via the iDrive, refer to page 101.
Assistance functions
Functional requirement
▷Rear view camera is switched on.▷Tailgate is completely closed.Seite 102ControlsDriving comfort102
Online Edition for Part no. 01 40 2 914 595 - VI/12
Page 239 of 291
Risk of damage
Before opening the hood, ensure that the
wiper arms with wiper blades are folded onto the
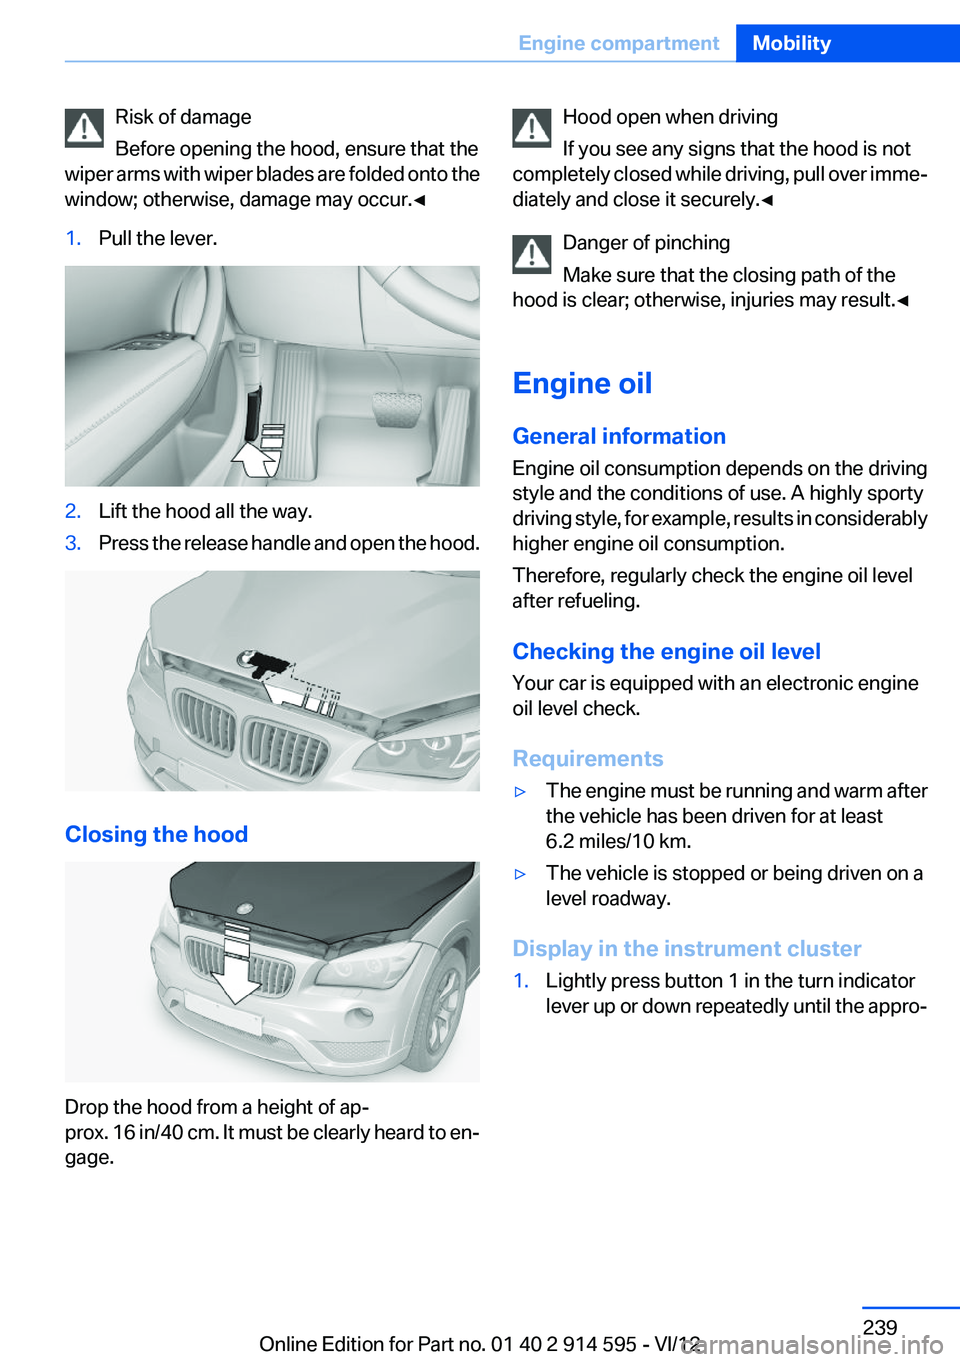
window; otherwise, damage may occur.◀1.Pull the lever.2.Lift the hood all the way.3.Press the release handle and open the hood.
Closing the hood
Drop the hood from a height of ap‐
prox. 16 in/40 cm. It must be clearly heard to en‐
gage.
Hood open when driving
If you see any signs that the hood is not
completely closed while driving, pull over imme‐
diately and close it securely.◀
Danger of pinching
Make sure that the closing path of the
hood is clear; otherwise, injuries may result.◀
Engine oil
General information
Engine oil consumption depends on the driving
style and the conditions of use. A highly sporty
driving style, for example, results in considerably
higher engine oil consumption.
Therefore, regularly check the engine oil level
after refueling.
Checking the engine oil level
Your car is equipped with an electronic engine
oil level check.
Requirements▷The engine must be running and warm after
the vehicle has been driven for at least
6.2 miles/10 km.▷The vehicle is stopped or being driven on a
level roadway.
Display in the instrument cluster
1.Lightly press button 1 in the turn indicator
lever up or down repeatedly until the appro‐Seite 239Engine compartmentMobility239
Online Edition for Part no. 01 40 2 914 595 - VI/12
Page 242 of 291
Oil change
An oil change should be carried out by the serv‐
ice center only.
Coolant
General information Danger of burns from hot engine
Do not open the cooling system while the
engine is hot; otherwise, escaping coolant may
cause burns.◀
Suitable additives
Only use suitable additives; otherwise, en‐
gine damage may occur. The additives are
harmful to your health.◀
Coolant consists of water and additives.
Not all commercially available additives are suit‐
able for your vehicle. Ask your service center for
suitable additives.
Checking the coolant level
1.Do not open the hood until the engine has
cooled down.2.Turn the expansion tank cap counterclock‐
wise slightly to allow any accumulated pres‐
sure to escape; then continue turning to
open.3.The coolant level is correct if it is between
the maximum and minimum marks in thefiller neck, refer also to the diagram next to
the filler neck.4.If the coolant is low, slowly add coolant up to
the specified level; do not overfill.5.Turn the cap until there is an audible click.6.Have the cause of the coolant loss elimi‐
nated as soon as possible.
Disposal
Comply with the appropriate environmen‐
tal protection regulations when disposing
of coolant additives.
Seite 242MobilityEngine compartment242
Online Edition for Part no. 01 40 2 914 595 - VI/12
Page 244 of 291
Maintenance and repair should be performed by
your service center. Make sure to have regular
maintenance procedures recorded in the vehi‐
cle's Service and Warranty Information Booklet
for US models, and in the Warranty and Service
Guide Booklet for Canadian models. These en‐
tries are proof of regular maintenance.
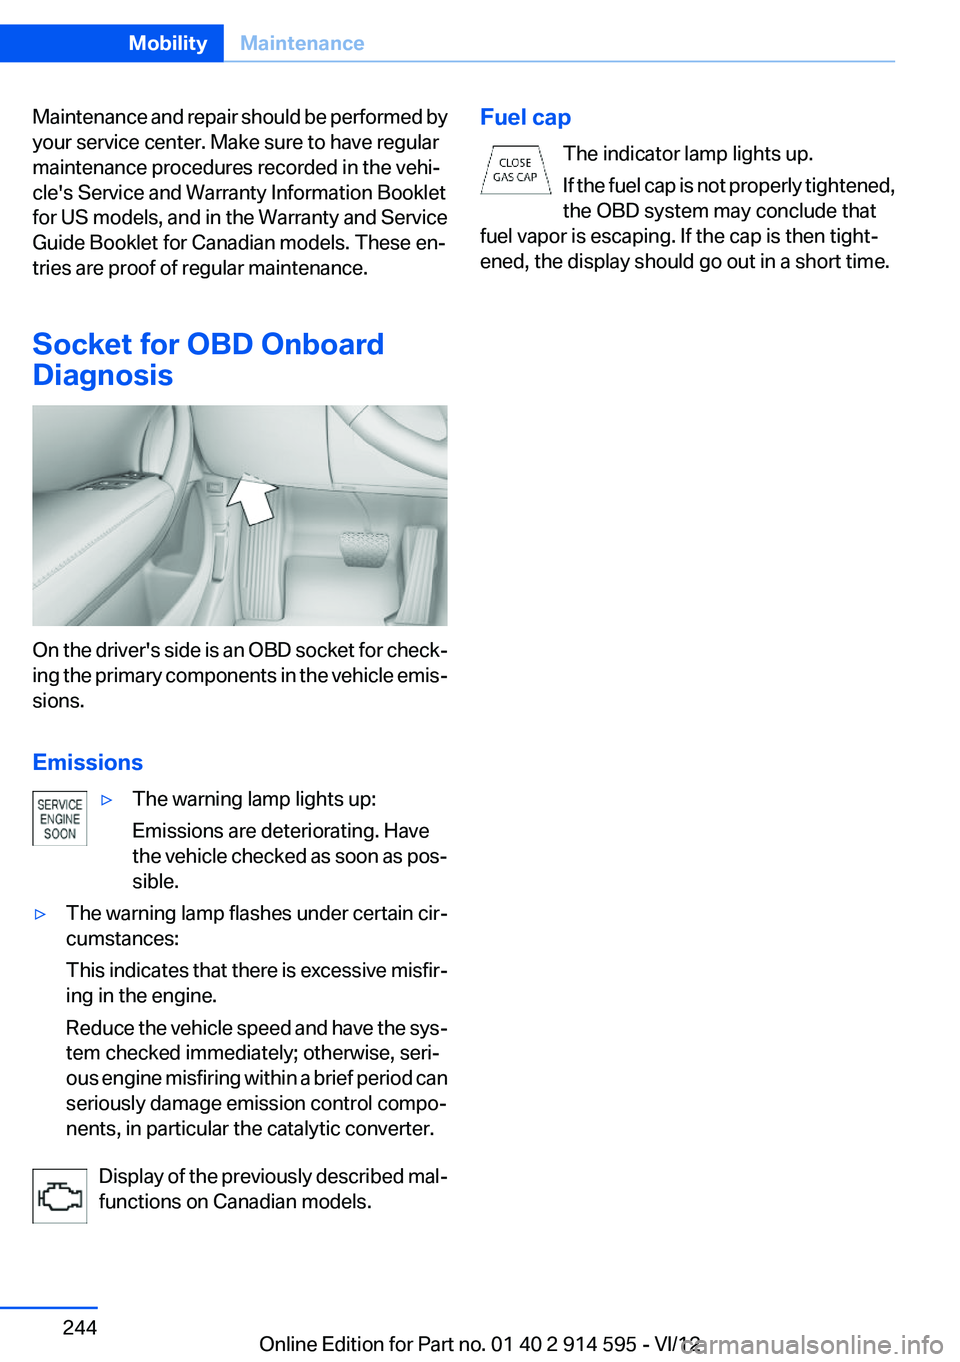
Socket for OBD Onboard
Diagnosis
On the driver's side is an OBD socket for check‐
ing the primary components in the vehicle emis‐
sions.
Emissions
▷The warning lamp lights up:
Emissions are deteriorating. Have
the vehicle checked as soon as pos‐
sible.▷The warning lamp flashes under certain cir‐
cumstances:
This indicates that there is excessive misfir‐
ing in the engine.
Reduce the vehicle speed and have the sys‐
tem checked immediately; otherwise, seri‐
ous engine misfiring within a brief period can
seriously damage emission control compo‐
nents, in particular the catalytic converter.
Display of the previously described mal‐
functions on Canadian models.
Fuel cap
The indicator lamp lights up.
If the fuel cap is not properly tightened,
the OBD system may conclude that
fuel vapor is escaping. If the cap is then tight‐
ened, the display should go out in a short time.Seite 244MobilityMaintenance244
Online Edition for Part no. 01 40 2 914 595 - VI/12
Page 251 of 291
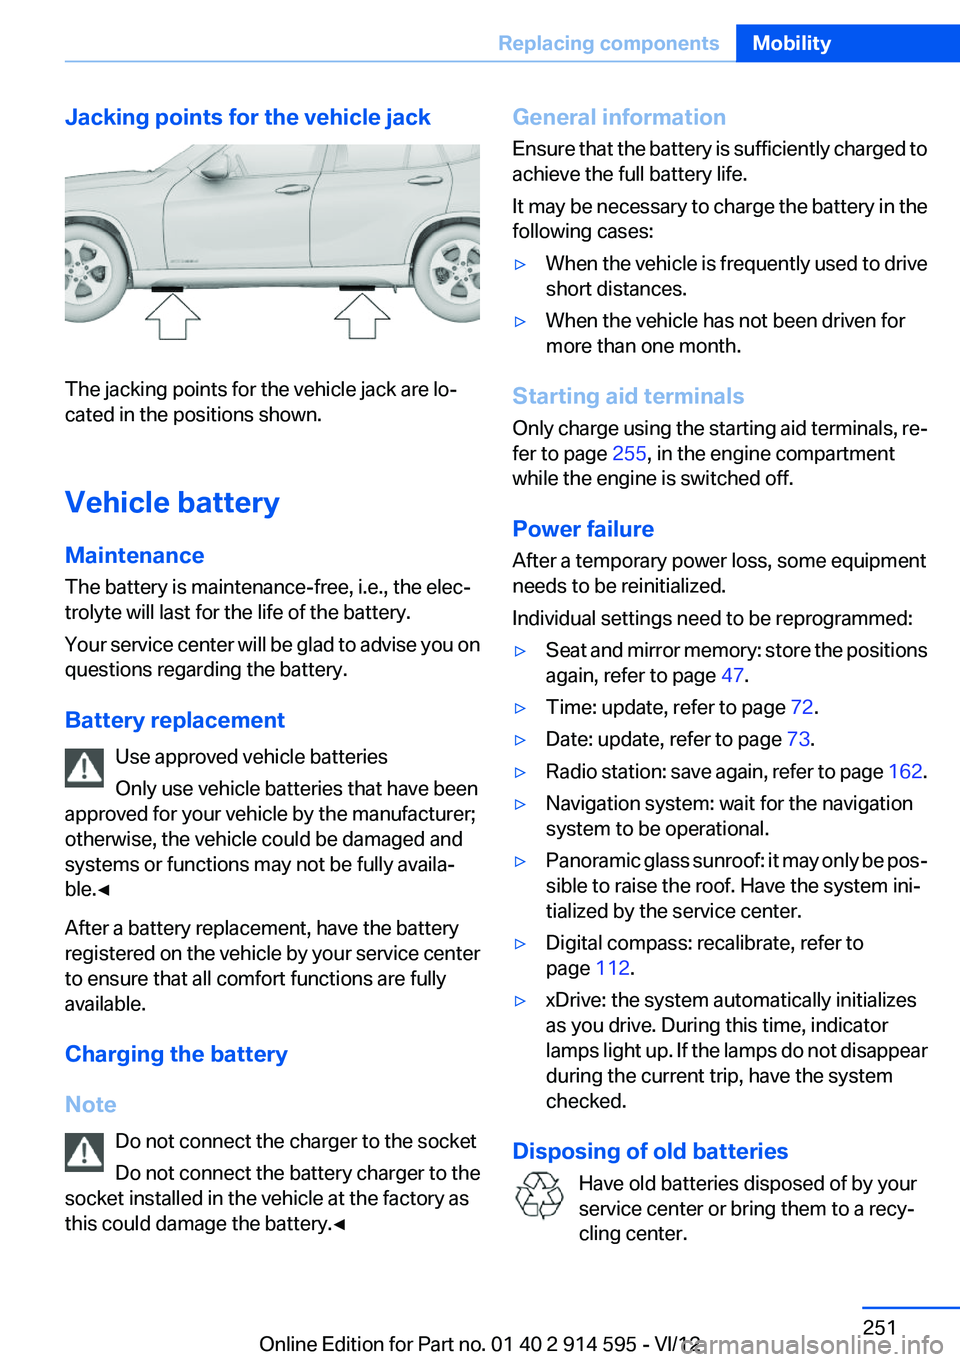
Jacking points for the vehicle jack
The jacking points for the vehicle jack are lo‐
cated in the positions shown.
Vehicle battery
Maintenance
The battery is maintenance-free, i.e., the elec‐
trolyte will last for the life of the battery.
Your service center will be glad to advise you on
questions regarding the battery.
Battery replacement Use approved vehicle batteries
Only use vehicle batteries that have been
approved for your vehicle by the manufacturer;
otherwise, the vehicle could be damaged and
systems or functions may not be fully availa‐
ble.◀
After a battery replacement, have the battery
registered on the vehicle by your service center
to ensure that all comfort functions are fully
available.
Charging the battery
Note Do not connect the charger to the socket
Do not connect the battery charger to the
socket installed in the vehicle at the factory as
this could damage the battery.◀
General information
Ensure that the battery is sufficiently charged to
achieve the full battery life.
It may be necessary to charge the battery in the
following cases:▷When the vehicle is frequently used to drive
short distances.▷When the vehicle has not been driven for
more than one month.
Starting aid terminals
Only charge using the starting aid terminals, re‐
fer to page 255, in the engine compartment
while the engine is switched off.
Power failure
After a temporary power loss, some equipment
needs to be reinitialized.
Individual settings need to be reprogrammed:
▷Seat and mirror memory: store the positions
again, refer to page 47.▷Time: update, refer to page 72.▷Date: update, refer to page 73.▷Radio station: save again, refer to page 162.▷Navigation system: wait for the navigation
system to be operational.▷Panoramic glass sunroof: it may only be pos‐
sible to raise the roof. Have the system ini‐
tialized by the service center.▷Digital compass: recalibrate, refer to
page 112.▷xDrive: the system automatically initializes
as you drive. During this time, indicator
lamps light up. If the lamps do not disappear
during the current trip, have the system
checked.
Disposing of old batteries
Have old batteries disposed of by your
service center or bring them to a recy‐
cling center.
Seite 251Replacing componentsMobility251
Online Edition for Part no. 01 40 2 914 595 - VI/12
Page 256 of 291
sponding engine or body ground of the ve‐
hicle to be started.
Starting the engine
Never use spray fluids to start the engine.
1.Start the engine of the assisting vehicle and
let it run for several minutes at an increased
idle speed.
If the vehicle being started has a diesel en‐
gine: let the engine of the assisting vehicle
run for approx. 10 minutes.2.Start the engine of the vehicle being started
in the usual way.
If the first starting attempt is not successful,
wait a few minutes before making another
attempt in order to allow the discharged bat‐
tery to recharge.3.Let both engines run for several minutes.4.Disconnect the jumper cables in the reverse
order.
Check the battery and recharge if necessary.
Tow-starting and towing Observe applicable laws and regulations
Observe applicable laws and regulations
for tow-starting and towing.◀
No additional passengers
Do not transport any passengers other
than the driver in a vehicle that is being towed. ◀
Automatic transmission, 8-gear:
transporting your vehicle
Note
Your vehicle is not permitted to be towed.
Therefore, contact a service center in the event
of a breakdown.
Do not have the vehicle towed
Have your vehicle transported on a loading
platform only; otherwise, damage may occur.◀
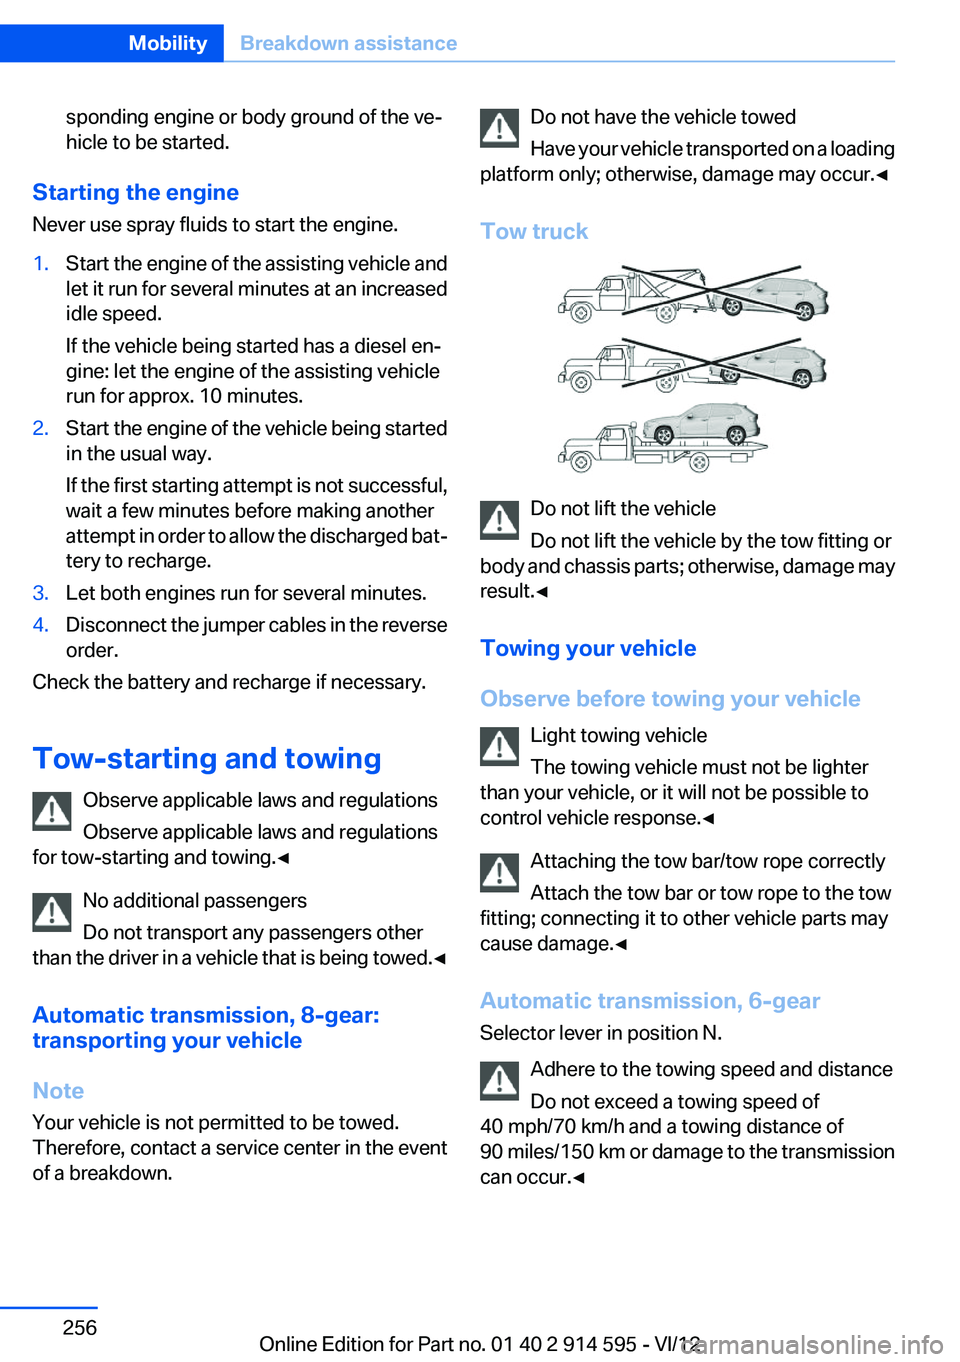
Tow truck
Do not lift the vehicle
Do not lift the vehicle by the tow fitting or
body and chassis parts; otherwise, damage may
result.◀
Towing your vehicle
Observe before towing your vehicle Light towing vehicle
The towing vehicle must not be lighter
than your vehicle, or it will not be possible to
control vehicle response.◀
Attaching the tow bar/tow rope correctly
Attach the tow bar or tow rope to the tow
fitting; connecting it to other vehicle parts may
cause damage.◀
Automatic transmission, 6-gear
Selector lever in position N.
Adhere to the towing speed and distance
Do not exceed a towing speed of
40 mph/70 km/h and a towing distance of
90 miles/150 km or damage to the transmission
can occur.◀
Seite 256MobilityBreakdown assistance256
Online Edition for Part no. 01 40 2 914 595 - VI/12
Page 276 of 291

Everything from A to Z
IndexA
ABS, Antilock Brake Sys‐ tem 94
Accident, refer to Emergency Request, initiating 253
Acoustic signal, refer to Check Control 77
Activated charcoal filter with automatic climate con‐
trol 108
Adaptive brake lights, refer to Brake force display 93
Adaptive light control 81
Additional telephone 192
Additives, coolant 242
Additives, engine oil 241
After washing vehicle 260
Airbags 85
Airbags, indicator/warning light 88
Air circulation, refer to Recir‐ culated air mode 107
Air conditioning mode– Automatic climate con‐
trol 105– Ventilation 108
Air distribution
– Automatic 106– Manual 106
Air drying, refer to Cooling
function 107
Air flow rate 106
Airing, refer to Ventilation 108
Air pressure, refer to Tire infla‐ tion pressure 228
Air supply
– Automatic climate con‐
trol 105– Ventilation 108
Air vents
– Refer to Ventilation 108Alarm system 38
Alarm system– Avoiding unintentional
alarms 39– Ending an alarm 39– Interior motion sensor 39– Tilt alarm sensor 39
All around the headliner 17
ALL program 107
All-season tires, refer to Win‐ ter tires 236
All-wheel drive, refer to
xDrive 96
Alternating-code hand-held transmitter 111
AM/FM station 162
Announcement, navigation, refer to Spoken instruc‐
tions 151
Antifreeze, coolant 242
Antifreeze, washer fluid 61
Antilock Brake System, ABS 94
Anti-slip control, refer to Dy‐ namic Stability Control
DSC 94
Anti-theft protection 32
Appointments 209
Approved axle loads, refer to Weights 267
Approved engine oils 241
Approved gross vehicle weight, refer to Weights 267
Armrest, refer to Center arm‐ rest 120
Arrival time, refer to Com‐ puter 70
Ashtray 114
Assist 215
Assistance, Roadside Assis‐ tance 254
Assistance with driving off, re‐
fer to Drive-off assistant 97
Assistance with starting en‐ gine, refer to Jump-start‐
ing 255
Audio device, external 121
Audio playback 171
Audio playback, Blue‐ tooth 185
Automatic– Air distribution 106– Air flow rate 106
Automatic car wash 259
Automatic climate control
– Automatic air distribu‐
tion 106
Automatic, cruise control 98
Automatic Curb Monitor 48
Automatic Engine Start/Stop Function 56
Automatic headlamp con‐ trol 80, 81
Automatic recirculated air control 107
Automatic transmission with Steptronic 62, 64
Automatic transmission with
Steptronic
– Interlock 62– Kickdown 63, 64– Overriding selector lever
lock 64
AUTO program with automatic
climate control 106
AUX-IN port 121, 181
Average fuel consumption 70
Average fuel consumption
– Setting the units 72
Average speed 70
Average speed, refer to Com‐ puter 70
Seite 276ReferenceEverything from A to Z276
Online Edition for Part no. 01 40 2 914 595 - VI/12