2013 BMW X1 XDRIVE 28I light
[x] Cancel search: lightPage 118 of 291
Removing
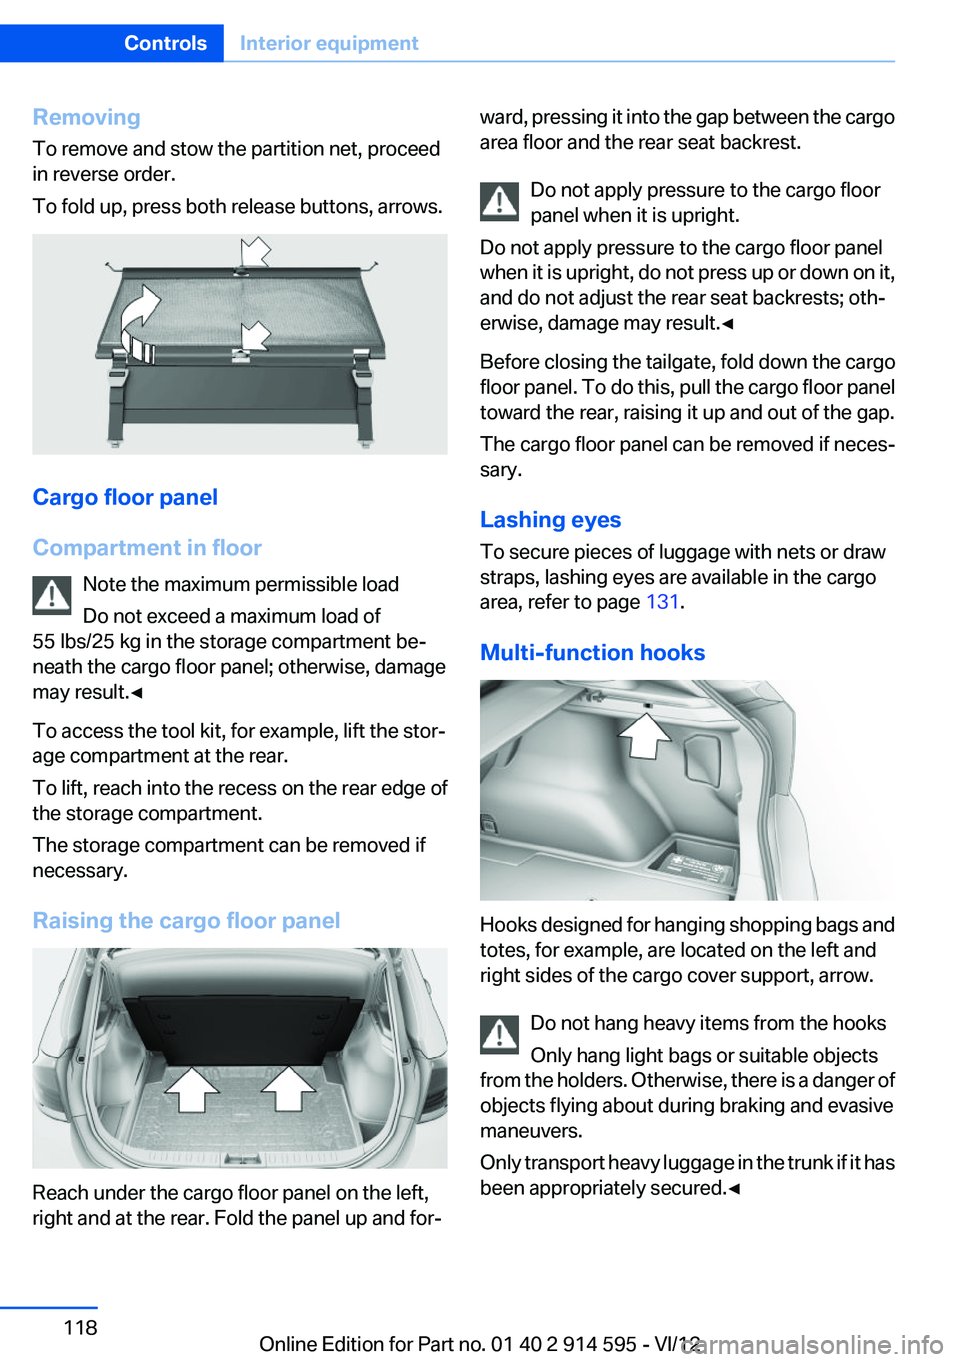
To remove and stow the partition net, proceed
in reverse order.
To fold up, press both release buttons, arrows.
Cargo floor panel
Compartment in floor Note the maximum permissible load
Do not exceed a maximum load of
55 lbs/25 kg in the storage compartment be‐
neath the cargo floor panel; otherwise, damage
may result.◀
To access the tool kit, for example, lift the stor‐
age compartment at the rear.
To lift, reach into the recess on the rear edge of
the storage compartment.
The storage compartment can be removed if
necessary.
Raising the cargo floor panel
Reach under the cargo floor panel on the left,
right and at the rear. Fold the panel up and for‐
ward, pressing it into the gap between the cargo
area floor and the rear seat backrest.
Do not apply pressure to the cargo floor
panel when it is upright.
Do not apply pressure to the cargo floor panel
when it is upright, do not press up or down on it,
and do not adjust the rear seat backrests; oth‐
erwise, damage may result.◀
Before closing the tailgate, fold down the cargo
floor panel. To do this, pull the cargo floor panel
toward the rear, raising it up and out of the gap.
The cargo floor panel can be removed if neces‐
sary.
Lashing eyes
To secure pieces of luggage with nets or draw
straps, lashing eyes are available in the cargo
area, refer to page 131.
Multi-function hooks
Hooks designed for hanging shopping bags and
totes, for example, are located on the left and
right sides of the cargo cover support, arrow.
Do not hang heavy items from the hooks
Only hang light bags or suitable objects
from the holders. Otherwise, there is a danger of
objects flying about during braking and evasive
maneuvers.
Only transport heavy luggage in the trunk if it has
been appropriately secured.◀
Seite 118ControlsInterior equipment118
Online Edition for Part no. 01 40 2 914 595 - VI/12
Page 120 of 291

Storage compartmentsVehicle equipment
This chapter describes all series equipment as
well as country-specific and special equipment
offered for this model series.Therefore, it also
describes equipment that may not be found in
your vehicle, for instance due to the selected
special equipment or the country version. This
also applies to safety-related functions and sys‐
tems.
Notes No loose objects in the passenger com‐
partment
Do not stow any objects in the passenger com‐
partment without securing them; otherwise,
they may present a danger to occupants for in‐
stance during braking and avoidance maneu‐
vers.◀
No non-slip mats on the dashboard
Do not use non-slip materials, such as
non-slip mats, on the dashboard, or it could be
damaged by the substances in the materials.◀
Glove compartment
Opening
Pull the handle.
The light in the glove compartment switches on. Close the glove compartment again im‐
mediately
Close the glove compartment immediately after
use while driving; otherwise, injury may occur
during accidents.◀
Closing
Fold up the cover.
USB interface for data transfer
Port for importing and exporting data, such as
music collections, refer to page 176, on USB
devices.
Observe the following when connecting:
▷Do not use force when plugging the con‐
nector into the USB interface.▷Do not connect devices such as fans or
lamps to the USB interface.▷Do not connect a USB hard drive.▷Do not use the USB interface to recharge
external devices.
Center armrest front
Storage compartment
The center armrest between the front seats
contains a compartment with cupholders or the
Seite 120ControlsStorage compartments120
Online Edition for Part no. 01 40 2 914 595 - VI/12
Page 122 of 291
Cargo area▷Retaining strap on the left side panel for se‐
curing small items.▷Retaining straps on the cargo area floor.▷Insertable partition elements for the storage
compartment under the cargo floor panel,
used to variably subdivide the storage com‐
partment.
With partition net: arrange the partition ele‐
ments in such a way that there is enough
space at the rear of the storage compart‐
ment for the partition net.▷Storage net next to the storage compart‐
ment on the right in the cargo area.
Clothes hooks
The clothes hooks are located at the grab han‐
dles in the rear.
Do not obstruct view
When suspending clothing from the
hooks, ensure that it will not obstruct the driver's
vision.◀
No heavy objects
Do not hang heavy objects from the hooks;
otherwise, they may present a danger to pas‐
sengers during braking and evasive maneu‐
vers.◀
Cupholders
Notes Shatter-proof containers and no hot
drinks
Use light and shatter-proof containers and do
not transport hot drinks. Otherwise, there is the
increased danger of injury in an accident.◀
Unsuitable containers
Do not forcefully push unsuitable contain‐
ers into the cupholders. This may result in dam‐
age.◀
Front▷In the front door compartments as a bottle
holder for 1-quart/1 liter bottles, for exam‐
ple.
Insert the bottle into the bottle holder with
the bottom slanted toward the front.▷In the center console.
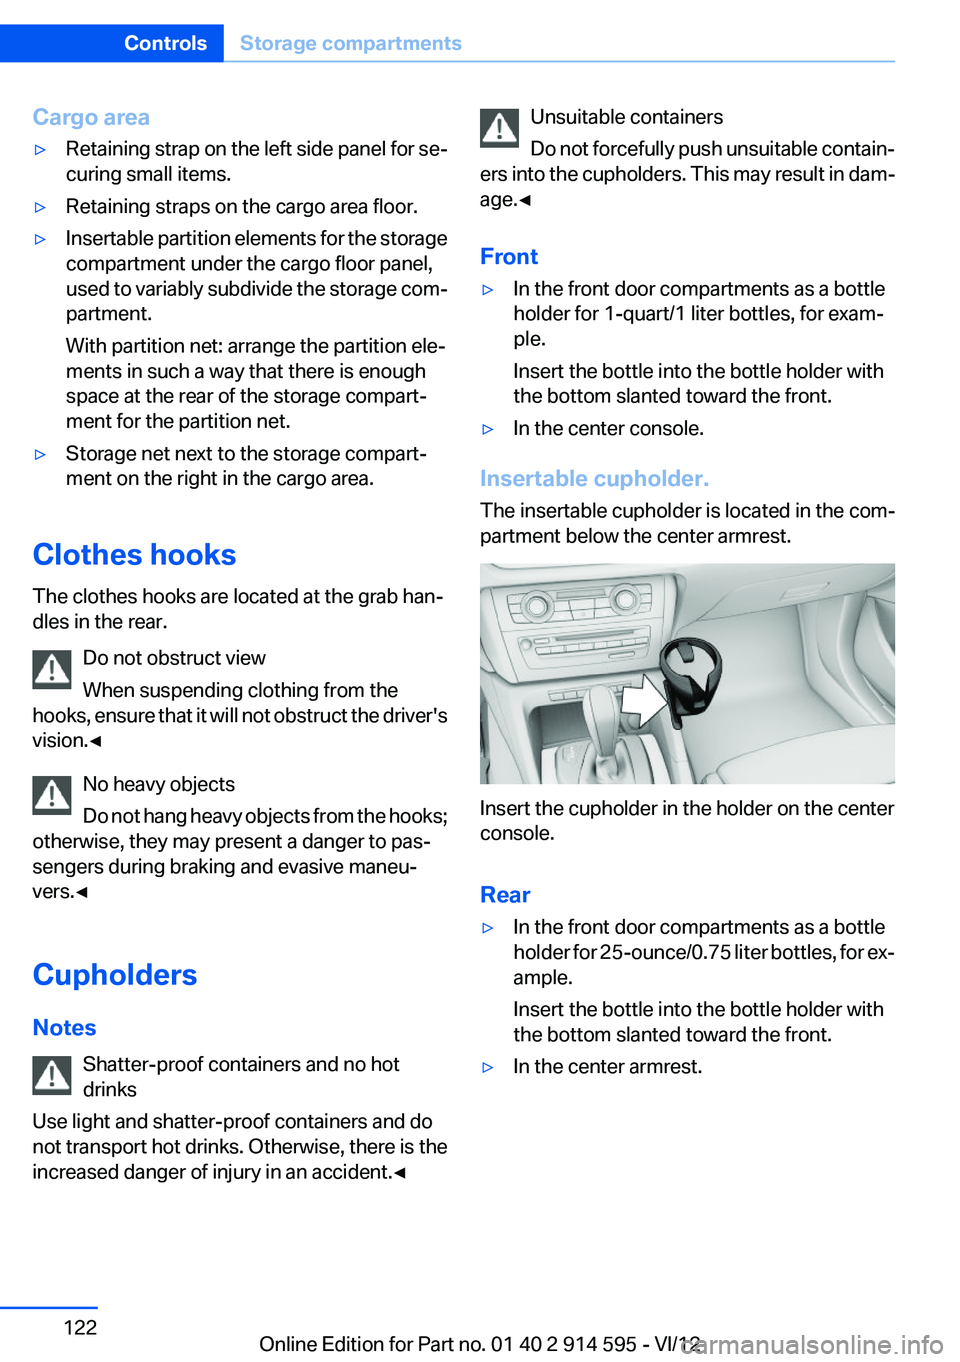
Insertable cupholder.
The insertable cupholder is located in the com‐
partment below the center armrest.
Insert the cupholder in the holder on the center
console.
Rear
▷In the front door compartments as a bottle
holder for 25-ounce/0.75 liter bottles, for ex‐
ample.
Insert the bottle into the bottle holder with
the bottom slanted toward the front.▷In the center armrest.Seite 122ControlsStorage compartments122
Online Edition for Part no. 01 40 2 914 595 - VI/12
Page 127 of 291
Do not remove the heat shields installed and
never apply undercoating to them. Make sure
that flammable materials, e. g. hay, leaves, grass,
etc. do not come in contact with the hot exhaust
system during driving, while in idle position
mode, or when parked. Such contact could lead
to a fire, and with it the risk of serious personal
injury as well as property damage.
Do not touch hot exhaust pipes; otherwise, there
is the danger of getting burned.◀
Mobile communication devices in the
vehicle
Mobile communication devices in the ve‐
hicle
It is not recommended to use mobile phones,
such as mobile phones without a direct connec‐
tion to an external aerial in the vehicle's passen‐
ger compartment. Otherwise, the vehicle elec‐
tronics and mobile communication devices can
interfere with each other. In addition, there is no
assurance that the radiation generated during
transmission will be discharged from the vehicle
interior.◀
Hydroplaning
On wet or slushy roads, a wedge of water can
form between the tires and road surface.
This phenomenon is referred to as hydroplan‐
ing. It is characterized by a partial or complete
loss of contact between the tires and the road
surface, ultimately undermining your ability to
steer and brake the vehicle.
Hydroplaning
When driving on wet or slushy roads, re‐
duce your speed to prevent hydroplaning.◀
The risk of hydroplaning increases as the tire
tread depth decreases. Minimum tread depth,
refer to page 234.Driving through water
Drive though calm water only if it is not deeper
than 12 inches/30 cm and at this height, no
faster than walking speed, up to 6 mph/10 km/h.
Adhere to water depth and speed limita‐
tions
Do not exceed this water depth and walking
speed; otherwise, the vehicle's engine, the elec‐
trical systems and the transmission may be
damaged.◀
Braking safely
Your vehicle is equipped with ABS as a standard
feature.
Applying the brakes fully is the most effective
way of braking in situations when this is neces‐
sary.
The vehicle maintains steering responsiveness.
You can still avoid any obstacles with a minimum
of steering effort.
Pulsation of the brake pedal and sounds from
the hydraulic circuits indicate that ABS is in its
active mode.
Do not let your foot rest on the brake pedal
Do not drive with your foot resting on the
brake pedal. Even light but consistent pedal
pressure can lead to high temperatures, brake
wear and possibly even brake failure.◀
Objects in the area around the pedals No objects in the area around the pedals
Keep floor mats, carpets, and any other
objects out of the area of motion of the pedals;
otherwise, the function of the pedals could be
impeded while driving
Do not place additional floor mats over existing
mats or other objects.
Only use floor mats that have been approved for
the vehicle and can be properly fixed in place.Seite 127Things to remember when drivingDriving tips127
Online Edition for Part no. 01 40 2 914 595 - VI/12
Page 128 of 291

Ensure that the floor mats are securely fastened
again when they are returned after being re‐
moved, such as for cleaning.◀
Driving in wet conditions
When roads are wet or there is heavy rain, briefly
exert gentle pressure on the brake pedal every
few miles.
Ensure that this action does not endanger other
road users.
The heat generated in this process helps dry the
brake discs and pads.
In this way braking efficiency will be available
when you need it.
Hills
Drive long or steep downhill gradients in the gear
in which the least braking is required. Otherwise,
the brake system may overheat, resulting in a
reduction in the brake system efficiency.
You can increase the engine's braking effect by
shifting down, going all the way to first gear, if
necessary.
Downshifting in manual mode of the automatic
transmission, refer to page 63.
Avoid load on the brakes
Avoid placing excessive load on the brake
system. Light but consistent brake pressure can
lead to high temperatures, brake wear and pos‐
sibly even brake failure.◀
Do not drive in neutral
Do not drive in neutral or with the engine
stopped, as doing so disables engine braking. In
addition, steering and brake assist is unavailable
with the engine stopped.◀
Brake disc corrosion
Corrosion on the brake discs and contamination
on the brake pads are furthered by:▷Low mileage.▷Extended periods when the vehicle is not
used at all.▷Infrequent use of the brakes.
Corrosion occurs when the minimum pressure
that must be exerted by the pads during brake
applications to clean the discs is not reached.
Should corrosion form on the brake discs, the
brakes will tend to respond with a pulsating ef‐
fect that generally cannot be corrected.
Condensation under the parked vehicle
When using the automatic climate control, con‐
densation water develops that exits underneath
the vehicle.
Therefore, traces of condensed water under the
vehicle are normal.
Driving on poor roads
BMW X1 combines an all-wheel drive system
with the advantages of a normal passenger car.
Do not drive on unpaved terrain
Do not drive on unpaved terrain, as other‐
wise the vehicle may be damaged.◀
For your own safety and the safety of passen‐
gers and the vehicle, adhere to the following
points:
▷Familiarize yourself with the vehicle before
driving; never take risks.▷Adjust speeds according to road conditions.
The steeper and rougher the road surface is,
the lower the speed should be.▷When driving on steep uphill and downhill
grades: the engine oil and coolant should be
filled nearly to the MAX mark.▷Use Hill Descent Control HDC, refer to
page 96, on steep downhill grades.▷Watch for stones, holes, and other obstacles
and drive around these where possible.Seite 128Driving tipsThings to remember when driving128
Online Edition for Part no. 01 40 2 914 595 - VI/12
Page 131 of 291
The greater the weight of the occupants, the
less cargo that can be transported.
Stowing cargo▷Very heavy cargo: when the rear seat is not
occupied, secure each of the outer safety
belts in the opposite buckle.▷Heavy cargo: stow as far forward and as low
as possible, ideally directly behind the back‐
rests.▷Cover sharp edges and corners.▷Do not pile cargo higher than the top edge
of the backrests.▷If necessary, fold down the rear backrests to
stow cargo.▷Use the partition net, refer to page 116, to
protect passengers. Make sure that objects
cannot penetrate the partition net.▷Place protective material around any sharp-
edged or pointed objects that could bump
against the rear window while the vehicle is
in motion.Securing cargo
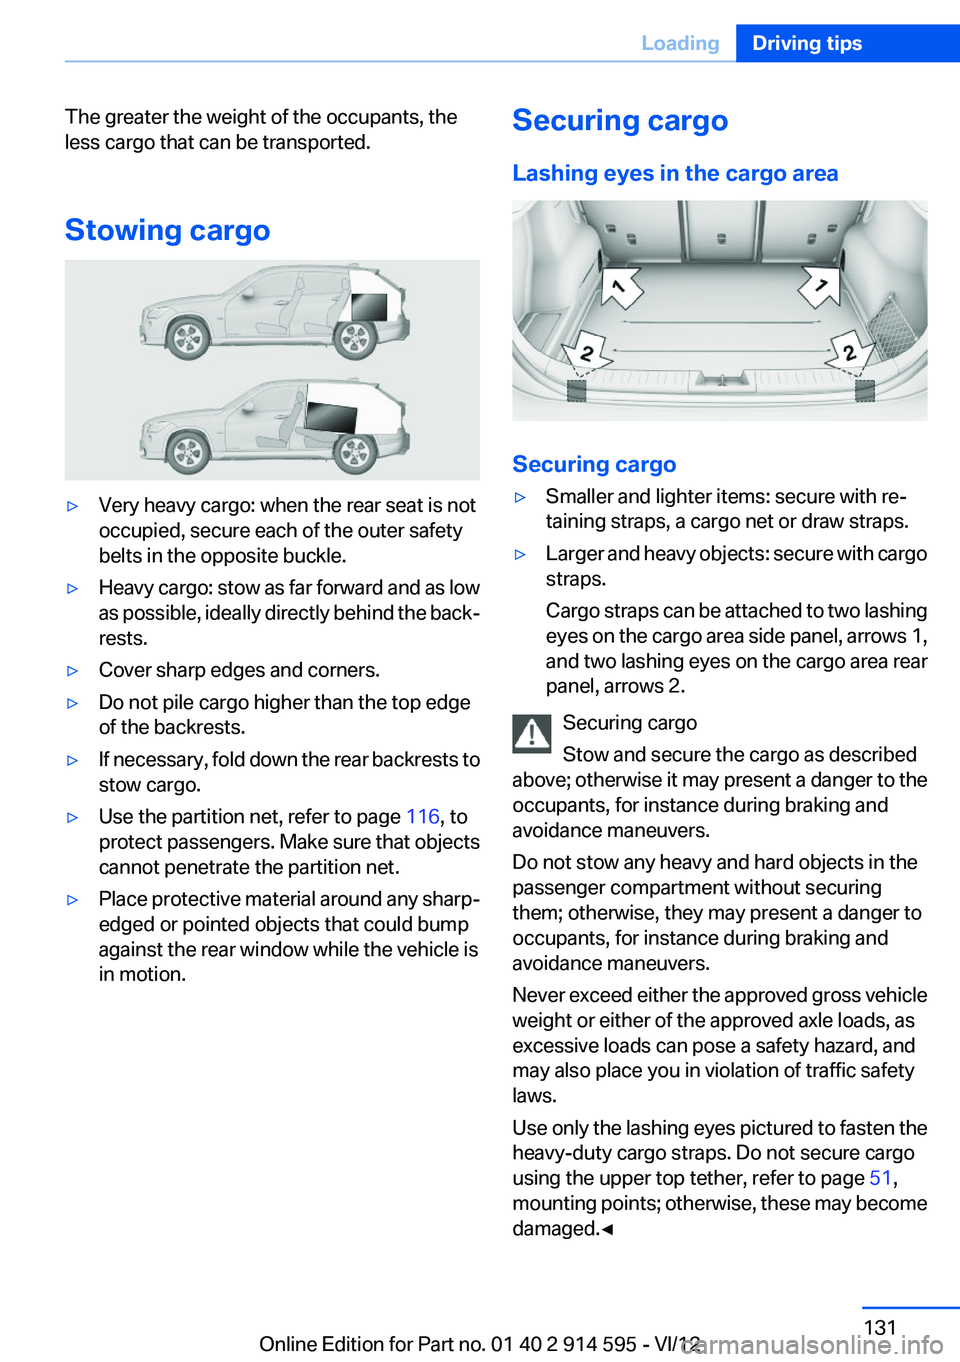
Lashing eyes in the cargo area
Securing cargo
▷Smaller and lighter items: secure with re‐
taining straps, a cargo net or draw straps.▷Larger and heavy objects: secure with cargo
straps.
Cargo straps can be attached to two lashing
eyes on the cargo area side panel, arrows 1,
and two lashing eyes on the cargo area rear
panel, arrows 2.
Securing cargo
Stow and secure the cargo as described
above; otherwise it may present a danger to the
occupants, for instance during braking and
avoidance maneuvers.
Do not stow any heavy and hard objects in the
passenger compartment without securing
them; otherwise, they may present a danger to
occupants, for instance during braking and
avoidance maneuvers.
Never exceed either the approved gross vehicle
weight or either of the approved axle loads, as
excessive loads can pose a safety hazard, and
may also place you in violation of traffic safety
laws.
Use only the lashing eyes pictured to fasten the
heavy-duty cargo straps. Do not secure cargo
using the upper top tether, refer to page 51,
mounting points; otherwise, these may become
damaged.◀
Seite 131LoadingDriving tips131
Online Edition for Part no. 01 40 2 914 595 - VI/12
Page 134 of 291
Use coasting conditions
When approaching a red light, take your foot off
the accelerator and let the vehicle coast to a halt.
On a downhill gradient, take your foot off the ac‐
celerator and let the vehicle roll.
The flow of fuel is interrupted while coasting.
Switch off the engine during
longer stops
Switch off the engine during longer stops, e.g.,
at traffic lights, railroad crossings or in traffic
congestion.
Fuel savings are already achieved after the en‐
gine is turned off for as little as 4 seconds.
Automatic Engine Start/Stop Function
The Automatic Start/Stop Function of your ve‐
hicle automatically switches off the engine dur‐
ing a stop. Additional information on the Auto‐
matic Engine Start/Stop Function, refer to
page 56.
If the engine is stopped and then started again,
fuel consumption and emissions drop com‐
pared to an engine that runs permanently. Stop‐
ping the engine even for just a few seconds can
result in savings.
Use of this system can cause premature wear on
certain vehicle components.
In addition, fuel consumption depends on other
factors as well, such as driving style, road con‐
ditions, maintenance, and environmental fac‐
tors.
Switch off any functions that
are not currently needed
Functions such as seat heating and the rear win‐
dow defroster require a lot of energy and con‐
sume additional fuel, especially in city and stop-
and-go traffic.Therefore, switch off these functions if they are
not actually needed.
Have maintenance carried out
Have vehicles maintained regularly to achieve
optimal vehicle economy and operating life.
Have the maintenance carried out by your serv‐
ice center.
Please also note the BMW Maintenance Sys‐
tem, refer to page 243.
ECO PRO
The concept
ECO PRO supports the driver in achieving high
fuel economy. Engine control and comfort func‐
tions, such as the climate control system, are
adjusted accordingly.
In addition, situation-related information can be
displayed that helps the driver achieve lower fuel
consumption.
The resulting range extension can be displayed
in the instrument cluster.
Activating ECO PRO Press the button; the LED above the
button lights up.
ECO PRO appears in the instrument cluster and
DSC is activated if necessary.Seite 134Driving tipsSaving fuel134
Online Edition for Part no. 01 40 2 914 595 - VI/12
Page 135 of 291
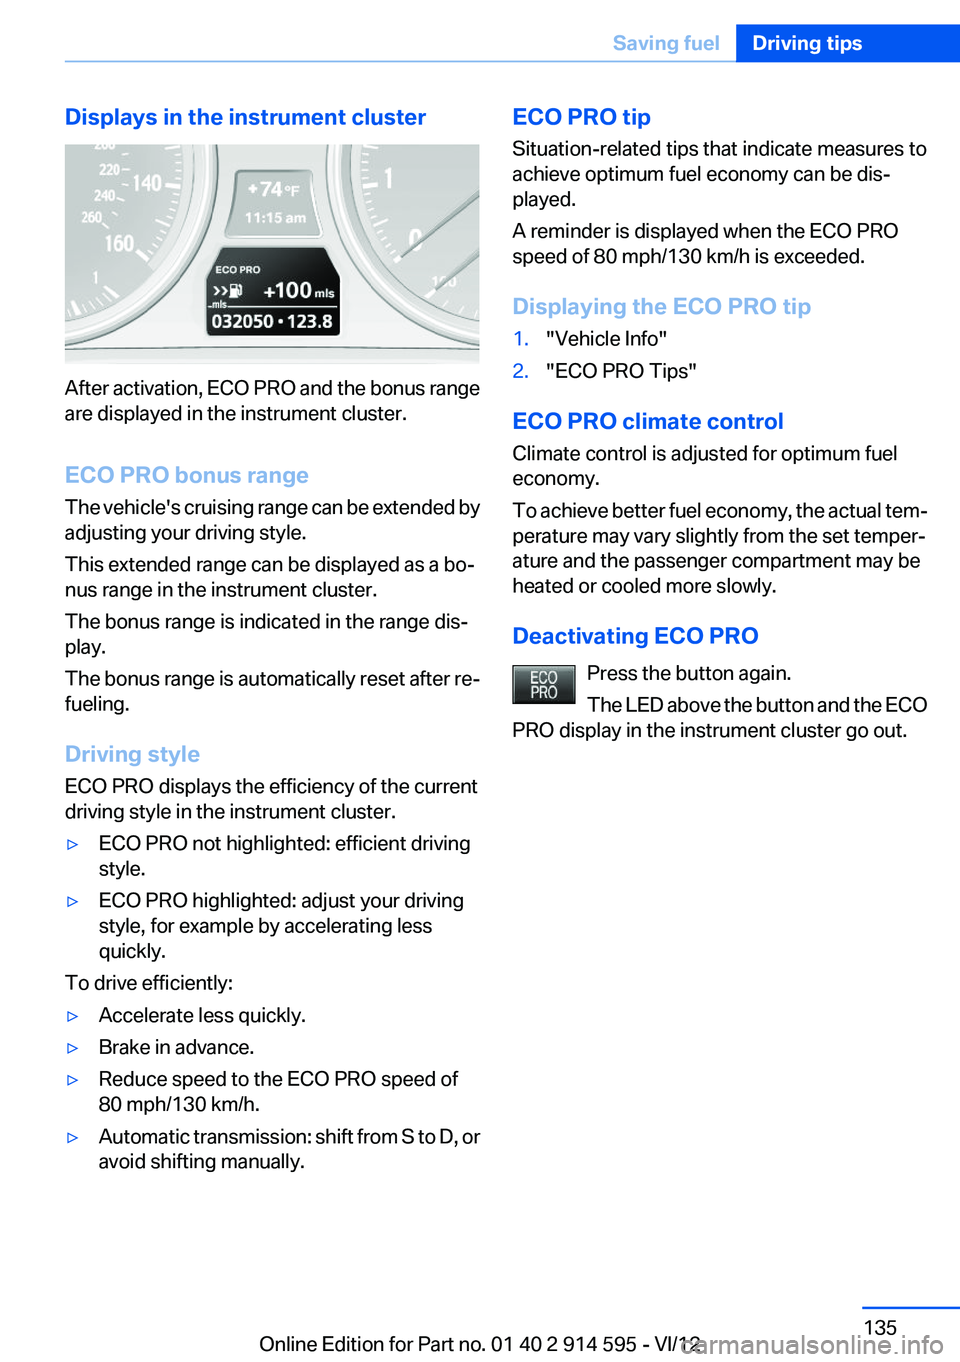
Displays in the instrument cluster
After activation, ECO PRO and the bonus range
are displayed in the instrument cluster.
ECO PRO bonus range
The vehicle's cruising range can be extended by
adjusting your driving style.
This extended range can be displayed as a bo‐
nus range in the instrument cluster.
The bonus range is indicated in the range dis‐
play.
The bonus range is automatically reset after re‐
fueling.
Driving style
ECO PRO displays the efficiency of the current
driving style in the instrument cluster.
▷ECO PRO not highlighted: efficient driving
style.▷ECO PRO highlighted: adjust your driving
style, for example by accelerating less
quickly.
To drive efficiently:
▷Accelerate less quickly.▷Brake in advance.▷Reduce speed to the ECO PRO speed of
80 mph/130 km/h.▷Automatic transmission: shift from S to D, or
avoid shifting manually.ECO PRO tip
Situation-related tips that indicate measures to
achieve optimum fuel economy can be dis‐
played.
A reminder is displayed when the ECO PRO
speed of 80 mph/130 km/h is exceeded.
Displaying the ECO PRO tip1."Vehicle Info"2."ECO PRO Tips"
ECO PRO climate control
Climate control is adjusted for optimum fuel
economy.
To achieve better fuel economy, the actual tem‐
perature may vary slightly from the set temper‐
ature and the passenger compartment may be
heated or cooled more slowly.
Deactivating ECO PRO Press the button again.
The LED above the button and the ECO
PRO display in the instrument cluster go out.
Seite 135Saving fuelDriving tips135
Online Edition for Part no. 01 40 2 914 595 - VI/12