2013 BMW X1 XDRIVE 28I navigation system
[x] Cancel search: navigation systemPage 145 of 291
Destination entry via BMW Assist
A connection is established to the Concierge
service, refer to page 216.1."Navigation"2."Enter address"3.Open "Options".4."BMW Assist dest. entry"
Displaying special destinations in the
map
To display symbols of the special destinations
in the map view:
1."Navigation"2."Map"3.Open "Options".4."Display Points of Interest"5.Select the setting.
Destination entry by map
Selecting the destination
1."Navigation"2."Map"
The current position of the vehicle is dis‐
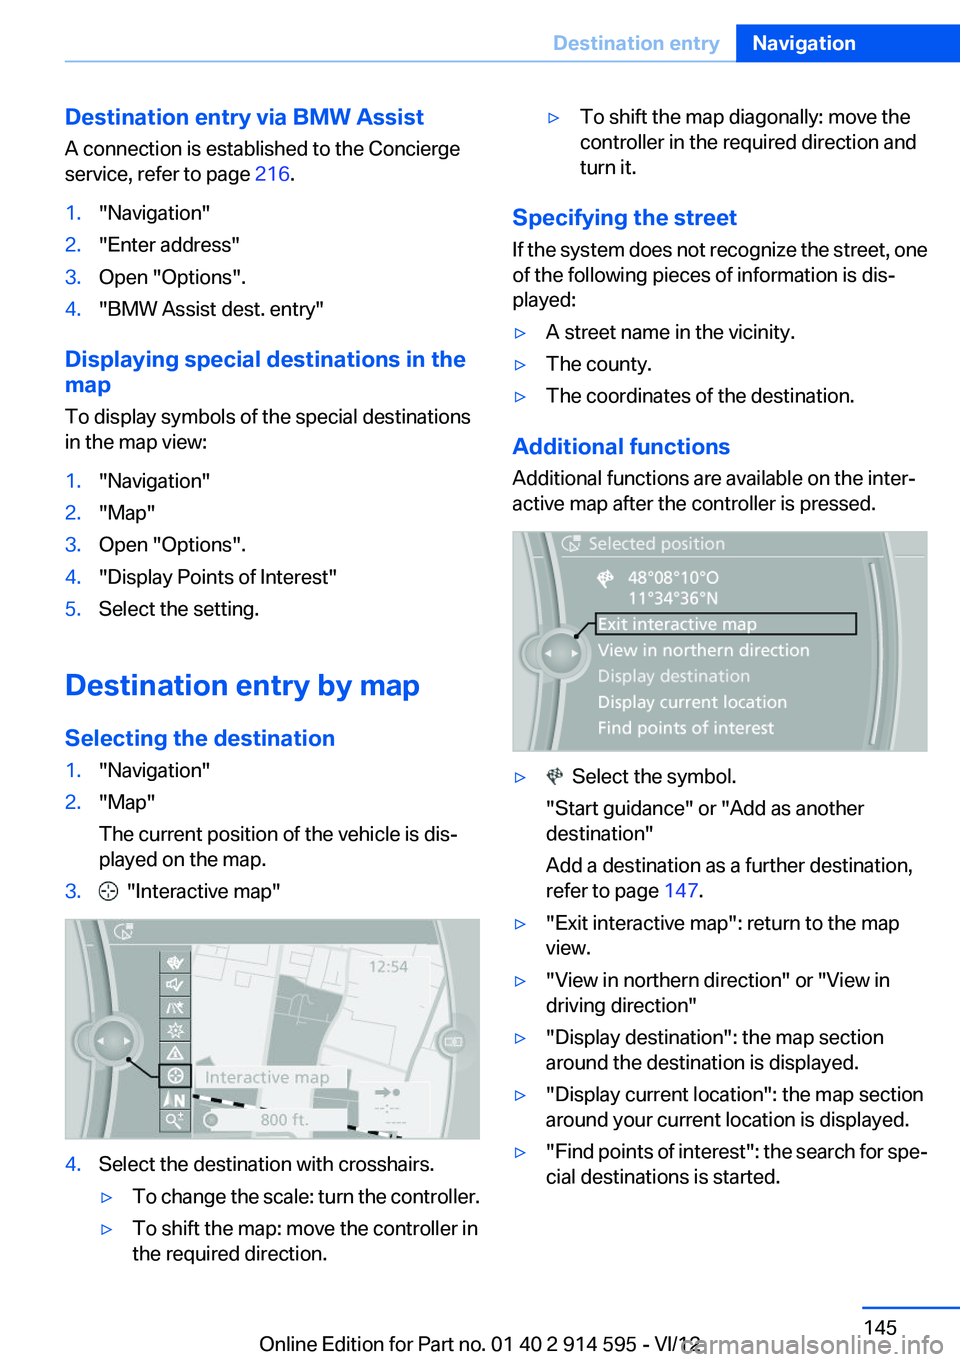
played on the map.3. "Interactive map"4.Select the destination with crosshairs.▷To change the scale: turn the controller.▷To shift the map: move the controller in
the required direction.▷To shift the map diagonally: move the
controller in the required direction and
turn it.
Specifying the street
If the system does not recognize the street, one
of the following pieces of information is dis‐
played:
▷A street name in the vicinity.▷The county.▷The coordinates of the destination.
Additional functions
Additional functions are available on the inter‐
active map after the controller is pressed.
▷ Select the symbol.
"Start guidance" or "Add as another
destination"
Add a destination as a further destination,
refer to page 147.▷"Exit interactive map": return to the map
view.▷"View in northern direction" or "View in
driving direction"▷"Display destination": the map section
around the destination is displayed.▷"Display current location": the map section
around your current location is displayed.▷" Find points of interest": the search for spe‐
cial destinations is started.Seite 145Destination entryNavigation145
Online Edition for Part no. 01 40 2 914 595 - VI/12
Page 146 of 291
Destination entry by voice
General information▷Instructions for voice activation system, re‐
fer to page 25.▷When making a destination entry by voice,
you can change between voice operation
and iDrive.▷To have the available spoken instructions
read out loud: ›Voice commands‹.
Saying the entries
▷The town/city, street, and house number
can be entered using a single command.▷Countries, towns and cities, streets, and in‐
tersections can be said as whole words or
spelled in the language of the system, refer
to page 74.
Example: to enter a destination in a US state
as a whole word, the system language must
be English.▷Spell the entry if the spoken language and
the language of the system differ.▷Say the letters smoothly, and avoid exag‐
gerating the pronunciation and inserting
lengthy pauses between the letters.▷The methods of entry depend on the navi‐
gation data in use and the country and lan‐
guage settings.
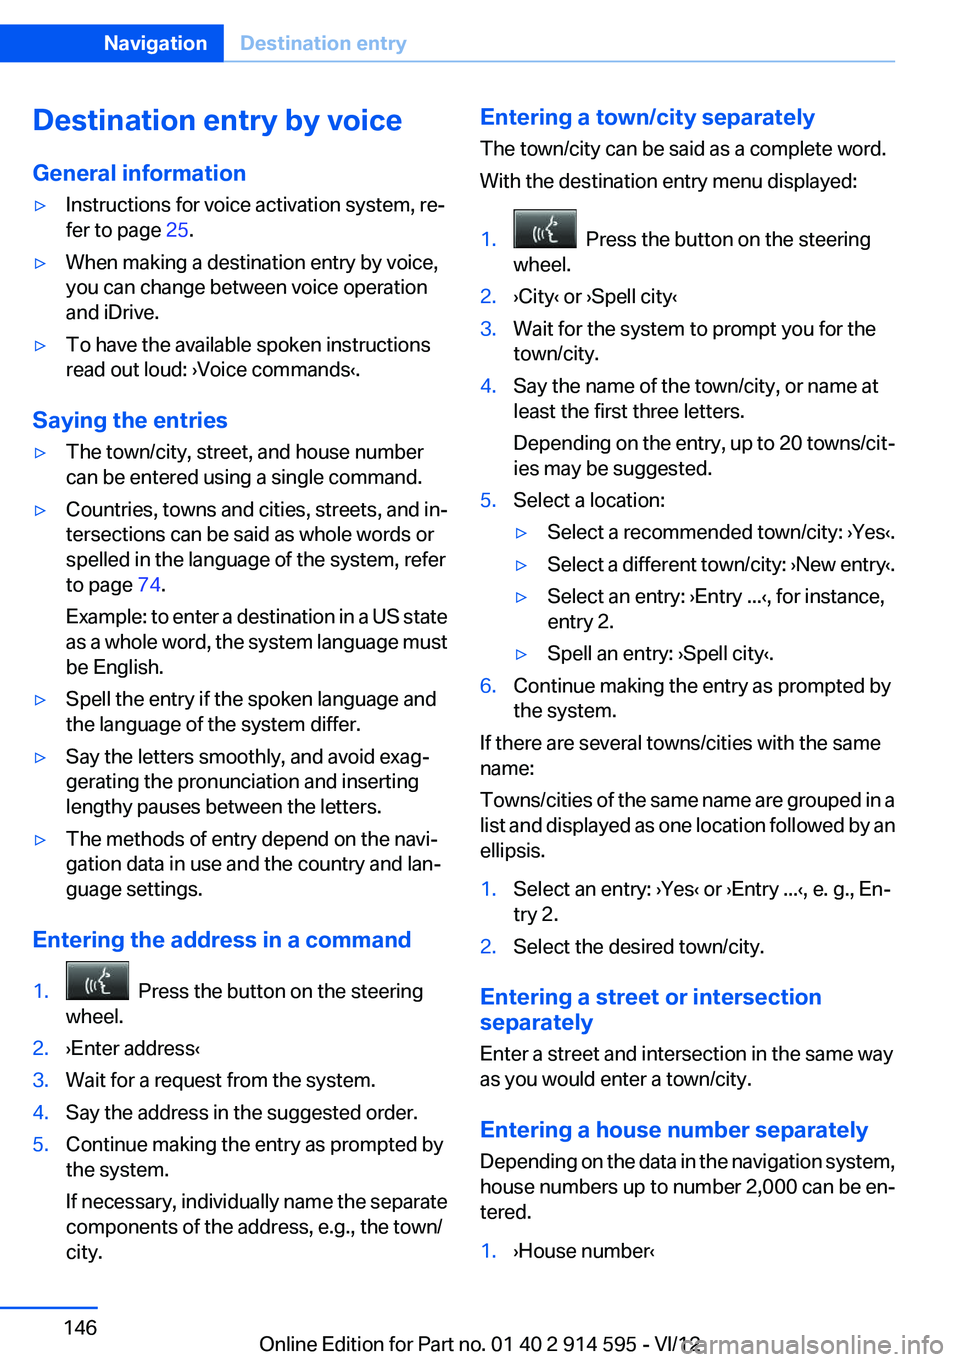
Entering the address in a command
1. Press the button on the steering
wheel.2.›Enter address‹3.Wait for a request from the system.4.Say the address in the suggested order.5.Continue making the entry as prompted by
the system.
If necessary, individually name the separate
components of the address, e.g., the town/
city.Entering a town/city separately
The town/city can be said as a complete word.
With the destination entry menu displayed:1. Press the button on the steering
wheel.2.›City‹ or ›Spell city‹3.Wait for the system to prompt you for the
town/city.4.Say the name of the town/city, or name at
least the first three letters.
Depending on the entry, up to 20 towns/cit‐
ies may be suggested.5.Select a location:▷Select a recommended town/city: › Yes‹.▷Select a different town/city: ›New entry‹.▷Select an entry: ›Entry ...‹, for instance,
entry 2.▷Spell an entry: ›Spell city‹.6.Continue making the entry as prompted by
the system.
If there are several towns/cities with the same
name:
Towns/cities of the same name are grouped in a
list and displayed as one location followed by an
ellipsis.
1.Select an entry: ›Yes‹ or ›Entry ...‹, e. g., En‐
try 2.2.Select the desired town/city.
Entering a street or intersection
separately
Enter a street and intersection in the same way
as you would enter a town/city.
Entering a house number separately
Depending on the data in the navigation system,
house numbers up to number 2,000 can be en‐
tered.
1.›House number‹Seite 146NavigationDestination entry146
Online Edition for Part no. 01 40 2 914 595 - VI/12
Page 147 of 291
2.Say the house number.
Say each digit separately.3.Continue making the entry as prompted by
the system.
Starting destination guidance
›Start guidance‹
Planning a trip with
intermediate destinations
New trip
A trip can be planned with several intermediate
destinations.
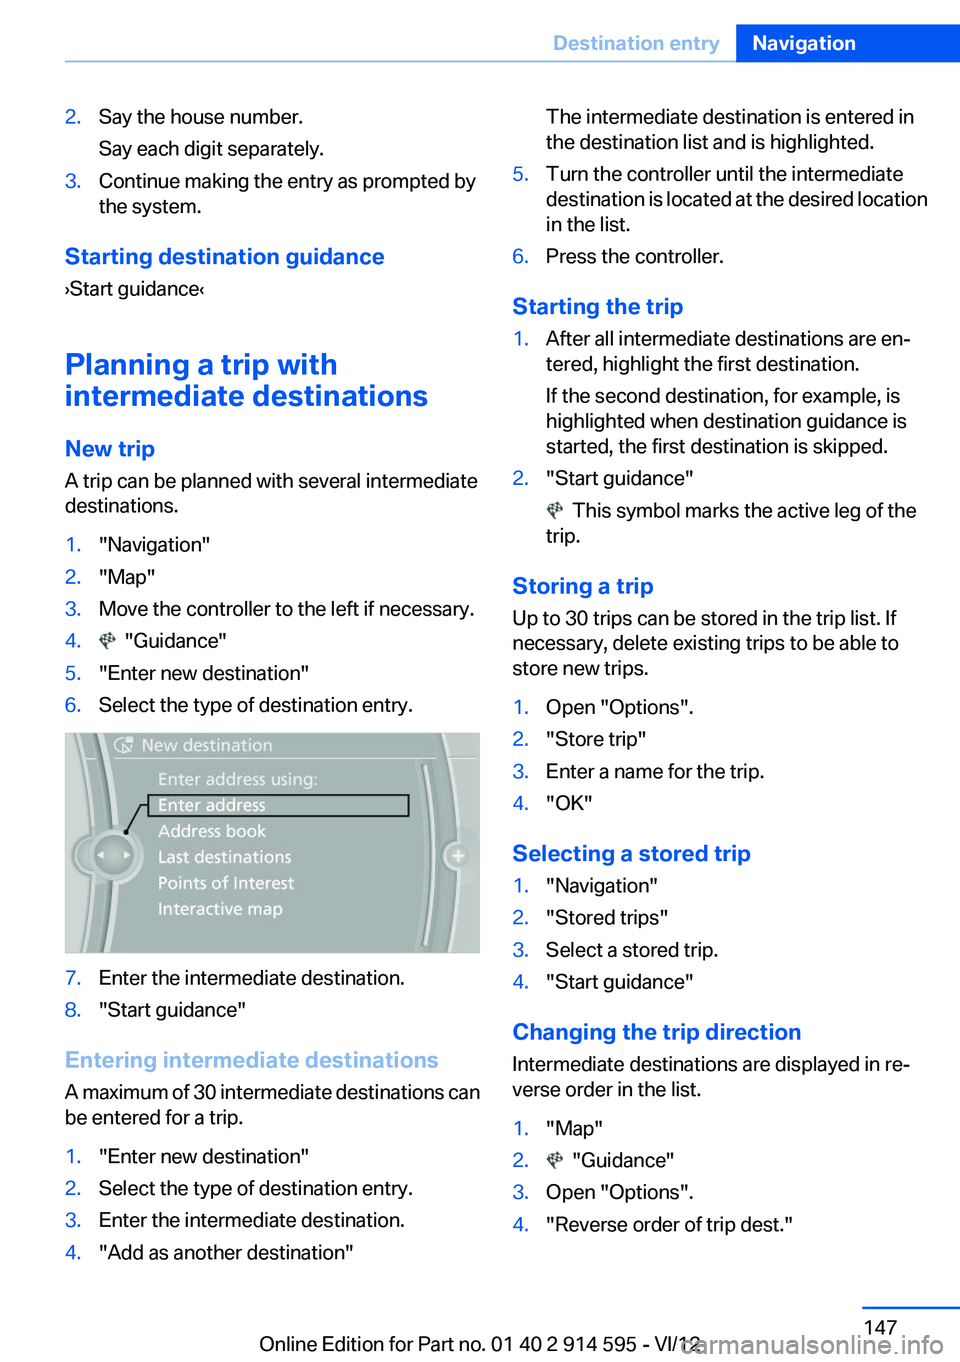
1."Navigation"2."Map"3.Move the controller to the left if necessary.4. "Guidance"5."Enter new destination"6.Select the type of destination entry.7.Enter the intermediate destination.8."Start guidance"
Entering intermediate destinations
A maximum of 30 intermediate destinations can
be entered for a trip.
1."Enter new destination"2.Select the type of destination entry.3.Enter the intermediate destination.4."Add as another destination"The intermediate destination is entered in
the destination list and is highlighted.5.Turn the controller until the intermediate
destination is located at the desired location
in the list.6.Press the controller.
Starting the trip
1.After all intermediate destinations are en‐
tered, highlight the first destination.
If the second destination, for example, is
highlighted when destination guidance is
started, the first destination is skipped.2."Start guidance"
This symbol marks the active leg of the
trip.
Storing a trip
Up to 30 trips can be stored in the trip list. If
necessary, delete existing trips to be able to
store new trips.
1.Open "Options".2."Store trip"3.Enter a name for the trip.4."OK"
Selecting a stored trip
1."Navigation"2."Stored trips"3.Select a stored trip.4."Start guidance"
Changing the trip direction
Intermediate destinations are displayed in re‐
verse order in the list.
1."Map"2. "Guidance"3.Open "Options".4."Reverse order of trip dest."Seite 147Destination entryNavigation147
Online Edition for Part no. 01 40 2 914 595 - VI/12
Page 153 of 291
4."Settings"5.To set the map view:▷"Day/night mode"
Select and create the necessary settings
depending on the light conditions.
"Traffic conditions/gray map" active: the
setting is disregarded.▷"Satellite images"
Depending on availability and resolution,
satellite images are displayed at scales of
approx. 1 mile to 600 miles/2 km to
1,000 km.▷"Perspective view in 3D"
Prominent areas that are contained in the
navigation data are displayed on the map in
3D.▷"Traffic conditions/gray map"
The map is optimized for displaying traffic
bulletins, refer to page 154.
Symbols for the special destinations are no
longer displayed.
Map view for splitscreen
The map view can be selected for the split
screen independently from the main screen.
1.Open "Options".2."Split screen"3.Move the controller to the right repeatedly
until the split screen is selected.4.Select "Split screen content" or the scale.5.Select the map view.▷"Arrow display"▷"Map facing north"▷"Map direction of travel"▷"Map view with perspective"▷"Position"▷"Exit ramp view": selected blind drive‐
ways are displayed three dimensionally.▷"Traffic conditions/gray map"6.To change the scale: select the split screen
and turn the controller.
Traffic bulletins
At a glance
▷Display the traffic bulletins from radio sta‐
tions that broadcast the TI Traffic Informa‐
tion of a traffic information service. Informa‐
tion on traffic obstructions and hazards is
updated continuously.
Certain BMW models equipped with navi‐
gation have the capability to display real-
time traffic information. If your system has
this capability the following additional terms
and conditions apply:
An End-User shall no longer have the right
to use the Traffic Data in the event that the
End-User is in material breach of the terms
and conditions contained herein.
A. Total Traffic Network, a division of Clear
Channel Broadcasting, Inc. (“Total Traffic
Network”) holds the rights to the traffic in‐
cident data and RDS-TMC network through
which it is delivered. You may not modify,
copy, scan or use any other method to re‐
produce, duplicate, republish, transmit or
distribute in any way any portion of traffic in‐
cident data. You agree to indemnify, defend
and hold harmless BMW of North America,
LLC. (“BMW NA”) and Total Traffic Net‐
work, Inrix, Inc (and their affiliates) against
any and all claims, damages, costs or other
expenses that arise directly or indirectly out
of (a) your unauthorized use of the traffic in‐
cident data or the RDS-TMC network, (b)
your violation of this directive and/or (c) any
unauthorized or unlawful activities by you in
connection herewith.
B. Total Traffic Network traffic data is infor‐
mational only. User assumes all risk of use.
Total Traffic Network, BMW NA, and their
suppliers make no representations aboutSeite 153Destination guidanceNavigation153
Online Edition for Part no. 01 40 2 914 595 - VI/12
Page 155 of 291
Additional information in the map view
Depending on the map scale, a traffic obstruc‐
tion's length, direction, and impact are displayed
in the map using triangles or gray bars along the
calculated route.▷Red: traffic congestion▷Orange: stop-and-go traffic▷Yellow: heavy traffic▷Green: clear roads▷Gray: general traffic bulletins such as road
construction
The displayed information depends on the par‐
ticular traffic information service.
Filtering traffic bulletins
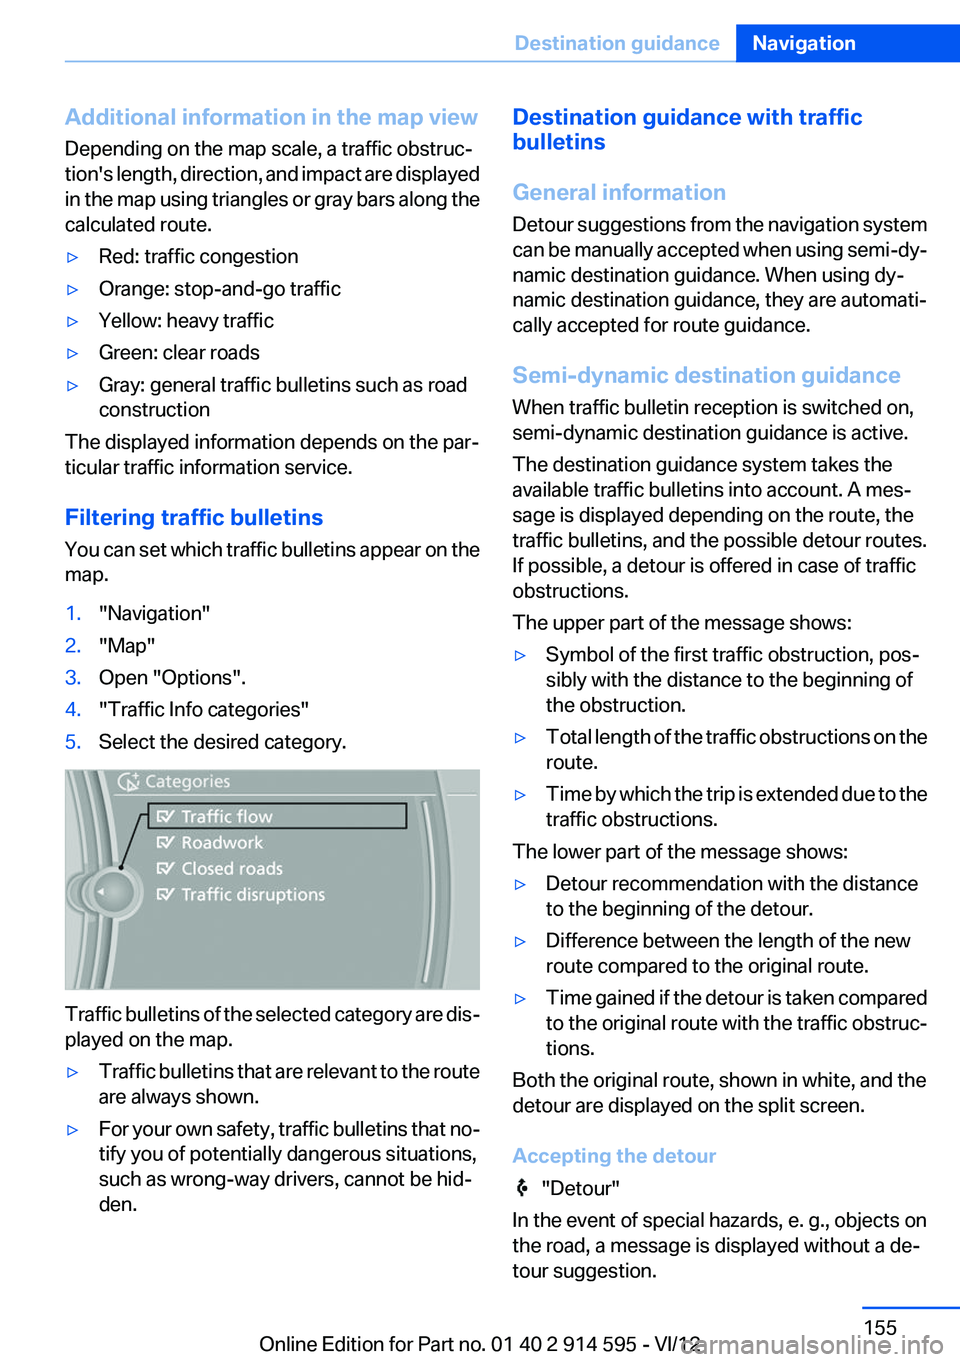
You can set which traffic bulletins appear on the
map.
1."Navigation"2."Map"3.Open "Options".4."Traffic Info categories"5.Select the desired category.
Traffic bulletins of the selected category are dis‐
played on the map.
▷Traffic bulletins that are relevant to the route
are always shown.▷For your own safety, traffic bulletins that no‐
tify you of potentially dangerous situations,
such as wrong-way drivers, cannot be hid‐
den.Destination guidance with traffic
bulletins
General information
Detour suggestions from the navigation system
can be manually accepted when using semi-dy‐
namic destination guidance. When using dy‐
namic destination guidance, they are automati‐
cally accepted for route guidance.
Semi-dynamic destination guidance
When traffic bulletin reception is switched on,
semi-dynamic destination guidance is active.
The destination guidance system takes the
available traffic bulletins into account. A mes‐
sage is displayed depending on the route, the
traffic bulletins, and the possible detour routes.
If possible, a detour is offered in case of traffic
obstructions.
The upper part of the message shows:▷Symbol of the first traffic obstruction, pos‐
sibly with the distance to the beginning of
the obstruction.▷Total length of the traffic obstructions on the
route.▷Time by which the trip is extended due to the
traffic obstructions.
The lower part of the message shows:
▷Detour recommendation with the distance
to the beginning of the detour.▷Difference between the length of the new
route compared to the original route.▷Time gained if the detour is taken compared
to the original route with the traffic obstruc‐
tions.
Both the original route, shown in white, and the
detour are displayed on the split screen.
Accepting the detour
"Detour"
In the event of special hazards, e. g., objects on
the road, a message is displayed without a de‐
tour suggestion.
Seite 155Destination guidanceNavigation155
Online Edition for Part no. 01 40 2 914 595 - VI/12
Page 156 of 291
Detours can also be accepted if the traffic mes‐
sages are called up in the list.1."Navigation"2."Map"3. "Traffic Info"4."Detour information"5. "Detour"
Dynamic destination guidance
The route is automatically changed in the event
of traffic obstructions.
▷The system does not point out traffic ob‐
structions along the original route.▷Traffic bulletins continue to be displayed on
the map.▷Depending on road type and the kind and
extent of the traffic obstruction, the calcu‐
lated route may lead through the traffic ob‐
struction.▷Dangerous situations are displayed regard‐
less of the setting.
Activating dynamic destination guidance
1."Navigation"2.Open "Options".3."Dynamic guidance"Seite 156NavigationDestination guidance156
Online Edition for Part no. 01 40 2 914 595 - VI/12
Page 157 of 291
What to do if...Vehicle equipment
This chapter describes all series equipment as
well as country-specific and special equipment
offered for this model series.Therefore, it also
describes equipment that may not be found in
your vehicle, for instance due to the selected
special equipment or the country version. This
also applies to safety-related functions and sys‐
tems.
What to do if...▷The current transmission position cannot be
displayed?
The vehicle is located in an unrecognized
region, is in a poor reception area, or the
system is currently determining the posi‐
tion. Reception is usually best when you
have an unobstructed view of the sky.▷The destination without street information is
not used for route guidance?
When city has been input, no downtown can
be determined. Input any street in the se‐
lected city and start destination guidance.▷The destination is not used for route guid‐
ance?
The destination data are not contained in the
navigation data. Select a destination that is
as close as possible to the original.▷Letters for destination input cannot be se‐
lected?
The stored data do not contain the data of
the destination. Select a goal that is as close
as possible to the original.▷Is the map displayed in shades of gray?
"Traffic conditions/gray map" active:
The Control Display changes to a black and
white display. This enables a better view of
the traffic bulletins.▷Spoken instructions are no longer output
during route guidance in front of intersec‐
tions?
The area has not yet been fully recorded, or
you have left the recommended route and
the system requires a few seconds to cal‐
culate a new route suggestion.Seite 157What to do if...Navigation157
Online Edition for Part no. 01 40 2 914 595 - VI/12
Page 166 of 291
6.Press the controller again to confirm the
highlighted channel.7.Select the desired memory location.
The channels are stored for the remote control
currently in use.
The channels can also be stored on the pro‐
grammable memory buttons, refer to page 23.
Changing the list view
The list view changes every time the first symbol
on the navigation bar is pressed.
Information on the channel is displayed.
SymbolMeaning Channel name Artist Track
Selecting a category
1."Radio"2."Satellite radio"3. "Category"4.Select the desired category.
Timeshift
Approx. one hour of the program being broad‐
cast on the channel currently being listened to
is stored in a buffer. Prerequisite: the signal must
be available.
The stored audio track can be played with a de‐
lay following the live broadcast. When the buffer
is full, the older tracks are overwritten. The buf‐
fer is cleared when a new channel is selected.
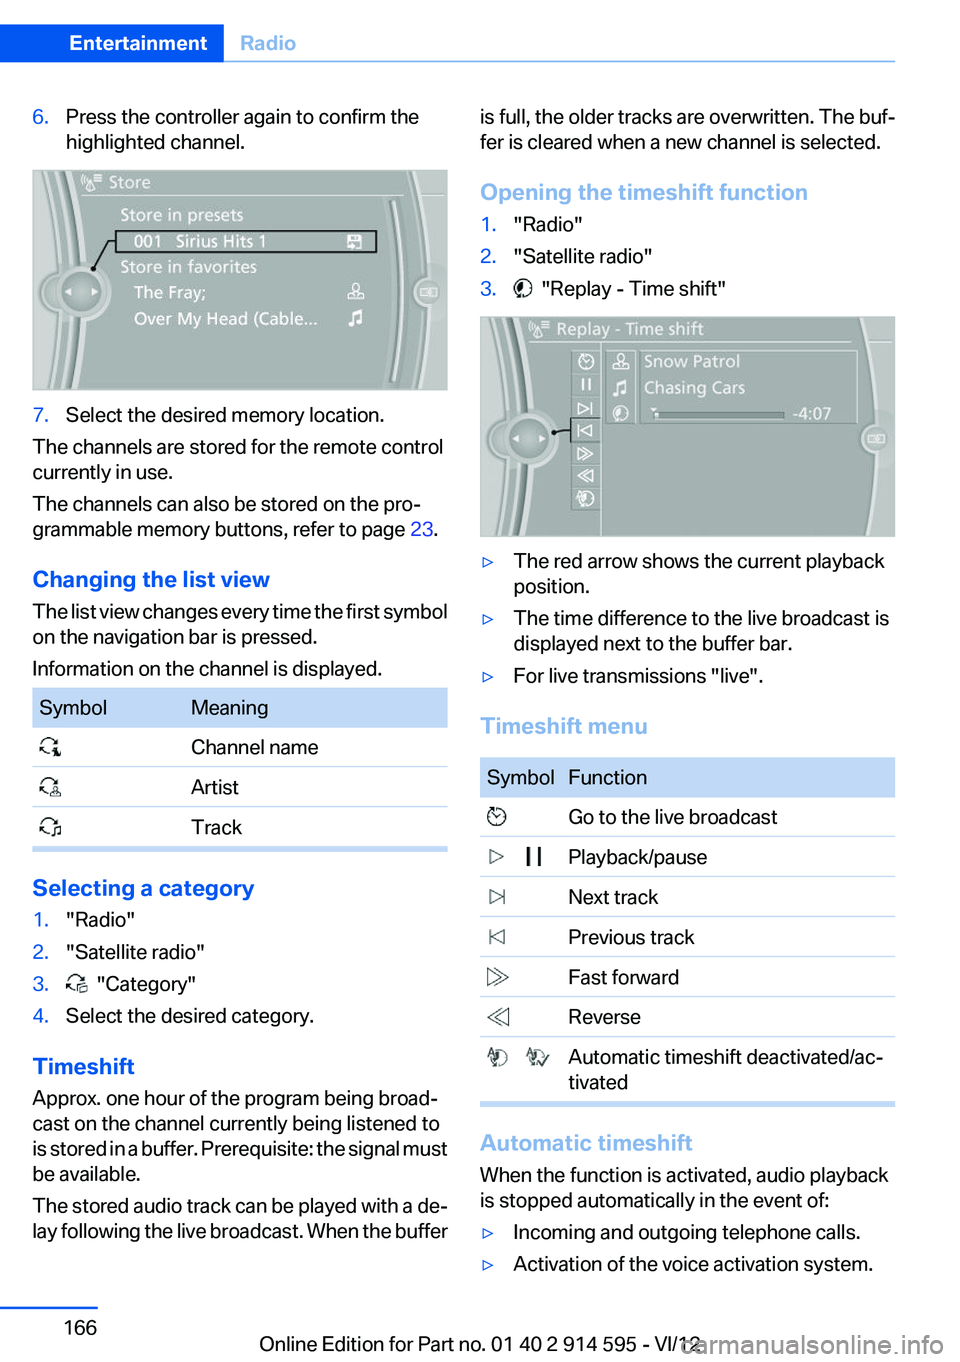
Opening the timeshift function1."Radio"2."Satellite radio"3. "Replay - Time shift"▷The red arrow shows the current playback
position.▷The time difference to the live broadcast is
displayed next to the buffer bar.▷For live transmissions "live".
Timeshift menu
SymbolFunction Go to the live broadcast Playback/pause Next track Previous track Fast forward Reverse Automatic timeshift deactivated/ac‐
tivated
Automatic timeshift
When the function is activated, audio playback
is stopped automatically in the event of:
▷Incoming and outgoing telephone calls.▷Activation of the voice activation system.Seite 166EntertainmentRadio166
Online Edition for Part no. 01 40 2 914 595 - VI/12