2013 BMW ACTIVEHYBRID5 roof rack
[x] Cancel search: roof rackPage 49 of 224

Driver's door controls
Roller blind for rear windowPress the button.
Roller sunblinds for the rear side
windows
Pull out the roller sunblind at the loop and hook
it onto the bracket.
Do not open the window while the roller
sunblind is raised.
Do not open the window while the roller sunblind
is raised; otherwise, there is a risk of damage at
high speeds that may result in personal injury. ◀
Glass sunroof, powered
General information
The glass sunroof and the sliding visor can be
operated together or separately, using the same
switch.
The glass sunroof is operational when the igni‐
tion is switched on.
Keep the closing path clear
Monitor the closing process and make
sure that the closing path of the glass sunroof is
clear; otherwise, injuries may result.◀
Take the remote control with you
Take the remote control with you when
leaving the vehicle so that children, for example,
cannot operate the roof and injure themselves. ◀
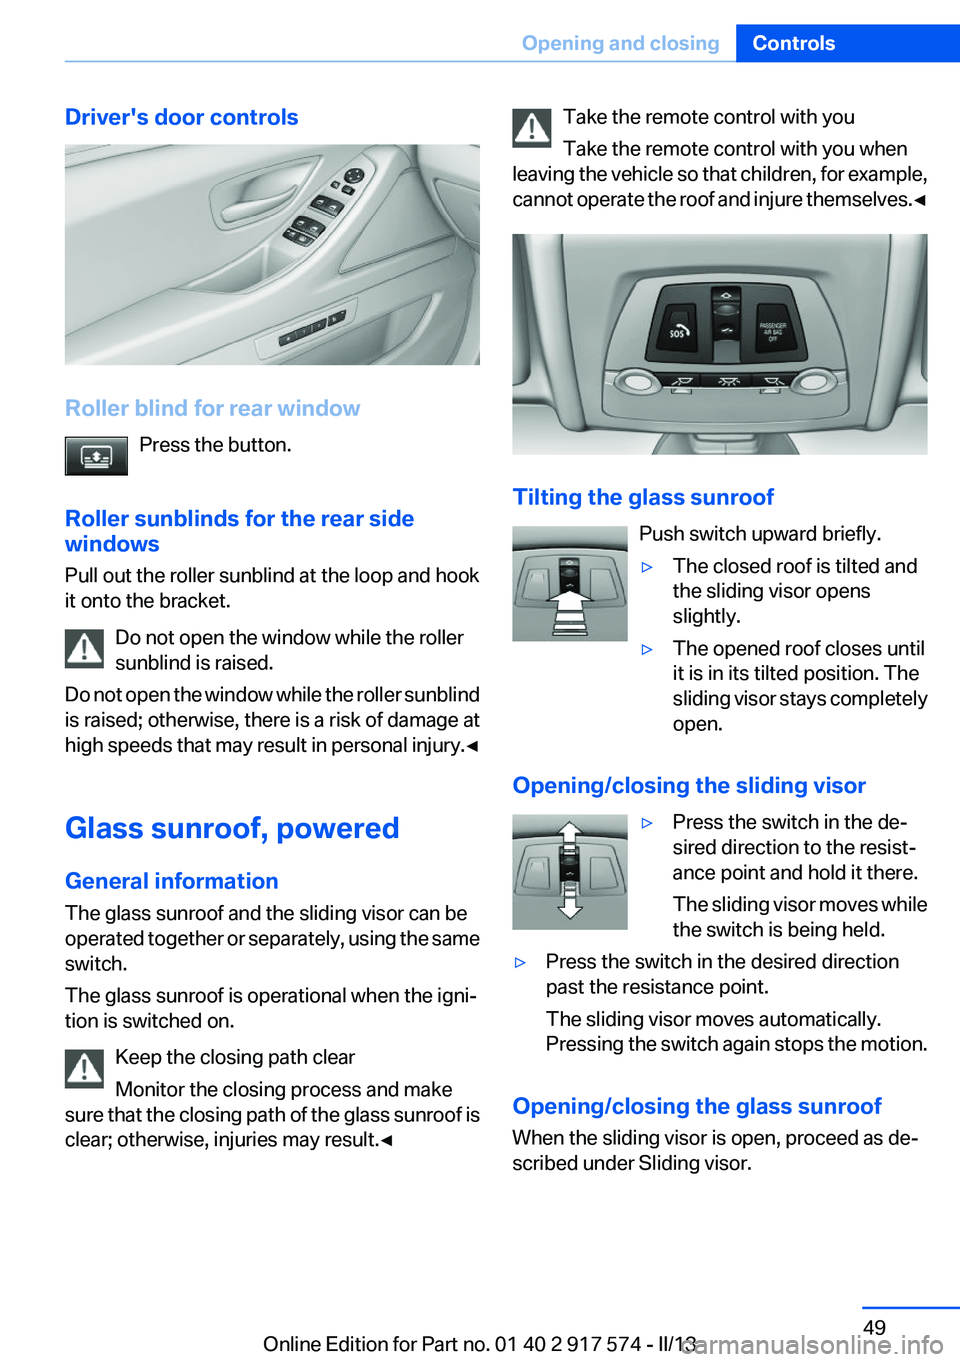
Tilting the glass sunroof
Push switch upward briefly.
▷The closed roof is tilted and
the sliding visor opens
slightly.▷The opened roof closes until
it is in its tilted position. The
sliding visor stays completely
open.
Opening/closing the sliding visor
▷Press the switch in the de‐
sired direction to the resist‐
ance point and hold it there.
The sliding visor moves while
the switch is being held.▷Press the switch in the desired direction
past the resistance point.
The sliding visor moves automatically.
Pressing the switch again stops the motion.
Opening/closing the glass sunroof
When the sliding visor is open, proceed as de‐
scribed under Sliding visor.
Seite 49Opening and closingControls49
Online Edition for Part no. 01 40 2 917 574 - II/13
Page 164 of 224

Stowing cargo▷The cover of the high-voltage battery is lo‐
cated in the trunk. Do not remove the cover
to stow luggage.▷Cover sharp edges and corners on the
cargo.▷Heavy cargo: stow as far forward as possi‐
ble, directly behind and at the bottom of the
rear passenger seat backrests.▷Very heavy cargo: when the rear seat is not
occupied, secure each of the outer safety
belts in the opposite buckle.
Securing cargo
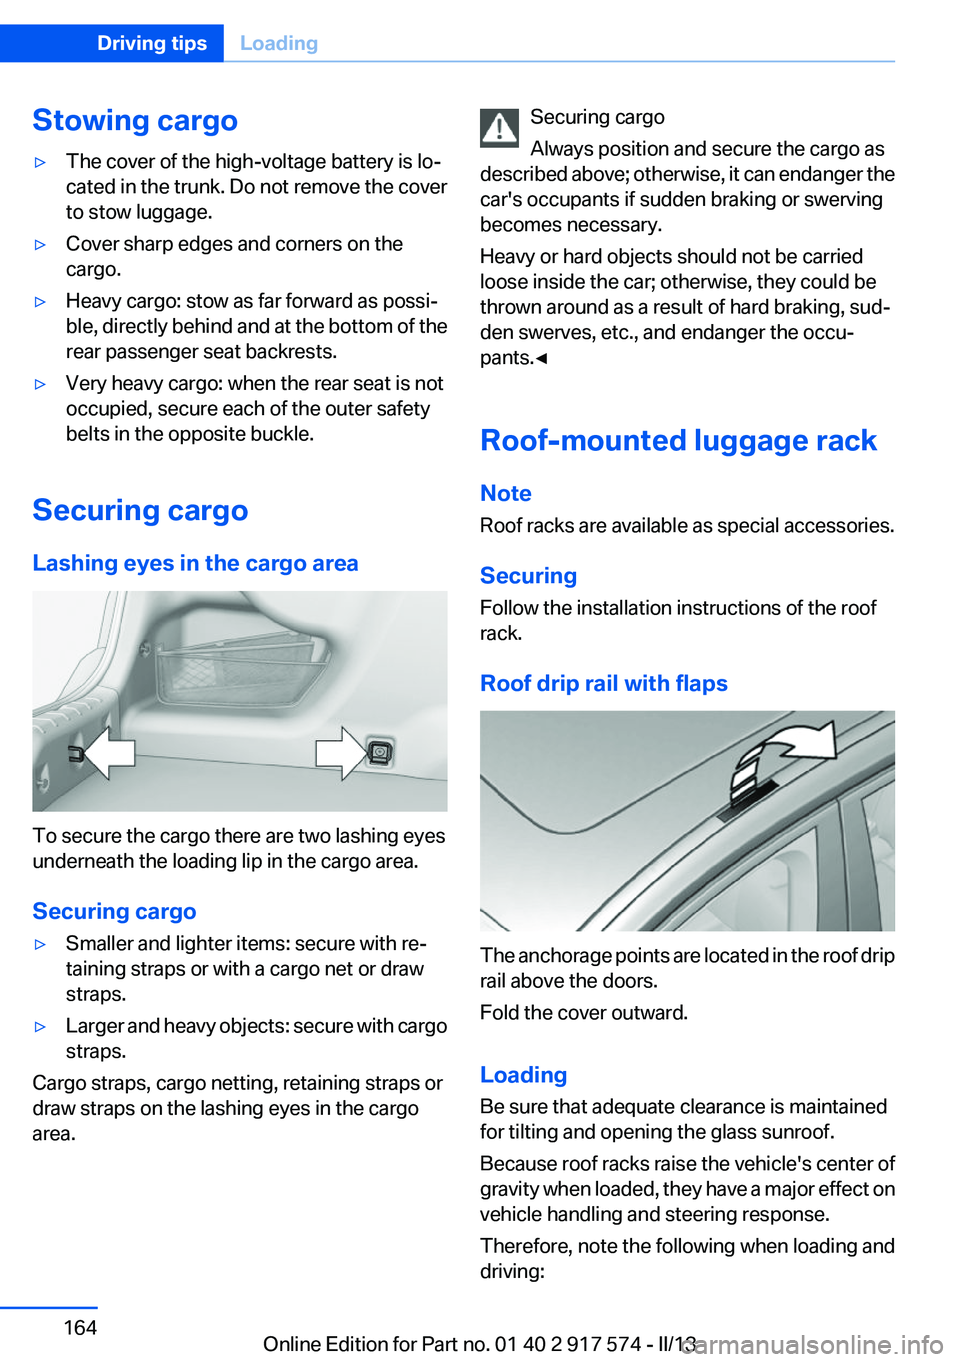
Lashing eyes in the cargo area
To secure the cargo there are two lashing eyes
underneath the loading lip in the cargo area.
Securing cargo
▷Smaller and lighter items: secure with re‐
taining straps or with a cargo net or draw
straps.▷Larger and heavy objects: secure with cargo
straps.
Cargo straps, cargo netting, retaining straps or
draw straps on the lashing eyes in the cargo
area.
Securing cargo
Always position and secure the cargo as
described above; otherwise, it can endanger the
car's occupants if sudden braking or swerving
becomes necessary.
Heavy or hard objects should not be carried
loose inside the car; otherwise, they could be
thrown around as a result of hard braking, sud‐
den swerves, etc., and endanger the occu‐
pants.◀
Roof-mounted luggage rack
Note
Roof racks are available as special accessories.
Securing
Follow the installation instructions of the roof
rack.
Roof drip rail with flaps
The anchorage points are located in the roof drip
rail above the doors.
Fold the cover outward.
Loading
Be sure that adequate clearance is maintained
for tilting and opening the glass sunroof.
Because roof racks raise the vehicle's center of
gravity when loaded, they have a major effect on
vehicle handling and steering response.
Therefore, note the following when loading and
driving:
Seite 164Driving tipsLoading164
Online Edition for Part no. 01 40 2 917 574 - II/13
Page 166 of 224

Saving fuelVehicle equipment
All standard, country-specific and optional
equipment that is offered in the model series is
described in this chapter. Therefore, equipment
is also described that is not available in a vehicle,
e. g., because of the selected optional equip‐
ment or country variant. This also applies for
safety-related functions and systems.
General information
Your vehicle contains advanced technology for
the reduction of fuel consumption and emis‐
sions.
Fuel consumption depends on a number of dif‐
ferent factors.
The implementation of certain measures, driv‐
ing style and regular maintenance can have an
influence on fuel consumption and on the envi‐
ronmental impact.
Remove unnecessary cargo
Additional weight increases fuel consumption.
Remove attached parts
following use
Remove auxiliary mirrors, roof or rear luggage
racks which are no longer required following
use.
Attached parts on the vehicle impair the aero‐
dynamics and increase the fuel consumption.Close the windows and glass
sunroof
Driving with the glass sunroof and windows
open results in increased air resistance and
raises fuel consumption.
Tires
General information
Tires can affect consumption values in various
ways, for instance consumption can be influ‐
enced by the size of the tires.
Check the tire inflation pressure
regularly
Check and, if necessary, correct the tire inflation
pressure at least twice a month and before start‐
ing on a long trip.
Low tire inflation pressure increases rolling re‐
sistance and thus raises fuel consumption and
tire wear.
Drive away without delay
Do not wait for the engine to warm up while the
vehicle remains stationary. Start driving right
away, but at moderate engine speeds.
This is the fastest way for the cold engine to
reach its operating temperature.
Look well ahead when driving
Avoid unnecessary acceleration and braking.
By maintaining a suitable distance to the vehicle
driving ahead of you.
Driving smoothly and looking ahead reduces
fuel consumption.Seite 166Driving tipsSaving fuel166
Online Edition for Part no. 01 40 2 917 574 - II/13
Page 218 of 224

Identification number, refer toImportant features in the en‐
gine compartment 182
iDrive 18
Ignition key, refer to Remote control 34
Ignition off 66
Ignition on 66
Indication of a flat tire 103 , 106
Individual air distribution 139
Individual settings, refer to Personal Profile 35
Inflation pressure, tires 175
Inflation pressure warning FTM, tires 105
Info display, refer to Com‐ puter 89
Initialize, Tire Pressure Moni‐ tor TPM 103
Initializing, Flat Tire Monitor FTM 106
Instrument cluster 79
Instrument cluster, electronic displays 80
Instrument lighting 98
Integrated key 34
Integrated universal remote control 146
Intensity, AUTO program 139
Interior equipment 146
Interior lamps 98
Interior lamps via remote con‐ trol 39
Interior motion sensor 47
Interior rearview mirror 60
Interior rearview mirror, auto‐ matic dimming feature 60
Internet page 6
Interval display, service re‐ quirements 86
J
Jacking points for the vehicle jack 196 Jack, refer to Vehicle jack 196
Joystick, automatic transmis‐ sion 76
Jump-starting 199
K
Key/remote control 34
Keyless Go, refer to Comfort Access 44
Key Memory, refer to Personal Profile 35
Kickdown, automatic trans‐ mission 76
Knee airbag 99
L
Lamp replacement 190
Lamp replacement, front 191
Lamp replacement, rear 194
Lamps 94
Lamps and bulbs 190
Lane departure warning 112
Lane margin, warning 112
Language on Control Dis‐ play 92
Lashing eyes, securing cargo 164
LATCH child restraint fixing system 63
Leather, care 205
LEDs, light-emitting di‐ odes 191
Length, vehicle 211
Letters and numbers, enter‐ ing 23
License plate lamp, bulb re‐ placement 195
Light-alloy wheels, care 206
Light control 96
Light-emitting diodes, LEDs 191
Lighter, front 148
Lighter, rear 149
Lighting 94 Lighting, speaker 98
Lighting via remote control 39
Light switch 94
Load 163
Loading 163
Lock, door 40
Locking/unlocking from in‐ side 41
Locking/unlocking via door lock 40
Locking/unlocking with re‐ mote control 38
Locking, automatic 41
Locking, central 38
Locking via trunk lid 42
Lock, power window 48
Locks, doors, and win‐ dows 65
Low beams 94
Low beams, automatic, refer to High-beam Assistant 96
Lower back support 53
Luggage rack, refer to Roof- mounted luggage rack 164
Lumbar support 53
M
Maintenance 188
Maintenance require‐ ments 188
Maintenance, service require‐ ments 86
Maintenance system, BMW 188
Malfunction displays, refer to Check Control 80
Manual air distribution 139
Manual air flow 139
Manual brake, refer to Parking brake 70
Manual mode, transmis‐ sion 77
Manual operation, backup camera 127 Seite 218ReferenceEverything from A to Z218
Online Edition for Part no. 01 40 2 917 574 - II/13
Page 220 of 224

Plastic, care 206
Power failure 197
Power sunroof, glass 49
Power windows 47
Pressure, tire air pres‐ sure 175
Pressure warning FTM, tires 105
Profile, refer to Personal Pro‐ file 35
Programmable memory but‐ tons, iDrive 22
Protective function, glass sun‐ roof 50
Protective function, win‐ dows 48
Push-and-turn switch, refer to Controller 18
R
Radiator fluid 187
Radio-operated key, refer to Remote control 34
Radio ready state 66
Radio, see user's manual for Navigation, Entertainment
and Communication
Rain sensor 74
Rear automatic climate con‐ trol 142
Rear lamps 194
Rear socket 150
Rearview mirror 59
Rear window defroster 140
Recirculated-air mode 140
Recommended tire brands 180
Refueling 172
Remaining range 84
Remote control/key 34
Remote control, auxiliary air conditioning, key 145
Remote control, button as‐ signment 34 Remote control, malfunc‐
tion 40
Remote control, universal 146
Replacement fuse 197
Replacing parts 190
Replacing wheels/tires 179
Reporting safety defects 9
Reserve warning, refer to Range 84
Reset, Tire Pressure Monitor TPM 103
Residual cooling 143
Residual heat, automatic cli‐ mate control 140
Retaining straps, securing cargo 164
Retreaded tires 180
Reversing lamp, bulb replace‐ ment 195
Roadside parking lamps 95
Roller sunblinds 48
RON gasoline quality 174
Roof load capacity 211
Roof-mounted luggage rack 164
Rope for tow-starting/tow‐ ing 202
RSC Run Flat System Compo‐ nent, refer to Run-flat
tires 181
Rubber components, care 206
Run-flat tires 181
S
Safe braking 161
Safety 7
Safety belt reminder for driv‐ er's seat and front passenger
seat 56
Safety belts 55
Safety belts, care 206
Safety of the hybrid sys‐ tem 202 Safety Package, refer to Active
Protection 115
Safety switch, windows 48
Safety systems, airbags 99
Saving fuel 166
Screen, refer to Control Dis‐ play 18
Screwdriver 190
Screw thread for tow fit‐ ting 202
Seat belts, refer to Safety belts 55
Seat heating, front 54
Seat heating, rear 54
Seating position for chil‐ dren 62
Seat, mirror, and steering wheel memory 58
Seats 51
Seat ventilation, front 54
Selection list in instrument cluster 88
Selector lever, automatic transmission 76
Sensors, care 207
Service and warranty 8
Service requirements, Condi‐ tion Based Service CBS 188
Service requirements, dis‐ play 86
Service, Roadside Assis‐ tance 199
Settings on Control Dis‐ play 91
Settings, storing for seat, mir‐ rors, steering wheel 58
Shifting, automatic transmis‐ sion 76
Shift paddles on steering wheel 78
Shoulder support 53
Side airbags 99
Side View 130
Signaling, horn 14
Signals when unlocking 39 Seite 220ReferenceEverything from A to Z220
Online Edition for Part no. 01 40 2 917 574 - II/13