2013 BMW ACTIVEHYBRID3 transmission
[x] Cancel search: transmissionPage 122 of 220
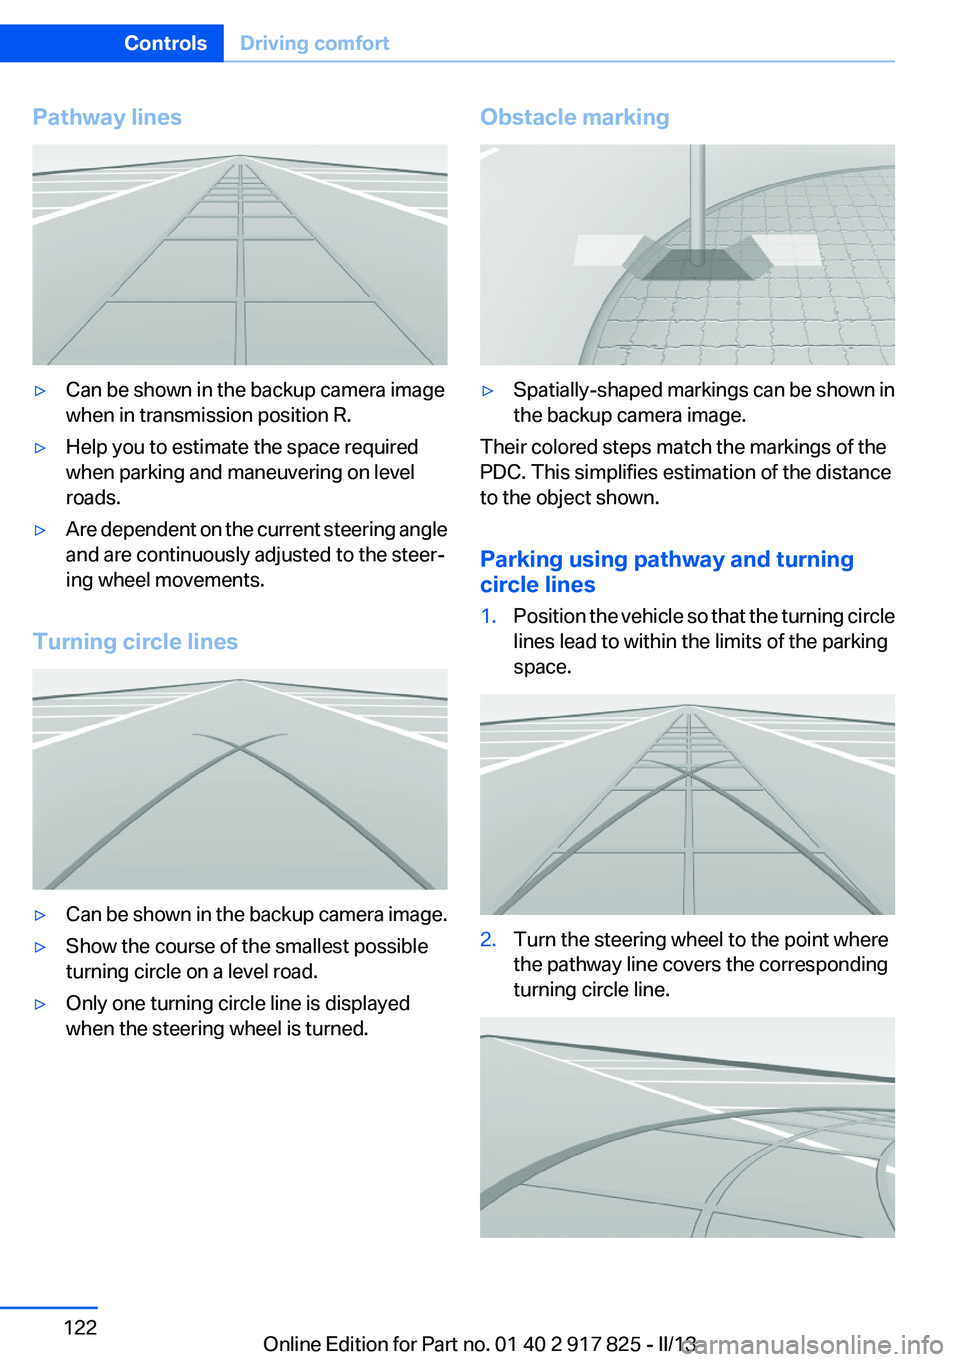
Pathway lines▷Can be shown in the backup camera image
when in transmission position R.▷Help you to estimate the space required
when parking and maneuvering on level
roads.▷Are dependent on the current steering angle
and are continuously adjusted to the steer‐
ing wheel movements.
Turning circle lines
▷Can be shown in the backup camera image.▷Show the course of the smallest possible
turning circle on a level road.▷Only one turning circle line is displayed
when the steering wheel is turned.Obstacle marking▷Spatially-shaped markings can be shown in
the backup camera image.
Their colored steps match the markings of the
PDC. This simplifies estimation of the distance
to the object shown.
Parking using pathway and turning
circle lines
1.Position the vehicle so that the turning circle
lines lead to within the limits of the parking
space.2.Turn the steering wheel to the point where
the pathway line covers the corresponding
turning circle line.Seite 122ControlsDriving comfort122
Online Edition for Part no. 01 40 2 917 825 - II/13
Page 123 of 220
Display settings
Brightness
With the backup camera switched on:1. Select the symbol.2.Turn the controller until the desired setting
is reached and press the controller.
Contrast
With the backup camera switched on:
1. Select the symbol.2.Turn the controller until the desired setting
is reached and press the controller.
System limits
Detection of objects
High, protruding objects such as ledges may not
be detected by the backup camera.
Top View
The concept
Top View assists you in parking and maneuver‐
ing. The area around the doors and the road area
around the vehicle are shown on the Control
Display for this purpose.
General information
The image is captured by two cameras
integrated in the exterior mirrors and by the
backup camera.
The range is at least 7 ft/2 m to the side and rear.
In this way, obstacles up to the height of the ex‐
terior mirrors are detected early.
Notes
Check the traffic situation as well
Check the traffic situation around the ve‐
hicle with your own eyes. Otherwise, an accident
could result from road users or objects located
outside the picture area of the cameras.◀
At a glance
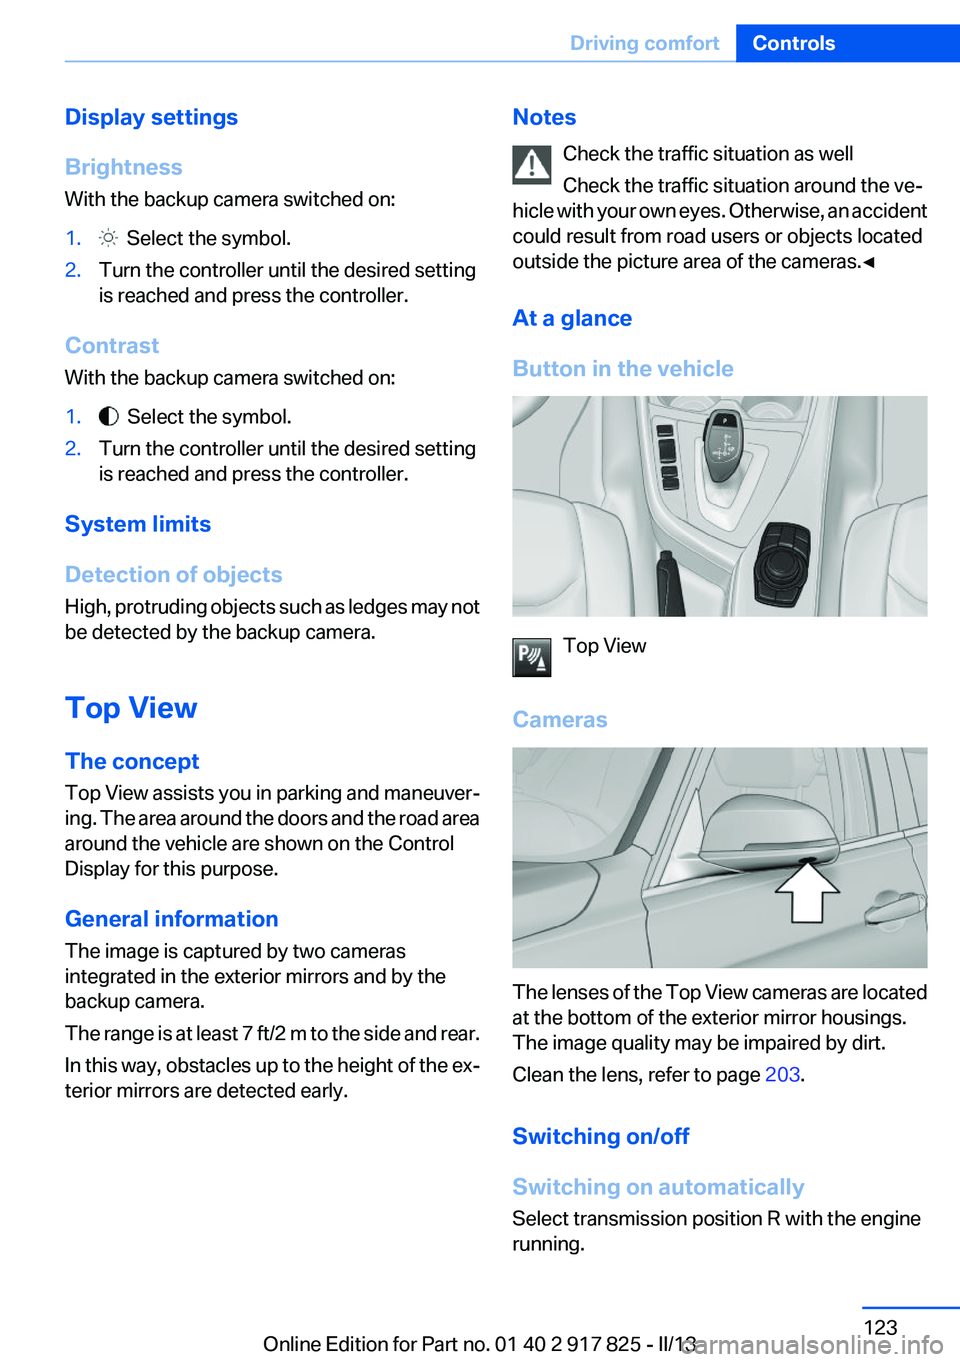
Button in the vehicle
Top View
Cameras
The lenses of the Top View cameras are located
at the bottom of the exterior mirror housings.
The image quality may be impaired by dirt.
Clean the lens, refer to page 203.
Switching on/off
Switching on automatically
Select transmission position R with the engine
running.
Seite 123Driving comfortControls123
Online Edition for Part no. 01 40 2 917 825 - II/13
Page 153 of 220

When coasting to a halt without pressing the
brake pedal.
Average energy recovery:
During a slight deceleration by gently pressing
the brake pedal.
Maximum energy recovery:
By pressing the brake pedal harder.
Brake according to the situation
Brake in accordance with the traffic con‐
ditions, or there is the risk of accident.◀
Optimum energy recovery
As soon as the display shows the maximum en‐
ergy recovery, only press the brake pedal harder
if required by the situation.
Driving situation examples for fuel
economy
In many driving situations, the hybrid system al‐
lows for a particularly efficient energy manage‐
ment.
▷Stop-and-go traffic:The combustion engine is switched on or
over automatically by the hybrid system.▷Driving with constant speed:
The electric motor relieves the combustion
engine periodically by also being switched
on.
Discharge of the high-voltage battery
In normal operation, a sufficient charging of the
high-voltage battery is ensured by energy re‐
covery. Longer idle periods can reduce the
charge state of the high-voltage battery.
Do not allow the vehicle to sit idle for ex‐
tended periods with a low charging state
Before storing the vehicle for an extended pe‐
riod, check the battery charge indicator to en‐
sure that the high-voltage battery is fully
charged. If necessary, charge the high-voltage
battery by driving the vehicle. Check the charge
level regularly, and if necessary recharge the
high-voltage battery by driving the vehicle. Al‐
lowing the high-voltage battery charge to drop
too low will damage the battery.◀
Charging by driving
In order to charge the high-voltage battery most
effectively when driving, activated the transmis‐
sion's Sport program DS, refer to page 72.
Coasting to a standstill and braking phases are
used more often to recover energy.
eDRIVE electric driving and the Auto Start Stop
function will also be deactivated.
Fast charging
In exceptional cases it can be charged in place,
such as before extended idle phases in order to
prevent damage to the high-voltage battery.
1.Start the engine.2.Engage transmission position P and set
parking brake.Seite 153Things to remember when drivingDriving tips153
Online Edition for Part no. 01 40 2 917 825 - II/13
Page 154 of 220
3.Press and hold down brake pedal.4.Use the accelerator pedal to maintain an en‐
gine speed of approx. 2,000 rpm.
After a few minutes, the high-voltage battery is
fully charged again.
The battery charge indicator in the instrument
cluster, refer to page 79, is used to check the
status.
General driving notes
Closing the trunk lid Drive with the trunk lid closed
Only drive with the tailgate closed; other‐
wise, in the event of an accident or braking or
evasive maneuvers, passengers or other road
users may be injured or the vehicle may be dam‐
aged. In addition, exhaust fumes may enter the
passenger compartment.◀
If driving with the tailgate open cannot be
avoided:
▷Close all windows and the glass sunroof.▷Greatly increase the blower speed.▷Drive moderately.
Hot exhaust system
Hot exhaust system
High temperatures are generated in the
exhaust system.
Do not remove the heat shields installed and
never apply undercoating to them. When driv‐
ing, standing at idle and while parking, take care
to avoid possible contact between the hot ex‐
haust system and any highly flammable materi‐
als such as hay, leaves, grass, etc. Such contact
could lead to a fire, and with it the risk of serious
personal injury as well as property damage.
Do not touch hot exhaust pipes; otherwise, there
is the danger of getting burned.◀
Mobile communication devices in the
vehicle
Mobile communication devices in the ve‐
hicle
It is advised that you do not use mobile commu‐
nication devices, e.g., mobile phones, inside the
vehicle without connecting them directly to the
external antenna. Otherwise, the vehicle elec‐
tronics and mobile communication devices can
interfere with each other. In addition, there is no
assurance that the radiation generated during
transmission will be discharged from the vehicle
interior.◀
Hydroplaning
On wet or slushy roads, a wedge of water can
form between the tires and road surface.
This phenomenon is referred to as hydroplan‐
ing. It is characterized by a partial or complete
loss of contact between the tires and the road
surface, ultimately undermining your ability to
steer and brake the vehicle.
Hydroplaning
When driving on wet or slushy roads, re‐
duce your speed to prevent hydroplaning.◀
Driving through water
Drive though calm water only if it is not deeper
than 9.8 inches/25 cm and at this height, no
faster than walking speed, up to 6 mph/10 km/h.
Adhere to water depth and speed limita‐
tions
Do not exceed this water depth and walking
speed; otherwise, the vehicle's engine, the elec‐
trical systems and the transmission may be
damaged.◀
Braking safely
Your vehicle is equipped with ABS as a standard
feature.Seite 154Driving tipsThings to remember when driving154
Online Edition for Part no. 01 40 2 917 825 - II/13
Page 162 of 220
▷Blue display: efficient driving style as long as
the mark moves within the blue range.▷Gray display: adjust driving style, e. g. by
backing off the accelerator pedal.
The display switches to blue as soon as all con‐
ditions for fuel-economy-optimized driving are
met.
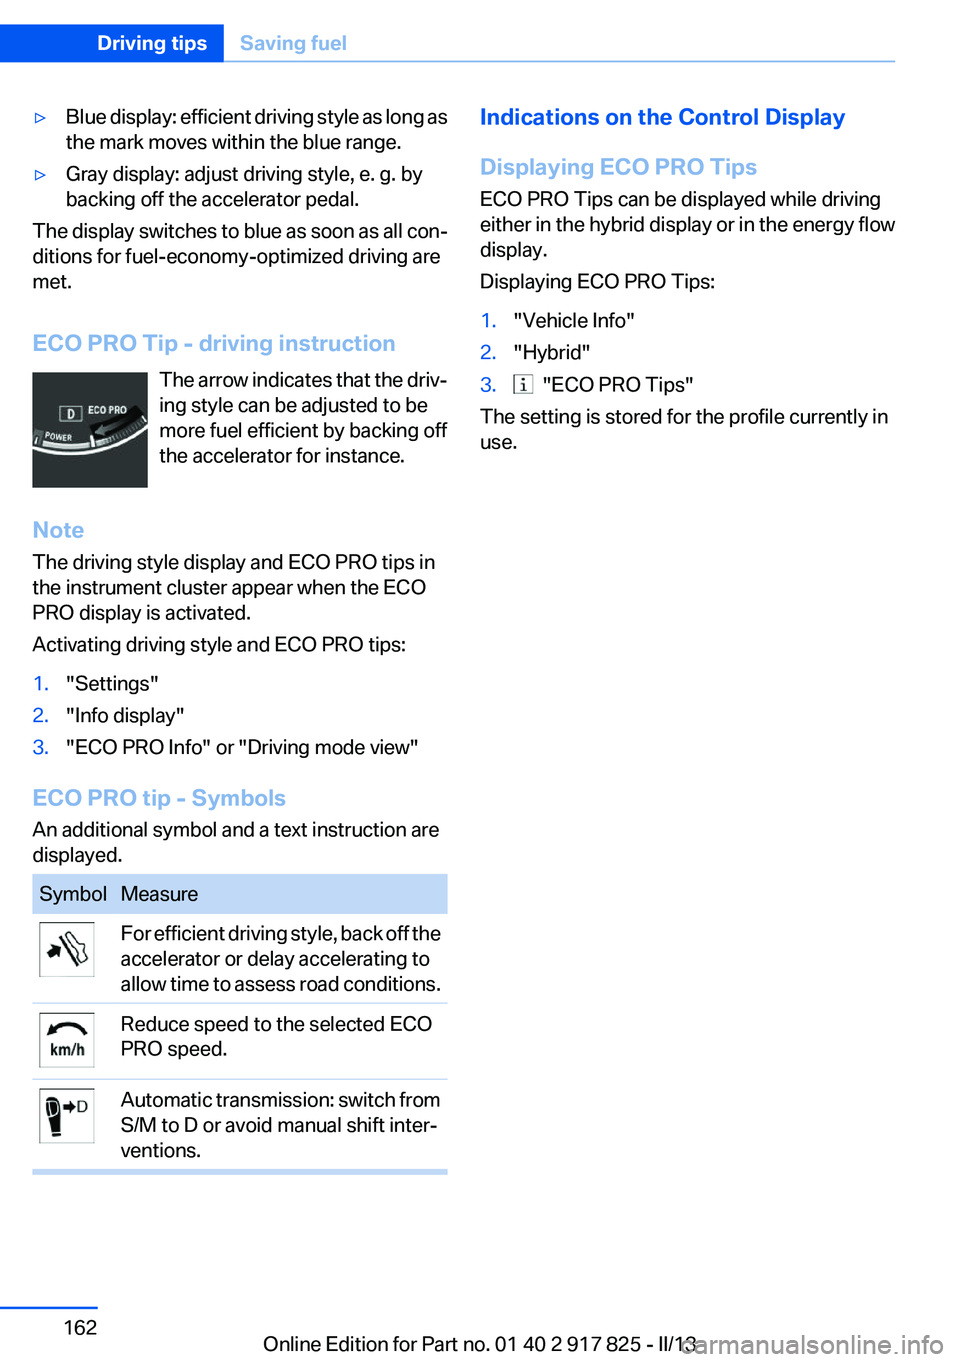
ECO PRO Tip - driving instruction The arrow indicates that the driv‐
ing style can be adjusted to be
more fuel efficient by backing off
the accelerator for instance.
Note
The driving style display and ECO PRO tips in
the instrument cluster appear when the ECO
PRO display is activated.
Activating driving style and ECO PRO tips:
1."Settings"2."Info display"3."ECO PRO Info" or "Driving mode view"
ECO PRO tip - Symbols
An additional symbol and a text instruction are
displayed.
SymbolMeasureFor efficient driving style, back off the
accelerator or delay accelerating to
allow time to assess road conditions.Reduce speed to the selected ECO
PRO speed.Automatic transmission: switch from
S/M to D or avoid manual shift inter‐
ventions.Indications on the Control Display
Displaying ECO PRO Tips
ECO PRO Tips can be displayed while driving
either in the hybrid display or in the energy flow
display.
Displaying ECO PRO Tips:1."Vehicle Info"2."Hybrid"3. "ECO PRO Tips"
The setting is stored for the profile currently in
use.
Seite 162Driving tipsSaving fuel162
Online Edition for Part no. 01 40 2 917 825 - II/13
Page 166 of 220
RefuelingVehicle equipment
All standard, country-specific and optional
equipment that is offered in the model series is
described in this chapter. Therefore, equipment
is also described that is not available in a vehicle,
e. g., because of the selected optional equip‐
ment or country variant. This also applies for
safety-related functions and systems.
General information Refuel promptly
Refuel no later than at a range of
30 miles/50 km, or operation of the engine is not
ensured and damage may occur.◀
Do not refuel unless the engine is at a
standstill and the transmission is in posi‐
tion P/N
Do not refuel unless the engine is at a standstill
and the transmission is in position P/N, other‐
wise the buildup of pressure may cause the fuel
nozzle to shut off prematurely.◀
Fuel cap
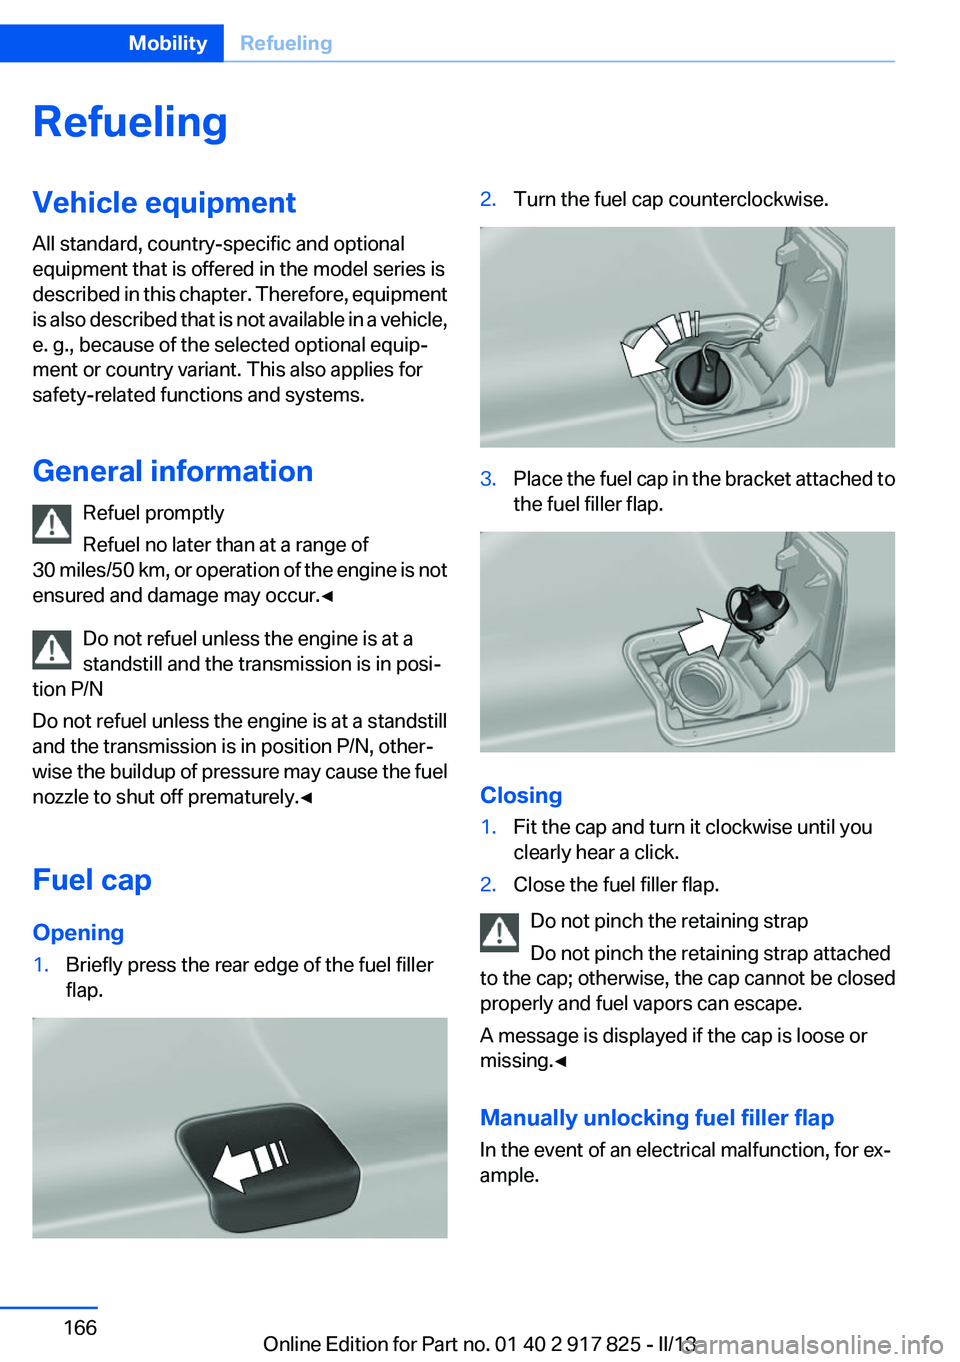
Opening1.Briefly press the rear edge of the fuel filler
flap.2.Turn the fuel cap counterclockwise.3.Place the fuel cap in the bracket attached to
the fuel filler flap.
Closing
1.Fit the cap and turn it clockwise until you
clearly hear a click.2.Close the fuel filler flap.
Do not pinch the retaining strap
Do not pinch the retaining strap attached
to the cap; otherwise, the cap cannot be closed
properly and fuel vapors can escape.
A message is displayed if the cap is loose or
missing.◀
Manually unlocking fuel filler flap
In the event of an electrical malfunction, for ex‐
ample.
Seite 166MobilityRefueling166
Online Edition for Part no. 01 40 2 917 825 - II/13
Page 178 of 220
Engine oilVehicle equipment
All standard, country-specific and optional
equipment that is offered in the model series is
described in this chapter. Therefore, equipment
is also described that is not available in a vehicle,
e. g., because of the selected optional equip‐
ment or country variant. This also applies for
safety-related functions and systems.
General information
Engine oil consumption depends on driving
style and driving conditions, e.g., if your driving
style is very sporty engine oil consumption will
be considerably greater.
Therefore, regularly check the engine oil level
after refueling.
Checking the oil level
electronically
Status display
The concept
The oil level is monitored electronically during
driving and shown on the Control Display.
If the oil level reaches the minimum level, a
check control message is displayed.
Requirements
Depending on the previous displays, the status
display appears when the engine is running or
after the vehicle has been driven for at least 30
minutes.
Displaying the oil level1."Vehicle Info"2."Vehicle status"3. "Engine oil level"
Oil level display messages
Different messages appear on the display de‐
pending on the oil level. Pay attention to these
messages.
If oil level is too low, immediately add 1 US
quart/liter of oil.
Take care not to add too much engine oil.
Too much engine oil
Have the vehicle checked immediately;
otherwise, surplus oil can lead to engine dam‐
age.◀
Detailed measurement
The concept
In the detailed measurement the oil level is
checked and displayed via a scale.
During the measurement, the idle speed is in‐
creased somewhat.
General information
A detailed measurement is only possible with
certain engines.
Requirements
▷Automatic transmission: selector lever in
transmission position N or P and accelerator
not depressed.▷Vehicle is on a level road and the engine is
running at operating temperature.
Performing a detailed measurement
In order to perform a detailed measurement of
the engine oil level:
1."Vehicle Info"2."Vehicle status"Seite 178MobilityEngine oil178
Online Edition for Part no. 01 40 2 917 825 - II/13
Page 197 of 220

corresponding engine or body ground of the
vehicle to be started.
Starting the engine
Never use spray fluids to start the engine.
1.Start the engine of the assisting vehicle and
let it run for several minutes at an increased
idle speed.2.Start the engine of the vehicle being started
in the usual way.
If the first starting attempt is not successful,
wait a few minutes before making another
attempt in order to allow the discharged bat‐
tery to recharge.3.Let both engines run for several minutes.4.Disconnect the jumper cables in the reverse
order.
Check the battery and recharge if necessary.
Tow-starting and towing
Automatic transmission: transporting
your vehicle
Note
Your vehicle is not permitted to be towed.
Therefore, contact a service center in the event
of a breakdown.
Do not have the vehicle towed
Have your vehicle transported on a loading
platform only; otherwise, damage may occur.◀
Tow truck
Do not lift the vehicle
Do not lift the vehicle by the tow fitting or
body and chassis parts; otherwise, damage may
result.◀
Use the tow fitting screwed in at the front for
maneuvering the vehicle only.
Towing other vehicles
General information Light towing vehicle
The towing vehicle must not be lighter
than the vehicle being towed; otherwise, it will
not be possible to control the vehicle re‐
sponse.◀
Attaching the tow bar/tow rope correctly
Attach the tow bar or tow rope to the tow
fitting; connecting it to other vehicle parts may
cause damage.◀
▷Switch on the hazard warning system, de‐
pending on local regulations.▷If the electrical system has failed, clearly
identify the vehicle being towed by placing
a sign or a warning triangle in the rear win‐
dow.
Tow bar
The tow fittings used should be on the same
side on both vehicles.
Seite 197Breakdown assistanceMobility197
Online Edition for Part no. 01 40 2 917 825 - II/13