2013 BMW 750LI XDRIVE lock
[x] Cancel search: lockPage 13 of 243
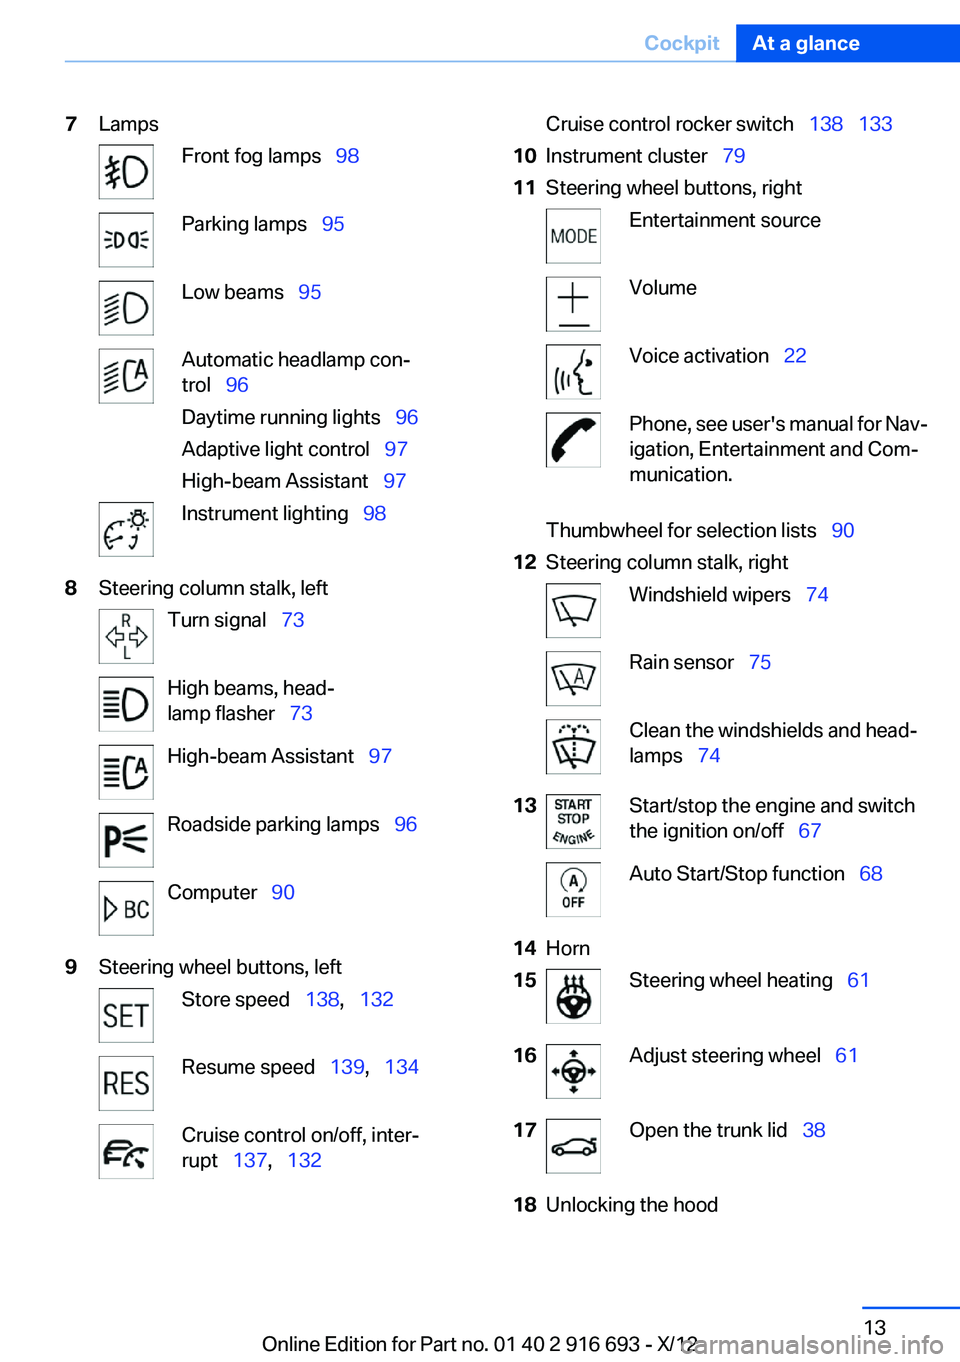
7LampsFront fog lamps 98Parking lamps 95Low beams 95Automatic headlamp con‐
trol 96
Daytime running lights 96
Adaptive light control 97
High-beam Assistant 97Instrument lighting 988Steering column stalk, leftTurn signal 73High beams, head‐
lamp flasher 73High-beam Assistant 97Roadside parking lamps 96Computer 909Steering wheel buttons, leftStore speed 138, 132Resume speed 139, 134Cruise control on/off, inter‐
rupt 137, 132Cruise control rocker switch 138 13310Instrument cluster 7911Steering wheel buttons, rightEntertainment sourceVolumeVoice activation 22Phone, see user's manual for Nav‐
igation, Entertainment and Com‐
munication.
Thumbwheel for selection lists 90
12Steering column stalk, rightWindshield wipers 74Rain sensor 75Clean the windshields and head‐
lamps 7413Start/stop the engine and switch
the ignition on/off 67Auto Start/Stop function 6814Horn15Steering wheel heating 6116Adjust steering wheel 6117Open the trunk lid 3818Unlocking the hoodSeite 13CockpitAt a glance13
Online Edition for Part no. 01 40 2 916 693 - X/12
Page 14 of 243
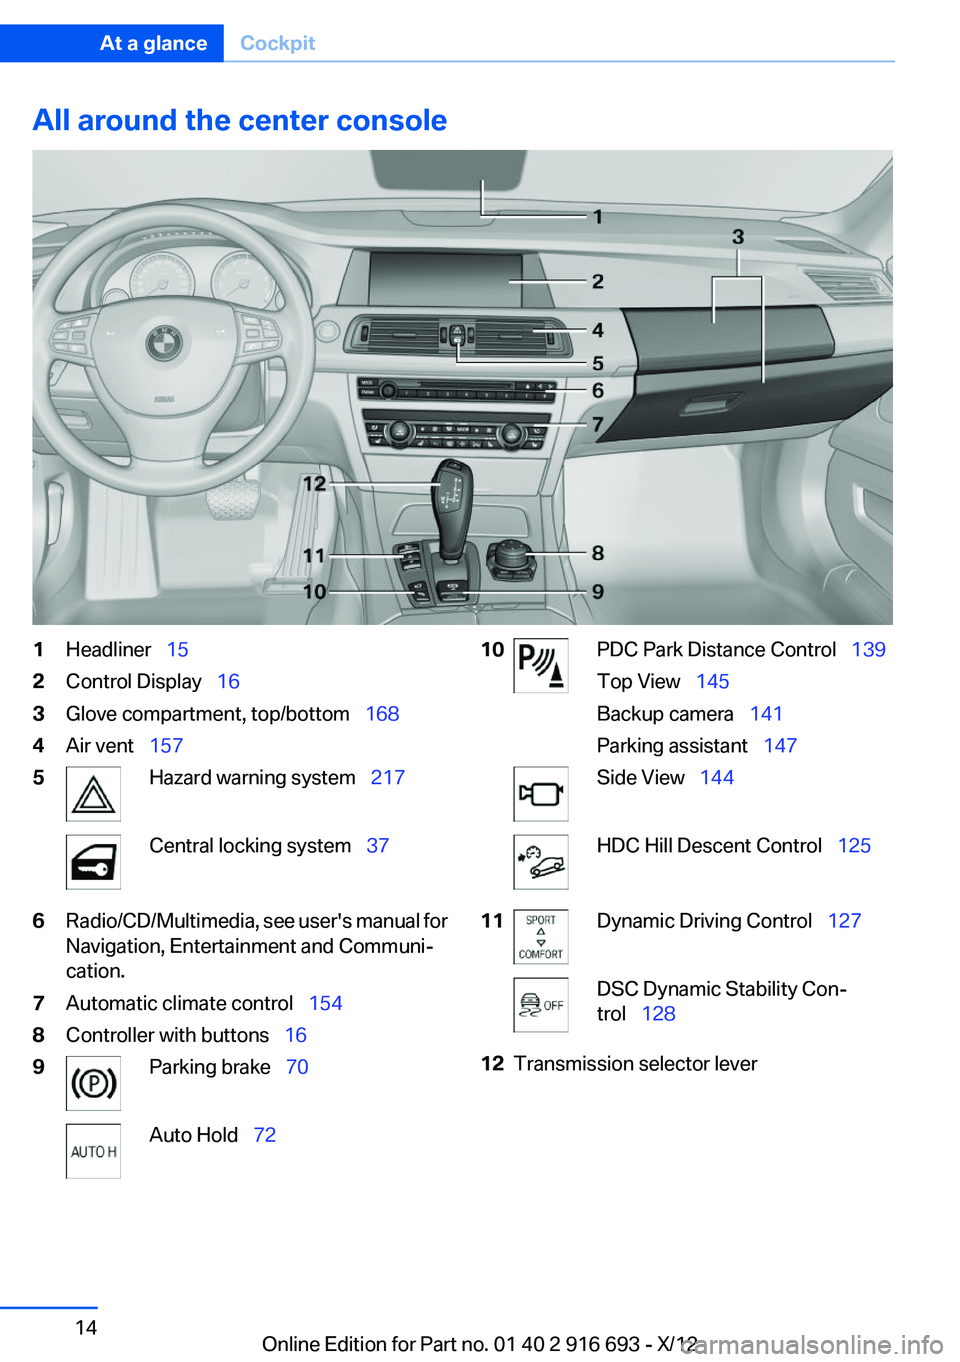
All around the center console1Headliner 152Control Display 163Glove compartment, top/bottom 1684Air vent 1575Hazard warning system 217Central locking system 376Radio/CD/Multimedia, see user's manual for
Navigation, Entertainment and Communi‐
cation.7Automatic climate control 1548Controller with buttons 169Parking brake 70Auto Hold 7210PDC Park Distance Control 139
Top View 145
Backup camera 141
Parking assistant 147Side View 144HDC Hill Descent Control 12511Dynamic Driving Control 127DSC Dynamic Stability Con‐
trol 12812Transmission selector leverSeite 14At a glanceCockpit14
Online Edition for Part no. 01 40 2 916 693 - X/12
Page 19 of 243

Example: setting the clock
Setting the clock1. Press the button. The main menu is
displayed.2.Turn the controller until "Settings" is high‐
lighted, and then press the controller.3.If necessary, move the controller to the left
to display "Time/Date".4.Turn the controller until "Time/Date" is high‐
lighted, and then press the controller.5.Turn the controller until "Time:" is high‐
lighted, and then press the controller.6.Turn the controller to set the hours and
press the controller.7.Turn the controller to set the minutes and
press the controller.
Status information
Status field
The following information is displayed in the sta‐
tus field at the top right:
▷Time.▷Current entertainment source.▷Sound output, on/off.▷Wireless network reception strength.▷Telephone status.▷Traffic bulletin reception.
Status field symbols
The symbols are grouped as follows.
Radio symbols
SymbolMeaning HD Radio™ is switched on. Satellite radio is switched on.
Telephone symbols
SymbolMeaning Incoming or outgoing call. Missed call. Wireless network reception strength
Symbol flashes: searching for net‐
work. Wireless network is not available. Bluetooth is switched on. Roaming is active.Seite 19iDriveAt a glance19
Online Edition for Part no. 01 40 2 916 693 - X/12
Page 20 of 243

SymbolMeaning Text message was received. Check the SIM card. SIM card is blocked. SIM card is missing. Enter the PIN.
Entertainment symbols
SymbolMeaning CD/DVD player. Music collection. Gracenote® database. AUX-IN port. Rear AUX-IN port on the left. Rear AUX-IN port on the right.
Additional symbols
SymbolMeaning Spoken instructions are switched off. Request of the current vehicle posi‐
tion.
Split screen
General information
Additional information can be displayed on the
right side of the split screen, e.g., information
from the computer.
In the divided screen view, the so-called split
screen, this information remains visible even
when you change to another menu.
Switching the split screen on and off1. Press the button.2."Split screen"
Selecting the display
1. Press the button.2."Split screen"3.Move the controller until the split screen is
selected.4.Press the controller or select "Split screen
content".5.Select the desired menu item.
Programmable memory
buttons
General information
The iDrive functions can be stored on the pro‐
grammable memory buttons and called up di‐
rectly, e.g., radio stations, navigation destina‐
tions, phone numbers and entry points into the
menu.
The settings are stored for the remote control
currently in use.
Saving a function
1.Highlight the function via the iDrive.2. Press the desired button for more
than 2 seconds.
Seite 20At a glanceiDrive20
Online Edition for Part no. 01 40 2 916 693 - X/12
Page 30 of 243
Opening and closingVehicle equipment
All standard, country-specific and optional
equipment that is offered in the model series is
described in this chapter. Therefore, equipment
is also described that is not available in a vehicle,
e. g., because of the selected optional equip‐
ment or country variant. This also applies for
safety-related functions and systems.
Remote control/key
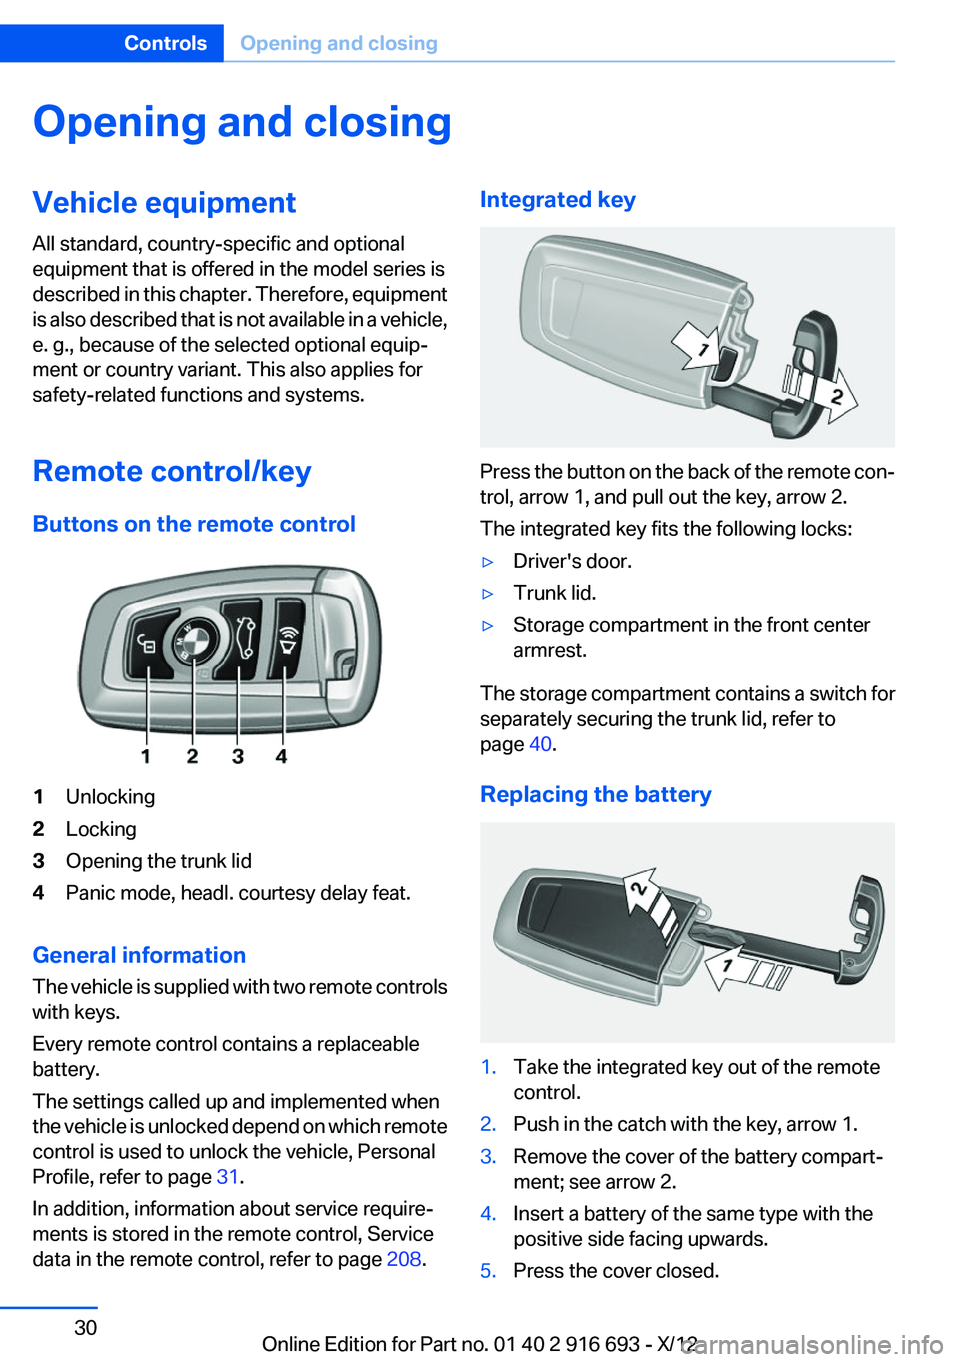
Buttons on the remote control1Unlocking2Locking3Opening the trunk lid4Panic mode, headl. courtesy delay feat.
General information
The vehicle is supplied with two remote controls
with keys.
Every remote control contains a replaceable
battery.
The settings called up and implemented when
the vehicle is unlocked depend on which remote
control is used to unlock the vehicle, Personal
Profile, refer to page 31.
In addition, information about service require‐
ments is stored in the remote control, Service
data in the remote control, refer to page 208.
Integrated key
Press the button on the back of the remote con‐
trol, arrow 1, and pull out the key, arrow 2.
The integrated key fits the following locks:
▷Driver's door.▷Trunk lid.▷Storage compartment in the front center
armrest.
The storage compartment contains a switch for
separately securing the trunk lid, refer to
page 40.
Replacing the battery
1.Take the integrated key out of the remote
control.2.Push in the catch with the key, arrow 1.3.Remove the cover of the battery compart‐
ment; see arrow 2.4.Insert a battery of the same type with the
positive side facing upwards.5.Press the cover closed.Seite 30ControlsOpening and closing30
Online Edition for Part no. 01 40 2 916 693 - X/12
Page 31 of 243
Take the used battery to a recycling cen‐
ter or to your service center.
New remote controls
You can obtain new remote controls from your
service center.
Loss of the remote controls
Lost remote controls can be blocked by your
service center.
Emergency detection of remote control
It is possible to switch on the ignition or start the
engine in situations such as the following:▷Interference of radio transmission to remote
control by external sources.▷Discharged battery in the remote control.▷Interference of radio transmission by mobile
devices in close proximity to the remote
control.▷Interference of radio transmission by
charger while charging items such as mobile
devices in the vehicle.
A Check Control message is displayed if an at‐
tempt is made to switch on the ignition or start
the engine.
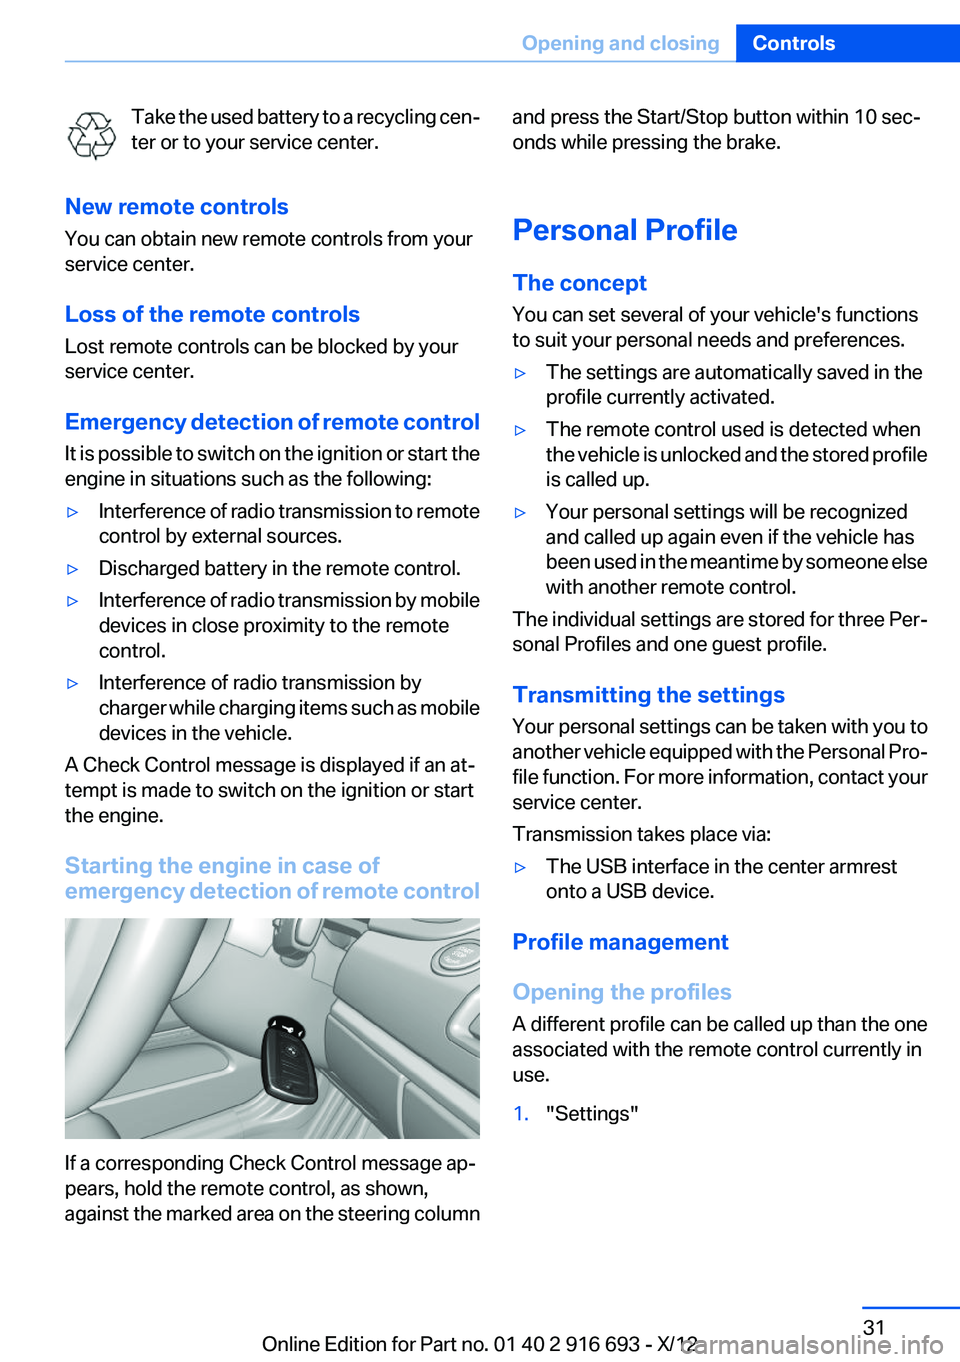
Starting the engine in case of
emergency detection of remote control
If a corresponding Check Control message ap‐
pears, hold the remote control, as shown,
against the marked area on the steering column
and press the Start/Stop button within 10 sec‐
onds while pressing the brake.
Personal Profile
The concept
You can set several of your vehicle's functions
to suit your personal needs and preferences.▷The settings are automatically saved in the
profile currently activated.▷The remote control used is detected when
the vehicle is unlocked and the stored profile
is called up.▷Your personal settings will be recognized
and called up again even if the vehicle has
been used in the meantime by someone else
with another remote control.
The individual settings are stored for three Per‐
sonal Profiles and one guest profile.
Transmitting the settings
Your personal settings can be taken with you to
another vehicle equipped with the Personal Pro‐
file function. For more information, contact your
service center.
Transmission takes place via:
▷The USB interface in the center armrest
onto a USB device.
Profile management
Opening the profiles
A different profile can be called up than the one
associated with the remote control currently in
use.
1."Settings"Seite 31Opening and closingControls31
Online Edition for Part no. 01 40 2 916 693 - X/12
Page 33 of 243
4.Open "Guest".5.Adjust the settings.
Note: the guest profile cannot be renamed.
Display profile list during start
The profile list can be displayed during each
start for selecting the desired profile.
1."Settings"2."Profiles"3.Open "Options".4."Display user list at startup"
Personal Profile settings
The following functions and settings can be
stored in a profile.
More information on the settings can be found
under:
▷Active Cruise Control: collision warning.▷Collision warning: warning time, last setting
on/off.▷Exterior mirror position.▷CD/Multimedia: audio source listened to
last.▷Driving Dynamics Control: sport program.▷Driver's seat position: automatic retrieval af‐
ter unlocking.▷Programmable memory buttons: assign‐
ment.▷Head-up Display: selection, brightness, po‐
sition and rotation of the display.▷Headlamp courtesy delay feature: time set‐
ting.▷Tone: tone settings.▷Automatic climate control: settings.▷Steering wheel position.▷Navigation: map views, route criteria, voice
output on/off.▷Night Vision with pedestrian detection: se‐
lection of functions and type of display.▷Park Distance Control PDC: adjusting the
signal tone volume.▷Radio: stored stations, station listened to
last, special settings.▷Backup camera: selection of functions and
type of display.▷Side View: selection of the display type.▷Language on the Control Display.▷Lane departure warning: last setting, on/off.▷Active Blind Spot Detection: last setting, on/
off.▷Daytime running lights: current setting.▷Triple turn signal activation.▷Locking the vehicle: after a brief period or
after starting to drive.
Central locking system
The concept
The central locking system becomes active
when the driver's door is closed.
The system simultaneously engages and re‐
leases the locks on the following:
▷Doors.▷Trunk lid.▷Fuel filler flap.
Operating from the outside
▷Via the remote control.▷Via the driver's door lock.▷Via the door handles.▷Via the button in the trunk lid.
The following takes place simultaneously when
locking/unlocking the vehicle via the remote
control:
▷Depending on how the vehicle is equipped,
the theft protection is activated/deactivated.
Theft protection prevents the doors from
being unlocked using the lock buttons or the
door opener.Seite 33Opening and closingControls33
Online Edition for Part no. 01 40 2 916 693 - X/12
Page 34 of 243
▷The welcome lamps, interior lamps and
courtesy lamps are switched on and off.▷The alarm system, refer to page 42, is
armed or disarmed.
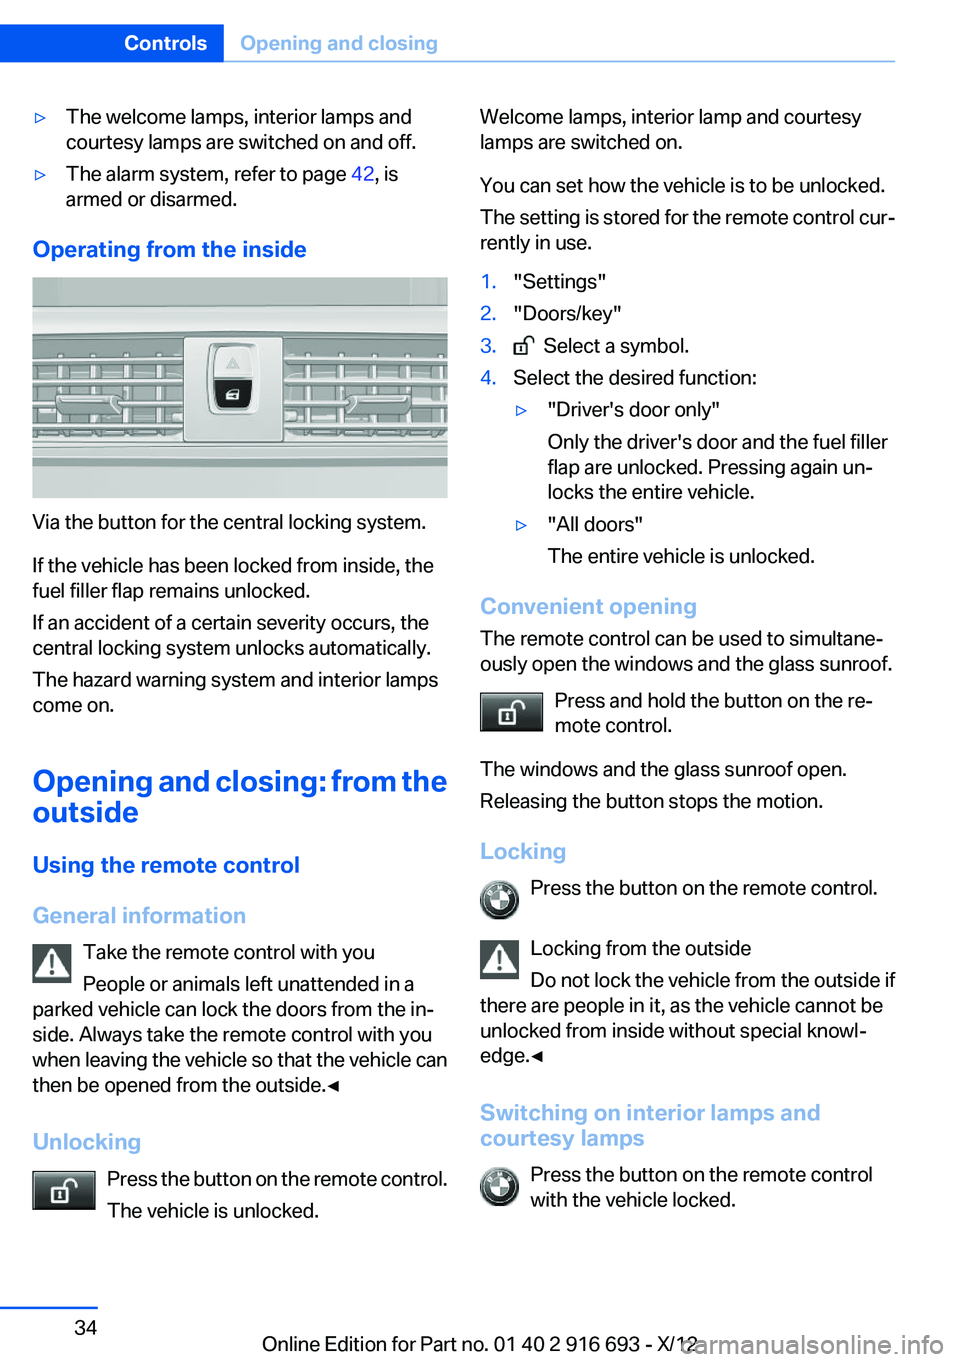
Operating from the inside
Via the button for the central locking system.
If the vehicle has been locked from inside, the
fuel filler flap remains unlocked.
If an accident of a certain severity occurs, the
central locking system unlocks automatically.
The hazard warning system and interior lamps
come on.
Opening and closing: from the
outside
Using the remote control
General information Take the remote control with you
People or animals left unattended in a
parked vehicle can lock the doors from the in‐
side. Always take the remote control with you
when leaving the vehicle so that the vehicle can
then be opened from the outside.◀
Unlocking Press the button on the remote control.
The vehicle is unlocked.
Welcome lamps, interior lamp and courtesy
lamps are switched on.
You can set how the vehicle is to be unlocked.
The setting is stored for the remote control cur‐
rently in use.1."Settings"2."Doors/key"3. Select a symbol.4.Select the desired function:▷"Driver's door only"
Only the driver's door and the fuel filler
flap are unlocked. Pressing again un‐
locks the entire vehicle.▷"All doors"
The entire vehicle is unlocked.
Convenient opening
The remote control can be used to simultane‐
ously open the windows and the glass sunroof.
Press and hold the button on the re‐
mote control.
The windows and the glass sunroof open.
Releasing the button stops the motion.
Locking Press the button on the remote control.
Locking from the outside
Do not lock the vehicle from the outside if
there are people in it, as the vehicle cannot be
unlocked from inside without special knowl‐
edge.◀
Switching on interior lamps and
courtesy lamps
Press the button on the remote control
with the vehicle locked.
Seite 34ControlsOpening and closing34
Online Edition for Part no. 01 40 2 916 693 - X/12