2013 BMW 740LI XDRIVE window
[x] Cancel search: windowPage 156 of 243
Air flows out of the vents for the upper body re‐
gion. Open them for this purpose.
Air is cooled as quickly as possible:▷At an external temperature of approx.
32 ℉/0 ℃.▷When the engine is running.
The air flow can be adjusted when the program
is active.
Automatic recirculated-air control/
recirculated-air mode
You can respond to unpleasant odors or pollu‐
tants in the immediate environment by tempo‐
rarily suspending the supply of outside air. The
system then recirculates the air currently within
the vehicle.
Press the button repeatedly to select
an operating mode:
▷LEDs off: outside air flows in continuously.▷Left LED on, automatic recirculated-air con‐
trol: a sensor detects pollutants in the out‐
side air and controls the shutoff automati‐
cally.▷Right LED on, recirculated-air mode: the
supply of outside air into the vehicle is per‐
manently blocked.
If the windows are fogged over, switch off the
recirculated-air mode and press the AUTO but‐
ton on the driver's side to utilize the condensa‐
tion sensor. Make sure that air can flow onto the
windshield.
Continuous recirculated-air mode
The recirculated-air mode should not be
used for an extended period of time, as the air
quality inside the vehicle deteriorates steadily. ◀
Cooling function
The passenger compartment can only be
cooled with the engine running.
Press the button.
The air is cooled and dehumidified and, depend‐
ing on the temperature setting, warmed again.
Depending on the weather, the windshield may
fog up briefly when the engine is started.
The cooling function is switched on automati‐
cally with the AUTO program.
When using the automatic climate control, con‐
densation water, refer to page 176, develops
that exits underneath the vehicle.
Rear window defroster Press the button.
The rear window defroster switches off
automatically after a certain period of time.
ALL program The current settings on the driver's side
for temperature, air flow, air distribu‐
tion, and AUTO program are transferred to the
front passenger side and to the left and right
rear.
The program is switched off if the settings on
the front passenger side or in the rear are
changed.
Residual heat
The heat stored in the engine is used to heat the
interior.
Functional requirement▷Up to 20 minutes after the engine has been
switched off.▷Warm engine.▷The battery is sufficiently charged.▷External temperature below 77 ℉/25 ℃.
Switching on
1.Switch off the ignition.2. Press the right side of the button on
the driver's side.
Seite 156ControlsClimate control156
Online Edition for Part no. 01 40 2 916 693 - X/12
Page 157 of 243
is shown on the display of the automatic cli‐
mate control.
The interior temperature, air volume and air dis‐
tribution can be adjusted with the ignition
switched on.
Switching off
At the lowest fan speed, press the left side of the
button on the driver's side.
on the display of the automatic climate control
goes out.
Switching the system on/off
Switching off
▷Complete system: Press and hold the left button on
the driver's side until the control
clicks off.▷On the front passenger side:
Press and hold the left button on
the front passenger side.
Switching on
Press any button except:
▷ALL program.▷Rear window defroster.▷Left side of Air volume button.▷Seat heating.▷Seat ventilation.
Microfilter/activated-charcoal filter
The microfilter removes dust and pollen from
the incoming air.
The activated-charcoal filter removes gaseous
pollutants from the outside air that enters the
vehicle.
This combined filter should be replaced during
scheduled maintenance, refer to page 208, of
your vehicle.
Ventilation
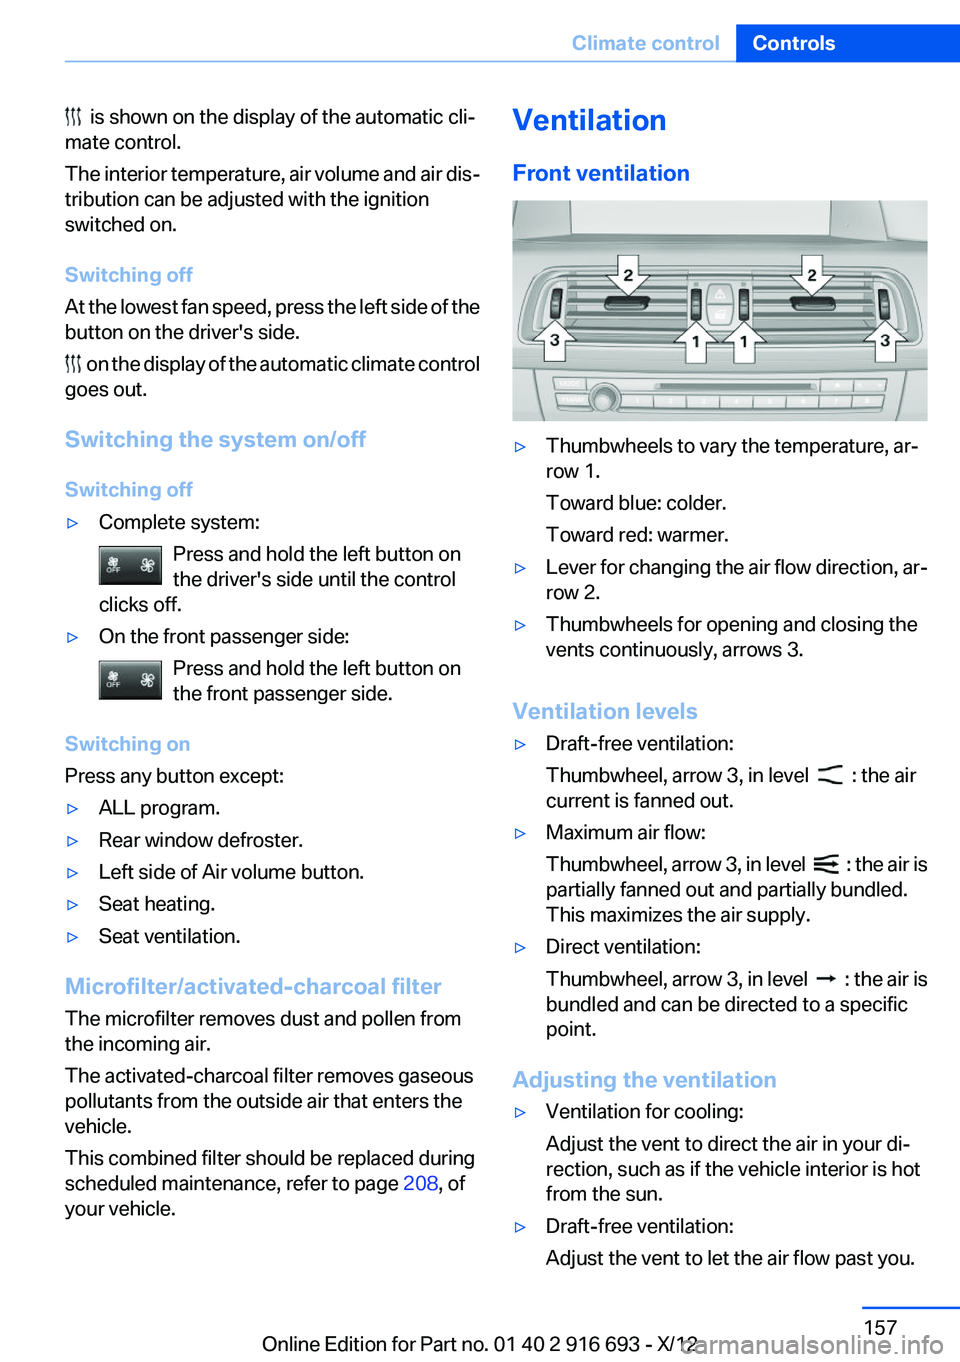
Front ventilation▷Thumbwheels to vary the temperature, ar‐
row 1.
Toward blue: colder.
Toward red: warmer.▷Lever for changing the air flow direction, ar‐
row 2.▷Thumbwheels for opening and closing the
vents continuously, arrows 3.
Ventilation levels
▷Draft-free ventilation:
Thumbwheel, arrow 3, in level
: the air
current is fanned out.
▷Maximum air flow:
Thumbwheel, arrow 3, in level
: the air is
partially fanned out and partially bundled.
This maximizes the air supply.
▷Direct ventilation:
Thumbwheel, arrow 3, in level
: the air is
bundled and can be directed to a specific
point.
Adjusting the ventilation
▷Ventilation for cooling:
Adjust the vent to direct the air in your di‐
rection, such as if the vehicle interior is hot
from the sun.▷Draft-free ventilation:
Adjust the vent to let the air flow past you.Seite 157Climate controlControls157
Online Edition for Part no. 01 40 2 916 693 - X/12
Page 158 of 243
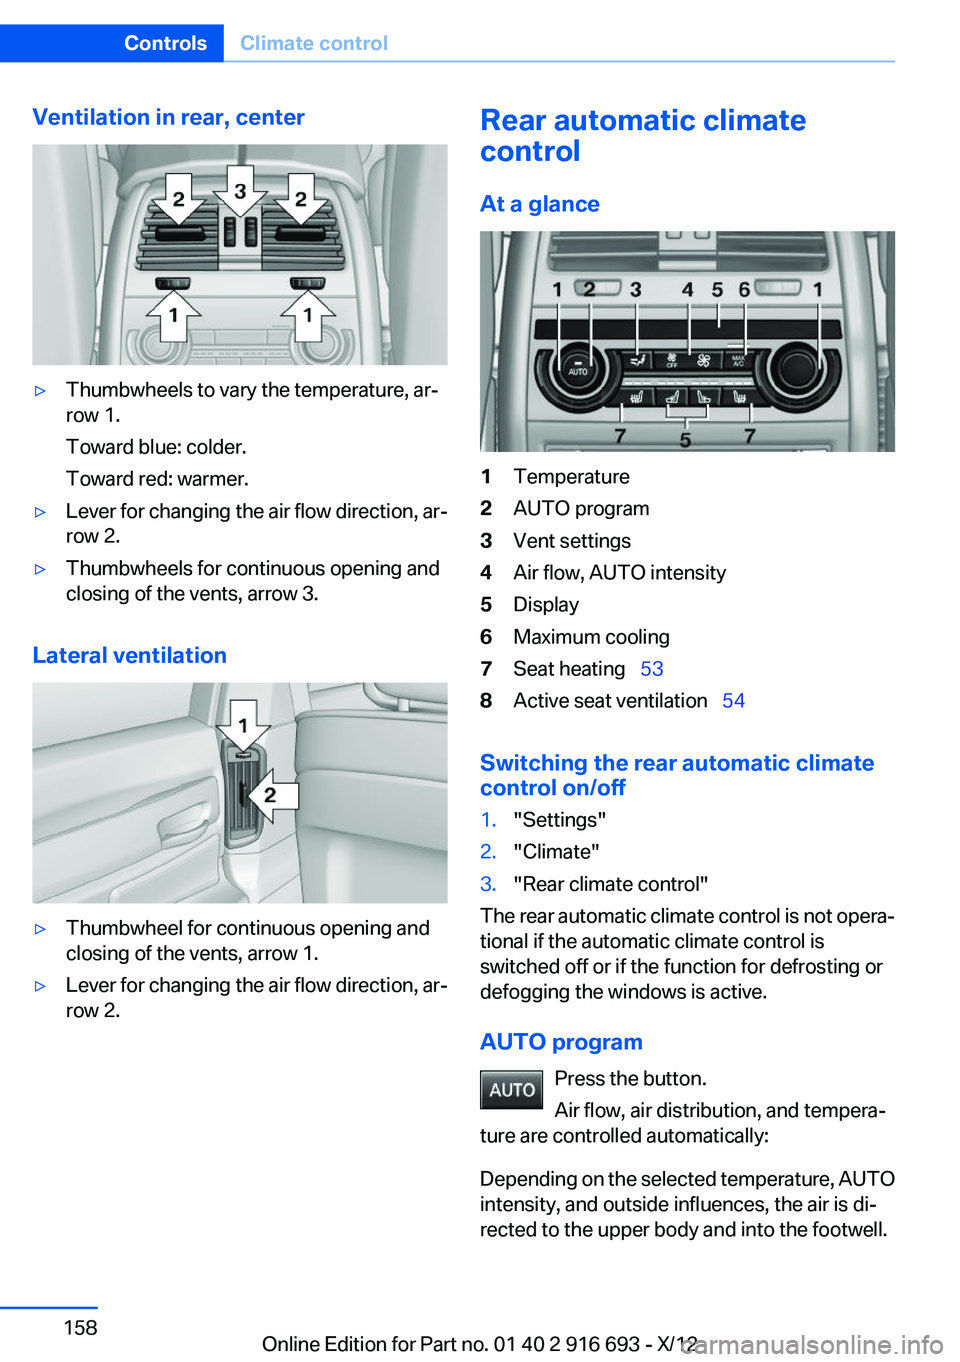
Ventilation in rear, center▷Thumbwheels to vary the temperature, ar‐
row 1.
Toward blue: colder.
Toward red: warmer.▷Lever for changing the air flow direction, ar‐
row 2.▷Thumbwheels for continuous opening and
closing of the vents, arrow 3.
Lateral ventilation
▷Thumbwheel for continuous opening and
closing of the vents, arrow 1.▷Lever for changing the air flow direction, ar‐
row 2.Rear automatic climate
control
At a glance1Temperature2AUTO program3Vent settings4Air flow, AUTO intensity5Display6Maximum cooling7Seat heating 538Active seat ventilation 54
Switching the rear automatic climate
control on/off
1."Settings"2."Climate"3."Rear climate control"
The rear automatic climate control is not opera‐
tional if the automatic climate control is
switched off or if the function for defrosting or
defogging the windows is active.
AUTO program Press the button.
Air flow, air distribution, and tempera‐
ture are controlled automatically:
Depending on the selected temperature, AUTO
intensity, and outside influences, the air is di‐
rected to the upper body and into the footwell.
Seite 158ControlsClimate control158
Online Edition for Part no. 01 40 2 916 693 - X/12
Page 174 of 243
Things to remember when drivingVehicle equipment
All standard, country-specific and optional
equipment that is offered in the model series is
described in this chapter. Therefore, equipment
is also described that is not available in a vehicle,
e. g., because of the selected optional equip‐
ment or country variant. This also applies for
safety-related functions and systems.
Breaking-in period
General information
Moving parts need to be broken in to adjust to
each other.
The following instructions will help achieve a
long vehicle life and good economy.
Engine and differential
Always obey the official speed limit.
Up to 1,200 miles/2,000 km
Do not exceed the maximum engine and road
speed:▷For gasoline engine, 4,500 rpm and
100 mph/160 km/h.
Avoid full load or kick-down under all circum‐
stances.
From 1,200 miles/2,000 km
The engine and vehicle speed can gradually be
increased.
Tires
Due to technical factors associated with their
manufacture, tires do not achieve their full trac‐
tion potential until after an initial breaking-in pe‐
riod.
Drive conservatively for the first
200 miles/300 km.
Brake system
Brakes require an initial break-in period of ap‐
prox. 300 miles/500 km to achieve optimized
contact and wear patterns between brake discs
and brake pads. Drive moderately during this
break-in period.
Following part replacement
The same breaking in procedures should be ob‐
served if any of the components mentioned
above have to be renewed in the course of the
vehicle's operating life.
General driving notes
Closing the trunk lid Drive with the trunk lid closed
Only drive with the tailgate closed; other‐
wise, in the event of an accident or braking or
evasive maneuvers, passengers or other road
users may be injured or the vehicle may be dam‐
aged. In addition, exhaust fumes may enter the
passenger compartment.◀
If driving with the tailgate open cannot be
avoided:▷Close all windows and the glass sunroof.▷Greatly increase the blower speed.▷Drive moderately.
Hot exhaust system
Hot exhaust system
High temperatures are generated in the
exhaust system.
Do not remove the heat shields installed and
never apply undercoating to them. When driv‐
ing, standing at idle and while parking, take care
to avoid possible contact between the hot ex‐
haust system and any highly flammable materi‐
Seite 174Driving tipsThings to remember when driving174
Online Edition for Part no. 01 40 2 916 693 - X/12
Page 180 of 243
Saving fuelVehicle equipment
All standard, country-specific and optional
equipment that is offered in the model series is
described in this chapter. Therefore, equipment
is also described that is not available in a vehicle,
e. g., because of the selected optional equip‐
ment or country variant. This also applies for
safety-related functions and systems.
General information
Your vehicle contains advanced technology for
the reduction of fuel consumption and emis‐
sions.
Fuel consumption depends on a number of dif‐
ferent factors.
The implementation of certain measures, driv‐
ing style and regular maintenance can have an
influence on fuel consumption and on the envi‐
ronmental impact.
Remove unnecessary cargo
Additional weight increases fuel consumption.
Remove attached parts
following use
Remove auxiliary mirrors, roof or rear luggage
racks which are no longer required following
use.
Attached parts on the vehicle impair the aero‐
dynamics and increase the fuel consumption.Close the windows and glass
sunroof
Driving with the glass sunroof and windows
open results in increased air resistance and
raises fuel consumption.
Tires
General information
Tires can affect consumption values in various
ways, for instance consumption can be influ‐
enced by the size of the tires.
Check the tire inflation pressure
regularly
Check and, if necessary, correct the tire inflation
pressure at least twice a month and before start‐
ing on a long trip.
Low tire inflation pressure increases rolling re‐
sistance and thus raises fuel consumption and
tire wear.
Drive away without delay
Do not wait for the engine to warm up while the
vehicle remains stationary. Start driving right
away, but at moderate engine speeds.
This is the fastest way for the cold engine to
reach its operating temperature.
Look well ahead when driving
Avoid unnecessary acceleration and braking.
By maintaining a suitable distance to the vehicle
driving ahead of you.
Driving smoothly and looking ahead reduces
fuel consumption.Seite 180Driving tipsSaving fuel180
Online Edition for Part no. 01 40 2 916 693 - X/12
Page 223 of 243
4.Engage transmission position N.5.Switch the engine off. In this way, the igni‐
tion remains switched on, and a Check-Con‐
trol message is displayed.
Transmission position P with the igni‐
tion off
When the ignition is switched off, position P
is engaged automatically. When in an auto‐
matic car wash, for example, ensure that the
ignition is not switched off accidentally.◀
The vehicle cannot be locked from the outside
when in transmission position N. A signal is
sounded when an attempt is made to lock the
vehicle.
Transmission position
Transmission position P is engaged automati‐
cally:
▷When the ignition is switched off.▷After approx. 15 minutes.
Headlamps
▷Do not rub dry and do not use abrasive or
caustic cleansers.▷Soak areas that have been soiled e.g. due to
insects, with shampoo and wash off with
water.▷Thaw ice with deicing spray; do not use an
ice scraper.
After washing the vehicle
After washing the vehicle, apply the brakes
briefly to dry them; otherwise, braking action can
be reduced and corrosion of the brake discs can
occur.
Completely remove all residues on the windows,
to minimize loss of visibility due to smearing and
to reduce wiper noises and wiper blade wear.
Vehicle care
Car care products
BMW recommends using cleaning and care
products from BMW, since these have been
tested and approved.
Car care and cleaning products
Follow the instructions on the container.
When cleaning the interior, open the doors or
windows.
Only use products intended for cleaning vehi‐
cles.
Cleansers can contain substances that are dan‐
gerous and harmful to your health.◀
Vehicle paint
Regular care contributes to driving safety and
value retention. Environmental influences in
areas with elevated air pollution or natural con‐
taminants, such as tree resin or pollen can affect
the vehicle's paintwork. Tailor the frequency
and extent of your car care to these influences.
Aggressive substances such as spilled fuel, oil,
grease or bird droppings must be removed im‐
mediately to prevent the finish from being al‐
tered or discolored.
Leather care
Remove dust from the leather often, using a
cloth or vacuum cleaner.
Otherwise, particles of dust and road grime
chafe in pores and folds, and lead to increased
wear and premature degradation of the leather
surface.
To guard against discoloration, such as from
clothing, provide leather care roughly every two
months.
Clean light-colored leather more frequently be‐
cause soiling on such surfaces is substantially
more visible.Seite 223CareMobility223
Online Edition for Part no. 01 40 2 916 693 - X/12
Page 234 of 243
Condensation under the vehi‐cle 176
Condition Based Service CBS 208
Configure driving mode 129
Confirmation signal 35
ConnectedDrive, see user's manual for Navigation, Enter‐
tainment and Communica‐
tion
Control Display 16
Control Display, settings 93
Controller 16
Control systems, driving sta‐ bility 123
Convenient opening 34
Coolant 207
Coolant temperature 86
Cooler 165
Cooling function 156
Cooling, maximum 155
Cooling system 207
Corrosion on brake discs 176
Cruise control 137
Cruise control, active with Stop & Go 131
Cruising range 87
Cupholder 170
Curb weight 229
Current fuel consumption 87
D
Damage, tires 198
Damping control, dy‐ namic 126
Data, technical 228
Date 87
Daytime running lights 96
Defrosting, refer to Windows, defrosting 155
Dehumidifying, air 156
Destination distance 91
Digital clock 86
Dimensions 228
Dimmable exterior mirrors 60 Dimmable interior rearview
mirror 60
Direction indicator, refer to Turn signals 73
Display in windshield 151
Display lighting, refer to Instru‐ ment lighting 98
Displays 79, 80
Displays, cleaning 225
Disposal, vehicle battery 216
Distance control, refer to PDC 139
Distance information 152
Distance, selecting for ACC 133
Distance to destination 91
Divided screen view, split screen 20
Door lock, refer to Remote control 30
Doors, Automatic Soft Clos‐ ing 37
Downhill control 125
Drive-off assistant 123
Drive-off assistant, refer to DSC 123
Driving Dynamics Control 127
Driving instructions, breaking in 174
Driving mode 127
Driving notes, general 174
Driving stability control sys‐ tems 123
Driving tips 174
DSC Dynamic Stability Con‐ trol 123
DTC driving dynamics 124
DTC Dynamic Traction Con‐ trol 124
Dynamic Damping Con‐ trol 126
Dynamic Drive 126
Dynamic Light Spot 213
Dynamic Light Spot, refer to Night Vision 114 Dynamic Stability Control
DSC 123
Dynamic Traction Control DTC 124
E
ECO PRO 181
ECO PRO, bonus range 182
ECO PRO display 181
ECO PRO driving mode 181
ECO PRO mode 181
ECO PRO Tip - driving instruc‐ tion 183
EfficientDynamics 183
Electronic displays, instru‐ ment cluster 80
Electronic Stability Program ESP, refer to DSC 123
Emergency detection, remote control 31
Emergency release, door lock 36
Emergency release, fuel filler flap 188
Emergency release, parking brake 70
Emergency Request 217
Emergency service, refer to Roadside Assistance 218
Emergency start function, en‐ gine start 31
Emergency unlocking, trunk lid 40
Energy Control 87
Energy recovery 87
Engine, automatic Start/Stop function 68
Engine, automatic switch- off 68
Engine compartment 202
Engine compartment, working in 202
Engine coolant 207
Engine idling when driving, coasting 184 Seite 234ReferenceEverything from A to Z234
Online Edition for Part no. 01 40 2 916 693 - X/12
Page 237 of 243

Locking/unlocking via doorlock 36
Locking/unlocking with re‐ mote control 34
Locking, automatic 37
Locking, central 33
Locking via trunk lid 38
Lock, power window 44
Locks, doors, and win‐ dows 65
Low beams 95
Low beams, automatic, refer to High-beam Assistant 97
Lower back support 49
Lug bolt lock 215
Luggage rack, refer to Roof- mounted luggage rack 178
Lumbar support 49
M
Maintenance 208
Maintenance require‐ ments 208
Maintenance, service require‐ ments 87
Maintenance system, BMW 208
Malfunction displays, refer to Check Control 83
Malfunction, self-leveling sus‐ pension 127
Manual air distribution 155
Manual air flow 155
Manual brake, refer to Parking brake 70
Manual mode, transmis‐ sion 78
Manual operation, backup camera 142
Manual operation, door lock 36
Manual operation, exterior mir‐ rors 59
Manual operation, fuel filler flap 188 Manual operation, Park Dis‐
tance Control PDC 140
Manual operation, parking brake 70
Manual operation, Side View 144
Manual operation, Top View 146
Manual operation, trunk lid 38
Marking on approved tires 199
Marking, run-flat tires 200
Massage seat, front 50
Massage seat, rear 53
Master key, refer to Remote control 30
Maximum cooling 155
Maximum speed, display 88
Maximum speed, winter tires 199
Measure, units of 94
Medical kit 218
Memory for seat, mirrors, steering wheel 58
Menu, EfficientDynamics 183
Menu in instrument cluster 90
Menus, operating, iDrive 16
Menus, refer to iDrive operat‐ ing concept 17
Messages, refer to Check Control 83
Microfilter 157
Minimum tread, tires 198
Mirror 59
Mirror memory 58
Mobile communication devi‐ ces in the vehicle 175
Modifications, technical, refer to Safety 7
Moisture in headlamp 211
Monitor, refer to Control Dis‐ play 16
Mounting of child restraint fix‐ ing systems 62
Multifunctional instrument display 80 Multifunction steering wheel,
buttons 12
N
Navigation, see user's manual for Navigation, Entertain‐
ment and Communication
Neck restraints, front, refer to Head restraints 55
Neck restraints, rear, refer to Head restraints 56
New wheels and tires 198
Night vision device, refer to Night Vision 114
Night Vision with pedestrian detection 114
No Passing Information 88
Nylon rope for tow-starting/ towing 220
O
OBD Onboard Diagnos‐ tics 209
Object detection, refer to Night Vision 114
Obstacle marking, backup camera 143
Octane rating, refer to Gaso‐ line quality 190
Odometer 86
Office, see user's manual for Navigation, Entertainment
and Communication
Oil 204
Oil, adding 205
Oil additives 205
Oil change 205
Oil change interval, service re‐ quirements 87
Oil filler neck 205
Oil types, alternative 205
Oil types, approved 205
Old batteries, disposal 216 Seite 237Everything from A to ZReference237
Online Edition for Part no. 01 40 2 916 693 - X/12