2013 BMW 740LI seats
[x] Cancel search: seatsPage 64 of 243

Mounts for the lower LATCH anchorsCorrectly engage the lower LATCH an‐
chors
Make sure that the lower LATCH anchors have
properly engaged and that the child restraint fix‐
ing system is resting snugly against the back‐
rest; otherwise, the degree of protection offered
may be reduced.◀
Before mounting the LATCH child restraint fix‐
ing system, pull the belt away from the child re‐
straint fixing system.
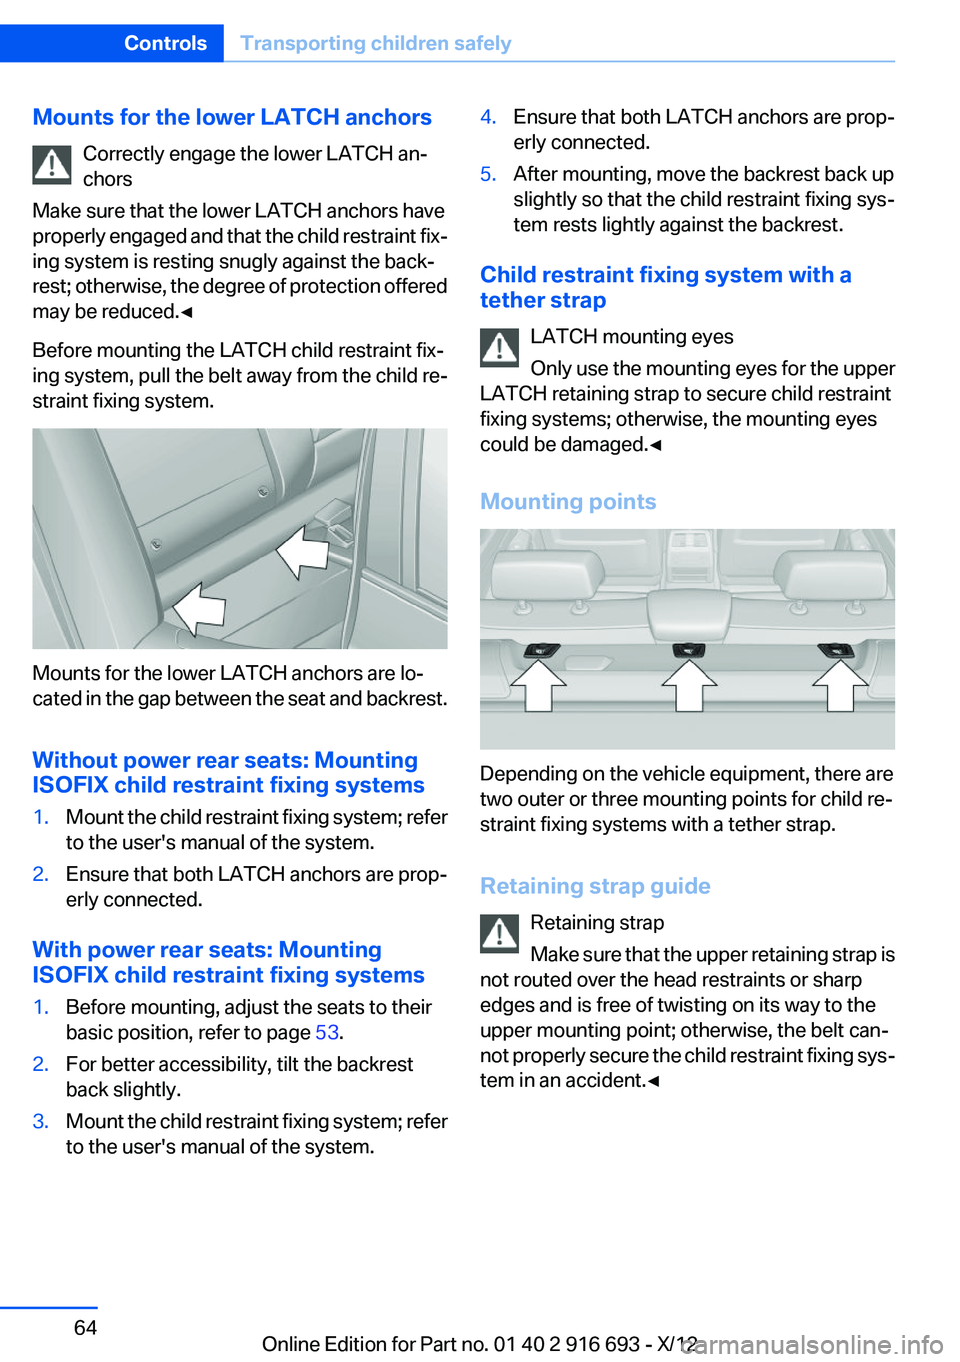
Mounts for the lower LATCH anchors are lo‐
cated in the gap between the seat and backrest.
Without power rear seats: Mounting
ISOFIX child restraint fixing systems
1.Mount the child restraint fixing system; refer
to the user's manual of the system.2.Ensure that both LATCH anchors are prop‐
erly connected.
With power rear seats: Mounting
ISOFIX child restraint fixing systems
1.Before mounting, adjust the seats to their
basic position, refer to page 53.2.For better accessibility, tilt the backrest
back slightly.3.Mount the child restraint fixing system; refer
to the user's manual of the system.4.Ensure that both LATCH anchors are prop‐
erly connected.5.After mounting, move the backrest back up
slightly so that the child restraint fixing sys‐
tem rests lightly against the backrest.
Child restraint fixing system with a
tether strap
LATCH mounting eyes
Only use the mounting eyes for the upper
LATCH retaining strap to secure child restraint
fixing systems; otherwise, the mounting eyes
could be damaged.◀
Mounting points
Depending on the vehicle equipment, there are
two outer or three mounting points for child re‐
straint fixing systems with a tether strap.
Retaining strap guide Retaining strap
Make sure that the upper retaining strap is
not routed over the head restraints or sharp
edges and is free of twisting on its way to the
upper mounting point; otherwise, the belt can‐
not properly secure the child restraint fixing sys‐
tem in an accident.◀
Seite 64ControlsTransporting children safely64
Online Edition for Part no. 01 40 2 916 693 - X/12
Page 102 of 243

Protective action
Airbags are not triggered in every impact situa‐
tion, e.g., in less severe accidents or rear-end
collisions.
Information on how to ensure the optimal
protective effect of the airbags▷Keep at a distance from the airbags.▷Always grasp the steering wheel on the
steering wheel rim, holding your hands at
the 3 o'clock and 9 o'clock positions, to keep
the danger of injury to your hands or arms as
low as possible if the airbag is triggered.▷There should be no people, animals, or ob‐
jects between an airbag and a person.▷Do not use the cover of the front airbag on
the front passenger side as a storage area.▷Keep the dashboard and window on the
front passenger side clear, i.e., do not cover
with adhesive labels or coverings, and do not
attach holders such as for navigation instru‐
ments and mobile phones.▷Make sure that the front passenger is sitting
correctly, i.e., keeps his or her feet and legs
in the footwell; otherwise, leg injuries can
occur if the front airbag is triggered.▷Do not place slip covers, seat cushions or
other objects on the front passenger seat
that are not approved specifically for seats
with integrated side airbags.▷Do not hang pieces of clothing, such as jack‐
ets, over the backrests.▷Make sure that occupants keep their heads
away from the side airbag and do not rest
against the head airbag; otherwise, injuries
can occur if the airbags are triggered.▷Do not remove the airbag restraint system.▷Do not remove the steering wheel.▷Do not apply adhesive materials to the air‐
bag cover panels, cover them or modify
them in any way.▷Never modify either the individual compo‐
nents or the wiring in the airbag system. This
also applies to steering wheel covers, the
dashboard, the seats, the roof pillars and the
sides of the headliner.◀
Even when all instructions are followed closely,
injury from contact with the airbags cannot be
ruled out in certain situations.
The ignition and inflation noise may lead to
short-term and, in most cases, temporary hear‐
ing impairment in sensitive individuals.
In the case of a malfunction, deactivation
and after triggering of the airbags
Do not touch the individual components imme‐
diately after the system has been triggered; oth‐
erwise, there is the danger of burns.
Only have the airbags checked, repaired or dis‐
mantled and the airbag generator scrapped by
your service center or a workshop that has the
necessary authorization for handling explosives.
Non-professional attempts to service the sys‐
tem could lead to failure in an emergency or un‐
desired triggering of the airbag, either of which
could result in injury.◀
Warnings and information on the airbags are
also found on the sun visors.
Functional readiness of the airbag
system
When the ignition is switch on, the warn‐
ing lamp in the instrument cluster lights
up briefly and thereby indicates the op‐
erational readiness of the entire airbag system
and the belt tensioner.
Airbag system malfunctioning
▷Warning lamp does not come on when the
ignition is turned on.▷The warning lamp lights up continuously.Seite 102ControlsSafety102
Online Edition for Part no. 01 40 2 916 693 - X/12
Page 103 of 243

When there is a malfunction, have the air‐
bag system checked immediately
When there is a malfunction, have the airbag
system checked immediately; otherwise, there
is a risk that the system does not function as ex‐
pected in the event of an accident despite cor‐
responding severity of the accident.◀
Automatic deactivation of the front
passenger airbags
The system determines whether the front pas‐
senger seat is occupied by measuring the re‐
sistance of the human body.
The front, knee, and side airbag on the front
passenger side are activated or deactivated ac‐
cordingly.
Leave feet in the footwell
Make sure that the front passenger keeps
his or her feet in the footwell; otherwise, the front
passenger airbags may not function properly.◀
Child restraint fixing system in the front
passenger seat
Before transporting a child on the front passen‐
ger seat, see the safety notes and instructions
under Children on the front passenger seat.◀
Malfunction of the automatic
deactivation system
When transporting older children and adults, the
front passenger airbags may be deactivated in
certain sitting positions. In this case, the indica‐
tor lamp for the front passenger airbags lights
up.
In this case, change the sitting position so that
the front passenger airbags are activated and
the indicator lamp goes out.
If it is not possible to activate the airbags, have
the person sit in the rear.
To make sure that the occupied seat cushion
can be evaluated correctly▷Do not attach covers, cushions, ball mats or
other items to the front passenger seat un‐less they are specifically recommended by
the manufacturer of your vehicle.▷Do not place any electronic devices on the
passenger seat if a child restraint system is
to be installed on it.▷Do not place objects under the seat that
could press against the seat from below.
Indicator lamp for the front passenger
airbags
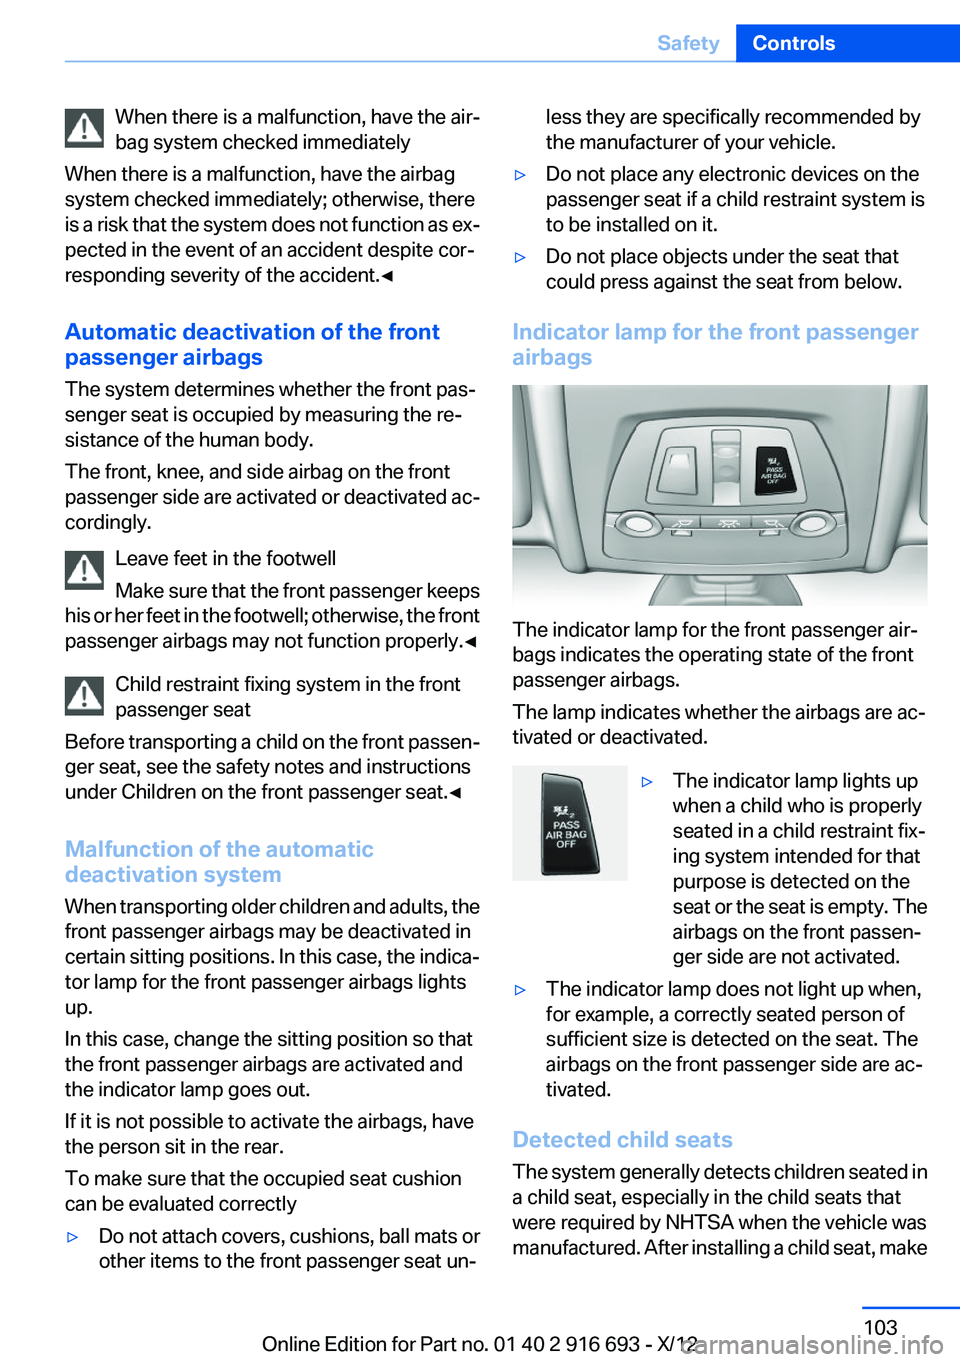
The indicator lamp for the front passenger air‐
bags indicates the operating state of the front
passenger airbags.
The lamp indicates whether the airbags are ac‐
tivated or deactivated.
▷The indicator lamp lights up
when a child who is properly
seated in a child restraint fix‐
ing system intended for that
purpose is detected on the
seat or the seat is empty. The
airbags on the front passen‐
ger side are not activated.▷The indicator lamp does not light up when,
for example, a correctly seated person of
sufficient size is detected on the seat. The
airbags on the front passenger side are ac‐
tivated.
Detected child seats
The system generally detects children seated in
a child seat, especially in the child seats that
were required by NHTSA when the vehicle was
manufactured. After installing a child seat, make
Seite 103SafetyControls103
Online Edition for Part no. 01 40 2 916 693 - X/12
Page 104 of 243

sure that the indicator lamp for the front pas‐
senger airbags lights up. This indicates that the
child seat has been detected and the front pas‐
senger airbags are not activated.
Strength of the driver's and front
passenger airbag
The strength with which the driver's and front
passenger airbags are triggered depends on the
position of the driver's and front passenger
seats.
To maintain the accuracy of this function over
the long-term, calibrate the front seats when a
corresponding message appears on the Control
Display.
Calibrating the front seats
A corresponding message appears on the Con‐
trol Display.1.Move the respective seat forward all the
way.2.Move the respective seat forward again. It
moves forward briefly.3.Readjust the seat to the desired position.
The calibration procedure is completed when
the message on the Control Display disappears.
If the message continues to be displayed, repeat
the calibration.
If the message does not disappear after a repeat
calibration, have the system checked as soon as
possible.
Unobstructed area of movement
Ensure that the area of movement of the
seats is unobstructed to avoid personal injury or
damage to objects.◀
FTM Flat Tire Monitor
The concept
The system does not measure the actual infla‐
tion pressure in the tires.
It detects a pressure loss in a tire by comparing
the rotational speeds of the individual wheels
while moving.
In the event of a pressure loss, the diameter and
therefore the rotational speed of the corre‐
sponding wheel change. This is detected and
reported as a flat tire.
Functional requirements
The system must have been initialized when the
tire inflation pressure was correct; otherwise,
reliable signaling of a flat tire is not ensured. In‐
itialize the system after each correction of the
tire inflation pressure and after every tire or
wheel change.
System limits Sudden tire damage
Sudden serious tire damage caused by
external influences cannot be indicated in ad‐
vance.◀
A natural, even pressure loss in all four tires can‐
not be detected. Therefore, check the tire infla‐
tion pressure regularly.
The system could be delayed or malfunction in
the following situations:▷When the system has not been initialized.▷When driving on a snowy or slippery road
surface.▷Sporty driving style: slip in the drive wheels,
high lateral acceleration.▷When driving with snow chains.
Status display
The current status of the Flat Tire Monitor can
be displayed on the Control Display, e.g.,
whether or not the FTM is active.
1."Vehicle Info"2."Vehicle status"3. "Flat Tire Monitor"
The status is displayed.
Seite 104ControlsSafety104
Online Edition for Part no. 01 40 2 916 693 - X/12
Page 121 of 243

Starting at approximately 43 mph/70 km/h, the
system is active and can display a recommen‐
dation to take a break.
Break recommendation
If the driver becomes increasingly less alert or
fatigued, a message is displayed in the Control
Display with the recommendation to take a
break.
A recommendation to take a break is displayed
only once during an uninterrupted trip.
After a break, another recommendation to take
a break cannot be displayed until after approxi‐
mately 45 minutes.
System limits
The function may be limited in the following sit‐
uations, for instance, and will either output an
incorrect warning or no warning at all:▷When the clock is set incorrectly.▷When the vehicle speed is mainly below
about 43 mph/70 km/h.▷With a sporty driving style, such as during
rapid acceleration or when cornering
quickly.▷In active driving situations, such as when
changing lanes frequently.▷When the road surface is poor.▷In the event of strong side winds.
PreCrash
The concept
With this system critical driving situations that
might result in an accident can be detected
above a speed of approx. 19 mph/30 km/h. In
these situations, preventative protection meas‐
ures are automatically undertaken to minimize
the risk in the event of an accident as much as
possible.
Critical driving situations may include:
▷Full brake applications.▷Severe understeering.▷Severe oversteering.
If the vehicle includes the collision warning or
collision warning with braking feature, impend‐
ing collisions with vehicles driving ahead or
stopped in front of you can also be detected
within the system's range.
Personal responsibility
The system cannot serve as a substitute
for the driver's personal judgment of the traffic
situation. The system may not always detect
critical situations reliably and in a timely manner.
Adapt speed to traffic situation and drive alertly;
otherwise, a risk to safety may result.◀
Function
After the safety belt is buckled, the front belts
are automatically pretensioned once after the
vehicle is driven is away.
In critical driving situations, the following indi‐
vidual functions become active as needed:
▷The front belts are automatically preten‐
sioned.▷Automatic closing of the windows.▷Automatic closing of the glass sunroof.▷Automatic Positioning of the backrest for
the front passenger seat.▷For vehicles equipped with Comfort Seats in
the rear: automatic positioning of the back‐
rests for the rear passenger seats.
After a critical driving situation without an acci‐
dent, the front belts are loosened again. All other
systems can be restored to the desired setting.
If the belt tension does not loosen automatically,
stop the vehicle and unbuckle the belt using the
red button in the buckle. Fasten the belt before
continuing on your trip.
PostCrash
If an accident above a certain degree of severity,
the system automatically brakes the vehicle to a
Seite 121SafetyControls121
Online Edition for Part no. 01 40 2 916 693 - X/12
Page 168 of 243

Storage compartmentsVehicle equipment
All standard, country-specific and optional
equipment that is offered in the model series is
described in this chapter. Therefore, equipment
is also described that is not available in a vehicle,
e. g., because of the selected optional equip‐
ment or country variant. This also applies for
safety-related functions and systems.
Notes No loose objects in the passenger com‐
partment
Do not stow any objects in the passenger com‐
partment without securing them; otherwise,
they may present a danger to occupants for in‐
stance during braking and avoidance maneu‐
vers.◀
Do not place anti-slip mats on the dash‐
board
Do not place anti-slip mats on the dashboard.
The mat materials could damage the dash‐
board.◀
Storage compartments
The following storage compartments are avail‐
able in the vehicle interior:▷Glove compartment on the driver's and front
passenger side, refer to page 168.▷Storage compartment in the center armrest,
refer to page 169, in the front and rear.▷Compartments in the doors.▷Pockets on the backrests of the front seats.▷Net in the front passenger footwell.Glove compartment
Front passenger side
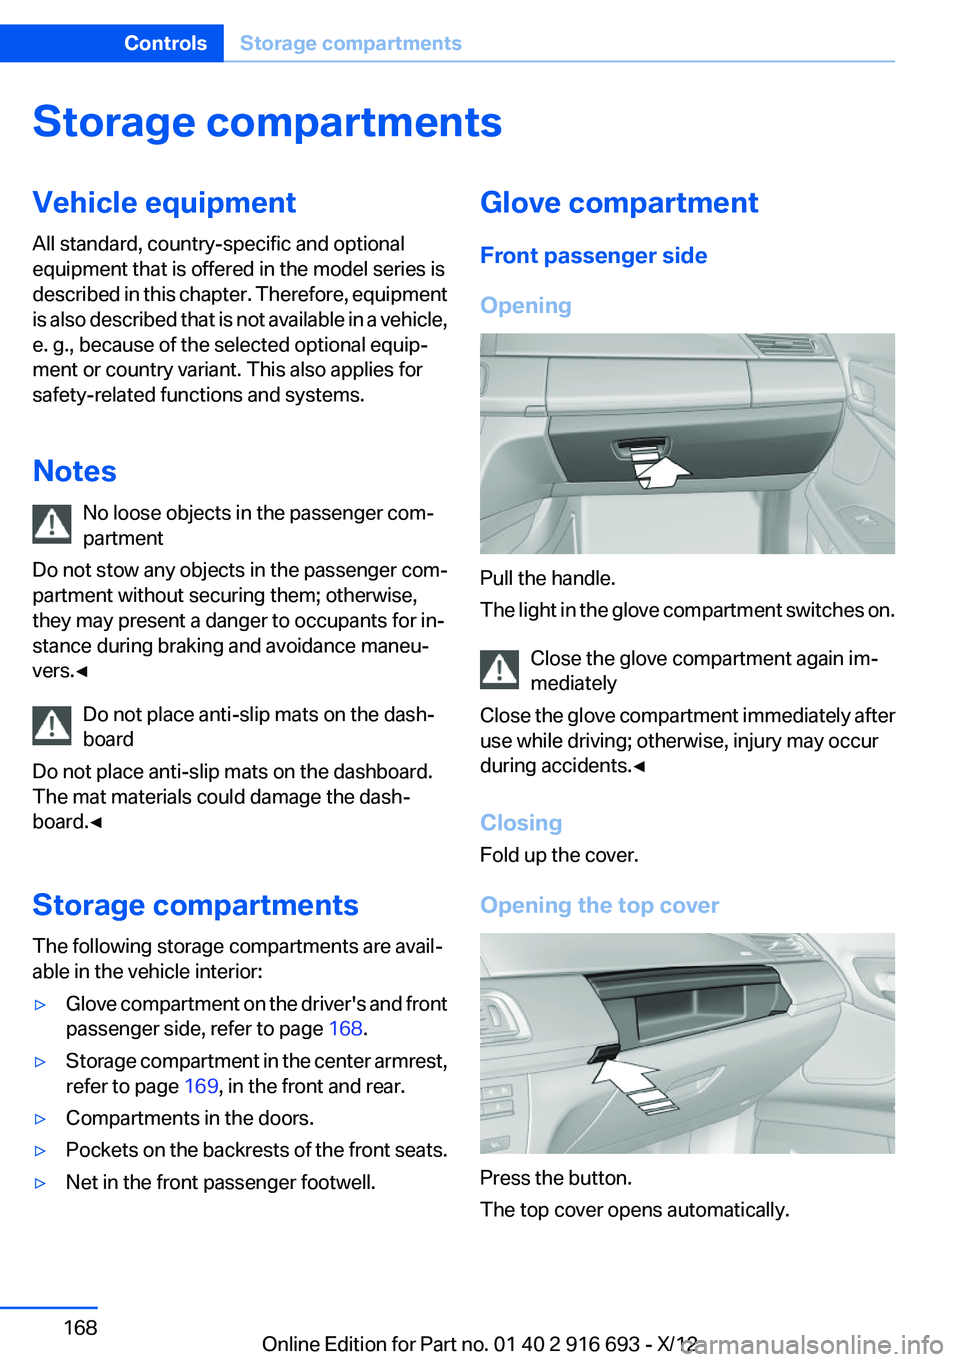
Opening
Pull the handle.
The light in the glove compartment switches on.
Close the glove compartment again im‐
mediately
Close the glove compartment immediately after
use while driving; otherwise, injury may occur
during accidents.◀
Closing
Fold up the cover.
Opening the top cover
Press the button.
The top cover opens automatically.
Seite 168ControlsStorage compartments168
Online Edition for Part no. 01 40 2 916 693 - X/12
Page 169 of 243

Closing the top cover
Press the cover closed.
Driver's side
Opening
Pull the handle. Close the glove compartment again im‐
mediately
Close the glove compartment immediately after
use while driving; otherwise, injury may occur
during accidents.◀
Closing
Fold up the cover.
Center armrest
Front
A storage compartment is located in the center
armrest between the front seats.
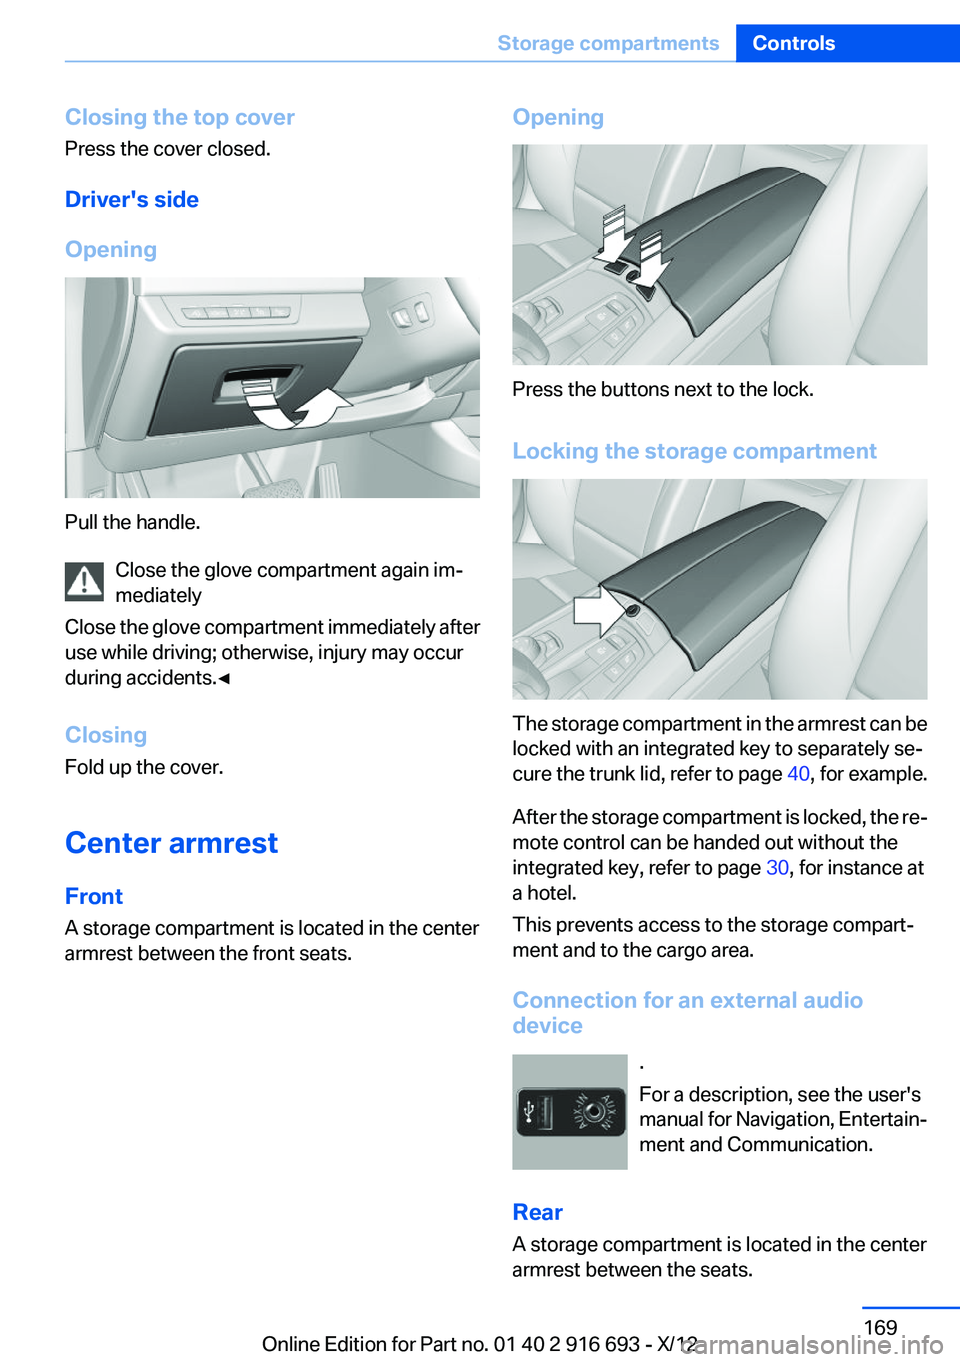
Opening
Press the buttons next to the lock.
Locking the storage compartment
The storage compartment in the armrest can be
locked with an integrated key to separately se‐
cure the trunk lid, refer to page 40, for example.
After the storage compartment is locked, the re‐
mote control can be handed out without the
integrated key, refer to page 30, for instance at
a hotel.
This prevents access to the storage compart‐
ment and to the cargo area.
Connection for an external audio
device
.
For a description, see the user's
manual for Navigation, Entertain‐
ment and Communication.
Rear
A storage compartment is located in the center
armrest between the seats.
Seite 169Storage compartmentsControls169
Online Edition for Part no. 01 40 2 916 693 - X/12
Page 232 of 243

Everything from A to Z
IndexA
ABS, Antilock Brake Sys‐ tem 123
ACC, Active Cruise Control with Stop & Go 131
Activated-charcoal filter 157
Active Blind Spot Detec‐ tion 118
Active Cruise Control with Stop & Go, ACC 131
Active Protection 120
Active seat, front 50
Active seat ventilation, front 51
Active seat ventilation, rear 54
Active Steering, integral 126
Adaptive brake lights, refer to Brake force display 120
Adaptive drive 125
Adaptive light control 97
Adaptive light control, bulb re‐ placement 212
Additives, oil 205
Adjust front seat 48
Adjustments, seats/head re‐ straints 48
After washing vehicle 223
Airbags 101
Airbags, indicator/warning light 102
Air circulation, refer to Recir‐ culated-air mode 156
Air, dehumidifying, refer to Cooling function 156
Air distribution, manual 155
Air flow, automatic climate control 155
Air pressure, tires 191 Air vents, refer to Ventila‐
tion 157
Alarm system 42
Alarm, unintentional 43
All around the center con‐ sole 14
All around the headliner 15
All around the steering wheel 12
ALL program, automatic cli‐ mate control 156
All-season tires, refer to Win‐ ter tires 199
All-wheel-drive 124
Alternating-code hand-held transmitter 162
Alternative oil types 205
Ambient light 99
Antifreeze, washer fluid 76
Antilock Brake System, ABS 123
Anti-slip control, refer to DSC 123
Approved axle load 229
Approved engine oils 205
Armrest, refer to Center arm‐ rest 169
Arrival time 91
Ashtray 163
Assistance, Roadside Assis‐ tance 218
Assistance when driving off 123
Assist system, refer to Intelli‐ gent Safety 109
Attentiveness assistant 120
AUTO H button, refer to Auto‐ matic Hold 72
AUTO intensity 155
Automatic car wash 222 Automatic climate con‐
trol 154
Automatic Cruise Control with Stop & Go 131
Automatic Curb Monitor 59
Automatic deactivation, front passenger airbags 103
Automatic headlamp con‐ trol 96
Automatic Hold 72
Automatic locking 37
Automatic recirculated-air control 156
Automatic Soft Closing, doors 37
Automatic Soft Closing, trunk lid 38
Automatic tailgate 38
Automatic transmission with Steptronic 76
AUTO program, automatic cli‐ mate control 155
AUTO program, intensity 155
Auto Start/Stop function 68
Average fuel consumption 91
Average speed 91
Axle loads, weights 229
B
Backrest curvature, refer to Lumbar support 49
Backrest, width 49
Back seats, adjusting 51
Backup camera 141
Band-aids, refer to First aid kit 218
Bar for tow-starting/tow‐ ing 220
Basic position, rear seats 53 Seite 232ReferenceEverything from A to Z232
Online Edition for Part no. 01 40 2 916 693 - X/12