2013 BMW 740I reset
[x] Cancel search: resetPage 32 of 243
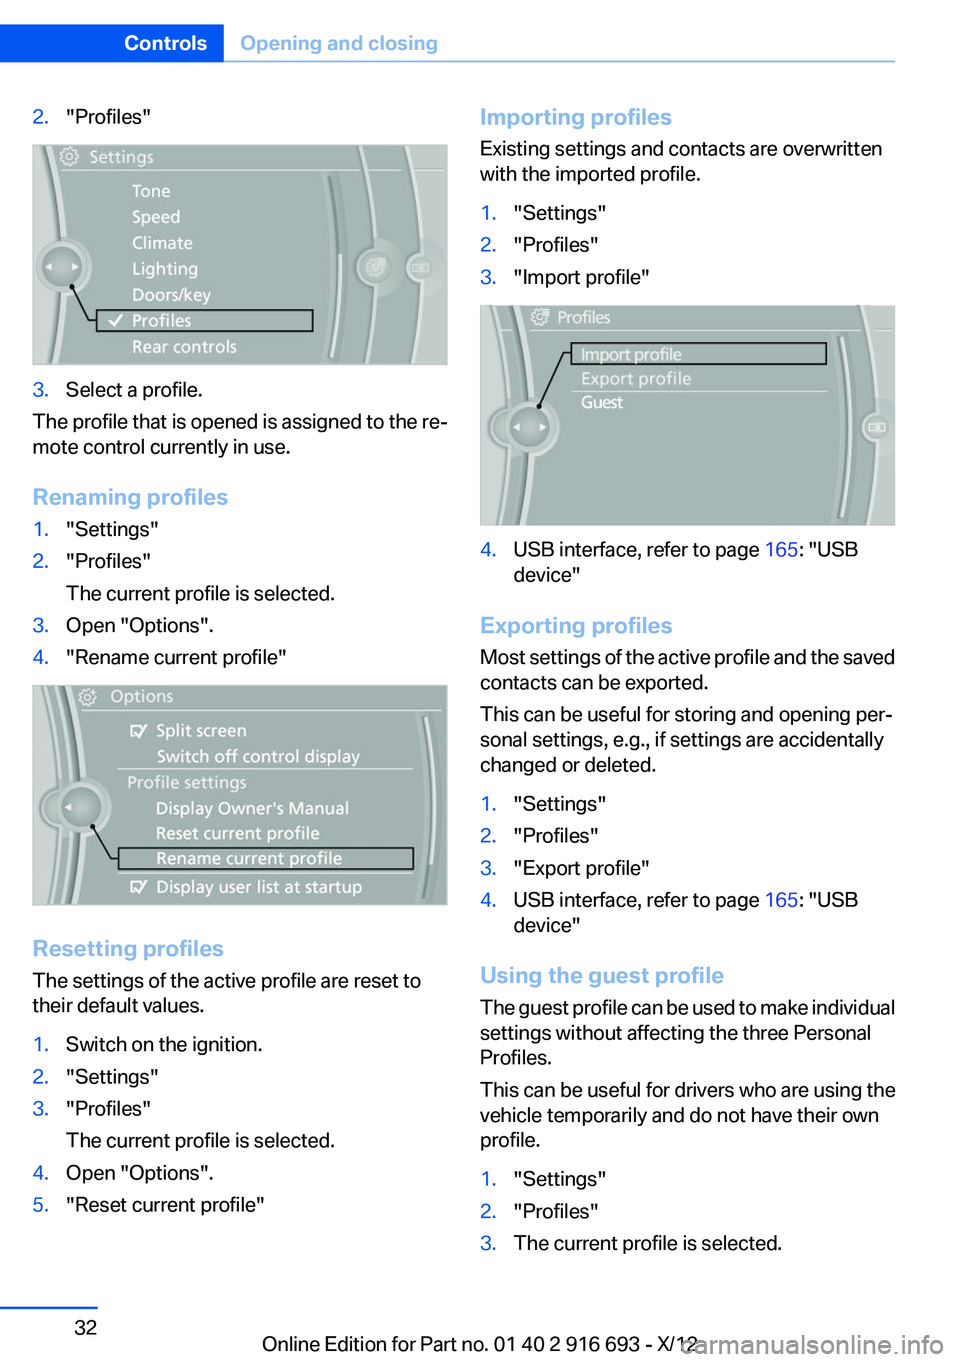
2."Profiles"3.Select a profile.
The profile that is opened is assigned to the re‐
mote control currently in use.
Renaming profiles
1."Settings"2."Profiles"
The current profile is selected.3.Open "Options".4."Rename current profile"
Resetting profiles
The settings of the active profile are reset to
their default values.
1.Switch on the ignition.2."Settings"3."Profiles"
The current profile is selected.4.Open "Options".5."Reset current profile"Importing profiles
Existing settings and contacts are overwritten
with the imported profile.1."Settings"2."Profiles"3."Import profile"4.USB interface, refer to page 165: "USB
device"
Exporting profiles
Most settings of the active profile and the saved
contacts can be exported.
This can be useful for storing and opening per‐
sonal settings, e.g., if settings are accidentally
changed or deleted.
1."Settings"2."Profiles"3."Export profile"4.USB interface, refer to page 165: "USB
device"
Using the guest profile
The guest profile can be used to make individual
settings without affecting the three Personal
Profiles.
This can be useful for drivers who are using the
vehicle temporarily and do not have their own
profile.
1."Settings"2."Profiles"3.The current profile is selected.Seite 32ControlsOpening and closing32
Online Edition for Part no. 01 40 2 916 693 - X/12
Page 51 of 243
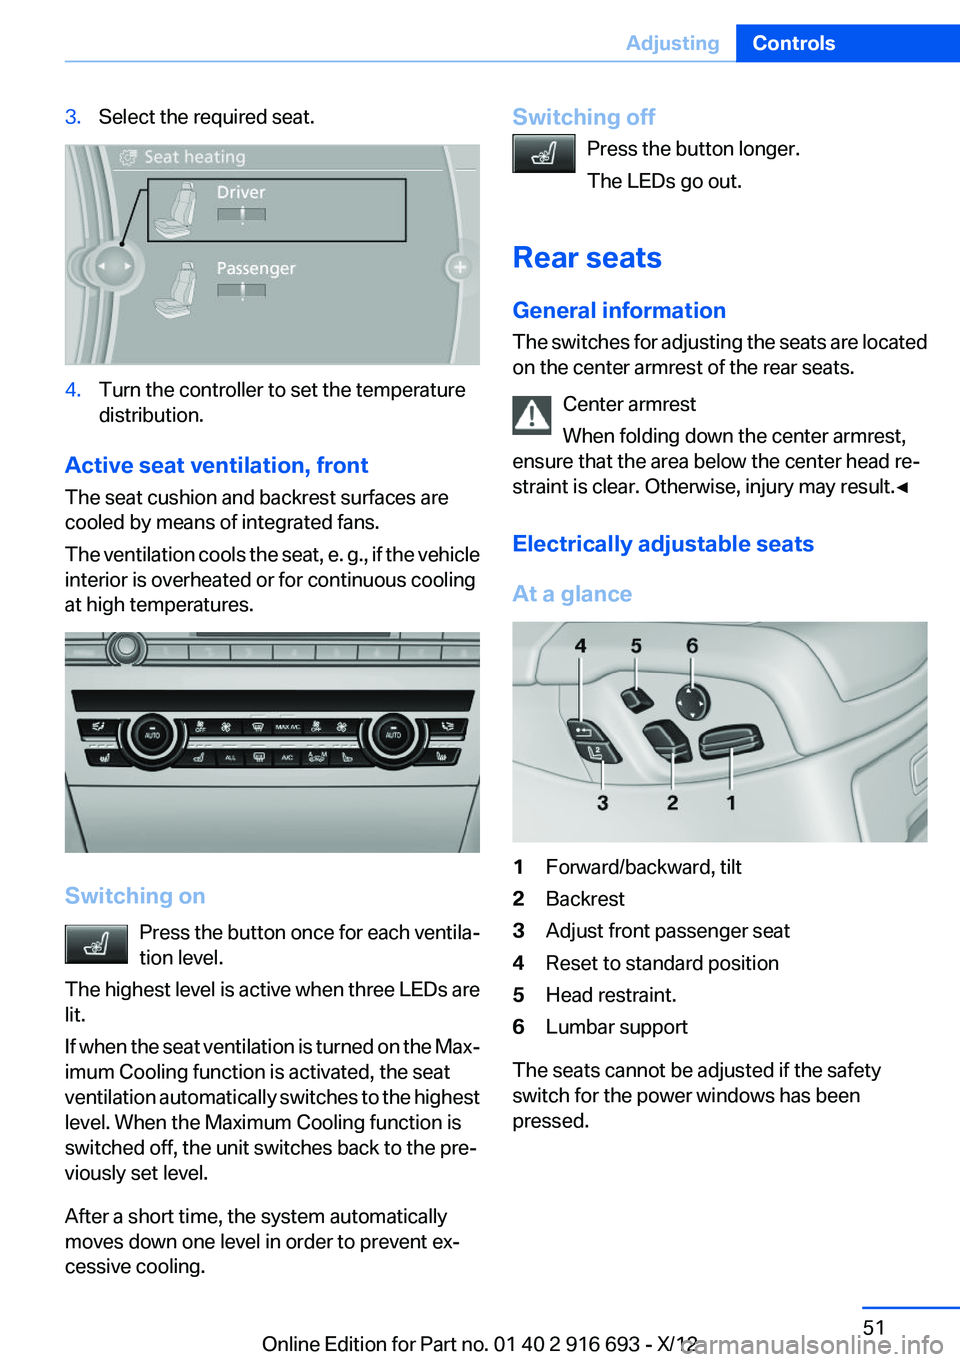
3.Select the required seat.4.Turn the controller to set the temperature
distribution.
Active seat ventilation, front
The seat cushion and backrest surfaces are
cooled by means of integrated fans.
The ventilation cools the seat, e. g., if the vehicle
interior is overheated or for continuous cooling
at high temperatures.
Switching on
Press the button once for each ventila‐
tion level.
The highest level is active when three LEDs are
lit.
If when the seat ventilation is turned on the Max‐
imum Cooling function is activated, the seat
ventilation automatically switches to the highest
level. When the Maximum Cooling function is
switched off, the unit switches back to the pre‐
viously set level.
After a short time, the system automatically
moves down one level in order to prevent ex‐
cessive cooling.
Switching off
Press the button longer.
The LEDs go out.
Rear seats
General information
The switches for adjusting the seats are located
on the center armrest of the rear seats.
Center armrest
When folding down the center armrest,
ensure that the area below the center head re‐
straint is clear. Otherwise, injury may result.◀
Electrically adjustable seats
At a glance1Forward/backward, tilt2Backrest3Adjust front passenger seat4Reset to standard position5Head restraint.6Lumbar support
The seats cannot be adjusted if the safety
switch for the power windows has been
pressed.
Seite 51AdjustingControls51
Online Edition for Part no. 01 40 2 916 693 - X/12
Page 53 of 243
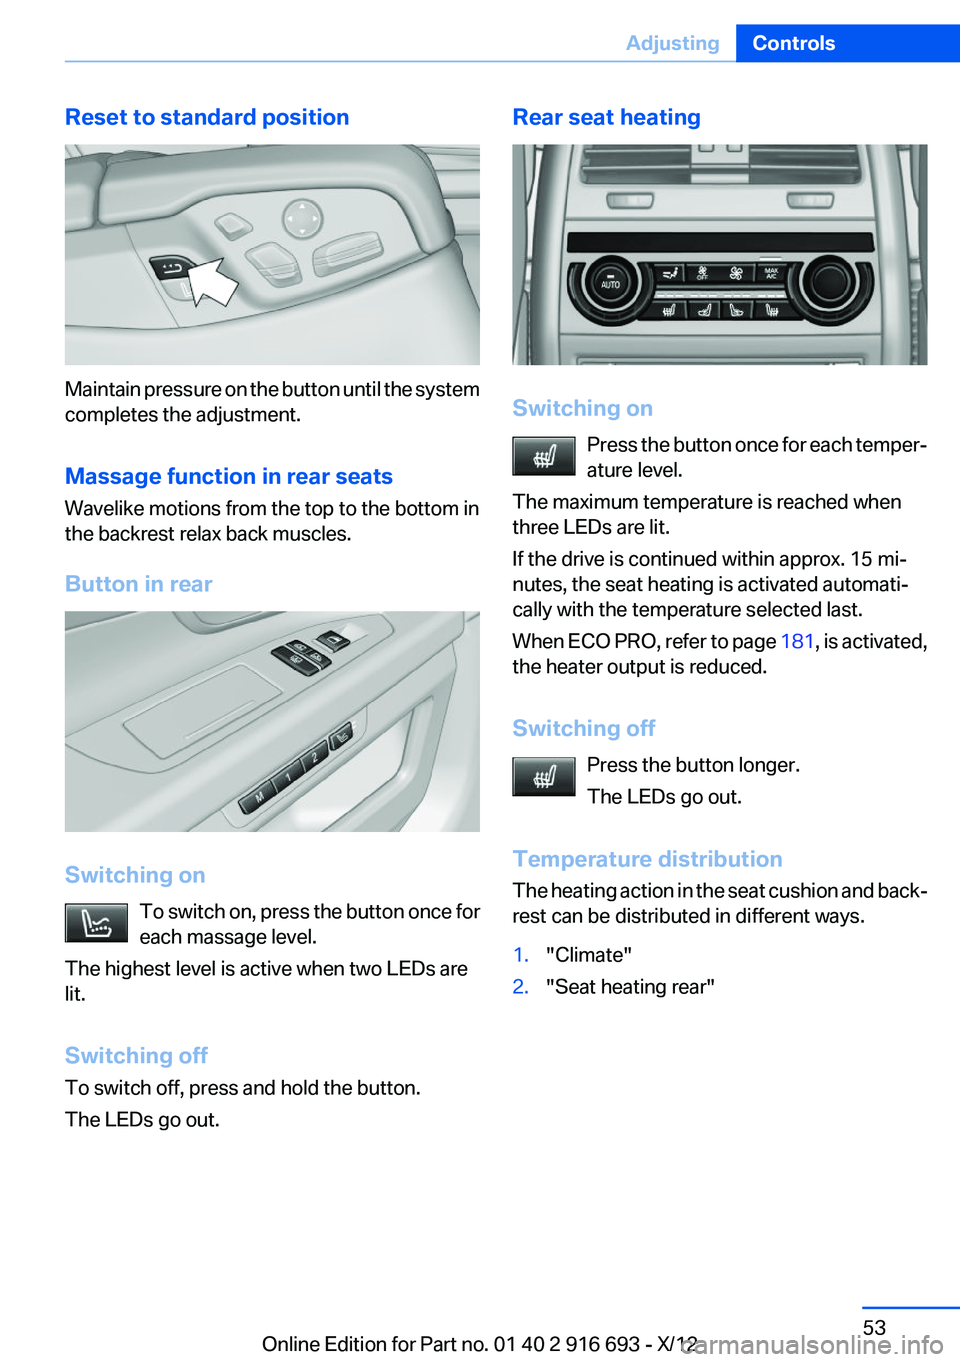
Reset to standard position
Maintain pressure on the button until the system
completes the adjustment.
Massage function in rear seats
Wavelike motions from the top to the bottom in
the backrest relax back muscles.
Button in rear
Switching on To switch on, press the button once for
each massage level.
The highest level is active when two LEDs are
lit.
Switching off
To switch off, press and hold the button.
The LEDs go out.
Rear seat heating
Switching on
Press the button once for each temper‐
ature level.
The maximum temperature is reached when
three LEDs are lit.
If the drive is continued within approx. 15 mi‐
nutes, the seat heating is activated automati‐
cally with the temperature selected last.
When ECO PRO, refer to page 181, is activated,
the heater output is reduced.
Switching off Press the button longer.
The LEDs go out.
Temperature distribution
The heating action in the seat cushion and back‐
rest can be distributed in different ways.
1."Climate"2."Seat heating rear"Seite 53AdjustingControls53
Online Edition for Part no. 01 40 2 916 693 - X/12
Page 79 of 243
DisplaysVehicle equipment
All standard, country-specific and optional
equipment that is offered in the model series is
described in this chapter. Therefore, equipmentis also described that is not available in a vehicle,
e. g., because of the selected optional equip‐
ment or country variant. This also applies for
safety-related functions and systems.
Instrument cluster
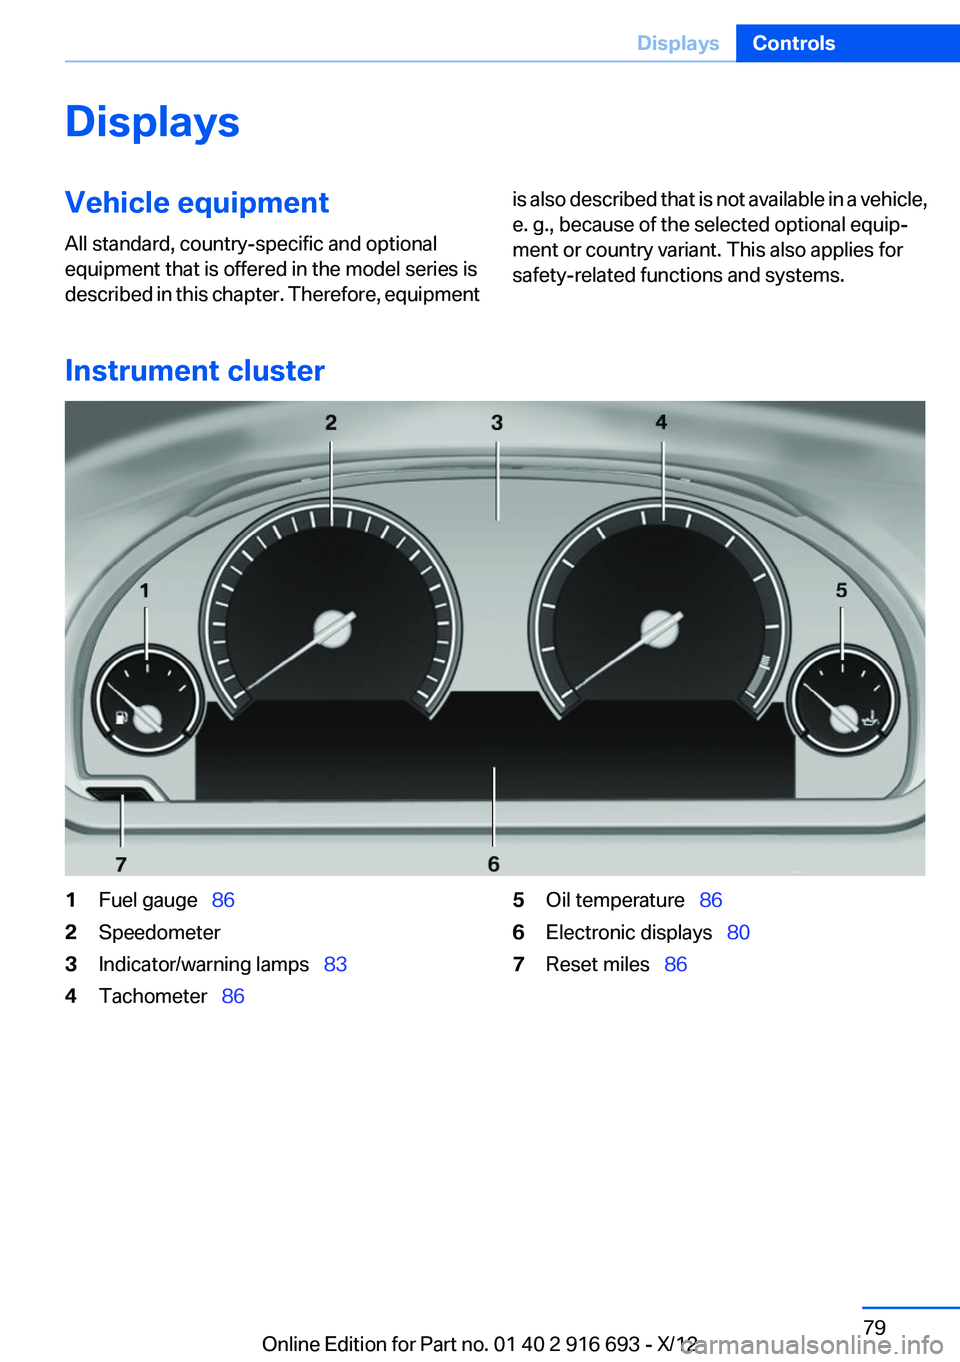
1Fuel gauge 862Speedometer3Indicator/warning lamps 834Tachometer 865Oil temperature 866Electronic displays 807Reset miles 86Seite 79DisplaysControls79
Online Edition for Part no. 01 40 2 916 693 - X/12
Page 81 of 243
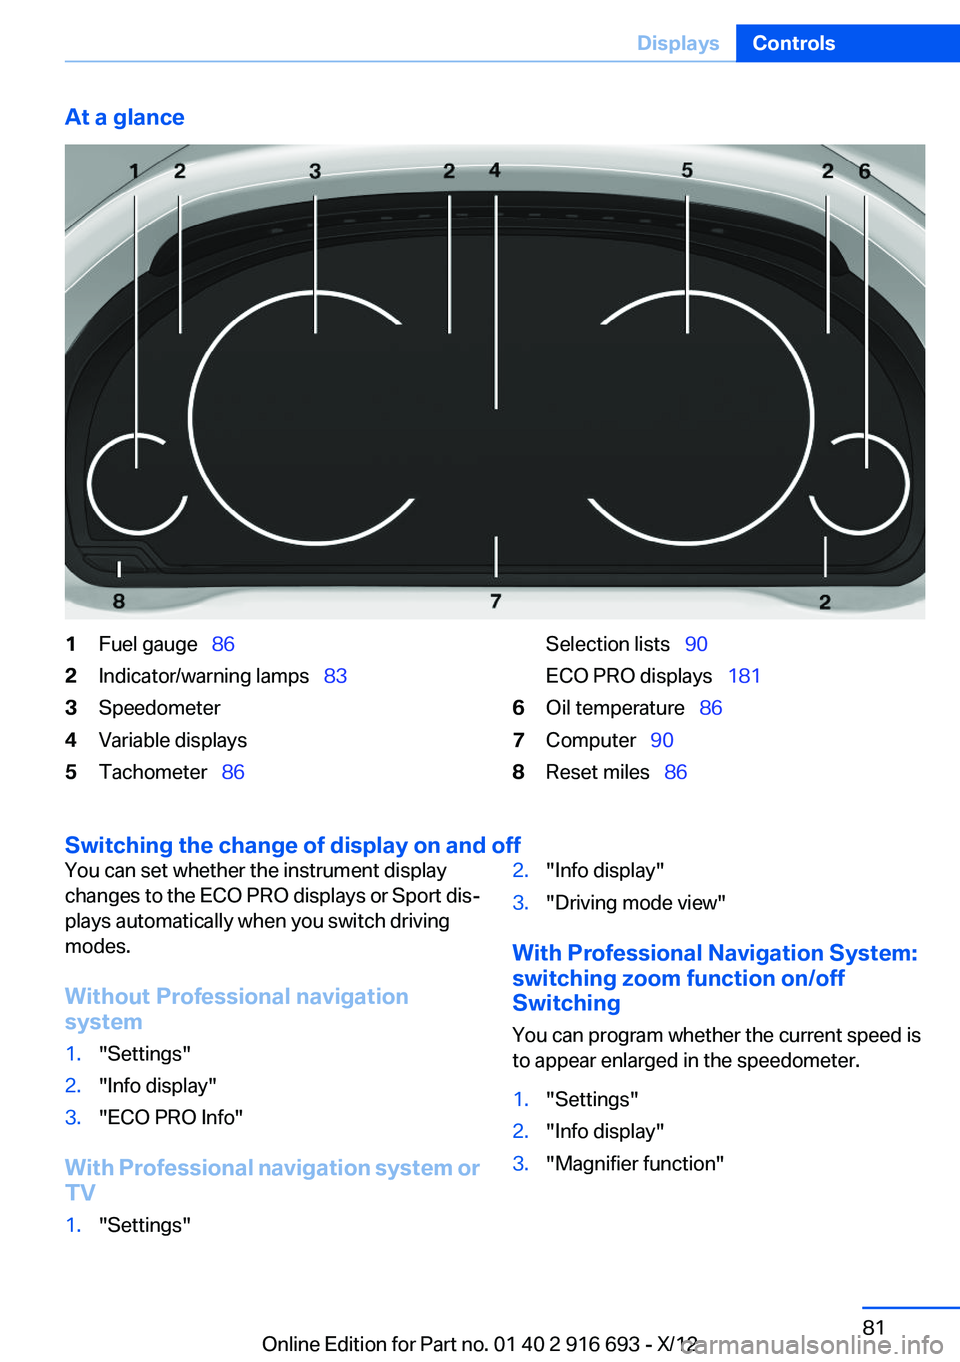
At a glance1Fuel gauge 862Indicator/warning lamps 833Speedometer4Variable displays5Tachometer 86Selection lists 90
ECO PRO displays 1816Oil temperature 867Computer 908Reset miles 86
Switching the change of display on and off
You can set whether the instrument display
changes to the ECO PRO displays or Sport dis‐
plays automatically when you switch driving
modes.
Without Professional navigation
system1."Settings"2."Info display"3."ECO PRO Info"
With Professional navigation system or
TV
1."Settings"2."Info display"3."Driving mode view"
With Professional Navigation System:
switching zoom function on/off
Switching
You can program whether the current speed is
to appear enlarged in the speedometer.
1."Settings"2."Info display"3."Magnifier function"Seite 81DisplaysControls81
Online Edition for Part no. 01 40 2 916 693 - X/12
Page 86 of 243

Fuel gaugeThe vehicle inclination may
cause the display to vary.
US models: the arrow beside the
fuel pump symbol shows which
side of the vehicle the fuel filler
flap is on.
Hints on refueling, refer to page 188.
Tachometer
Always avoid engine speeds in the red warning
field. In this range, the fuel supply is interrupted
to protect the engine.
Engine oil temperature▷Cold engine: the pointer is at
the low temperature end.
Drive at moderate engine and
vehicle speeds.▷Normal operating tempera‐
ture: the pointer is in the mid‐
dle or in the left half of the
temperature display.▷Hot engine: the pointer is at the high end of
the temperature range. A Check Control
message is also displayed.
Coolant temperature
If the coolant along with the engine becomes too
hot, a Check Control message is displayed.
Check the coolant level, refer to page 207.
Odometer and trip odometer▷Odometer, arrow 1.▷Trip odometer, arrow 2.
Display/reset miles
Press the knob.
▷When the ignition is switched
off, the time, external temper‐
ature and odometer are dis‐
played.▷When the ignition is switched on, the trip
odometer is reset.
External temperature
External temperature warning If the indicator drops to
+37 ℉/+3 ℃, a signal sounds.
A Check Control message is dis‐
played.
There is an increased risk of ice
on roads.
Ice on roads
Even at temperatures above +37 ℉/+3 ℃,
there can be a risk of ice on roads.
Therefore, drive carefully on bridges and shaded
roads, for example, to avoid the increased risk of
an accident.◀
Time The time is displayed at the bot‐
tom of the instrument cluster.
Setting the time and time format,
refer to page 93.
Seite 86ControlsDisplays86
Online Edition for Part no. 01 40 2 916 693 - X/12
Page 91 of 243
Information at a glance
Repeatedly pressing the button on the turn sig‐
nal lever calls up the following information on the
info display:▷Range.▷Average fuel consumption.▷Average speed.▷Date.▷Speed limit detection.▷Time of arrival.
When destination guidance is activated in
the navigation system.▷Distance to destination.
When destination guidance is activated in
the navigation system.▷Arrow view of navigation system.
When destination guidance is activated in
the navigation system.
When the arrow view in the Head-up Display
is inactive.▷ECO PRO bonus range.
Adjusting the info display
You can select what information from the on‐
board computer is to be displayed on the info
display of the instrument cluster.
1."Settings"2."Info display"3.Select the desired displays.
Information in detail
Range
Displays the estimated cruising range available
with the remaining fuel.
It is calculated based on your driving style over
the last 20 miles/30 km. If there is only enough
fuel left for less than 45 miles/80 km, the color
of the display changes.
Average fuel consumption
This is calculated for the period during which the
engine is running.
The average fuel consumption is calculated on
the basis of various distances.
Average speed
Periods in which the vehicle is parked with the
engine manually stopped do not enter into the
calculation of the average speed.
Resetting average values
Press and hold the computer button on the turn
signal lever.
Distance to destination
The distance remaining to the destination is dis‐
played if a destination is entered in the naviga‐
tion system before the trip is started.
The distance to the destination is adopted au‐
tomatically.
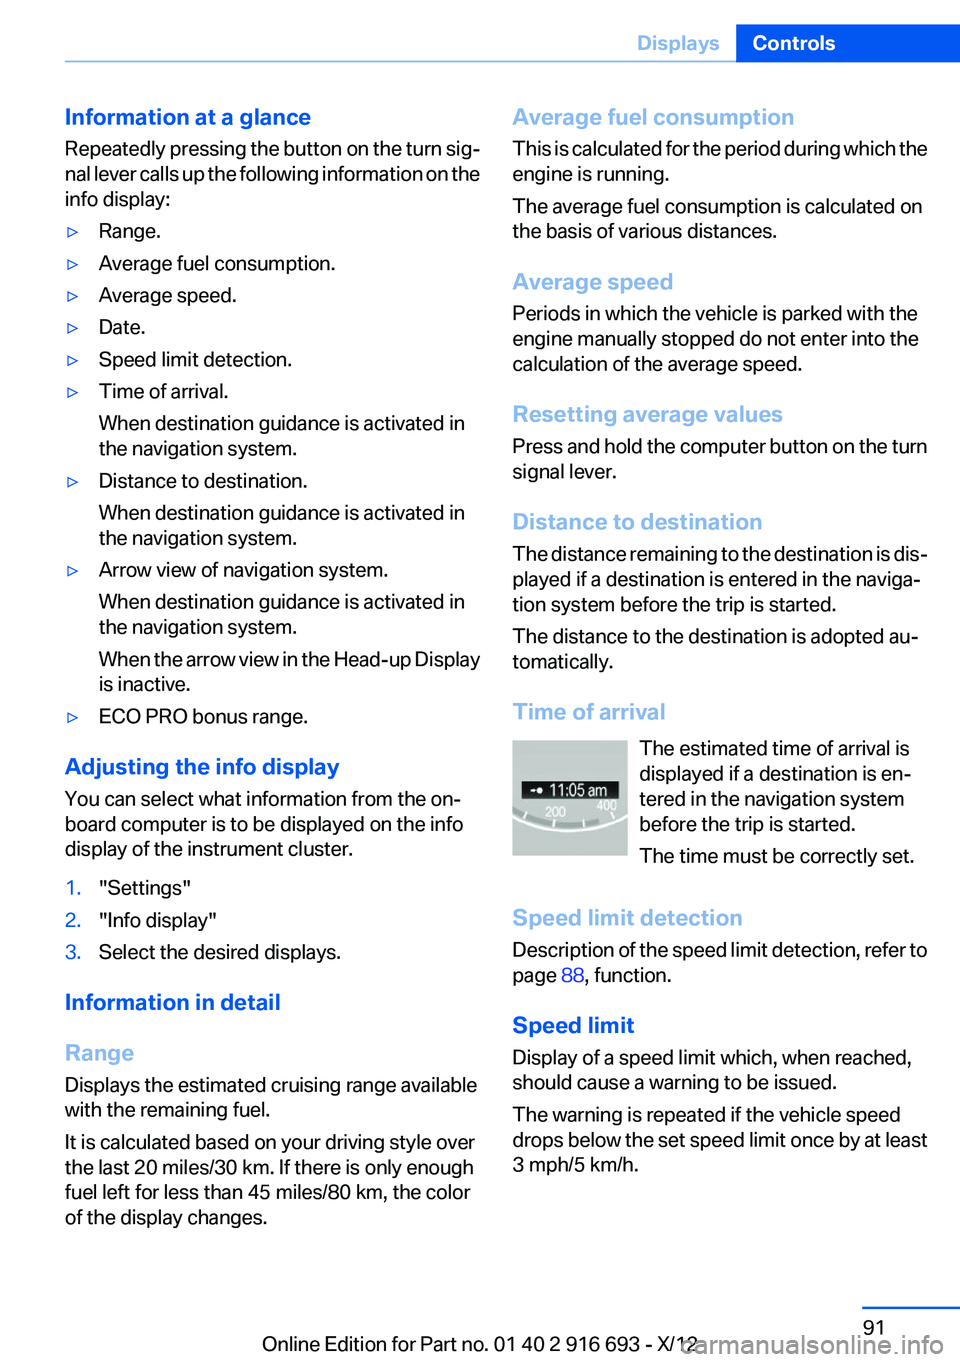
Time of arrival The estimated time of arrival is
displayed if a destination is en‐
tered in the navigation system
before the trip is started.
The time must be correctly set.
Speed limit detection
Description of the speed limit detection, refer to
page 88, function.
Speed limit
Display of a speed limit which, when reached,
should cause a warning to be issued.
The warning is repeated if the vehicle speed
drops below the set speed limit once by at least
3 mph/5 km/h.Seite 91DisplaysControls91
Online Edition for Part no. 01 40 2 916 693 - X/12
Page 92 of 243
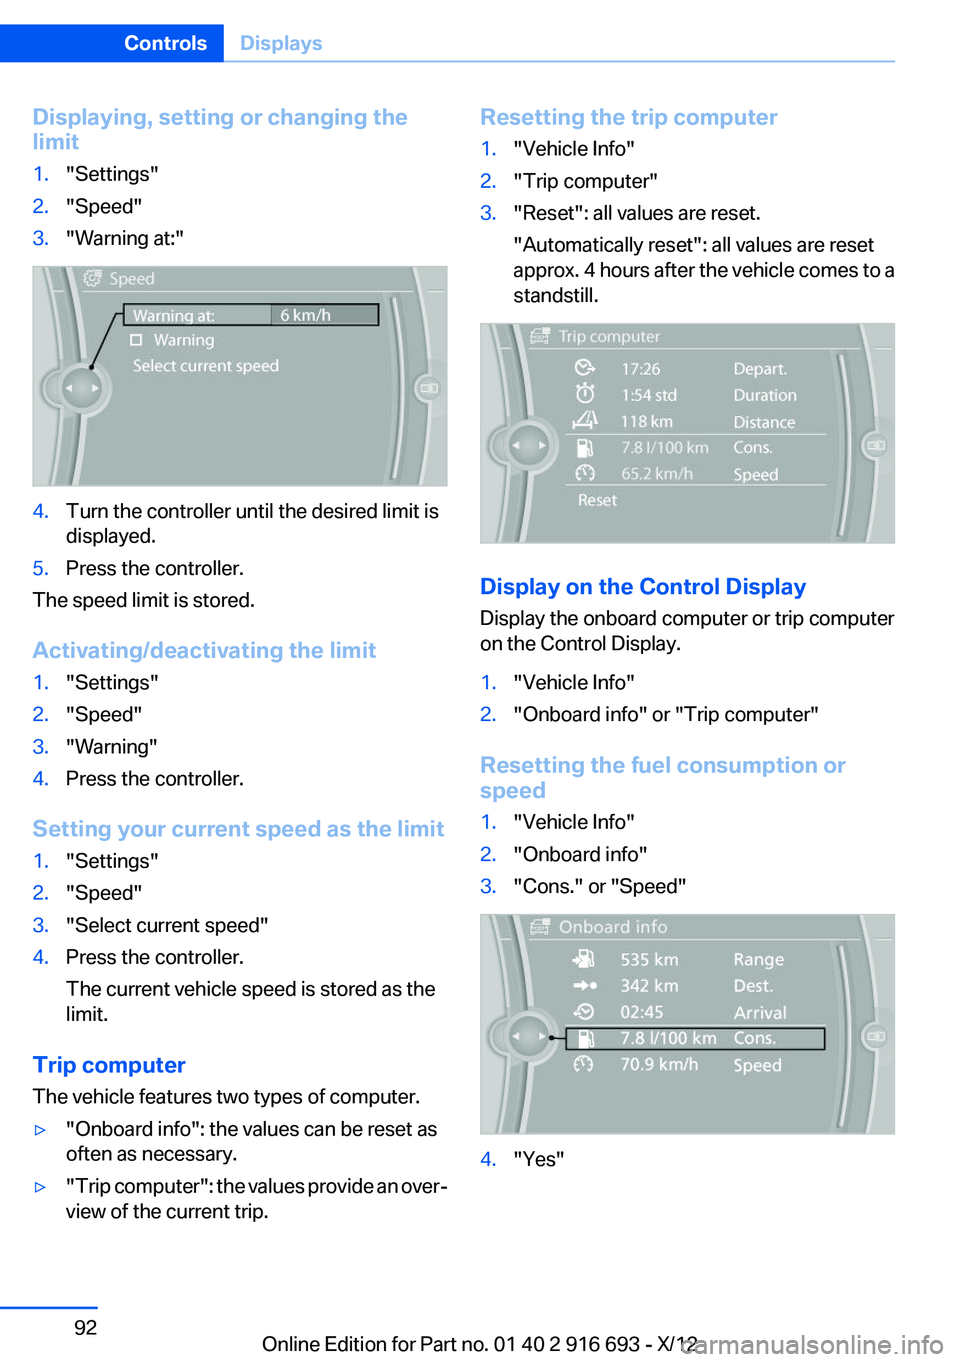
Displaying, setting or changing the
limit1."Settings"2."Speed"3."Warning at:"4.Turn the controller until the desired limit is
displayed.5.Press the controller.
The speed limit is stored.
Activating/deactivating the limit
1."Settings"2."Speed"3."Warning"4.Press the controller.
Setting your current speed as the limit
1."Settings"2."Speed"3."Select current speed"4.Press the controller.
The current vehicle speed is stored as the
limit.
Trip computer
The vehicle features two types of computer.
▷"Onboard info": the values can be reset as
often as necessary.▷" Trip computer": the values provide an over‐
view of the current trip.Resetting the trip computer1."Vehicle Info"2."Trip computer"3."Reset": all values are reset.
"Automatically reset": all values are reset
approx. 4 hours after the vehicle comes to a
standstill.
Display on the Control Display
Display the onboard computer or trip computer
on the Control Display.
1."Vehicle Info"2."Onboard info" or "Trip computer"
Resetting the fuel consumption or
speed
1."Vehicle Info"2."Onboard info"3."Cons." or "Speed"4."Yes"Seite 92ControlsDisplays92
Online Edition for Part no. 01 40 2 916 693 - X/12