2013 BMW 650I XDRIVE GRAN COUPE fold seats
[x] Cancel search: fold seatsPage 50 of 232

Head restraints
Correctly adjusted head restraint
A correctly adjusted head restraint reduces the
risk of injury to cervical vertebrae in the event of
an accident.
Adjusting the head restraint
If possible, correctly adjust the head re‐
straints of all occupied seats; otherwise, there is
an increased risk of injury in an accident.◀
Front
Height
Adjust the head restraint so that its center is ap‐
proximately at ear level.
Distance
Adjust the distance so that the head restraint is
as close as possible to the back of the head.
Active head restraint
In the event of a rear-end collision with a certain
severity, the active head restraint automatically
reduces the distance from the head.
Reduced protective function▷Do not use seat or head restraint cov‐
ers.▷Do not hang objects, e.g., clothes hangers,
on the head restraints.▷Only attach accessories approved by BMW
to the seat or head restraint.
Otherwise, the protective function of the active
head restraint will be impaired and the personal
safety of the occupants will be endangered.◀
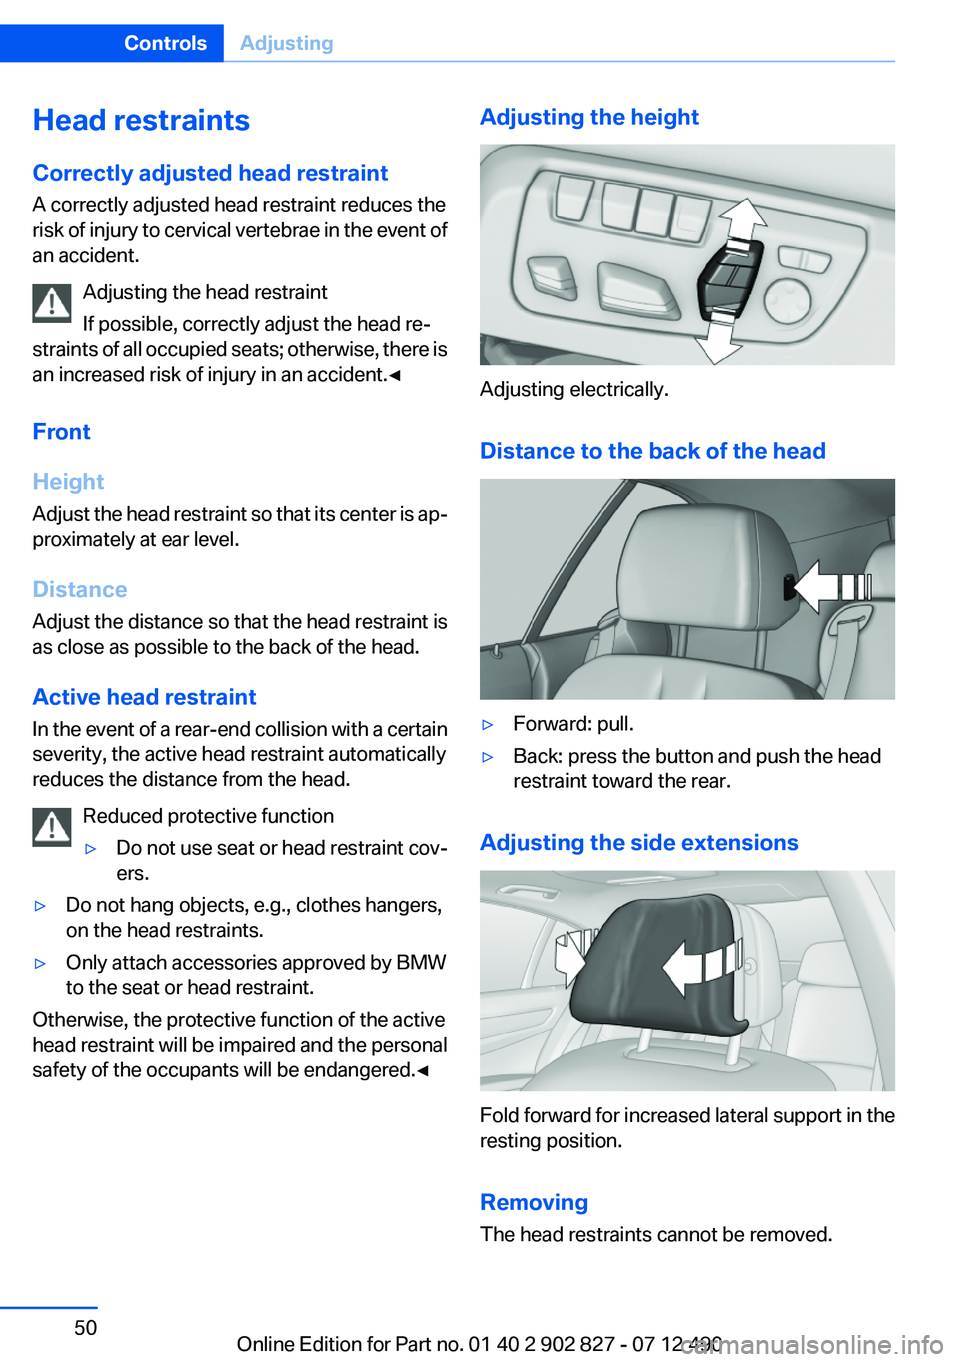
Adjusting the height
Adjusting electrically.
Distance to the back of the head
▷Forward: pull.▷Back: press the button and push the head
restraint toward the rear.
Adjusting the side extensions
Fold forward for increased lateral support in the
resting position.
Removing
The head restraints cannot be removed.
Seite 50ControlsAdjusting50
Online Edition for Part no. 01 40 2 902 827 - 07 12 490
Page 149 of 232

rear seat backrests. Otherwise, injury or damage
may result.◀
Locking the backrest
Before driving with passengers in the rear
of the vehicle, make sure that the backrests are
engaged and thus locked in place. Otherwise,
the restraining effect of the safety belts may be
limited in an accident.◀
Preventing indentations
When folding down the rear seats, ensure
that the safety belt buckles are located in the
recesses provided form them in the seat. Oth‐
erwise they can create indentations in the back‐
rest.◀
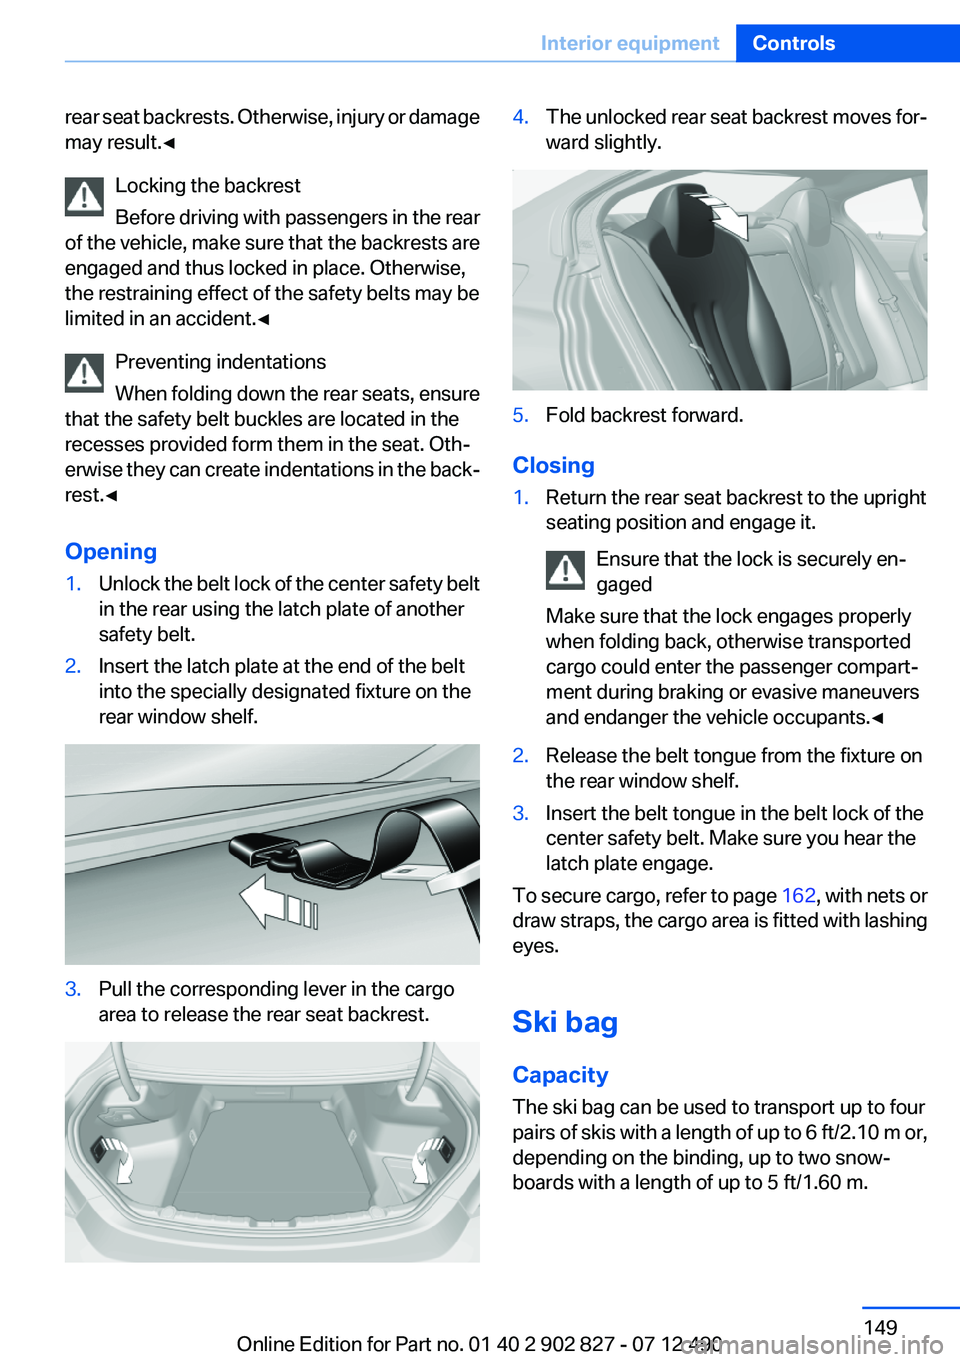
Opening1.Unlock the belt lock of the center safety belt
in the rear using the latch plate of another
safety belt.2.Insert the latch plate at the end of the belt
into the specially designated fixture on the
rear window shelf.3.Pull the corresponding lever in the cargo
area to release the rear seat backrest.4.The unlocked rear seat backrest moves for‐
ward slightly.5.Fold backrest forward.
Closing
1.Return the rear seat backrest to the upright
seating position and engage it.
Ensure that the lock is securely en‐
gaged
Make sure that the lock engages properly
when folding back, otherwise transported
cargo could enter the passenger compart‐
ment during braking or evasive maneuvers
and endanger the vehicle occupants.◀2.Release the belt tongue from the fixture on
the rear window shelf.3.Insert the belt tongue in the belt lock of the
center safety belt. Make sure you hear the
latch plate engage.
To secure cargo, refer to page 162, with nets or
draw straps, the cargo area is fitted with lashing
eyes.
Ski bag
Capacity
The ski bag can be used to transport up to four
pairs of skis with a length of up to 6 ft/2.10 m or,
depending on the binding, up to two snow‐
boards with a length of up to 5 ft/1.60 m.
Seite 149Interior equipmentControls149
Online Edition for Part no. 01 40 2 902 827 - 07 12 490
Page 151 of 232

Storage compartmentsVehicle equipment
All standard, country-specific and optional
equipment that is offered in the model series is
described in this chapter. Therefore, equipment
is also described that is not available in a vehicle,
e. g., because of the selected optional equip‐
ment or country variant. This also applies for
safety-related functions and systems.
Notes No loose objects in the passenger com‐
partment
Do not stow any objects in the passenger com‐
partment without securing them; otherwise,
they may present a danger to occupants for in‐
stance during braking and avoidance maneu‐
vers.◀
Do not place anti-slip mats on the dash‐
board
Do not place anti-slip mats on the dashboard.
The mat materials could damage the dash‐
board.◀
Storage compartments
The following storage compartments are avail‐
able in the vehicle interior:▷Glove compartment on the front passenger
side, refer to page 151.▷Storage compartment in the front center
armrest, refer to page 152.▷Storage compartment in the rear center
armrest, refer to page 152.▷Compartments in the doors.▷Pockets on the backrests of the front seats.▷Net in the front passenger footwell.Glove compartment
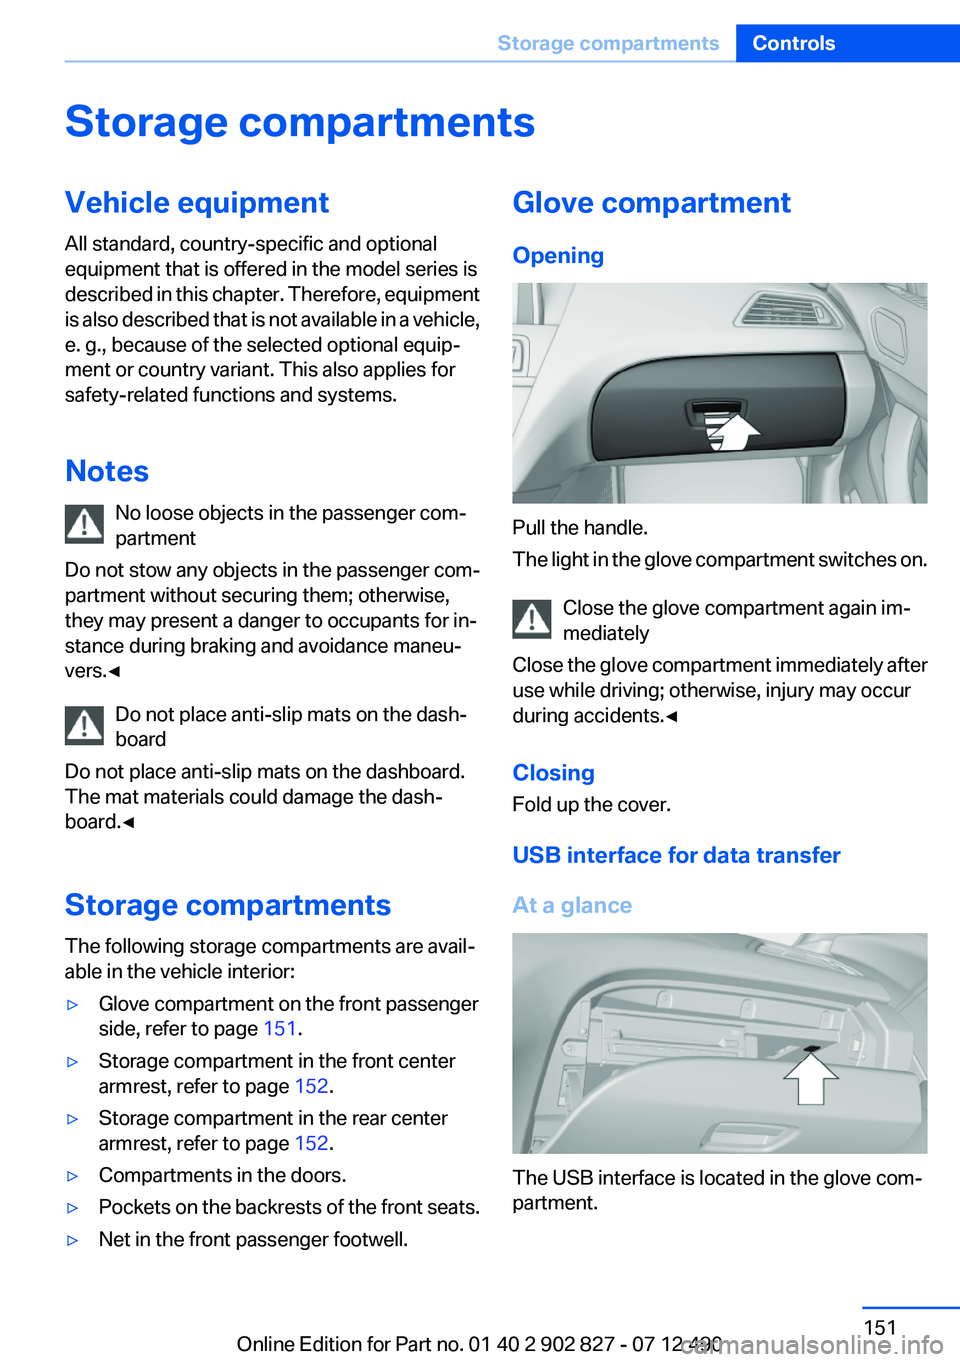
Opening
Pull the handle.
The light in the glove compartment switches on.
Close the glove compartment again im‐
mediately
Close the glove compartment immediately after
use while driving; otherwise, injury may occur
during accidents.◀
Closing
Fold up the cover.
USB interface for data transfer
At a glance
The USB interface is located in the glove com‐
partment.
Seite 151Storage compartmentsControls151
Online Edition for Part no. 01 40 2 902 827 - 07 12 490
Page 225 of 232

F
Failure message, refer to Check Control 74
False alarm, refer to Uninten‐ tional alarm 41
Fan, refer to Air flow 141
Fault displays, refer to Check Control 74
Filler neck for engine oil 187
Fine wood, care 205
First aid kit 199
Fitting for towing, refer to Tow fitting 202
Flat tire, changing wheels 195
Flat Tire Monitor FTM 97
Flat tire, Tire Pressure Monitor TPM 94
Flat tire, warning lamp 95, 98
Flooding 159
Floor carpet, care 205
Floor mats, care 205
Fold-out position, windshield wipers 66
Foot brake 159
For the headliner, refer to All around the interior rearview
mirror 15
Front airbags 91
Front center armrest 152
Front fog lamps 89
Front lamps 0
Front passenger airbags, au‐ tomatic deactivation 93
Front passenger airbags, indi‐ cator lamp 93
Front seats 45
Front turn signals, refer to Light-emitting diodes,
LEDs 193
FTM Flat Tire Monitor 97
Fuel cap 170
Fuel consumption, current 78
Fuel consumption, refer to Average fuel consump‐
tion 82 Fuel filler flap 170
Fuel gauge 77
Fuel quality 172
Fuel, tank capacity 212
Fuse 197
G
Garage door opener, refer to Integrated universal remote
control 145
Gasoline 172
Gasoline quality 172
Gear change, automatic trans‐ mission 68
General driving notes 158
Glass sunroof, powered with tilt function 43
Glove compartment 151
Gross vehicle weight, ap‐ proved 211
H
Handbrake, refer to Parking brake 62
Hand-held transmitter, alter‐ nating code 146
Hazard warning flashers 198
HDC Hill Descent Control 112
Head airbags 91
Headlamp control, auto‐ matic 87
Headlamp courtesy delay fea‐ ture 87
Headlamp courtesy delay fea‐ ture via remote control 35
Headlamp flasher 65
Headlamp glass 193
Headlamps 0
Headlamps, care 204
Headlamp washer system 65
Head restraints 45
Head restraints, front 50
Head-Up Display 138
Head-up Display, care 206 Heavy cargo, stowing 162
Height, seats 45
Height, vehicle 210
High-beam Assistant 88
High beams 65
High beams/low beams, refer to High-beam Assistant 88
Hill Descent Control HDC 112
Hills 160
Hill start assistant, refer to Drive-off assistant 110
Hints 6
Holder for beverages 153
Homepage 6
Hood 184
Horn 12
Hotel function, trunk lid 38
Hot exhaust system 158
HUD Head-Up Display 138
Hydroplaning 159
I
Ice warning, refer to External temperature warning 77
Icy roads, refer to External temperature warning 77
Identification marks, tires 178
Identification number, refer to Important features in the en‐
gine compartment 184
iDrive 16
Ignition key, refer to Remote control 30
Ignition off 58
Ignition on 58
Indication of a flat tire 95, 98
Individual air distribution 141
Individual settings, refer to Personal Profile 31
Inflation pressure, tires 173
Inflation pressure warning FTM, tires 97
Info display, refer to Com‐ puter 81 Seite 225Everything from A to ZReference225
Online Edition for Part no. 01 40 2 902 827 - 07 12 490