2013 BMW 650I GRAN COUPE ESP
[x] Cancel search: ESPPage 192 of 232
Replacing componentsVehicle equipment
All standard, country-specific and optional
equipment that is offered in the model series is
described in this chapter. Therefore, equipment
is also described that is not available in a vehicle,
e. g., because of the selected optional equip‐
ment or country variant. This also applies for
safety-related functions and systems.
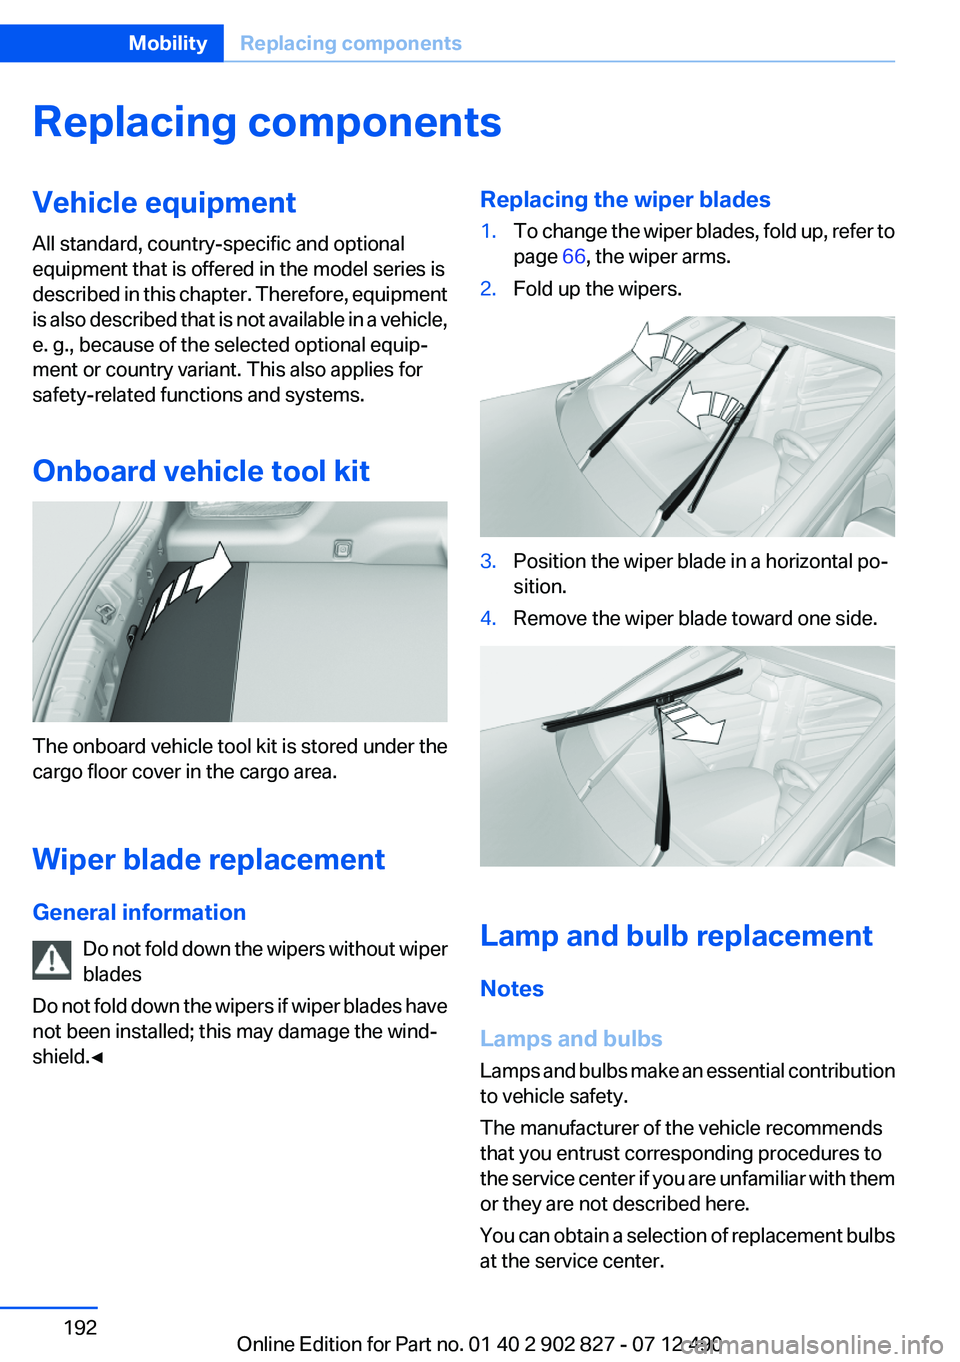
Onboard vehicle tool kit
The onboard vehicle tool kit is stored under the
cargo floor cover in the cargo area.
Wiper blade replacement
General information Do not fold down the wipers without wiper
blades
Do not fold down the wipers if wiper blades have
not been installed; this may damage the wind‐
shield.◀
Replacing the wiper blades1.To change the wiper blades, fold up, refer to
page 66, the wiper arms.2.Fold up the wipers.3.Position the wiper blade in a horizontal po‐
sition.4.Remove the wiper blade toward one side.
Lamp and bulb replacement
Notes
Lamps and bulbs
Lamps and bulbs make an essential contribution
to vehicle safety.
The manufacturer of the vehicle recommends
that you entrust corresponding procedures to
the service center if you are unfamiliar with them
or they are not described here.
You can obtain a selection of replacement bulbs
at the service center.
Seite 192MobilityReplacing components192
Online Edition for Part no. 01 40 2 902 827 - 07 12 490
Page 193 of 232
Danger of burns
Only change bulbs when they are cool;
otherwise, there is the danger of getting
burned.◀
Working on the lighting system
When working on the lighting system, you
should always switch off the lights affected to
prevent short circuits.
To avoid possible injury or equipment damage
when replacing bulbs, observe any instructions
provided by the bulb manufacturer.◀
Do not perform work/bulb replacement on
xenon headlamps
Have any work on the xenon lighting system, in‐
cluding bulb replacement, performed only by a
service center. Due to the high voltage present
in the system, there is the danger of fatal injuries
if work is carried out improperly.◀
Do not touch the bulbs
Do not touch the glass of new bulbs with
your bare hands, as even minute amounts of
contamination will burn into the bulb's surface
and reduce its service life.
Use a clean tissue, cloth or something similar, or
hold the bulb by its base.◀
Light-emitting diodes (LEDs)
Light-emitting diodes installed behind a cover
serve as the light source for controls, display el‐
ements and other equipment.
These light-emitting diodes, which are related
to conventional lasers, are officially designated
as Class 1 light-emitting diodes.
Do not remove the covers
Do not remove the covers, and never stare
into the unfiltered light for several hours; other‐
wise, irritation of the retina could result.◀Headlamp glass
Condensation can form on the inside of the ex‐
ternal lamps in cool or humid weather. When
driving with the light switched on, the conden‐
sation evaporates after a short time. The head‐
lamp glasses do not need to be changed.
If the headlamps do not dim despite driving with
the light switched on, increasing humidity forms,
e. g. water droplets in the light, have the service
center check this.
Xenon headlamps
Notes
Because of the long life of these bulbs, the like‐
lihood of failure is very low. Switching the lamps
on and off frequently shortens their life.
If a xenon bulb fails, switch on the front fog lamps
and continue the trip with great care. Comply
with local regulations.
Do not perform work/bulb replacement on
xenon headlamps
Have any work on the xenon lighting system, in‐
cluding bulb replacement, performed only by a
service center. Due to the high voltage present
in the system, there is the danger of fatal injuries
if work is carried out improperly.◀
For checking and adjusting headlamp aim,
please contact your BMW center.
Light-emitting diodes (LEDs)
Follow the general instructions on lamps and
bulbs, refer to page 192.
With Xenon-headlamps, the following lamps are
designed with LED technology:▷Parking lamps and roadside parking lamps▷Turn signals, incl. side indicators▷Front fog lamps▷Daytime running lights
Contact your service center in the event of a
malfunction.
Seite 193Replacing componentsMobility193
Online Edition for Part no. 01 40 2 902 827 - 07 12 490
Page 198 of 232
Breakdown assistanceVehicle equipment
All standard, country-specific and optional
equipment that is offered in the model series is
described in this chapter. Therefore, equipment
is also described that is not available in a vehicle,
e. g., because of the selected optional equip‐
ment or country variant. This also applies for
safety-related functions and systems.
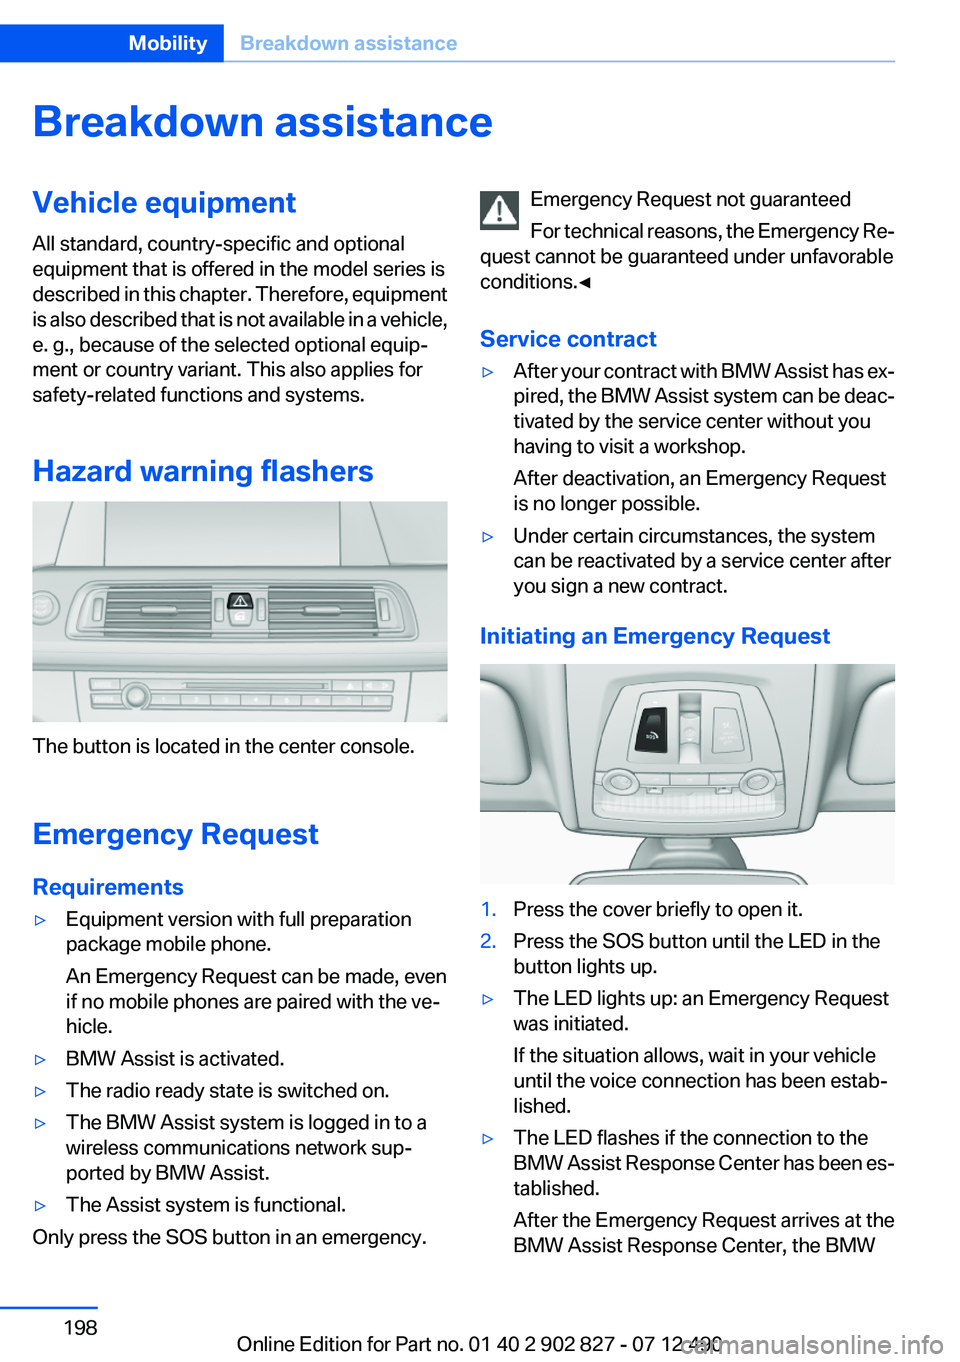
Hazard warning flashers
The button is located in the center console.
Emergency Request
Requirements
▷Equipment version with full preparation
package mobile phone.
An Emergency Request can be made, even
if no mobile phones are paired with the ve‐
hicle.▷BMW Assist is activated.▷The radio ready state is switched on.▷The BMW Assist system is logged in to a
wireless communications network sup‐
ported by BMW Assist.▷The Assist system is functional.
Only press the SOS button in an emergency.
Emergency Request not guaranteed
For technical reasons, the Emergency Re‐
quest cannot be guaranteed under unfavorable
conditions.◀
Service contract▷After your contract with BMW Assist has ex‐
pired, the BMW Assist system can be deac‐
tivated by the service center without you
having to visit a workshop.
After deactivation, an Emergency Request
is no longer possible.▷Under certain circumstances, the system
can be reactivated by a service center after
you sign a new contract.
Initiating an Emergency Request
1.Press the cover briefly to open it.2.Press the SOS button until the LED in the
button lights up.▷The LED lights up: an Emergency Request
was initiated.
If the situation allows, wait in your vehicle
until the voice connection has been estab‐
lished.▷The LED flashes if the connection to the
BMW Assist Response Center has been es‐
tablished.
After the Emergency Request arrives at the
BMW Assist Response Center, the BMWSeite 198MobilityBreakdown assistance198
Online Edition for Part no. 01 40 2 902 827 - 07 12 490
Page 199 of 232
Assist Response Center contacts you and
takes further steps to help you.
Even if you are unable to respond, the BMW
Assist Response Center can take further
steps to help you under certain circumstan‐
ces.
For this purpose, data that are used to de‐
termine the necessary rescue measures,
such as the current position of the vehicle if
it can be established, are transmitted to the
BMW Assist Response Center.▷If the LED is flashing but the BMW Assist
Response Center cannot be heard on the
hands-free system, the hands-free system
may be malfunctioning. However, the BMW
Assist Response Center may still be able to
hear you.
Initiating an Emergency Request
automatically
Under certain conditions, an Emergency Re‐
quest is automatically initiated immediately after
a severe accident. Automatic Collision Notifica‐
tion is not affected by pressing the SOS button.
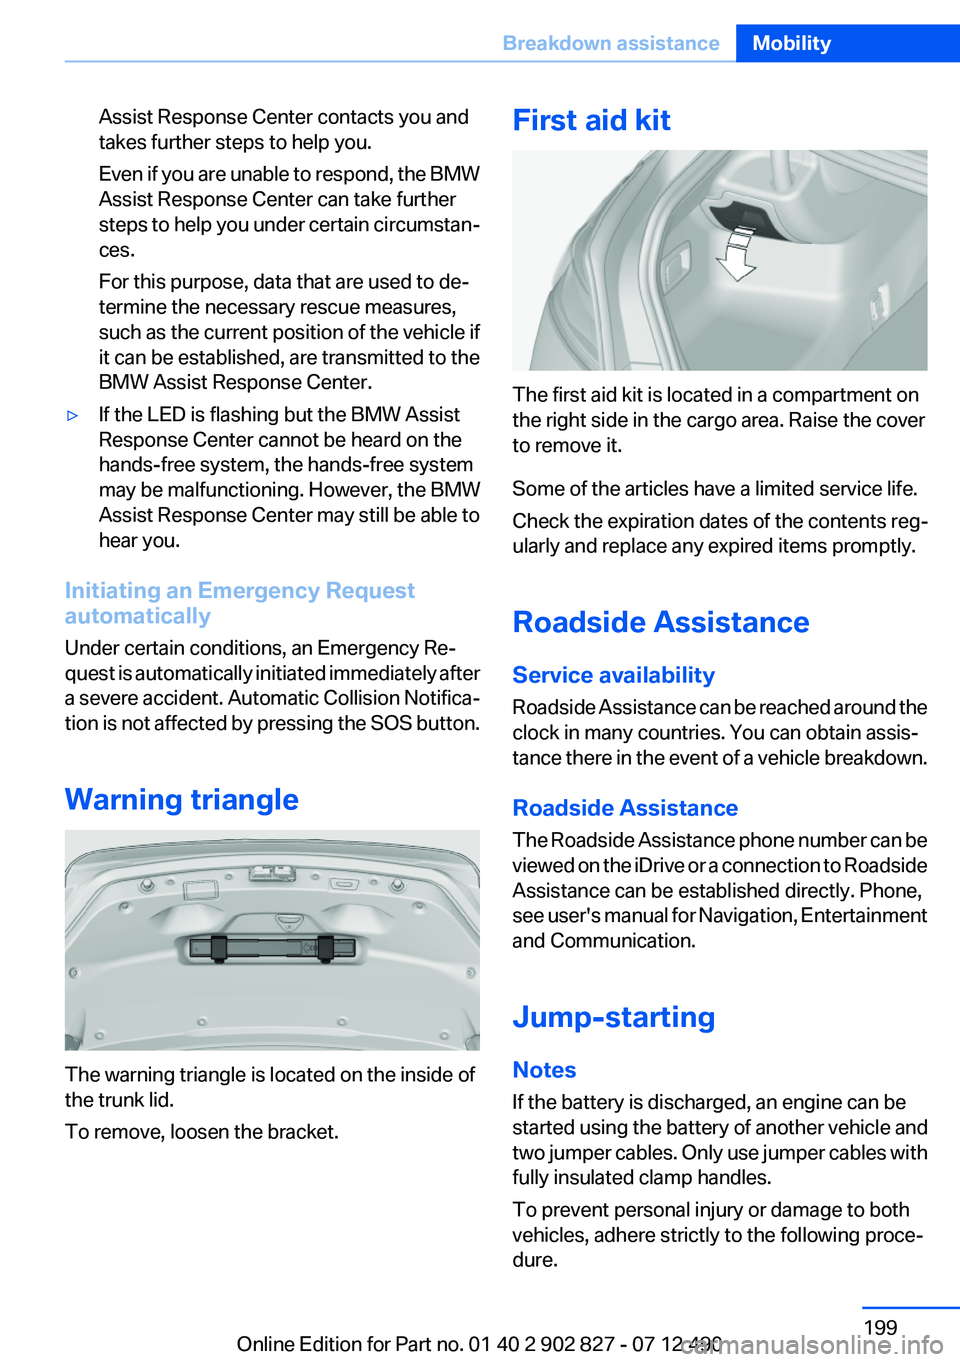
Warning triangle
The warning triangle is located on the inside of
the trunk lid.
To remove, loosen the bracket.
First aid kit
The first aid kit is located in a compartment on
the right side in the cargo area. Raise the cover
to remove it.
Some of the articles have a limited service life.
Check the expiration dates of the contents reg‐
ularly and replace any expired items promptly.
Roadside Assistance
Service availability
Roadside Assistance can be reached around the
clock in many countries. You can obtain assis‐
tance there in the event of a vehicle breakdown.
Roadside Assistance
The Roadside Assistance phone number can be
viewed on the iDrive or a connection to Roadside
Assistance can be established directly. Phone,
see user's manual for Navigation, Entertainment
and Communication.
Jump-starting
Notes
If the battery is discharged, an engine can be
started using the battery of another vehicle and
two jumper cables. Only use jumper cables with
fully insulated clamp handles.
To prevent personal injury or damage to both
vehicles, adhere strictly to the following proce‐
dure.
Seite 199Breakdown assistanceMobility199
Online Edition for Part no. 01 40 2 902 827 - 07 12 490
Page 200 of 232
Do not touch live parts
To avoid the risk of potentially fatal injury,
always avoid all contact with electrical compo‐
nents while the engine is running.◀
Preparation1.Check whether the battery of the other ve‐
hicle has a voltage of 12 volts. This informa‐
tion can be found on the battery.2.Switch off the engine of the assisting vehi‐
cle.3.Switch off any electronic systems/power
consumers in both vehicles.
Bodywork contact between vehicles
Make sure that there is no contact be‐
tween the bodywork of the two vehicles; other‐
wise, there is the danger of short circuits.◀
Starting aid terminals Connecting order
Connect the jumper cables in the correct
order; otherwise, there is the danger of injury
from sparking.◀
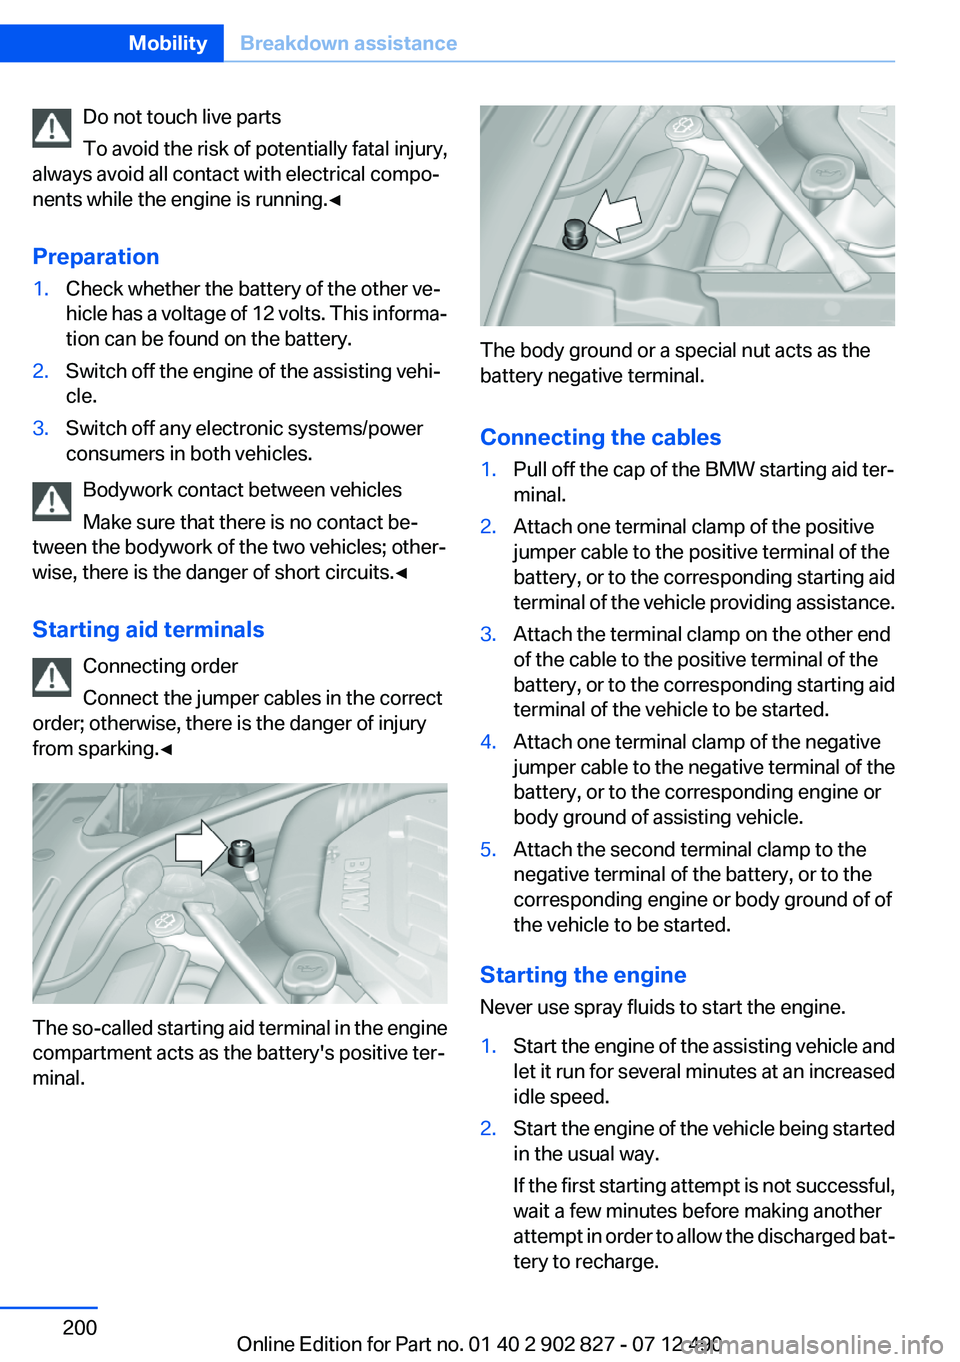
The so-called starting aid terminal in the engine
compartment acts as the battery's positive ter‐
minal.
The body ground or a special nut acts as the
battery negative terminal.
Connecting the cables
1.Pull off the cap of the BMW starting aid ter‐
minal.2.Attach one terminal clamp of the positive
jumper cable to the positive terminal of the
battery, or to the corresponding starting aid
terminal of the vehicle providing assistance.3.Attach the terminal clamp on the other end
of the cable to the positive terminal of the
battery, or to the corresponding starting aid
terminal of the vehicle to be started.4.Attach one terminal clamp of the negative
jumper cable to the negative terminal of the
battery, or to the corresponding engine or
body ground of assisting vehicle.5.Attach the second terminal clamp to the
negative terminal of the battery, or to the
corresponding engine or body ground of of
the vehicle to be started.
Starting the engine
Never use spray fluids to start the engine.
1.Start the engine of the assisting vehicle and
let it run for several minutes at an increased
idle speed.2.Start the engine of the vehicle being started
in the usual way.
If the first starting attempt is not successful,
wait a few minutes before making another
attempt in order to allow the discharged bat‐
tery to recharge.Seite 200MobilityBreakdown assistance200
Online Edition for Part no. 01 40 2 902 827 - 07 12 490
Page 224 of 232

Cruising range 78
Cupholder 153
Current fuel consumption 78
D
Damage, tires 179
Damping control, dy‐ namic 113
Data, technical 210
Date 77
Daytime running lights 87
Defrosting, refer to Windows, defrosting 141
Dehumidifying, air 142
Destination distance 82
Digital clock 77
Dimensions 210
Dimmable exterior mirrors 52
Dimmable interior rearview mirror 53
Direction indicator, refer to Turn signals 64
Display in windshield 138
Display lighting, refer to Instru‐ ment lighting 89
Displays 70, 71
Displays, cleaning 206
Disposal, vehicle battery 196
Distance control, refer to PDC 126
Distance, selecting for ACC 120
Distance to destination 82
Divided screen view, split screen 20
Door lock, refer to Remote control 30
Doors, Automatic Soft Clos‐ ing 37
Downhill control 112
Drive-off assistant 110
Drive-off assistant, refer to DSC 110
Driving Experience Switch 114 Driving instructions, breaking
in 158
Driving mode 114
Driving notes, general 158
Driving stability control sys‐ tems 110
Driving tips 158
DSC Dynamic Stability Con‐ trol 110
DTC driving dynamics 111
DTC Dynamic Traction Con‐ trol 111
Dynamic Damping Con‐ trol 113
Dynamic Drive 113
Dynamic Stability Control DSC 110
Dynamic Traction Control DTC 111
E
ECO PRO 164
ECO PRO display 164
ECO PRO mode 164
EfficientDynamics 165
Electronic displays, instru‐ ment cluster 71
Electronic Stability Program ESP, refer to DSC 110
Emergency detection, remote control 31
Emergency release, door lock 36
Emergency release, fuel filler flap 170
Emergency Request 198
Emergency service, refer to Roadside Assistance 199
Emergency start function, en‐ gine start 31
Emergency unlocking, trunk lid 38
Energy Control 78
Energy recovery 78 Engine, automatic Start/Stop
function 60
Engine, automatic switch- off 60
Engine compartment 184
Engine compartment, working in 184
Engine coolant 188
Engine oil 186
Engine oil, adding 187
Engine oil additives 187
Engine oil change 187
Engine oil filler neck 187
Engine oil temperature 77
Engine oil types, alterna‐ tive 187
Engine oil types, ap‐ proved 187
Engine start during malfunc‐ tion 31
Engine start, jump-start‐ ing 199
Engine start, refer to Starting the engine 59
Engine stop 59
Engine temperature 77
Entering/exiting vehicle, assis‐ tance, steering wheel 53
Entering a car wash 203
Equipment, interior 145
ESP Electronic Stability Pro‐ gram, refer to DSC 110
Exchanging wheels/tires 180
Exhaust system 158
Exterior mirror, automatic dim‐ ming feature 52
Exterior mirrors 51
External start 199
External temperature dis‐ play 77
External temperature warn‐ ing 77
Eyes for securing cargo 162 Seite 224ReferenceEverything from A to Z224
Online Edition for Part no. 01 40 2 902 827 - 07 12 490