2013 BMW 650I GRAN COUPE remote start
[x] Cancel search: remote startPage 86 of 232
LampsVehicle equipment
All standard, country-specific and optional
equipment that is offered in the model series is
described in this chapter. Therefore, equipment
is also described that is not available in a vehicle,
e. g., because of the selected optional equip‐
ment or country variant. This also applies for
safety-related functions and systems.
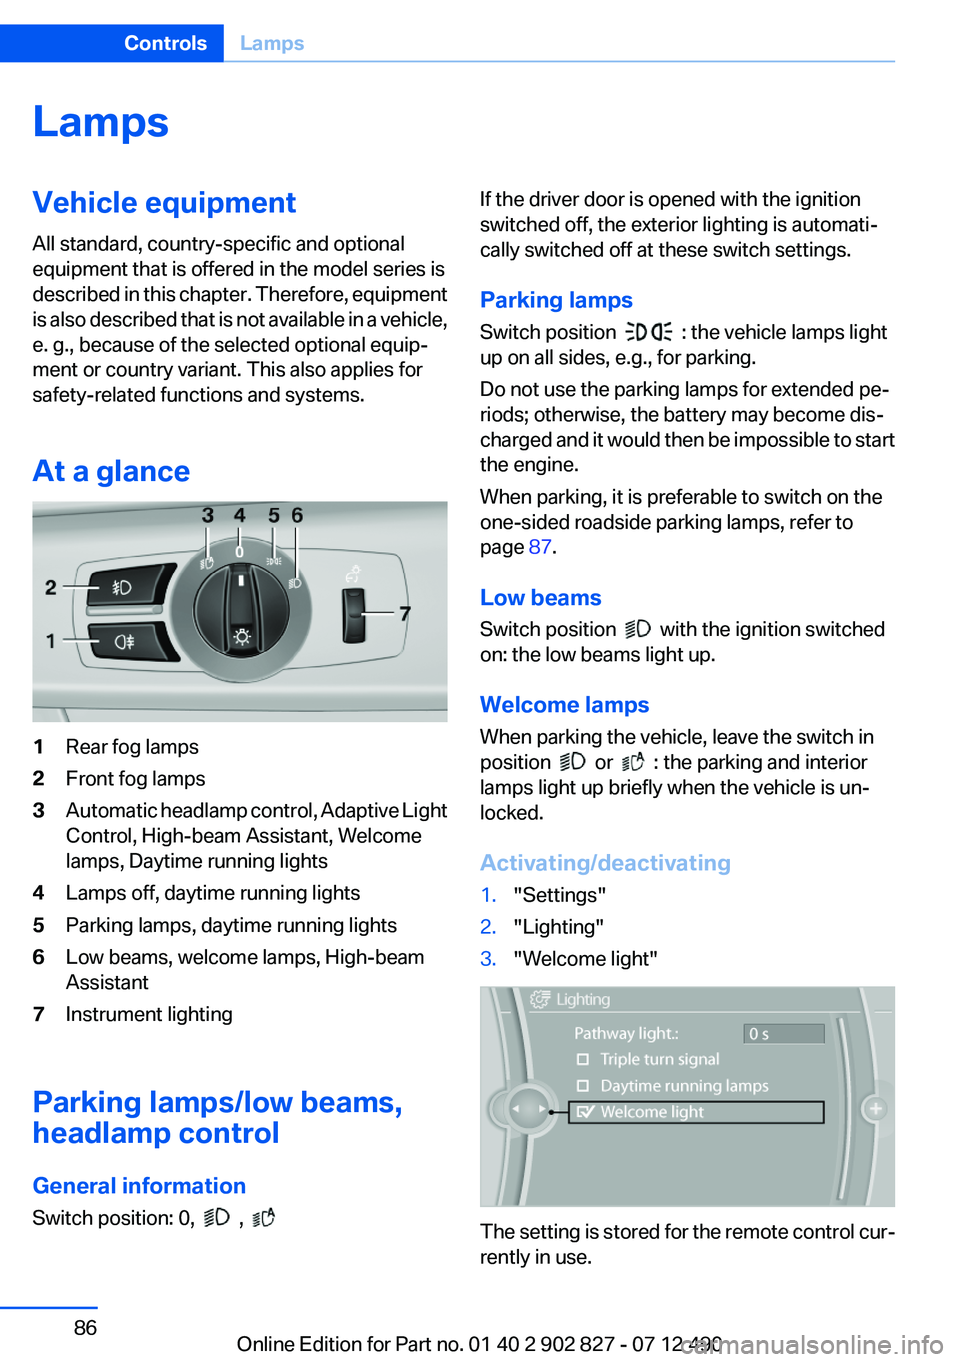
At a glance1Rear fog lamps2Front fog lamps3Automatic headlamp control, Adaptive Light
Control, High-beam Assistant, Welcome
lamps, Daytime running lights4Lamps off, daytime running lights5Parking lamps, daytime running lights6Low beams, welcome lamps, High-beam
Assistant7Instrument lighting
Parking lamps/low beams,
headlamp control
General information
Switch position: 0,
,
If the driver door is opened with the ignition
switched off, the exterior lighting is automati‐
cally switched off at these switch settings.
Parking lamps
Switch position
: the vehicle lamps light
up on all sides, e.g., for parking.
Do not use the parking lamps for extended pe‐
riods; otherwise, the battery may become dis‐
charged and it would then be impossible to start
the engine.
When parking, it is preferable to switch on the
one-sided roadside parking lamps, refer to
page 87.
Low beams
Switch position
with the ignition switched
on: the low beams light up.
Welcome lamps
When parking the vehicle, leave the switch in
position
or : the parking and interior
lamps light up briefly when the vehicle is un‐
locked.
Activating/deactivating
1."Settings"2."Lighting"3."Welcome light"
The setting is stored for the remote control cur‐
rently in use.
Seite 86ControlsLamps86
Online Edition for Part no. 01 40 2 902 827 - 07 12 490
Page 102 of 232
When the vehicle is intentionally brought into
contact with a vehicle, the collision warning is
delayed to avoid false warnings.
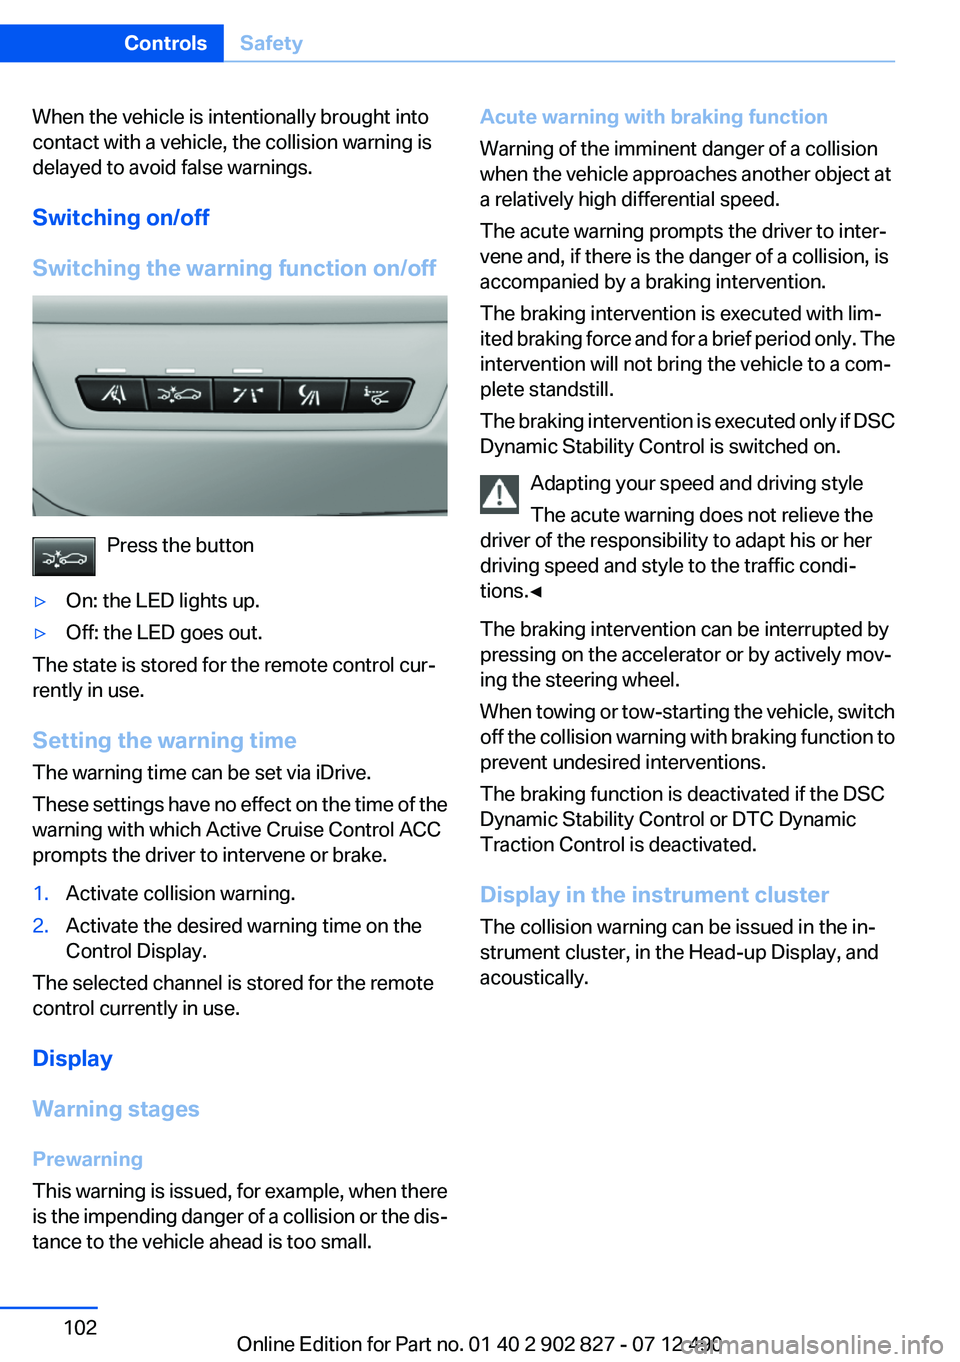
Switching on/off
Switching the warning function on/off
Press the button
▷On: the LED lights up.▷Off: the LED goes out.
The state is stored for the remote control cur‐
rently in use.
Setting the warning time
The warning time can be set via iDrive.
These settings have no effect on the time of the
warning with which Active Cruise Control ACC
prompts the driver to intervene or brake.
1.Activate collision warning.2.Activate the desired warning time on the
Control Display.
The selected channel is stored for the remote
control currently in use.
Display
Warning stages
Prewarning
This warning is issued, for example, when there
is the impending danger of a collision or the dis‐
tance to the vehicle ahead is too small.
Acute warning with braking function
Warning of the imminent danger of a collision
when the vehicle approaches another object at
a relatively high differential speed.
The acute warning prompts the driver to inter‐
vene and, if there is the danger of a collision, is
accompanied by a braking intervention.
The braking intervention is executed with lim‐
ited braking force and for a brief period only. The
intervention will not bring the vehicle to a com‐
plete standstill.
The braking intervention is executed only if DSC
Dynamic Stability Control is switched on.
Adapting your speed and driving style
The acute warning does not relieve the
driver of the responsibility to adapt his or her
driving speed and style to the traffic condi‐
tions.◀
The braking intervention can be interrupted by
pressing on the accelerator or by actively mov‐
ing the steering wheel.
When towing or tow-starting the vehicle, switch
off the collision warning with braking function to
prevent undesired interventions.
The braking function is deactivated if the DSC
Dynamic Stability Control or DTC Dynamic
Traction Control is deactivated.
Display in the instrument cluster
The collision warning can be issued in the in‐
strument cluster, in the Head-up Display, and
acoustically.Seite 102ControlsSafety102
Online Edition for Part no. 01 40 2 902 827 - 07 12 490
Page 106 of 232
Display
Adjustments via the iDrive
With Night Vision switched on:1.Activate Night Vision with pedestrian detec‐
tion.2.Press the controller.3.Open the desired menu item.▷ "Brightness"▷ "Contrast"▷ "Pedestrian detection"
The settings are stored for the remote control
currently in use.
Camera
Rain, dirt, snow, or ice can impair camera oper‐
ation.
The camera is automatically heated when the
external temperatures are low.
The camera is automatically cleaned together
with the headlamps.
Clean the lens, refer to page 206.
Lane departure warning
The concept
Starting at a specific speed, this system alerts
you when the vehicle on streets with lane mark‐
ings is about to leave the lane. Depending on the
country-specific version of the vehicle, the
speed is between 35 mph/55 km/h and
45 mph/70 km/h. When switching on the system
below this speed, a message appears in the in‐
strument cluster.
The steering wheel begins vibrating gently in the
event of warnings. The time of the warning may
vary depending on the current driving situation.
The system does not provide a warning if the
turn signal is set before leaving the lane.
Notes Personal responsibility
The system cannot serve as a substitute
for the driver's personal judgment of the course
of the road and the traffic situation.
In the event of a warning, do not jerk the steering
wheel, as you may lose control of the vehicle.◀
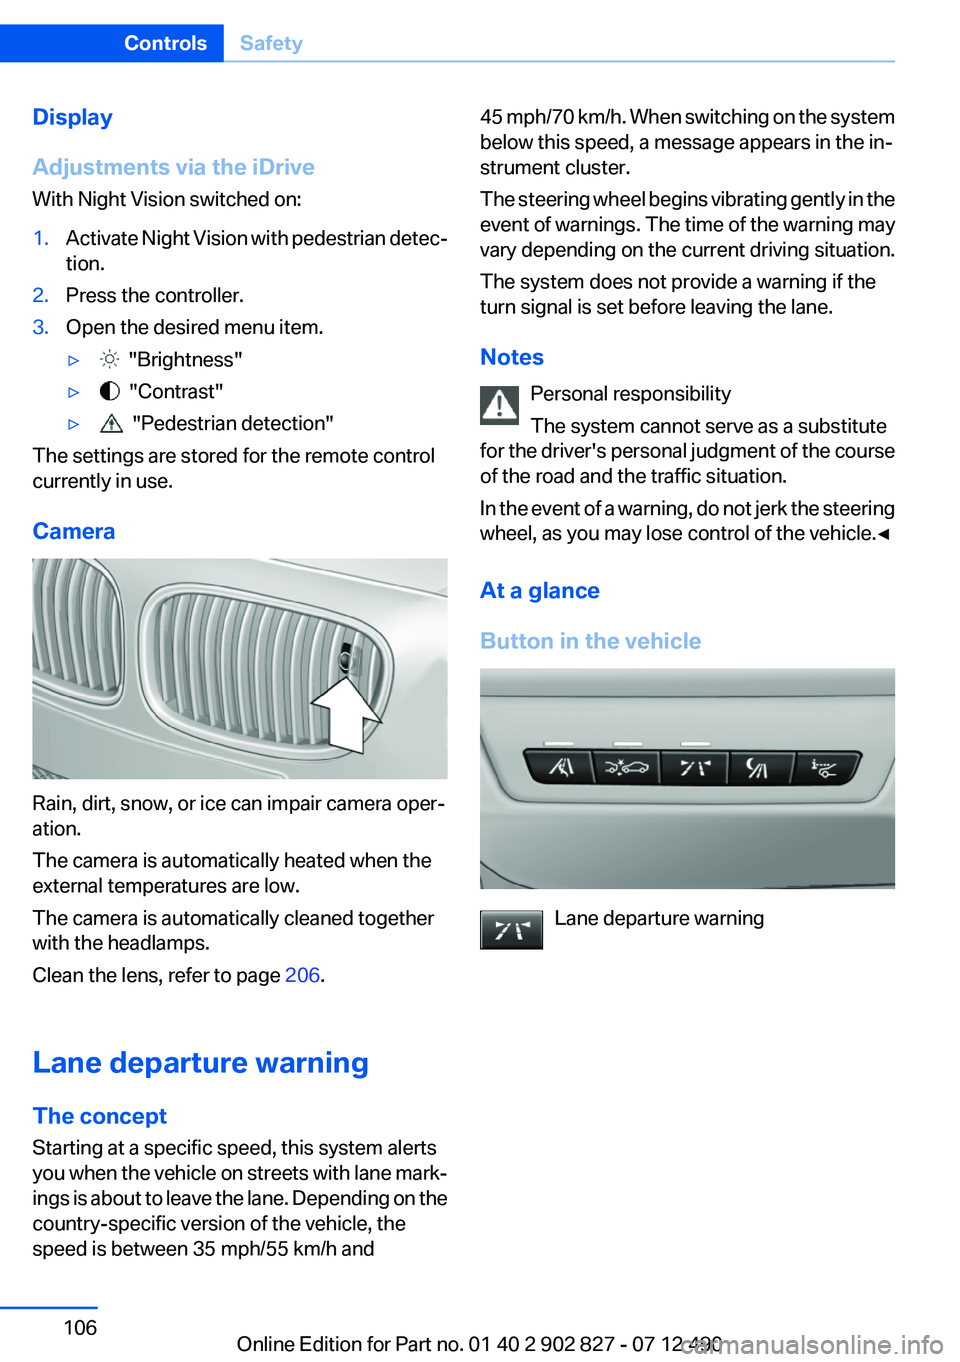
At a glance
Button in the vehicle
Lane departure warning
Seite 106ControlsSafety106
Online Edition for Part no. 01 40 2 902 827 - 07 12 490
Page 146 of 232
rearview mirror. The required distance de‐
pends on the manual transmitter.4.Simultaneously press and hold the button of
the desired function on the hand-held trans‐
mitter and the button to be programmed on
the interior rearview mirror. The LED on the
interior rearview mirror will begin flashing
slowly.5.Release both buttons as soon as the LED
flashes more rapidly. When the LED is flash‐
ing faster, this indicates that the button on
the interior rearview mirror has been pro‐
grammed.
If the LED does not flash faster after at least
60 seconds, change the distance between
the interior rearview mirror and the hand-
held transmitter and repeat the step. Several
more attempts at different distances may be
necessary. Wait at least 15 seconds be‐
tween attempts.
Canada: if programming with the hand-held
transmitter was interrupted, hold down the
interior rearview mirror button and repeat‐
edly press and release the hand-held trans‐
mitter button for 2 seconds.6.To program other functions on other but‐
tons, repeat steps 3 to 5.
The systems can be controlled using the interior
rearview mirror buttons.
Special feature of the alternating-code
wireless system
If you are unable to operate the system after re‐
peated programming, please check if the sys‐
tem to be controlled features an alternating-
code system.
Read the system's operating manual, or press
the programmed button on the interior rearview
mirror longer. If the LED on the interior rearview
mirror starts flashing rapidly and then stays lit
constantly for 2 seconds, the system features
an alternating-code system. Flashing and con‐
tinuous illumination of the LED will repeat for
approximately 20 seconds.
For systems with an alternating-code system,
the integrated universal remote control and the
system also have to be synchronized.
Please read the operating manual of the system
being set up for information on how to syn‐
chronize the system.
Synchronizing is easier with the aid of a second
person.
To synchronize:1.Park the vehicle within range of the remote-
controlled system.2.Program the relevant button on the interior
rearview mirror as described.3.Locate and press the synchronizing button
on the system being programmed. You have
approx. 30 seconds for the next step.4.Hold down the programmed button on the
interior rearview mirror for approximately
3 seconds and then release it. If necessary,
repeat this work step up to three times in or‐
der to finish synchronization. Once synchro‐
nization is complete, the programmed func‐
tion will be carried out.
Reprogramming individual buttons
1.Switch on the ignition.2.Press and hold the interior rearview mirror
button to be programmed.3.As soon as the interior rearview mirror LED
starts flashing slowly, hold the hand-held
transmitter for the system to be controlled
approx. 1 to 3 in/2.5 to 8 cm away from the
buttons on the interior rearview mirror. The
required distance depends on the manual
transmitter.4.Likewise, press and hold the button of the
desired function on the hand-held transmit‐
ter.5.Release both buttons as soon as the interior
rearview mirror LED flashes more rapidly.
When the LED is flashing faster, this indi‐
cates that the button on the interior rearview
mirror has been programmed. The systemSeite 146ControlsInterior equipment146
Online Edition for Part no. 01 40 2 902 827 - 07 12 490
Page 147 of 232
can then be controlled by the button on the
interior rearview mirror.
If the LED does not flash faster after at least
60 seconds, change the distance and repeat
the step. Several more attempts at different
distances may be necessary. Wait at least
15 seconds between attempts.
Canada: if programming with the hand-held
transmitter was interrupted, hold down the
interior rearview mirror button and repeat‐
edly press and release the hand-held trans‐
mitter button for 2 seconds.
Controls
Before operation
Before operating a system using the
integrated universal remote control, ensure that
there are no people, animals, or objects within
the range of movement of the remote-controlled
system; otherwise, there is a risk of injury or
damage.
Also follow the safety instructions of the hand-
held transmitter.◀
The system, such as the garage door, can be
operated using the button on the interior rear‐
view mirror while the engine is running or when
the ignition is started. To do this, hold down the
button within receiving range of the system until
the function is activated. The interior rearview
mirror LED stays lit while the wireless signal is
being transmitted.
Deleting stored functions
Press and hold the left and right button on the
interior rearview mirror simultaneously for ap‐
proximately 20 seconds until the LED flashes
rapidly. All stored functions are deleted. The
functions cannot be deleted individually.
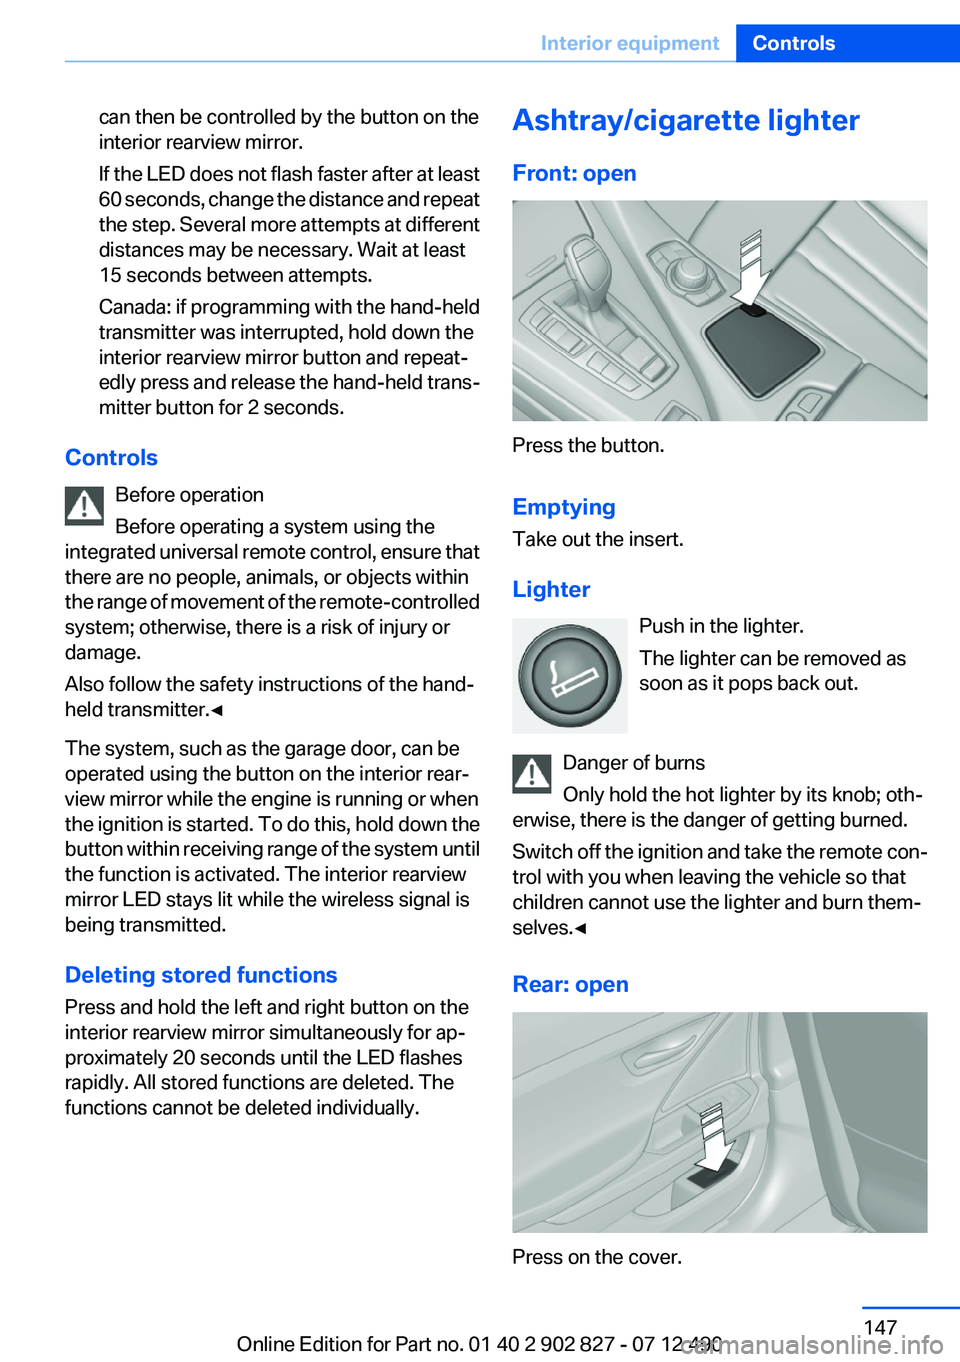
Ashtray/cigarette lighter
Front: open
Press the button.
Emptying
Take out the insert.
Lighter Push in the lighter.
The lighter can be removed as
soon as it pops back out.
Danger of burns
Only hold the hot lighter by its knob; oth‐
erwise, there is the danger of getting burned.
Switch off the ignition and take the remote con‐
trol with you when leaving the vehicle so that
children cannot use the lighter and burn them‐
selves.◀
Rear: open
Press on the cover.
Seite 147Interior equipmentControls147
Online Edition for Part no. 01 40 2 902 827 - 07 12 490
Page 222 of 232
Everything from A to Z
IndexA
ABS, Antilock Brake Sys‐ tem 110
ACC, Active Cruise Control with Stop & Go 118
Activated-charcoal filter 143
Active Blind Spot Detec‐ tion 108
Active Cruise Control with Stop & Go, ACC 118
Active seat, front 47
Active seat ventilation, front 48
Active Steering, integral 113
Adaptive brake assistant 110
Adaptive brake lights, refer to Brake force display 109
Adaptive drive 113
Adaptive light control 88
Additives, oil 187
Adjustments, seats/head re‐ straints 45
After washing vehicle 204
Airbags 91
Airbags, indicator/warning light 92
Air circulation, refer to Recir‐ culated-air mode 142
Air, dehumidifying, refer to Cooling function 142
Air distribution, manual 141
Air flow, automatic climate control 141
Air pressure, tires 173
Air vents, refer to Ventila‐ tion 143
Alarm system 40
Alarm, unintentional 41
All around the center con‐ sole 14 All around the interior rearview
mirror 15
All around the steering wheel 12
ALL program, automatic cli‐ mate control 142
All-season tires, refer to Win‐ ter tires 181
All-wheel-drive 112
Alternating-code hand-held transmitter 146
Alternative oil types 187
Ambient light 90
Antifreeze, washer fluid 67
Antilock Brake System, ABS 110
Anti-slip control, refer to DSC 110
Approved axle load 211
Approved engine oils 187
Armrest, refer to Front center armrest 152
Armrest, refer to Rear center armrest 152
Arrival time 82
Ashtray 147
Ashtray, rear 147
Assistance, Roadside Assis‐ tance 199
Assistance when driving off 110
AUTO H button, refer to Auto‐ matic Hold 63
AUTO intensity 141
Automatic car wash 203
Automatic Cruise Control with Stop & Go 118
Automatic Curb Monitor 52
Automatic deactivation, front passenger airbags 93 Automatic headlamp con‐
trol 87
Automatic Hold 63
Automatic locking 37
Automatic recirculated-air control 142
Automatic Soft Closing, doors 37
Automatic transmission with Steptronic 67
AUTO program, automatic cli‐ mate control 141
AUTO program, intensity 141
Auto Start/Stop function 60
Average fuel consumption 82
Average speed 82
Axle loads, weights 211
B
Backrest curvature, refer to Lumbar support 46
Backrest, seats 45
Backrest, width 46
Backup camera 128
Band-aids, refer to First aid kit 199
Bar for tow-starting/tow‐ ing 201
Battery replacement, vehicle battery 196
Battery replacement, vehicle remote control 30
Battery, vehicle 196
Belts, safety belts 49
Beverage holder, cu‐ pholder 153
Blinds, sun protection 42
BMW Assist, see user's manual for Navigation, Enter‐Seite 222ReferenceEverything from A to Z222
Online Edition for Part no. 01 40 2 902 827 - 07 12 490
Page 223 of 232
tainment and Communica‐
tion
BMW Homepage 6
BMW Internet page 6
BMW Maintenance Sys‐ tem 189
Bottle holder, refer to Cu‐ pholder 153
Brake assistant 110
Brake assistant, adaptive 110
Brake discs, breaking in 158
Brake force display 109
Brake lamps, brake force dis‐ play 109
Brake lamps, bulb replace‐ ment 194
Brake lights, adaptive 109
Brake pads, breaking in 158
Braking, notes 159
Breakdown assis‐ tance 198, 199
Breaking in 158
Brightness of Control Dis‐ play 85
Bulb replacement 192
Bulb replacement, front 0
Bulb replacement, rear 194
Bulbs and lamps 192
Button, RES 120
Button, Start/Stop 58
Bypassing, refer to Jump- starting 199
C
California Proposition 65 Warning 7
Camera, backup camera 129
Camera, care 206
Camera, Side View 133
Camera, Top View 131
Can holder, refer to Cu‐ pholder 153
Car battery 196
Car care products 204
Care, displays 206 Care, vehicle 204
Cargo 161
Cargo area, enlarging 148
Cargo area lid 37
Cargo area, storage compart‐ ments 154
Cargo straps, securing cargo 162
Car key, refer to Remote con‐ trol 30
Carpet, care 205
Car wash 203
Catalytic converter, refer to Hot exhaust system 158
CBS Condition Based Serv‐ ice 189
CD/Multimedia, see user's manual for Navigation, Enter‐
tainment and Communica‐
tion
Center console 14
Central locking system 33
Central screen, refer to Control Display 16
Changes, technical, refer to Safety 7
Changing parts 192
Changing wheels 195
Changing wheels/tires 180
Check Control 74
Children, seating position 54
Children, transporting safely 54
Child restraint fixing sys‐ tem 54
Child restraint fixing system LATCH 55
Child restraint fixing systems, mounting 54
Child safety locks 57
Child seat, mounting 54
Child seats 54
Chrome parts, care 205
Cigarette lighter 147
Cleaning, displays 206
Climate control 140 Climate control wind‐
shield 159
Clock 77
Closing/opening from in‐ side 37
Closing/opening via door lock 36
Closing/opening with remote control 34
Clothes hooks 153
Collision warning 99, 101
Combination switch, refer to Turn signals 64
Combination switch, refer to Wiper system 65
Comfort Access 38
COMFORT program, Driving Experience Switch 116
Computer 81
Condensation on win‐ dows 141
Condensation under the vehi‐ cle 160
Condition Based Service CBS 189
Configure driving mode 116
Confirmation signal 35
ConnectedDrive, see user's manual for Navigation, Enter‐
tainment and Communica‐
tion
Control Display 16
Control Display, settings 83
Controller 16
Control systems, driving sta‐ bility 110
Convenient opening 34
Coolant 188
Coolant temperature 77
Cooling function 142
Cooling, maximum 141
Cooling system 188
Corrosion on brake discs 160
Cruise control 124
Cruise control, active with Stop & Go 118 Seite 223Everything from A to ZReference223
Online Edition for Part no. 01 40 2 902 827 - 07 12 490
Page 224 of 232

Cruising range 78
Cupholder 153
Current fuel consumption 78
D
Damage, tires 179
Damping control, dy‐ namic 113
Data, technical 210
Date 77
Daytime running lights 87
Defrosting, refer to Windows, defrosting 141
Dehumidifying, air 142
Destination distance 82
Digital clock 77
Dimensions 210
Dimmable exterior mirrors 52
Dimmable interior rearview mirror 53
Direction indicator, refer to Turn signals 64
Display in windshield 138
Display lighting, refer to Instru‐ ment lighting 89
Displays 70, 71
Displays, cleaning 206
Disposal, vehicle battery 196
Distance control, refer to PDC 126
Distance, selecting for ACC 120
Distance to destination 82
Divided screen view, split screen 20
Door lock, refer to Remote control 30
Doors, Automatic Soft Clos‐ ing 37
Downhill control 112
Drive-off assistant 110
Drive-off assistant, refer to DSC 110
Driving Experience Switch 114 Driving instructions, breaking
in 158
Driving mode 114
Driving notes, general 158
Driving stability control sys‐ tems 110
Driving tips 158
DSC Dynamic Stability Con‐ trol 110
DTC driving dynamics 111
DTC Dynamic Traction Con‐ trol 111
Dynamic Damping Con‐ trol 113
Dynamic Drive 113
Dynamic Stability Control DSC 110
Dynamic Traction Control DTC 111
E
ECO PRO 164
ECO PRO display 164
ECO PRO mode 164
EfficientDynamics 165
Electronic displays, instru‐ ment cluster 71
Electronic Stability Program ESP, refer to DSC 110
Emergency detection, remote control 31
Emergency release, door lock 36
Emergency release, fuel filler flap 170
Emergency Request 198
Emergency service, refer to Roadside Assistance 199
Emergency start function, en‐ gine start 31
Emergency unlocking, trunk lid 38
Energy Control 78
Energy recovery 78 Engine, automatic Start/Stop
function 60
Engine, automatic switch- off 60
Engine compartment 184
Engine compartment, working in 184
Engine coolant 188
Engine oil 186
Engine oil, adding 187
Engine oil additives 187
Engine oil change 187
Engine oil filler neck 187
Engine oil temperature 77
Engine oil types, alterna‐ tive 187
Engine oil types, ap‐ proved 187
Engine start during malfunc‐ tion 31
Engine start, jump-start‐ ing 199
Engine start, refer to Starting the engine 59
Engine stop 59
Engine temperature 77
Entering/exiting vehicle, assis‐ tance, steering wheel 53
Entering a car wash 203
Equipment, interior 145
ESP Electronic Stability Pro‐ gram, refer to DSC 110
Exchanging wheels/tires 180
Exhaust system 158
Exterior mirror, automatic dim‐ ming feature 52
Exterior mirrors 51
External start 199
External temperature dis‐ play 77
External temperature warn‐ ing 77
Eyes for securing cargo 162 Seite 224ReferenceEverything from A to Z224
Online Edition for Part no. 01 40 2 902 827 - 07 12 490