2013 BMW 650I CONVERTIBLE wipers
[x] Cancel search: wipersPage 13 of 240
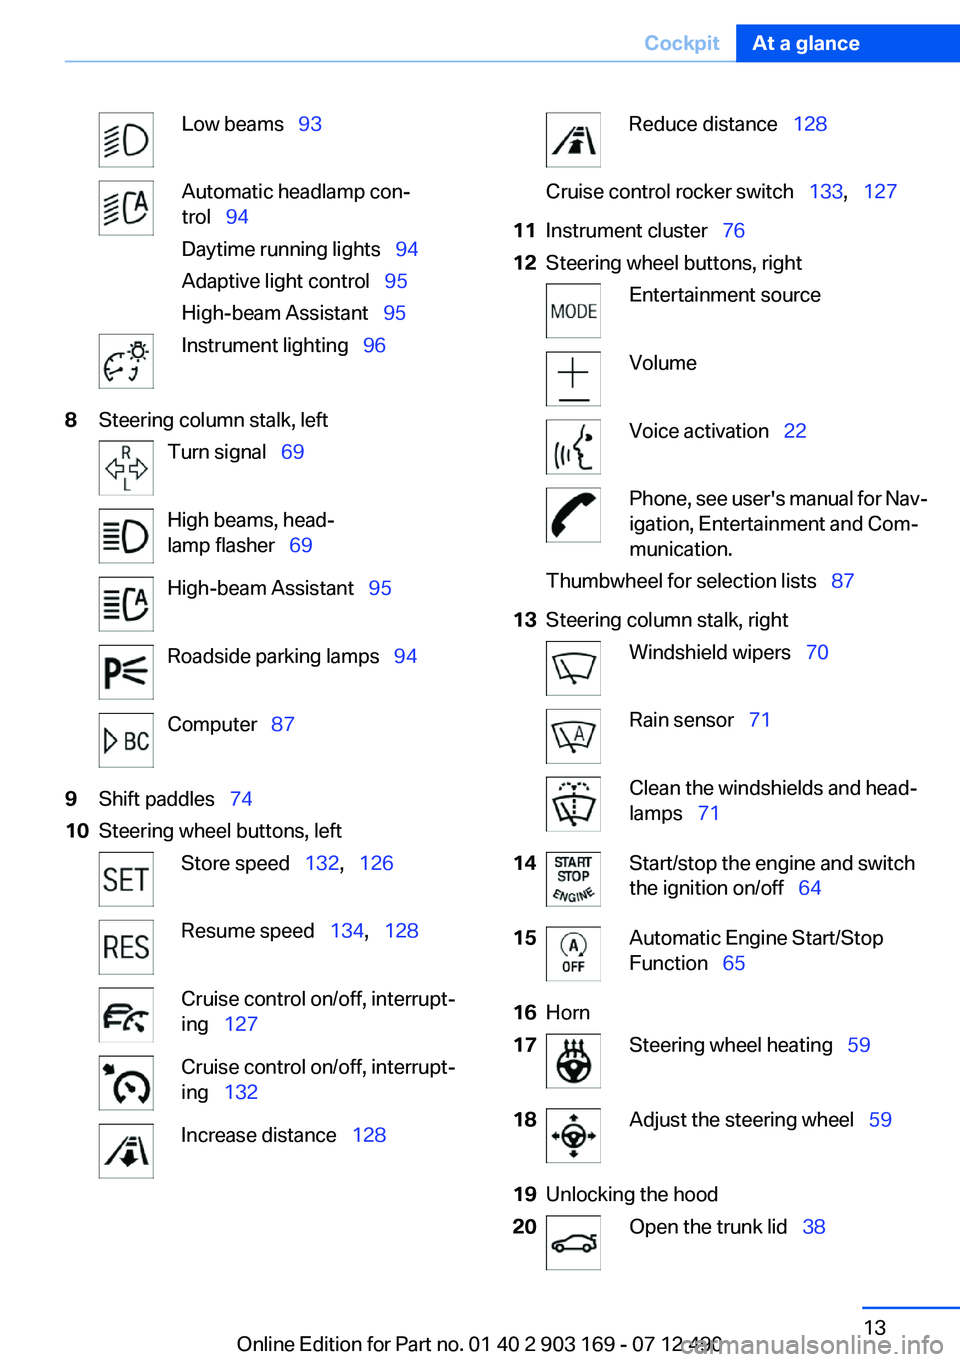
Low beams 93Automatic headlamp con‐
trol 94
Daytime running lights 94
Adaptive light control 95
High-beam Assistant 95Instrument lighting 968Steering column stalk, leftTurn signal 69High beams, head‐
lamp flasher 69High-beam Assistant 95Roadside parking lamps 94Computer 879Shift paddles 7410Steering wheel buttons, leftStore speed 132, 126Resume speed 134, 128Cruise control on/off, interrupt‐
ing 127Cruise control on/off, interrupt‐
ing 132Increase distance 128Reduce distance 128Cruise control rocker switch 133, 12711Instrument cluster 7612Steering wheel buttons, rightEntertainment sourceVolumeVoice activation 22Phone, see user's manual for Nav‐
igation, Entertainment and Com‐
munication.Thumbwheel for selection lists 8713Steering column stalk, rightWindshield wipers 70Rain sensor 71Clean the windshields and head‐
lamps 7114Start/stop the engine and switch
the ignition on/off 6415Automatic Engine Start/Stop
Function 6516Horn17Steering wheel heating 5918Adjust the steering wheel 5919Unlocking the hood20Open the trunk lid 38Seite 13CockpitAt a glance13
Online Edition for Part no. 01 40 2 903 169 - 07 12 490
Page 70 of 240
To switch off manually, press the lever to the re‐
sistance point.
Unusually rapid flashing of the indicator lamp in‐
dicates that a turn signal bulb has failed.
Triple turn signal activation
Press the lever to the resistance point.
The turn signal flashes three times.
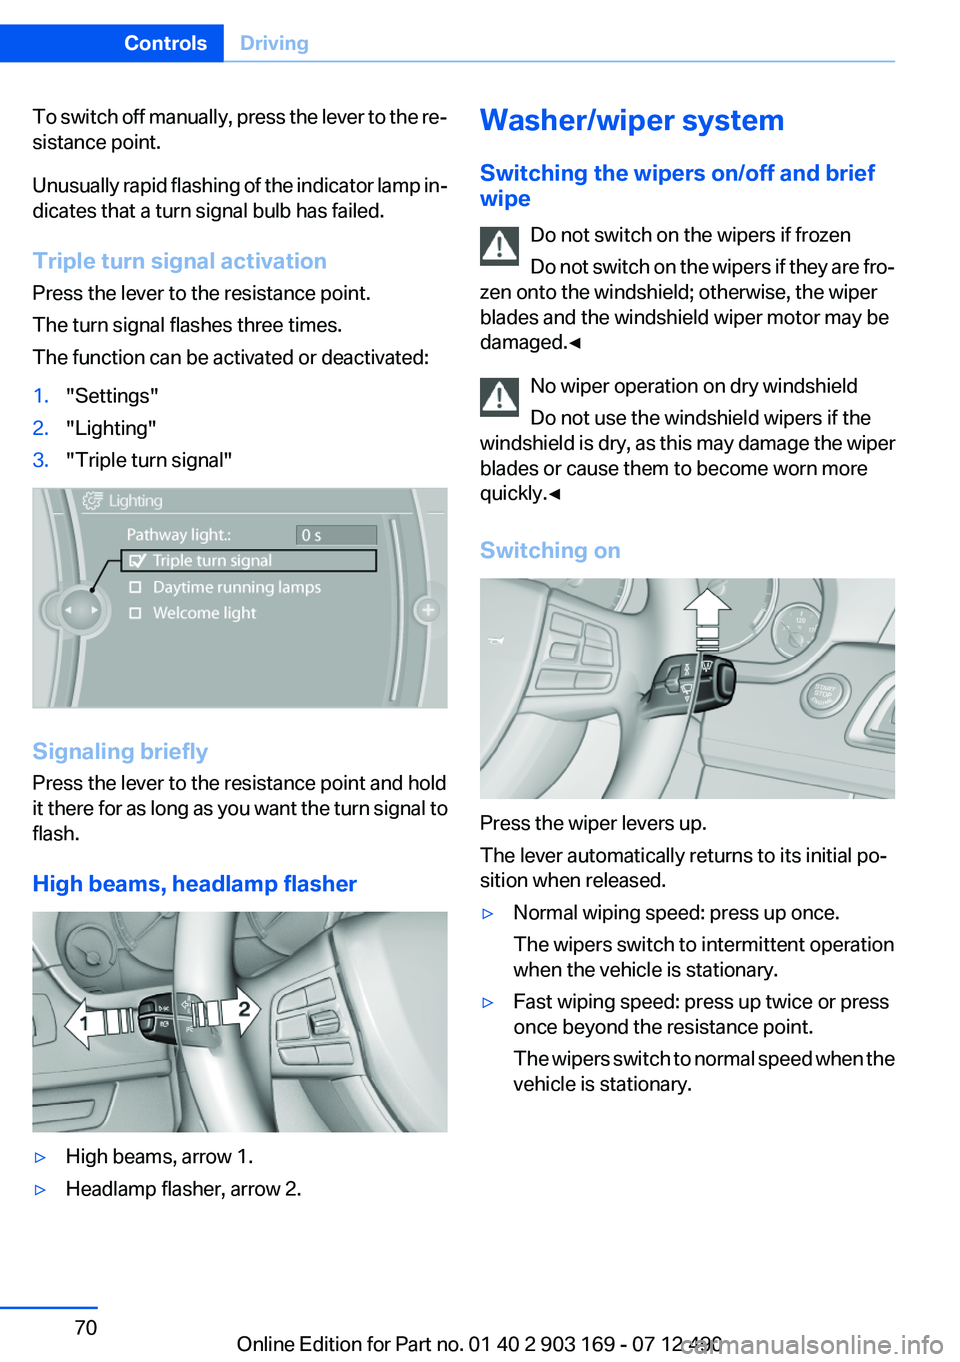
The function can be activated or deactivated:1."Settings"2."Lighting"3."Triple turn signal"
Signaling briefly
Press the lever to the resistance point and hold
it there for as long as you want the turn signal to
flash.
High beams, headlamp flasher
▷High beams, arrow 1.▷Headlamp flasher, arrow 2.Washer/wiper system
Switching the wipers on/off and brief
wipe
Do not switch on the wipers if frozen
Do not switch on the wipers if they are fro‐
zen onto the windshield; otherwise, the wiper
blades and the windshield wiper motor may be
damaged.◀
No wiper operation on dry windshield
Do not use the windshield wipers if the
windshield is dry, as this may damage the wiper
blades or cause them to become worn more
quickly.◀
Switching on
Press the wiper levers up.
The lever automatically returns to its initial po‐
sition when released.
▷Normal wiping speed: press up once.
The wipers switch to intermittent operation
when the vehicle is stationary.▷Fast wiping speed: press up twice or press
once beyond the resistance point.
The wipers switch to normal speed when the
vehicle is stationary.Seite 70ControlsDriving70
Online Edition for Part no. 01 40 2 903 169 - 07 12 490
Page 71 of 240
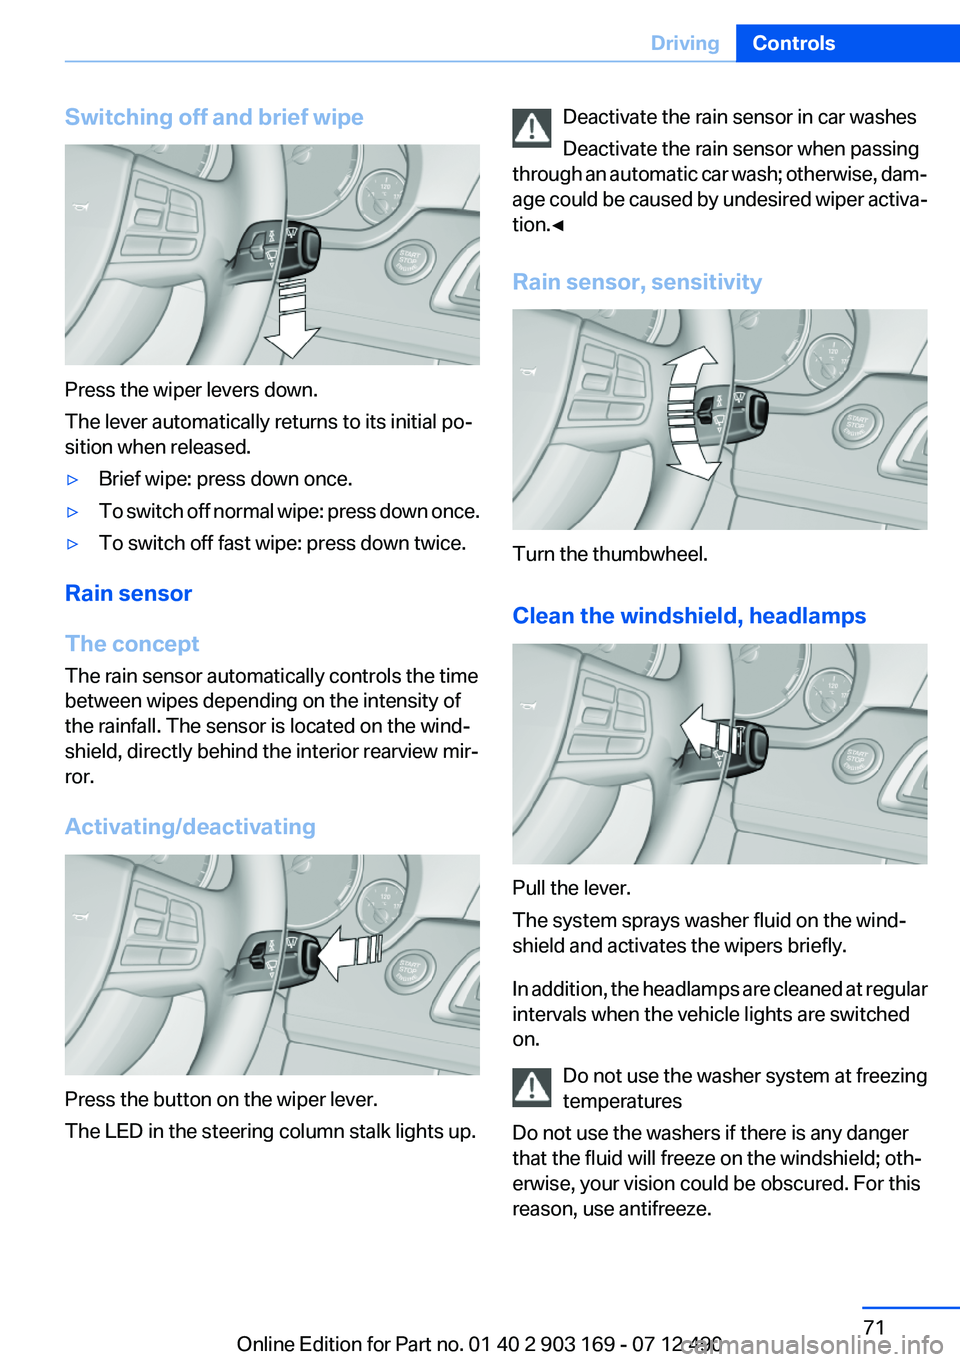
Switching off and brief wipe
Press the wiper levers down.
The lever automatically returns to its initial po‐
sition when released.
▷Brief wipe: press down once.▷To switch off normal wipe: press down once.▷To switch off fast wipe: press down twice.
Rain sensor
The concept
The rain sensor automatically controls the time
between wipes depending on the intensity of
the rainfall. The sensor is located on the wind‐
shield, directly behind the interior rearview mir‐
ror.
Activating/deactivating
Press the button on the wiper lever.
The LED in the steering column stalk lights up.
Deactivate the rain sensor in car washes
Deactivate the rain sensor when passing
through an automatic car wash; otherwise, dam‐
age could be caused by undesired wiper activa‐
tion.◀
Rain sensor, sensitivity
Turn the thumbwheel.
Clean the windshield, headlamps
Pull the lever.
The system sprays washer fluid on the wind‐
shield and activates the wipers briefly.
In addition, the headlamps are cleaned at regular
intervals when the vehicle lights are switched
on.
Do not use the washer system at freezing
temperatures
Do not use the washers if there is any danger
that the fluid will freeze on the windshield; oth‐
erwise, your vision could be obscured. For this
reason, use antifreeze.
Seite 71DrivingControls71
Online Edition for Part no. 01 40 2 903 169 - 07 12 490
Page 72 of 240
Avoid using the washer when the reservoir is
empty; otherwise, you could damage the
pump.◀
Windshield washer nozzles
The windshield washer nozzles are automati‐
cally heated while the ignition is switched on.
Fold-out position of the wipers
Required when changing the wiper blades or
under frosty conditions, for example.1.Switch off the ignition.2.Under frosty conditions, ensure that the
wiper blades are not frozen onto the wind‐
shield.3.Press the wiper lever up beyond the point of
resistance and hold it for approx. 3 seconds,
until the wiper remains in a nearly vertical
position.
After the wipers are folded back down, the wiper
system must be reactivated.
Fold the wipers back down
Before switching the ignition on, fold the
wipers back down to the windshield; otherwise,
the wipers may become damaged when they are
switched on.◀
1.Switch on the ignition.2.Press the wiper levers down. The wipers
move to their resting position and are ready
for operation.
Washer fluid
General information Antifreeze for washer fluid
Antifreeze is flammable. Therefore, keep
it away from sources of ignition.
Only keep it in the closed original container and
inaccessible to children.
Follow the instructions on the container.◀
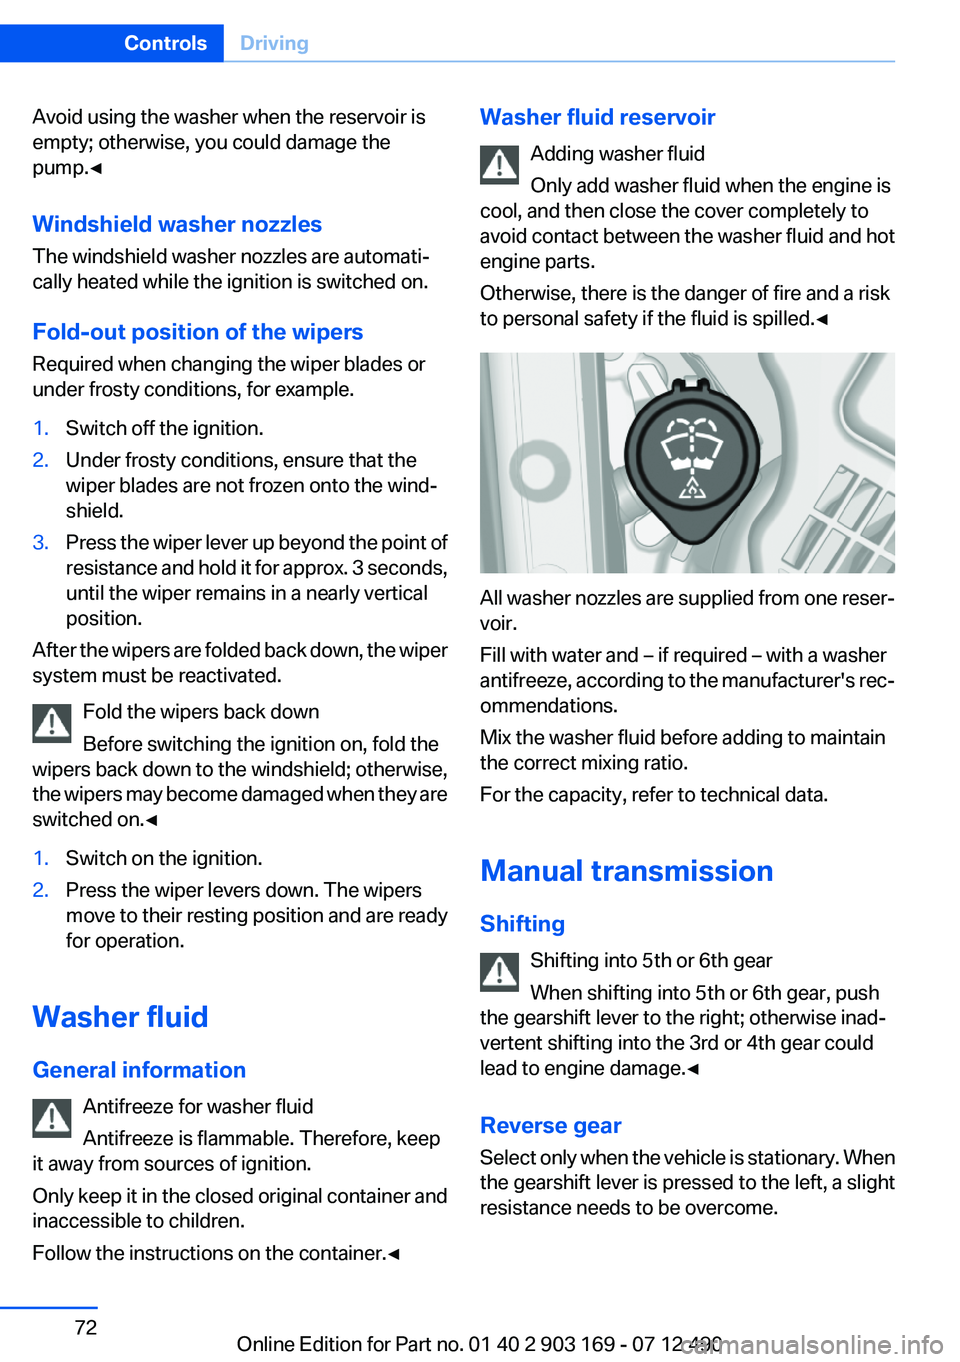
Washer fluid reservoir
Adding washer fluid
Only add washer fluid when the engine is
cool, and then close the cover completely to
avoid contact between the washer fluid and hot
engine parts.
Otherwise, there is the danger of fire and a risk
to personal safety if the fluid is spilled.◀
All washer nozzles are supplied from one reser‐
voir.
Fill with water and – if required – with a washer
antifreeze, according to the manufacturer's rec‐
ommendations.
Mix the washer fluid before adding to maintain
the correct mixing ratio.
For the capacity, refer to technical data.
Manual transmission
Shifting Shifting into 5th or 6th gear
When shifting into 5th or 6th gear, push
the gearshift lever to the right; otherwise inad‐
vertent shifting into the 3rd or 4th gear could
lead to engine damage.◀
Reverse gear
Select only when the vehicle is stationary. When
the gearshift lever is pressed to the left, a slight
resistance needs to be overcome.
Seite 72ControlsDriving72
Online Edition for Part no. 01 40 2 903 169 - 07 12 490
Page 198 of 240
Replacing componentsVehicle equipment
All standard, country-specific and optional
equipment that is offered in the model series is
described in this chapter. Therefore, equipment
is also described that is not available in a vehicle,
e. g., because of the selected optional equip‐
ment or country variant. This also applies for
safety-related functions and systems.
Onboard vehicle tool kit
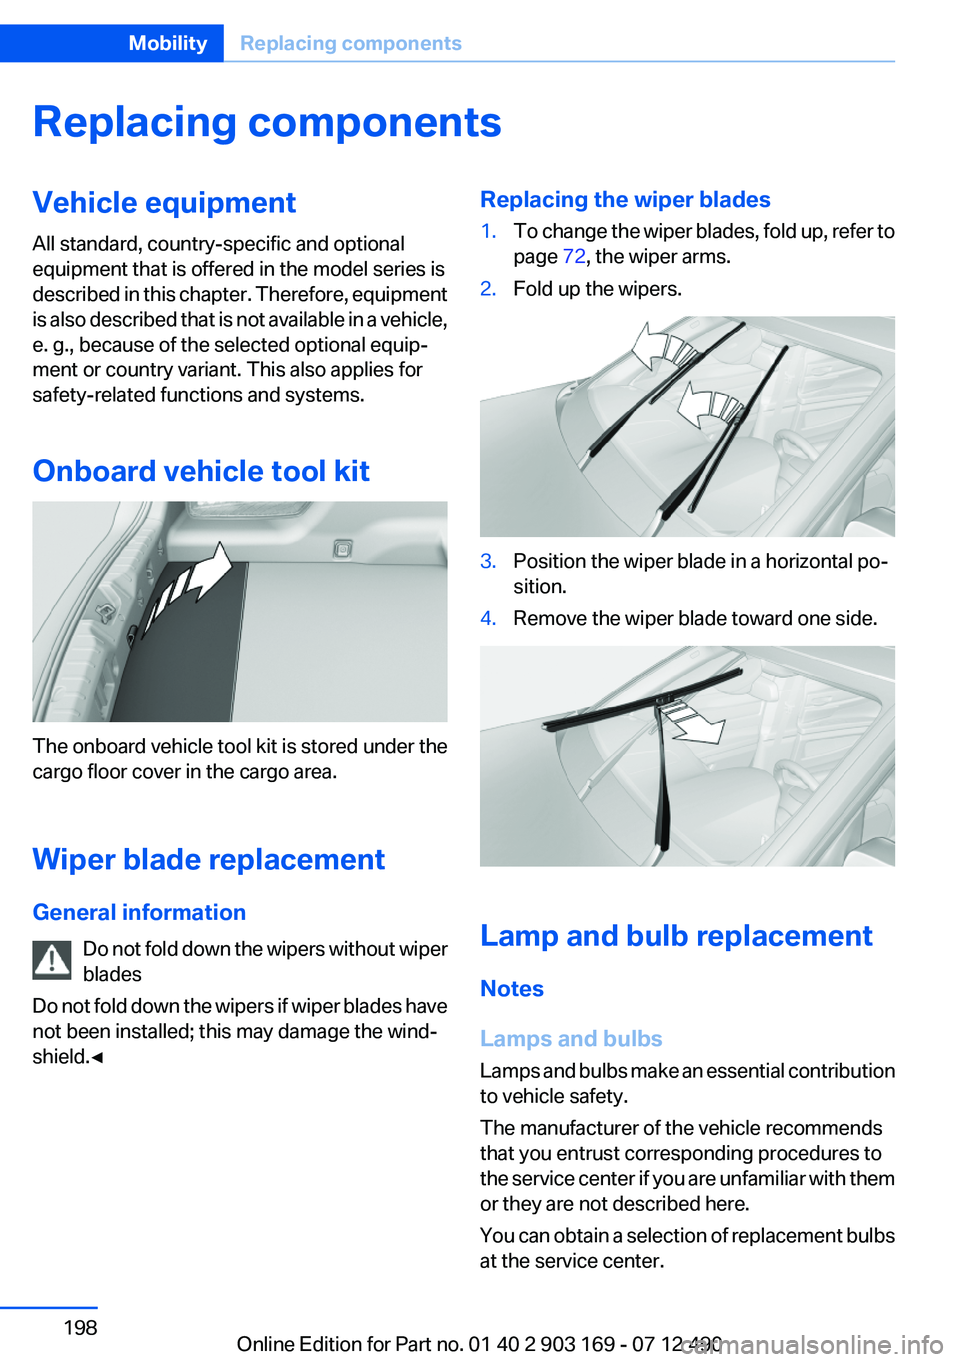
The onboard vehicle tool kit is stored under the
cargo floor cover in the cargo area.
Wiper blade replacement
General information Do not fold down the wipers without wiper
blades
Do not fold down the wipers if wiper blades have
not been installed; this may damage the wind‐
shield.◀
Replacing the wiper blades1.To change the wiper blades, fold up, refer to
page 72, the wiper arms.2.Fold up the wipers.3.Position the wiper blade in a horizontal po‐
sition.4.Remove the wiper blade toward one side.
Lamp and bulb replacement
Notes
Lamps and bulbs
Lamps and bulbs make an essential contribution
to vehicle safety.
The manufacturer of the vehicle recommends
that you entrust corresponding procedures to
the service center if you are unfamiliar with them
or they are not described here.
You can obtain a selection of replacement bulbs
at the service center.
Seite 198MobilityReplacing components198
Online Edition for Part no. 01 40 2 903 169 - 07 12 490
Page 207 of 240
Starting the engine
Never use spray fluids to start the engine.1.Start the engine of the assisting vehicle and
let it run for several minutes at an increased
idle speed.2.Start the engine of the vehicle being started
in the usual way.
If the first starting attempt is not successful,
wait a few minutes before making another
attempt in order to allow the discharged bat‐
tery to recharge.3.Let both engines run for several minutes.4.Disconnect the jumper cables in the reverse
order.
Check the battery and recharge if necessary.
Tow-starting and towing
Manual transmission
Observe before towing your vehicle
Gearshift lever in neutral position.
Towing When the parking brake is blocked
The parking brake cannot be released
manually.
Do not tow the vehicle with the parking brake
blocked, or the vehicle can be damaged.
Contact your service center.◀
Follow the towing instructions
Follow all towing instructions; otherwise,
vehicle damage or accidents may occur.◀
▷Make sure that the ignition is switched on;
otherwise, the low beams, tail lamps, turn
signals, and windshield wipers may be un‐
available.▷Do not tow the vehicle with the rear axle
tilted, as the front wheels could turn.▷When the engine is stopped, there is no
power assist. Consequently, more force
needs to be applied when braking and steer‐
ing.▷Larger steering wheel movements are re‐
quired.▷The towing vehicle must not be lighter than
the vehicle being towed; otherwise, it will not
be possible to control the vehicle response.
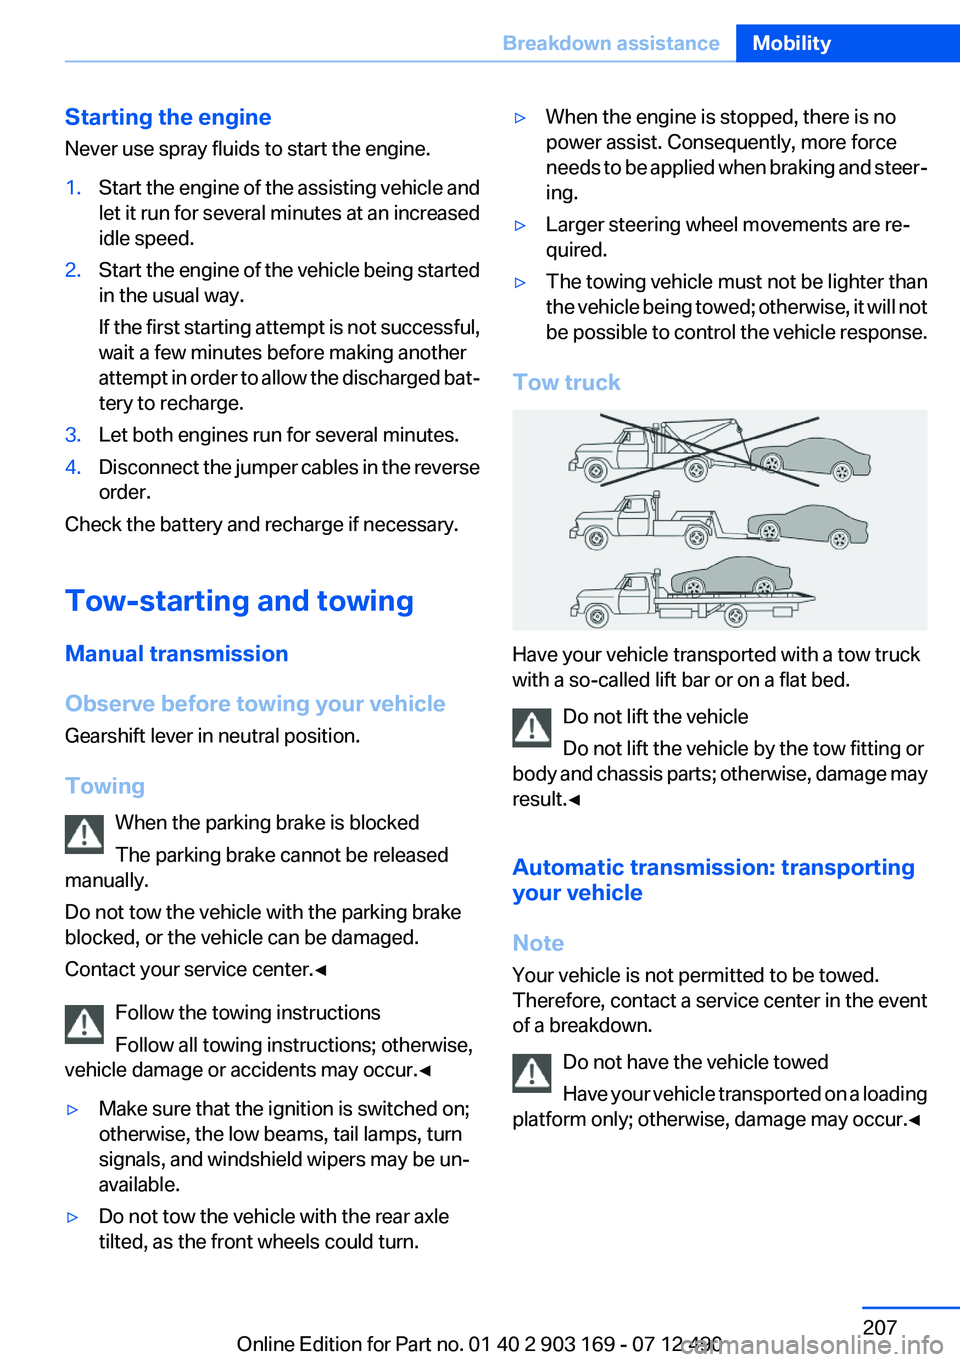
Tow truck
Have your vehicle transported with a tow truck
with a so-called lift bar or on a flat bed.
Do not lift the vehicle
Do not lift the vehicle by the tow fitting or
body and chassis parts; otherwise, damage may
result.◀
Automatic transmission: transporting
your vehicle
Note
Your vehicle is not permitted to be towed.
Therefore, contact a service center in the event
of a breakdown.
Do not have the vehicle towed
Have your vehicle transported on a loading
platform only; otherwise, damage may occur.◀
Seite 207Breakdown assistanceMobility207
Online Edition for Part no. 01 40 2 903 169 - 07 12 490
Page 211 of 240
Manual transmission:1.Release the parking brake.2.Drive into the car wash.3.Shift to neutral.4.Switch the engine off.5.Switch on the ignition.
Automatic transmission:
1.Release parking brake, refer to page 67, and
deactivate Automatic Hold, refer to
page 68.2.Drive into the car wash.3.Depress the brake pedal as needed.4.Engage transmission position N.5.Switch the engine off. In this way, the igni‐
tion remains switched on, and a Check-Con‐
trol message is displayed.
Transmission position P with the igni‐
tion off
When the ignition is switched off, position P
is engaged automatically. When in an auto‐
matic car wash, for example, ensure that the
ignition is not switched off accidentally.◀
The vehicle cannot be locked from the outside
when in transmission position N. A signal is
sounded when an attempt is made to lock the
vehicle.
Transmission position
Transmission position P is engaged automati‐
cally:
▷When the ignition is switched off.▷After approx. 15 minutes.
Headlamps
▷Do not rub dry and do not use abrasive or
caustic cleansers.▷Soak areas that have been soiled e.g. due to
insects, with shampoo and wash off with
water.▷Thaw ice with deicing spray; do not use an
ice scraper.
After washing the vehicle
After washing the vehicle, apply the brakes
briefly to dry them; otherwise, braking action can
be reduced and corrosion of the brake discs can
occur.
Remove all residue completely from the wind‐
shields, otherwise streaking may cause loss of
visibility and wiper noise when the windshield
wipers are operated.
Vehicle care
Car care products
BMW recommends using cleaning and care
products from BMW, since these have been
tested and approved.
Car care and cleaning products
Follow the instructions on the container.
When cleaning the interior, open the doors or
windows.
Only use products intended for cleaning vehi‐
cles.
Cleansers can contain substances that are dan‐
gerous and harmful to your health.◀
Vehicle paint
Regular care contributes to driving safety and
value retention. Environmental influences in
areas with elevated air pollution or natural con‐
taminants, such as tree resin or pollen can affect
the vehicle's paintwork. Tailor the frequency
and extent of your car care to these influences.
Aggressive substances such as spilled fuel, oil,
grease or bird droppings must be removed im‐
mediately to prevent the finish from being al‐
tered or discolored.
Seite 211CareMobility211
Online Edition for Part no. 01 40 2 903 169 - 07 12 490
Page 233 of 240
Exterior mirror, automatic dim‐ming feature 58
Exterior mirrors 57
External start 206
External temperature dis‐ play 83
External temperature warn‐ ing 83
Eyes for securing cargo 168
F
Failure message, refer to Check Control 80
False alarm, refer to Uninten‐ tional alarm 42
Fan, refer to Air flow 149
Fault displays, refer to Check Control 80
Filler neck for engine oil 192
Fine wood, care 213
First aid kit 205
Fitting for towing, refer to Tow fitting 208
Flat tire, changing wheels 201
Flat Tire Monitor FTM 105
Flat tire, Tire Pressure Monitor TPM 102
Flat tire, warning lamp 103, 106
Flooding 165
Floor carpet, care 213
Floor mats, care 213
Fold-out position, windshield wipers 72
Foot brake 165
Front airbags 98
Front center armrest 159
Front fog lamps 96
Front lamps 0
Front passenger airbags, au‐ tomatic deactivation 99
Front passenger airbags, indi‐ cator lamp 100
Front seats 51 Front turn signals, refer to
Light-emitting diodes,
LEDs 199
FTM Flat Tire Monitor 105
Fuel cap 176
Fuel consumption, current 84
Fuel consumption, refer to Average fuel consump‐
tion 88
Fuel filler flap 176
Fuel gauge 83
Fuel quality 178
Fuel, tank capacity 220
Fuse 203
G
Garage door opener, refer to Integrated universal remote
control 153
Gasoline 178
Gasoline quality 178
Gear change, automatic trans‐ mission 73
Gear shift indicator 85
General driving notes 164
Glove compartment 158
Gross vehicle weight, ap‐ proved 219
H
Handbrake, refer to Parking brake 67
Hand-held transmitter, alter‐ nating code 154
Hazard warning flashers 204
HDC Hill Descent Control 120
Headlamp control, auto‐ matic 94
Headlamp courtesy delay fea‐ ture 94
Headlamp courtesy delay fea‐ ture via remote control 35
Headlamp flasher 70
Headlamp glass 199 Headlamps 0
Headlamps, care 211
Headlamp washer system 70
Head restraints 51
Head restraints, front 55
Head-Up Display 146
Head-up Display, care 214
Heavy cargo, stowing 168
Height, seats 51
Height, vehicle 218
High-beam Assistant 95
High beams 70
High beams/low beams, refer to High-beam Assistant 95
Hill Descent Control HDC 120
Hills 166
Hill start assistant, refer to Drive-off assistant 118
Hints 6
Holder for beverages 159
Homepage 6
Hood 189
Horn 12
Hotel function, trunk lid 39
Hot exhaust system 165
HUD Head-Up Display 146
Hydroplaning 165
I
Ice warning, refer to External temperature warning 83
Icy roads, refer to External temperature warning 83
Identification marks, tires 184
Identification number, refer to Important features in the en‐
gine compartment 189
iDrive 16
Ignition key, refer to Remote control 30
Ignition off 63
Ignition on 63
Indication of a flat tire 103 , 106
Individual air distribution 149 Seite 233Everything from A to ZReference233
Online Edition for Part no. 01 40 2 903 169 - 07 12 490