2013 BMW 640I GRAN COUPE change time
[x] Cancel search: change timePage 191 of 305
CD/multimediaVehicle equipment
All standard, country-specific and optional
equipment that is offered in the model series is
described in this chapter. Therefore, equipment
is also described that is not available in a vehicle,
e. g., because of the selected optional equip‐
ment or country variant. This also applies for
safety-related functions and systems.
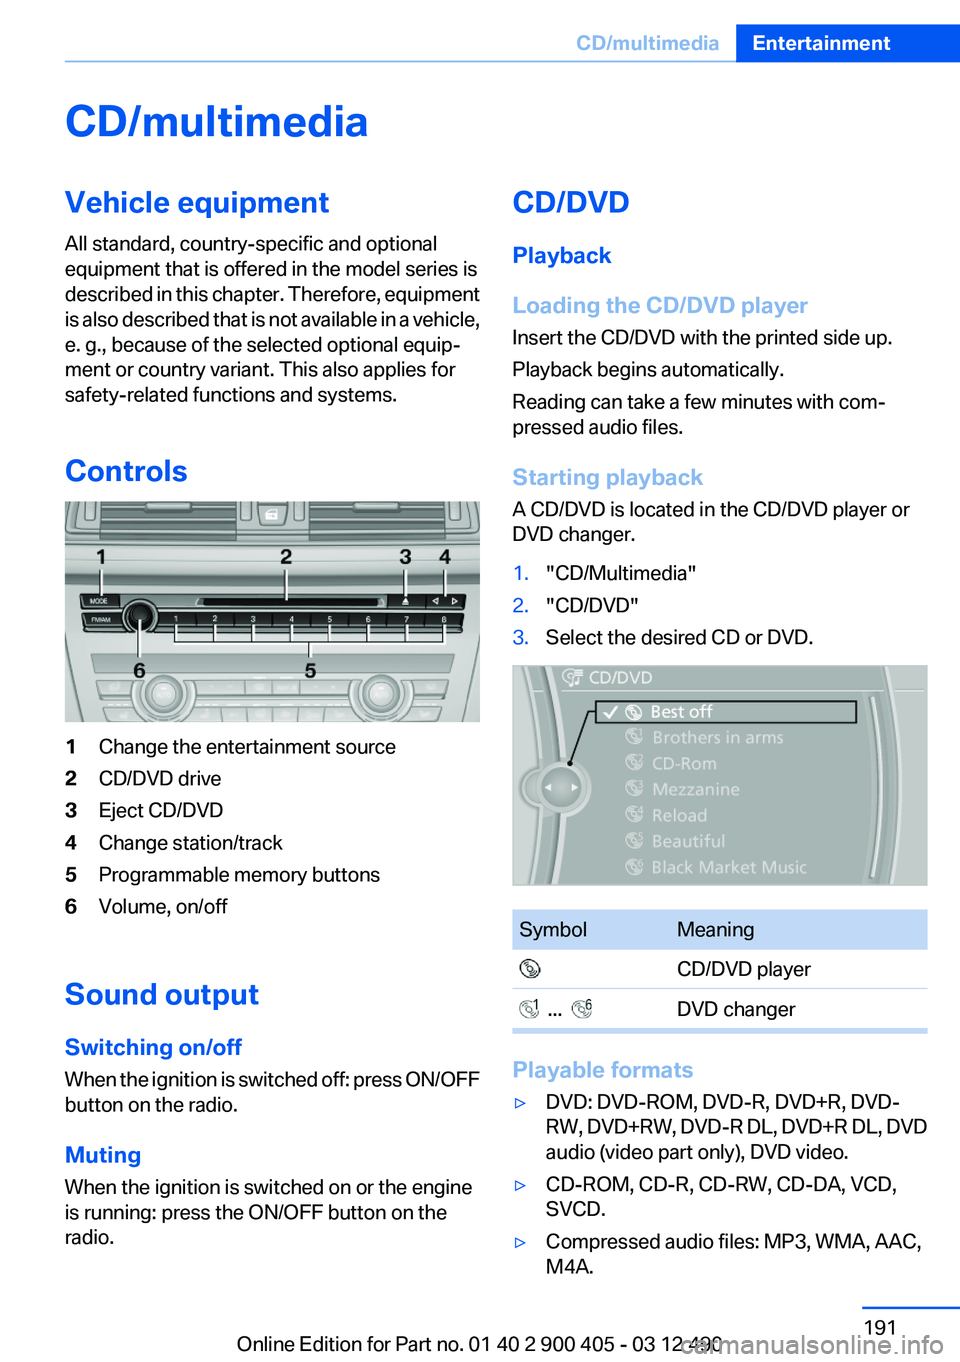
Controls1Change the entertainment source2CD/DVD drive3Eject CD/DVD4Change station/track5Programmable memory buttons6Volume, on/off
Sound output
Switching on/off
When the ignition is switched off: press ON/OFF
button on the radio.
Muting
When the ignition is switched on or the engine
is running: press the ON/OFF button on the
radio.
CD/DVD
Playback
Loading the CD/DVD player
Insert the CD/DVD with the printed side up.
Playback begins automatically.
Reading can take a few minutes with com‐
pressed audio files.
Starting playback
A CD/DVD is located in the CD/DVD player or
DVD changer.1."CD/Multimedia"2."CD/DVD"3.Select the desired CD or DVD.SymbolMeaning CD/DVD player ... DVD changer
Playable formats
▷DVD: DVD-ROM, DVD-R, DVD+R, DVD-
RW, DVD+RW, DVD-R DL, DVD+R DL, DVD
audio (video part only), DVD video.▷CD-ROM, CD-R, CD-RW, CD-DA, VCD,
SVCD.▷Compressed audio files: MP3, WMA, AAC,
M4A.Seite 191CD/multimediaEntertainment191
Online Edition for Part no. 01 40 2 900 405 - 03 12 490
Page 194 of 305
SymbolFunction Fast forward Reverse
In fast forward/reverse: the speed increases ev‐
ery time the controller is pressed. To stop, start
playback.
DVD menu
1.If necessary, turn the controller to open the
video menu.2. "DVD menu"
The DVD menu is displayed. The display de‐
pends on the contents of the DVD.3.To select menu items: move the controller
and press it.
To change to the video menu: turn the controller
and press it.
DVD/VCD settings
For some DVDs, settings can only be made via
the DVD menu; refer also to the information on
the DVD.
Selecting the language
The languages that are available depend on the
DVD.
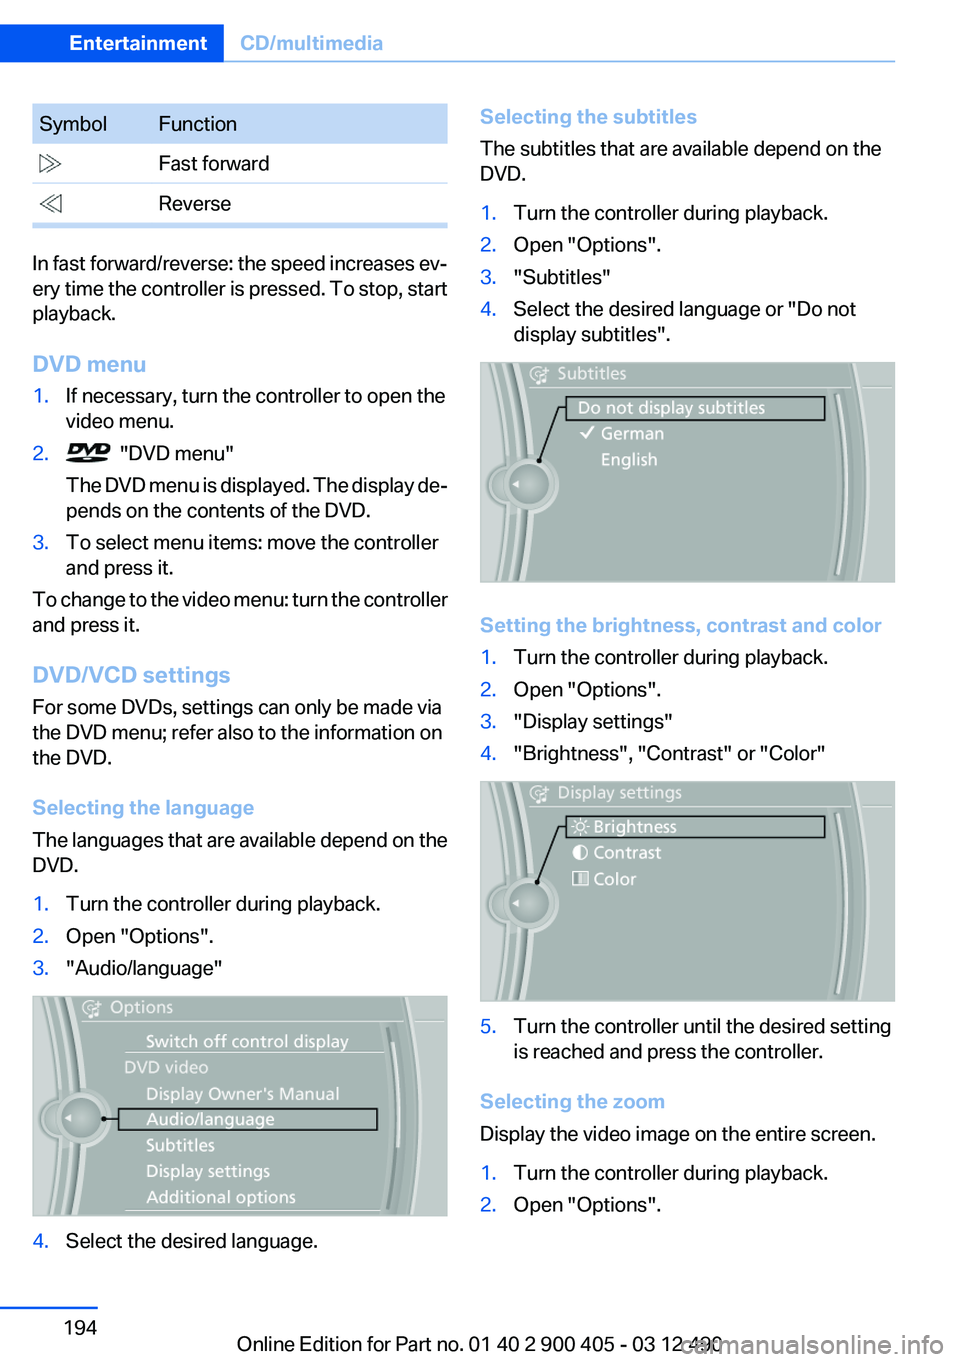
1.Turn the controller during playback.2.Open "Options".3."Audio/language"4.Select the desired language.Selecting the subtitles
The subtitles that are available depend on the
DVD.1.Turn the controller during playback.2.Open "Options".3."Subtitles"4.Select the desired language or "Do not
display subtitles".
Setting the brightness, contrast and color
1.Turn the controller during playback.2.Open "Options".3."Display settings"4."Brightness", "Contrast" or "Color"5.Turn the controller until the desired setting
is reached and press the controller.
Selecting the zoom
Display the video image on the entire screen.
1.Turn the controller during playback.2.Open "Options".Seite 194EntertainmentCD/multimedia194
Online Edition for Part no. 01 40 2 900 405 - 03 12 490
Page 195 of 305
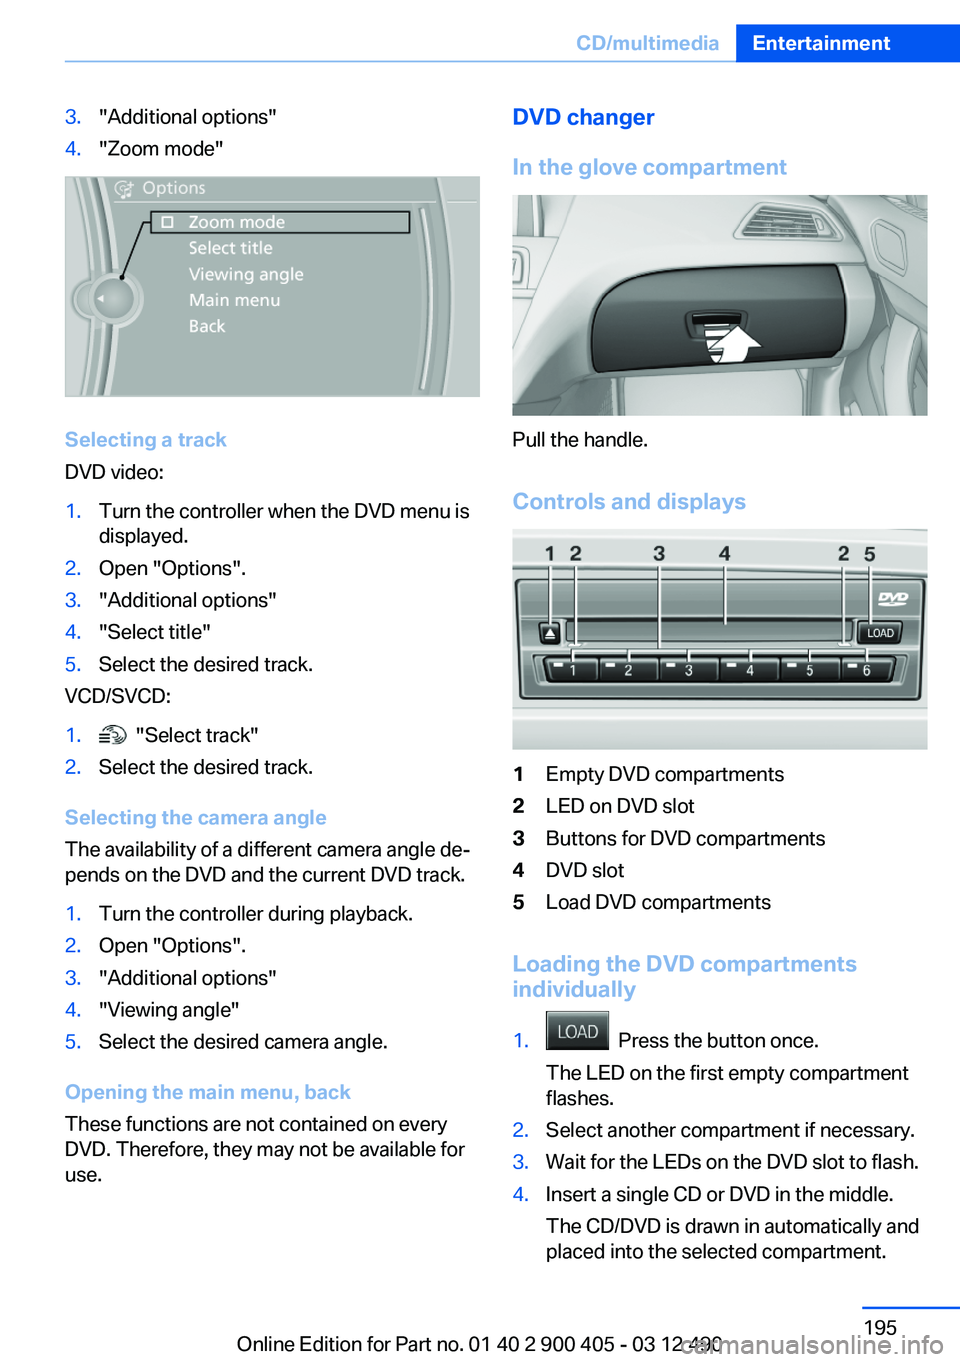
3."Additional options"4."Zoom mode"
Selecting a track
DVD video:
1.Turn the controller when the DVD menu is
displayed.2.Open "Options".3."Additional options"4."Select title"5.Select the desired track.
VCD/SVCD:
1. "Select track"2.Select the desired track.
Selecting the camera angle
The availability of a different camera angle de‐
pends on the DVD and the current DVD track.
1.Turn the controller during playback.2.Open "Options".3."Additional options"4."Viewing angle"5.Select the desired camera angle.
Opening the main menu, back
These functions are not contained on every
DVD. Therefore, they may not be available for
use.
DVD changer
In the glove compartment
Pull the handle.
Controls and displays
1Empty DVD compartments2LED on DVD slot3Buttons for DVD compartments4DVD slot5Load DVD compartments
Loading the DVD compartments
individually
1. Press the button once.
The LED on the first empty compartment
flashes.2.Select another compartment if necessary.3.Wait for the LEDs on the DVD slot to flash.4.Insert a single CD or DVD in the middle.
The CD/DVD is drawn in automatically and
placed into the selected compartment.Seite 195CD/multimediaEntertainment195
Online Edition for Part no. 01 40 2 900 405 - 03 12 490
Page 196 of 305
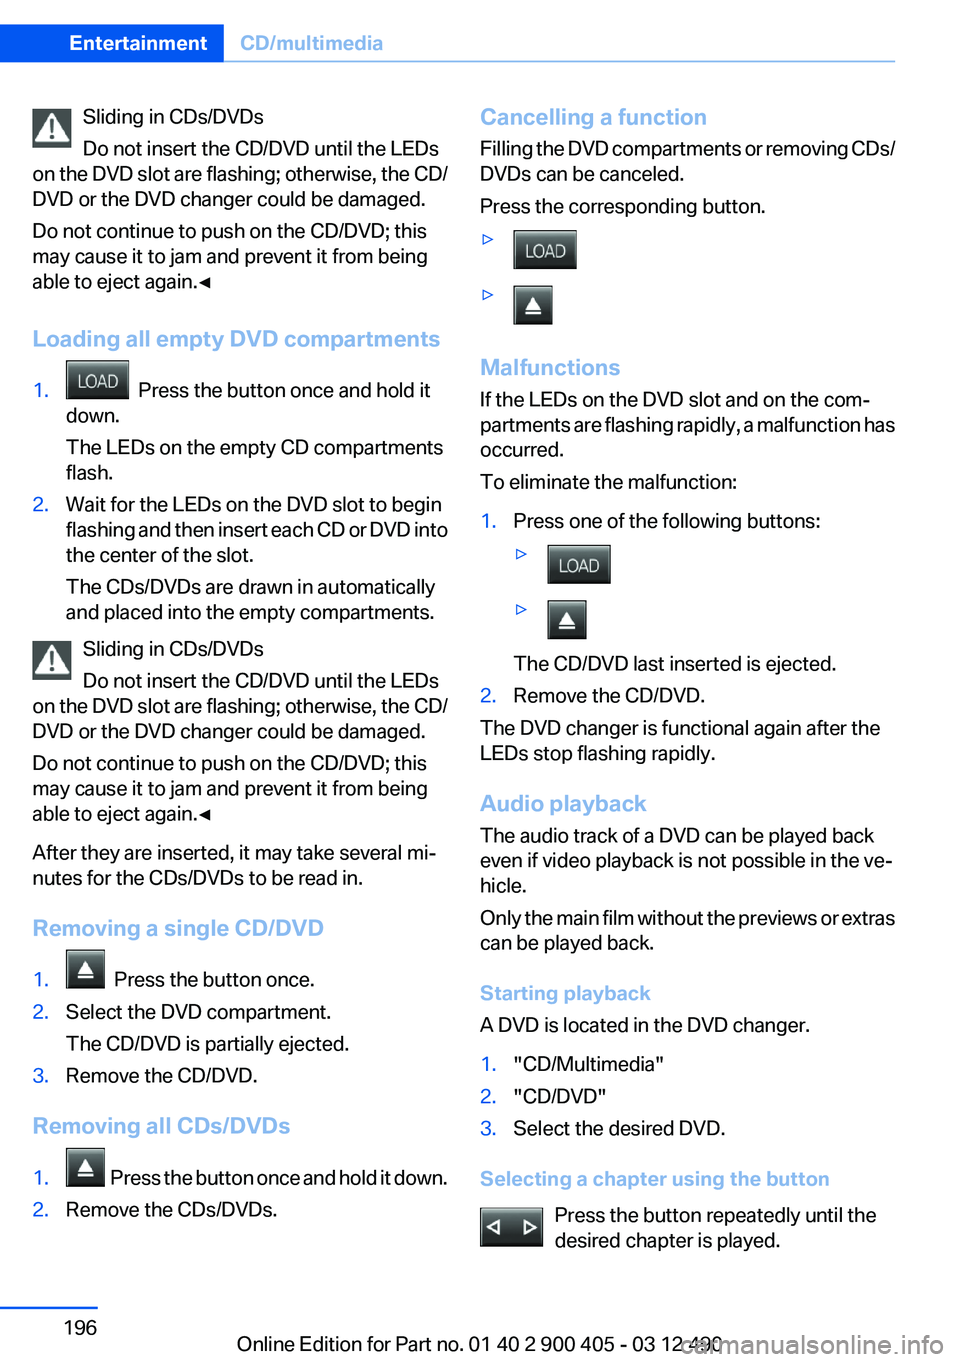
Sliding in CDs/DVDs
Do not insert the CD/DVD until the LEDs
on the DVD slot are flashing; otherwise, the CD/
DVD or the DVD changer could be damaged.
Do not continue to push on the CD/DVD; this
may cause it to jam and prevent it from being
able to eject again.◀
Loading all empty DVD compartments1. Press the button once and hold it
down.
The LEDs on the empty CD compartments
flash.2.Wait for the LEDs on the DVD slot to begin
flashing and then insert each CD or DVD into
the center of the slot.
The CDs/DVDs are drawn in automatically
and placed into the empty compartments.
Sliding in CDs/DVDs
Do not insert the CD/DVD until the LEDs
on the DVD slot are flashing; otherwise, the CD/
DVD or the DVD changer could be damaged.
Do not continue to push on the CD/DVD; this
may cause it to jam and prevent it from being
able to eject again.◀
After they are inserted, it may take several mi‐
nutes for the CDs/DVDs to be read in.
Removing a single CD/DVD
1. Press the button once.2.Select the DVD compartment.
The CD/DVD is partially ejected.3.Remove the CD/DVD.
Removing all CDs/DVDs
1. Press the button once and hold it down.2.Remove the CDs/DVDs.Cancelling a function
Filling the DVD compartments or removing CDs/
DVDs can be canceled.
Press the corresponding button.▷▷
Malfunctions
If the LEDs on the DVD slot and on the com‐
partments are flashing rapidly, a malfunction has
occurred.
To eliminate the malfunction:
1.Press one of the following buttons:▷▷
The CD/DVD last inserted is ejected.
2.Remove the CD/DVD.
The DVD changer is functional again after the
LEDs stop flashing rapidly.
Audio playback
The audio track of a DVD can be played back
even if video playback is not possible in the ve‐
hicle.
Only the main film without the previews or extras
can be played back.
Starting playback
A DVD is located in the DVD changer.
1."CD/Multimedia"2."CD/DVD"3.Select the desired DVD.
Selecting a chapter using the button
Press the button repeatedly until the
desired chapter is played.
Seite 196EntertainmentCD/multimedia196
Online Edition for Part no. 01 40 2 900 405 - 03 12 490
Page 197 of 305
Selecting a chapter using iDrive1."CD/Multimedia"2."CD/DVD"3.Select the desired DVD.4.Select the desired chapter.
Fast forward/reversePress and hold the button.
Selecting the language
The languages that are available depend on the
DVD.
1."CD/Multimedia"2."CD/DVD"3.Select the desired DVD.4.Open "Options".5."Audio/language"6.Select the desired language.
Notes
CD/DVD player and changer Do not remove the cover
BMW CD/DVD players and changers are
officially designated Class 1 laser products. Do
not operate if the cover is damaged; otherwise,
severe eye damage may occur.◀
CDs and DVDs Use of CDs/DVDs
▷Do not use self-recorded CDs/DVDs
with labels applied, as these can be‐
come detached during playback due
to heat buildup and can cause irrepar‐
able damage to the device.▷Only use round CDs/DVDs with a standard
diameter of 4.7 in/12 cm and do not play
CDs/DVDs with an adapter, e.g., single CDs;
otherwise, the CDs or the adapter may jam
and no longer eject.▷Do not use combined CDs/DVDs, e.g., DVD
Plus, as the CDs/DVDs can jam and will no
longer eject.◀
General malfunctions
▷CD/DVD changers and players have been
optimized for performance in vehicles. In
some instances they may be more sensitive
to faulty CDs/DVDs than stationary devices
would be.▷If a CD/DVD cannot be played, first check
whether it has been inserted correctly.
Humidity
High levels of humidity can lead to condensation
on the CD/DVD or the laser's scan lens, and
temporarily prevent playback.
Malfunctions involving individual CDs/
DVDs
If malfunctions occur only with particular CDs/
DVDs, this can be due to one of the following
causes:
Home-recorded CDs/DVDs
▷Possible reasons for malfunctions with
home-recorded CDs/DVDs are inconsistent
data creation or recording processes, or
poor quality or old age of the blank CD/DVD.▷Only label CDs/DVDs on the upper side with
a pen intended for this purpose.
Damage
▷Avoid fingerprints, dust, scratches and
moisture.▷Store CDs/DVDs in a sleeve.▷Do not subject CDs/DVDs to temperatures
over 122 ℉/50 ℃, high humidity or direct
sunlight.Seite 197CD/multimediaEntertainment197
Online Edition for Part no. 01 40 2 900 405 - 03 12 490
Page 201 of 305
Albums
All stored albums, listed in order of their storage
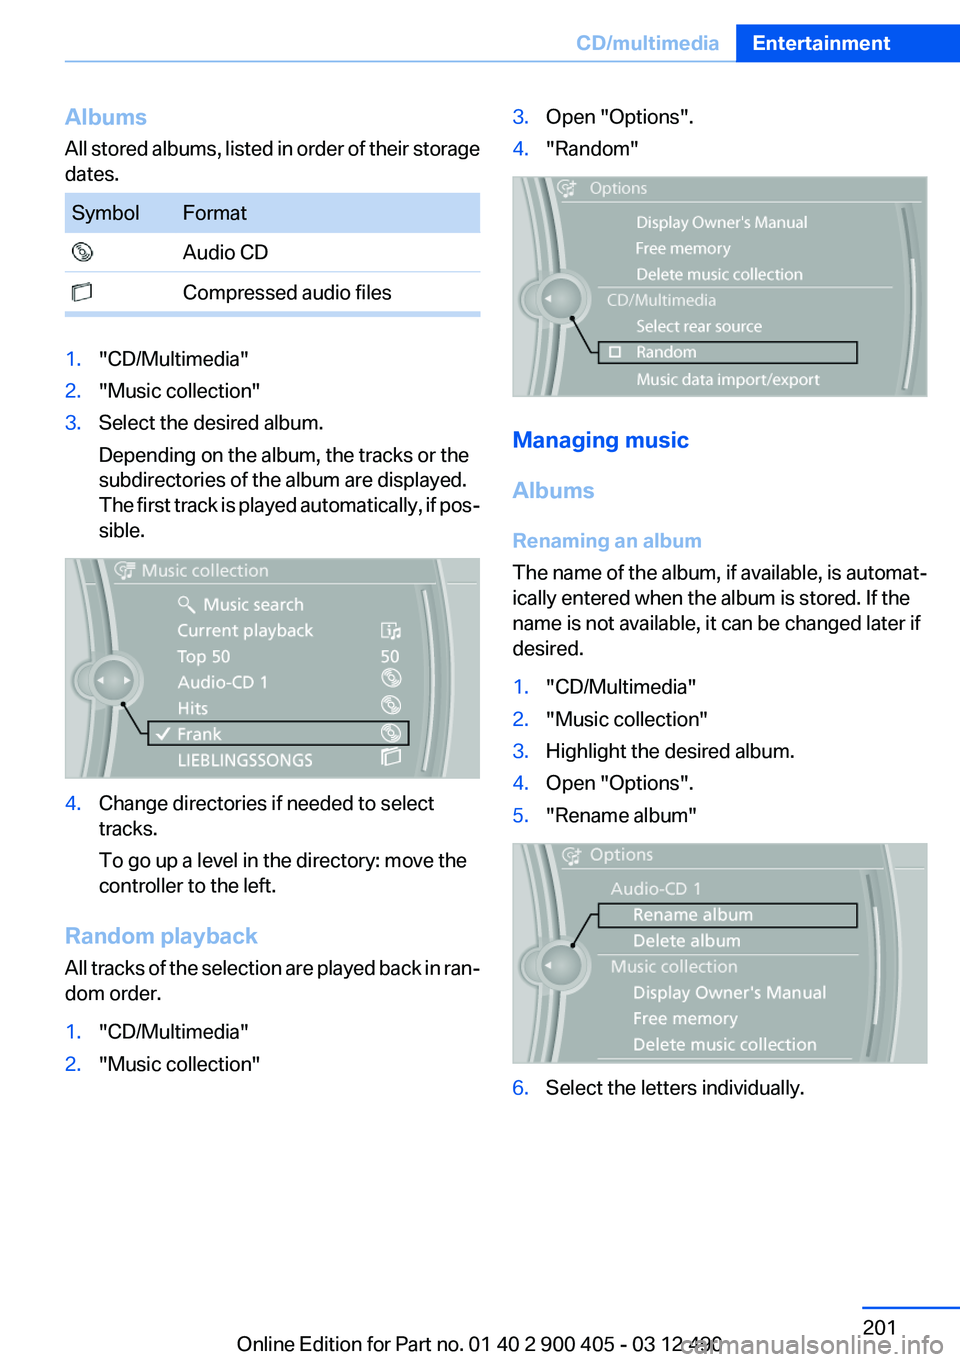
dates.SymbolFormat Audio CD Compressed audio files1."CD/Multimedia"2."Music collection"3.Select the desired album.
Depending on the album, the tracks or the
subdirectories of the album are displayed.
The first track is played automatically, if pos‐
sible.4.Change directories if needed to select
tracks.
To go up a level in the directory: move the
controller to the left.
Random playback
All tracks of the selection are played back in ran‐
dom order.
1."CD/Multimedia"2."Music collection"3.Open "Options".4."Random"
Managing music
Albums
Renaming an album
The name of the album, if available, is automat‐
ically entered when the album is stored. If the
name is not available, it can be changed later if
desired.
1."CD/Multimedia"2."Music collection"3.Highlight the desired album.4.Open "Options".5."Rename album"6.Select the letters individually.Seite 201CD/multimediaEntertainment201
Online Edition for Part no. 01 40 2 900 405 - 03 12 490
Page 208 of 305
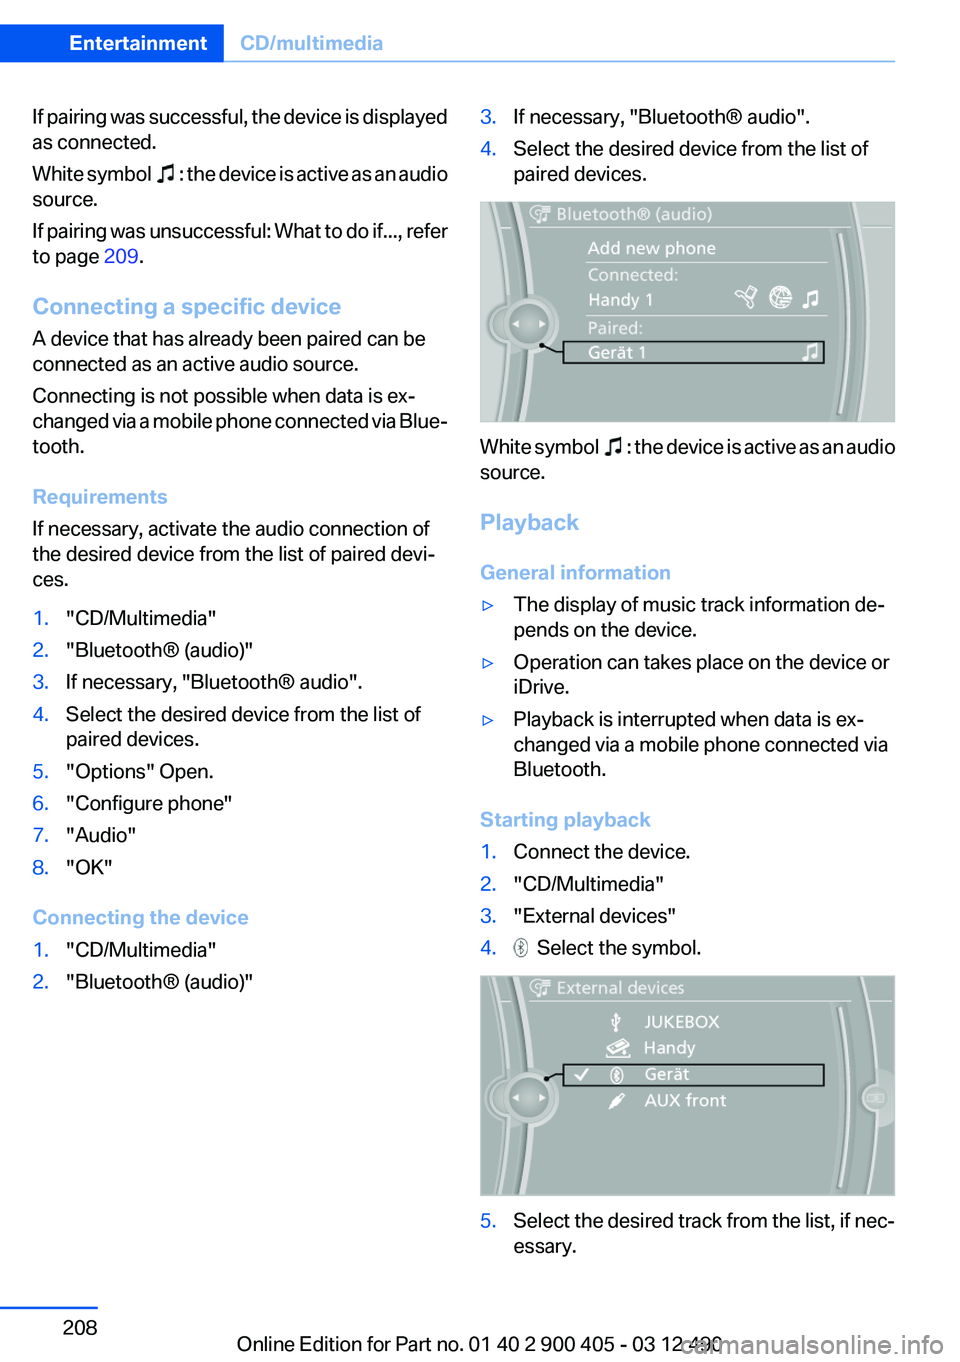
If pairing was successful, the device is displayed
as connected.
White symbol
: the device is active as an audio
source.
If pairing was unsuccessful: What to do if..., refer
to page 209.
Connecting a specific device
A device that has already been paired can be
connected as an active audio source.
Connecting is not possible when data is ex‐
changed via a mobile phone connected via Blue‐
tooth.
Requirements
If necessary, activate the audio connection of
the desired device from the list of paired devi‐
ces.
1."CD/Multimedia"2."Bluetooth® (audio)"3.If necessary, "Bluetooth® audio".4.Select the desired device from the list of
paired devices.5."Options" Open.6."Configure phone"7."Audio"8."OK"
Connecting the device
1."CD/Multimedia"2."Bluetooth® (audio)"3.If necessary, "Bluetooth® audio".4.Select the desired device from the list of
paired devices.
White symbol : the device is active as an audio
source.
Playback
General information
▷The display of music track information de‐
pends on the device.▷Operation can takes place on the device or
iDrive.▷Playback is interrupted when data is ex‐
changed via a mobile phone connected via
Bluetooth.
Starting playback
1.Connect the device.2."CD/Multimedia"3."External devices"4. Select the symbol.5.Select the desired track from the list, if nec‐
essary.Seite 208EntertainmentCD/multimedia208
Online Edition for Part no. 01 40 2 900 405 - 03 12 490
Page 265 of 305
Danger of burns
Only change bulbs when they are cool;
otherwise, there is the danger of getting
burned.◀
Working on the lighting system
When working on the lighting system, you
should always switch off the lights affected to
prevent short circuits.
To avoid possible injury or equipment damage
when replacing bulbs, observe any instructions
provided by the bulb manufacturer.◀
Do not perform work/bulb replacement on
xenon headlamps
Have any work on the xenon lighting system, in‐
cluding bulb replacement, performed only by a
service center. Due to the high voltage present
in the system, there is the danger of fatal injuries
if work is carried out improperly.◀
Do not touch the bulbs
Do not touch the glass of new bulbs with
your bare hands, as even minute amounts of
contamination will burn into the bulb's surface
and reduce its service life.
Use a clean tissue, cloth or something similar, or
hold the bulb by its base.◀
Light-emitting diodes (LEDs)
Light-emitting diodes installed behind a cover
serve as the light source for controls, display el‐
ements and other equipment.
These light-emitting diodes, which are related
to conventional lasers, are officially designated
as Class 1 light-emitting diodes.
Do not remove the covers
Do not remove the covers, and never stare
into the unfiltered light for several hours; other‐
wise, irritation of the retina could result.◀Headlamp glass
Condensation can form on the inside of the ex‐
ternal lamps in cool or humid weather. When
driving with the light switched on, the conden‐
sation evaporates after a short time. The head‐
lamp glasses do not need to be changed.
If the headlamps do not dim despite driving with
the light switched on, increasing humidity forms,
e. g. water droplets in the light, have the service
center check this.
Front lamps, bulb replacement
Xenon headlamps
Because of the long life of these bulbs, the like‐
lihood of failure is very low. Switching the lamps
on and off frequently shortens their life.
Do not perform work/bulb replacement on
xenon headlamps
Have any work on the xenon lighting system, in‐
cluding bulb replacement, performed only by a
service center. Due to the high voltage present
in the system, there is the danger of fatal injuries
if work is carried out improperly.◀
Low beams and high beams are designed with
xenon technology.
For checking and adjusting headlamp aim,
please contact your BMW center.
LED headlamps, Light-emitting diodes
(LEDs) or light modules
With Xenon-headlamps, the following lamps are
designed with LED technology or as a light mod‐
ule:▷Parking lamps and roadside parking lamps▷Turn signal lamps▷Daytime running lights
With LED headlamps, all front lamps are de‐
signed with LED technology or as a light module.
Contact your service center in the event of a
malfunction.
Seite 265Replacing componentsMobility265
Online Edition for Part no. 01 40 2 900 405 - 03 12 490