2013 BMW 640I COUPE seat adjustment
[x] Cancel search: seat adjustmentPage 35 of 232

Convenient opening
The remote control can be used to simultane‐
ously open the windows and the glass sunroof.
Press and hold the button on the re‐
mote control.
The windows are opened, the glass sunroof is
tilted and the sliding visor moves back.
Releasing the button stops the motion.
Locking Press the button on the remote control.
Locking from the outside
Do not lock the vehicle from the outside if
there are people in it, as the vehicle cannot be
unlocked from inside without special knowl‐
edge.◀
Switching on interior lamps and
courtesy lamps
Press the button on the remote control
with the vehicle locked.
Panic mode
You can trigger the alarm system if you find
yourself in a dangerous situation.
Press the button on the remote control
for at least 3 seconds.
To switch off the alarm: press any button.
Switching on the headlamp courtesy
delay feature
Briefly press the button on the remote
control.
The duration can be set in the Control Display.
Opening the trunk lid Press the button on the remote control
for approx. 1 second.The trunk lid opens, regardless of whether it was
previously locked or unlocked.
During opening, the trunk lid pivots back and up.
Ensure that adequate clearance is available be‐
fore opening.
In some vehicle equipment variants, the trunk lid
can only be opened using the remote control if
the vehicle was unlocked first.
To avoid locking yourself out of the vehicle, do
not place the remote control into the cargo area.
The trunk lid is locked again as soon as it is
pushed closed.
Confirmation signals from the vehicle1."Settings"2."Door locks"3.Deactivate or activate the desired confirma‐
tion signals.▷"Acoustic sig. lock/unlock"▷"Flash when lock/unlock"
Retrieving the seat, mirror, and
steering wheel settings
The driver's seat, exterior mirror, and steering
wheel positions selected last are stored for the
currently used remote control.
When the vehicle is unlocked, these positions
are automatically retrieved if this function was
activated.
Pinch hazard when moving back the seat
If this function is used, first make sure that
the footwell behind the driver's seat is empty.
Otherwise, people can be injured or objects
damaged when the seat is moved back.◀
The adjustment procedure is interrupted:
▷When a seat position switch is pressed.▷When a button of the seat, mirror, and steer‐
ing wheel memory is pressed briefly.
Activating the setting
1."Settings"Seite 35Opening and closingControls35
Online Edition for Part no. 01 40 2 903 329 - 07 12 490
Page 45 of 232

AdjustingVehicle equipment
All standard, country-specific and optional
equipment that is offered in the model series is
described in this chapter. Therefore, equipment
is also described that is not available in a vehicle,
e. g., because of the selected optional equip‐
ment or country variant. This also applies for
safety-related functions and systems.
Sitting safely
The ideal seating position can make a vital con‐
tribution to relaxed, fatigue-free driving.
The seating position plays an important role in
an accident in combination with:▷Safety belts, refer to page 48.▷Head restraints, refer to page 49.▷Airbags, refer to page 92.
Seats
Adjusting
General information Do not adjust the seat while driving
Do not adjust the driver's seat while driv‐
ing, or the seat could respond with unexpected
movement and the ensuing loss of vehicle con‐
trol could lead to an accident.◀
Do not incline the backrest too far to the
rear
Also on the front passenger side, do not incline
the backrest on the front passenger side too far
to the rear during driving, or there is a risk of
slipping under the safety belt in the event of an
accident. This would eliminate the protection
normally provided by the belt.◀
At a glance1Active seat2Seat, mirror, and steering wheel memory3Backrest width4Lumbar support5Backrest, head restraint6Shoulder support7Forward/back, height, tilt8Thigh support
Note
The seat setting for the driver's seat is stored for
the remote control currently in use. When the
vehicle is unlocked via the remote control, the
position is automatically retrieved if the Func‐
tion, refer to page 35, for this is activated.
Adjustments in detail
1.Forward/back.Seite 45AdjustingControls45
Online Edition for Part no. 01 40 2 903 329 - 07 12 490
Page 47 of 232

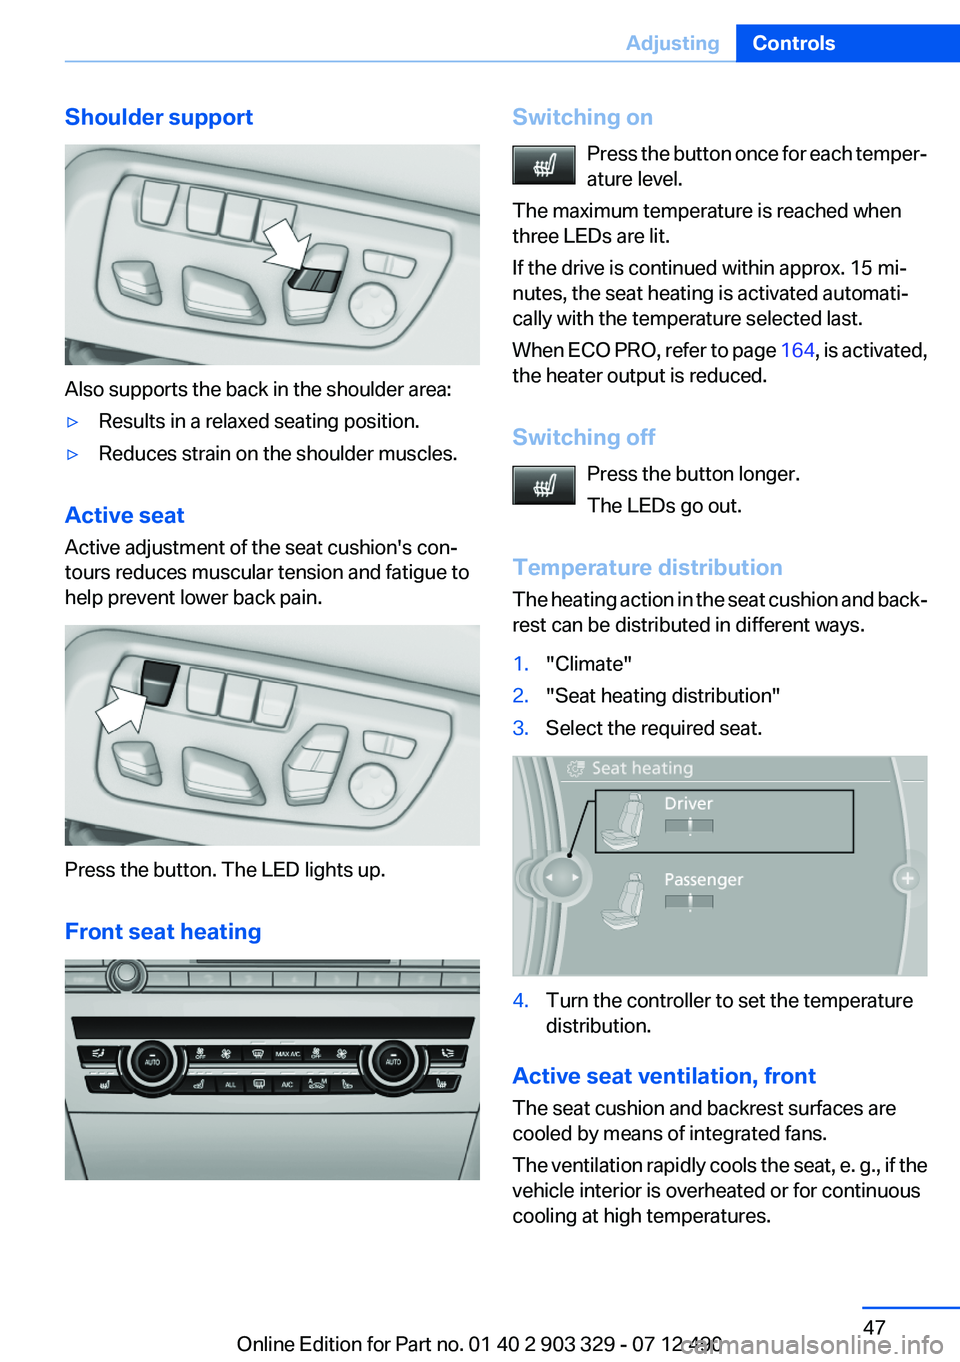
Shoulder support
Also supports the back in the shoulder area:
▷Results in a relaxed seating position.▷Reduces strain on the shoulder muscles.
Active seat
Active adjustment of the seat cushion's con‐
tours reduces muscular tension and fatigue to
help prevent lower back pain.
Press the button. The LED lights up.
Front seat heating
Switching on Press the button once for each temper‐
ature level.
The maximum temperature is reached when
three LEDs are lit.
If the drive is continued within approx. 15 mi‐
nutes, the seat heating is activated automati‐
cally with the temperature selected last.
When ECO PRO, refer to page 164, is activated,
the heater output is reduced.
Switching off Press the button longer.
The LEDs go out.
Temperature distribution
The heating action in the seat cushion and back‐
rest can be distributed in different ways.1."Climate"2."Seat heating distribution"3.Select the required seat.4.Turn the controller to set the temperature
distribution.
Active seat ventilation, front
The seat cushion and backrest surfaces are
cooled by means of integrated fans.
The ventilation rapidly cools the seat, e. g., if the
vehicle interior is overheated or for continuous
cooling at high temperatures.
Seite 47AdjustingControls47
Online Edition for Part no. 01 40 2 903 329 - 07 12 490
Page 51 of 232

Two different driver's seat, exterior mirror, and
steering wheel positions can be stored and re‐
trieved for each remote control. The adjustment
of the lumbar support is not stored.
Storing1.Switch on the ignition.2.Set the desired position.3. Press the button. The LED in the
button lights up.4.Press the desired button 1 or 2. The LED
goes out.
If the M button is pressed accidentally:
Press the button again.
The LED goes out.
Calling up settings Do not retrieve the memory while driving
Do not retrieve the memory setting while
driving, as an unexpected movement of the seat
or steering wheel could result in an accident.◀
Comfort function
1.Open the driver's door.2.Switch off the ignition.3.Briefly press the desired button 1 or 2.
The corresponding seat position is performed
automatically.
The procedure stops when a switch for adjust‐
ing the seat or one of the buttons is pressed.
Safety mode
1.Close the driver's door or switch on the ig‐
nition.2.Press and hold the desired button 1 or 2 until
the adjustment procedure is completed.Calling up of a seat position
deactivated
After a brief period, the calling up of stored seat
positions is deactivated to save battery power.
To reactivate calling up of a seat position:▷Open or close the door or trunk lid.▷Press a button on the remote control.▷Press the Start/Stop button.
Mirrors
Exterior mirrors
At a glance
1Adjusting2Left/right, Automatic Curb Monitor3Fold in and out
General information
The mirror on the passenger side is more curved
than the driver's side mirror.
Estimating distances correctly
Objects reflected in the mirror are closer
than they appear. Do not estimate the distance
to the traffic behind you based on what you see
in the mirror, as this will increase your risk of an
accident.◀
Depending on how the vehicle is equipped, the
mirror setting is stored for the remote control in
use. When the vehicle is unlocked via the remote
control, the position is automatically retrieved if
the setting for this function is active.
Seite 51AdjustingControls51
Online Edition for Part no. 01 40 2 903 329 - 07 12 490
Page 55 of 232

Seat position and height
Before installing a child restraint fixing system,
move the front passenger seat as far back as
possible and adjust its height to the highest po‐
sition to obtain the best possible position for the
belt and to offer optimal protection in the event
of an accident.
Do not change the seat position and height after
this.
Backrest width
Adjustable backrest width: before installing a
child restraint fixing system in the front passen‐
ger seat, open the backrest width completely.
Do not change the backrest width again and do
not call up a memory position.
Backrest width for the child seat
Before installing a child restraint fixing
system in the front passenger seat, the backrest
width must be opened completely. Do not
change the adjustment after this; otherwise, the
stability of the child seat will be reduced.◀
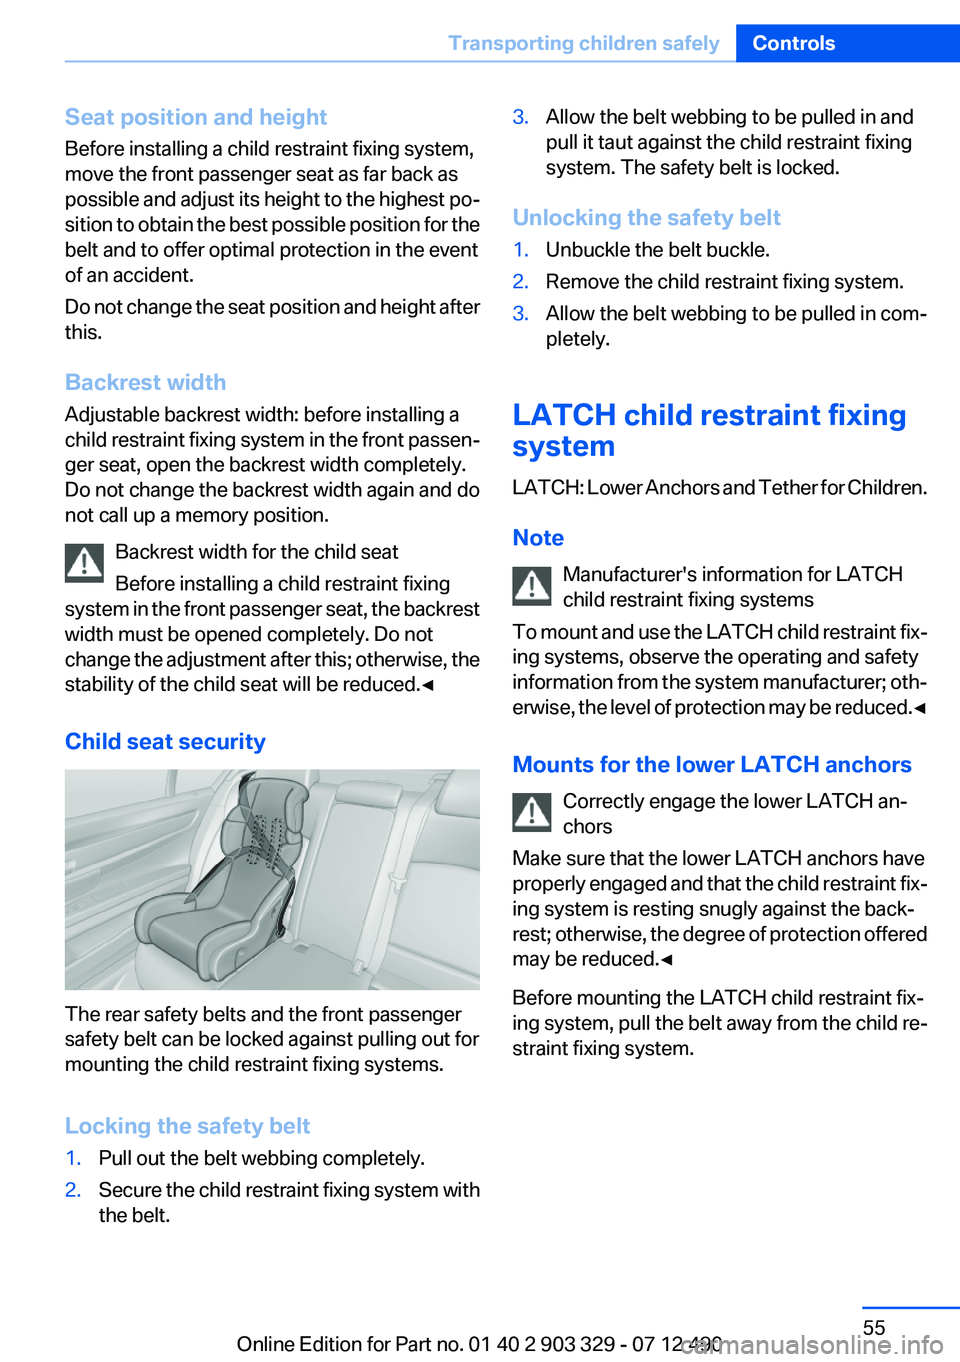
Child seat security
The rear safety belts and the front passenger
safety belt can be locked against pulling out for
mounting the child restraint fixing systems.
Locking the safety belt
1.Pull out the belt webbing completely.2.Secure the child restraint fixing system with
the belt.3.Allow the belt webbing to be pulled in and
pull it taut against the child restraint fixing
system. The safety belt is locked.
Unlocking the safety belt
1.Unbuckle the belt buckle.2.Remove the child restraint fixing system.3.Allow the belt webbing to be pulled in com‐
pletely.
LATCH child restraint fixing
system
LATCH: Lower Anchors and Tether for Children.
Note Manufacturer's information for LATCH
child restraint fixing systems
To mount and use the LATCH child restraint fix‐
ing systems, observe the operating and safety
information from the system manufacturer; oth‐
erwise, the level of protection may be reduced. ◀
Mounts for the lower LATCH anchors Correctly engage the lower LATCH an‐
chors
Make sure that the lower LATCH anchors have
properly engaged and that the child restraint fix‐
ing system is resting snugly against the back‐
rest; otherwise, the degree of protection offered
may be reduced.◀
Before mounting the LATCH child restraint fix‐
ing system, pull the belt away from the child re‐
straint fixing system.
Seite 55Transporting children safelyControls55
Online Edition for Part no. 01 40 2 903 329 - 07 12 490
Page 222 of 232

Everything from A to Z
IndexA
ABS, Antilock Brake Sys‐ tem 111
ACC, Active Cruise Control with Stop & Go 119
Activated-charcoal filter 144
Active Blind Spot Detec‐ tion 109
Active Cruise Control with Stop & Go, ACC 119
Active seat, front 47
Active seat ventilation, front 47
Active Steering, integral 114
Adaptive brake assistant 111
Adaptive brake lights, refer to Brake force display 110
Adaptive drive 114
Adaptive light control 89
Additives, oil 186
Adjustments, seats/head re‐ straints 45
After washing vehicle 205
Airbags 92
Airbags, indicator/warning light 93
Air circulation, refer to Recir‐ culated-air mode 143
Air, dehumidifying, refer to Cooling function 143
Air distribution, manual 142
Air flow, automatic climate control 142
Air pressure, tires 173
Air vents, refer to Ventila‐ tion 144
Alarm system 40
Alarm, unintentional 41
All around the center con‐ sole 14 All around the interior rearview
mirror 15
All around the steering wheel 12
ALL program, automatic cli‐ mate control 143
All-season tires, refer to Win‐ ter tires 181
All-wheel-drive 113
Alternating-code hand-held transmitter 147
Alternative oil types 186
Ambient light 91
Antifreeze, washer fluid 66
Antilock Brake System, ABS 111
Anti-slip control, refer to DSC 111
Approved axle load 211
Approved engine oils 186
Armrest, refer to Front center armrest 152
Arrival time 83
Ashtray 148
Assistance, Roadside Assis‐ tance 199
Assistance when driving off 111
AUTO H button, refer to Auto‐ matic Hold 62
AUTO intensity 142
Automatic car wash 204
Automatic Cruise Control with Stop & Go 119
Automatic Curb Monitor 52
Automatic deactivation, front passenger airbags 94
Automatic headlamp con‐ trol 88
Automatic Hold 62
Automatic locking 37 Automatic recirculated-air
control 143
Automatic Soft Closing, doors 37
Automatic transmission with Steptronic 67
AUTO program, automatic cli‐ mate control 142
AUTO program, intensity 142
Auto Start/Stop function 59
Average fuel consumption 82
Average speed 82
Axle loads, weights 211
B
Backrest curvature, refer to Lumbar support 46
Backrest, seats 45
Backrest, width 46
Backup camera 129
Band-aids, refer to First aid kit 199
Bar for tow-starting/tow‐ ing 202
Battery replacement, vehicle battery 196
Battery replacement, vehicle remote control 30
Battery, vehicle 196
Belts, safety belts 48
Beverage holder, cu‐ pholder 153
Blinds, sun protection 42
BMW Assist, see user's manual for Navigation, Enter‐
tainment and Communica‐
tion
BMW Homepage 6
BMW Internet page 6 Seite 222ReferenceEverything from A to Z222
Online Edition for Part no. 01 40 2 903 329 - 07 12 490