2013 BMW 6 SERIES GRAN COUPE belt
[x] Cancel search: beltPage 120 of 247
NotePersonal responsibility
The system cannot possibly serve as a
substitute for the driver's personal judgment of
the traffic situation. The system may not al‐
ways detect critical situations reliably and in a
timely manner. Adapt speed to traffic situation
and drive alertly; otherwise, a risk to safety may
result.◀
Function
After the safety belt is buckled, the front belts
are automatically pretensioned once after the
vehicle is driven is away.
In critical driving situations, the following indi‐
vidual functions become active as needed:▷The front belts are automatically preten‐
sioned.▷Automatic closing of the windows.▷Automatic closing of the glass sunroof.▷For vehicles equipped with Comfort Seats:
automatic positioning of the backrest for
the front passenger seat.
After a critical driving situation without an acci‐
dent, the front belts are loosened again. All
other systems can be restored to the desired
setting.
If the belt tension does not loosen automati‐
cally, stop the vehicle and unbuckle the belt
using the red button in the buckle. Fasten the
belt before continuing on your trip.
PostCrash
In the event of an accident, the system can
bring the car to a halt automatically without in‐
tervention by the driver in certain situations.
This can reduce the risk of a further collision
and the consequences thereof.
Depressing the brake pedal can cause the ve‐
hicle to brake harder. This interrupts automatic
braking. Depressing the accelerator pedal also
interrupts automatic braking.
After coming to a halt, the brake is released
automatically. Secure the vehicle against roll‐
ing.Seite 116ControlsSafety116
Online Edition for Part no. 01 40 2 909 877 - VI/13
Page 131 of 247
The displays go out. The stored desired speed
and distance are deleted.
Interrupting Press the button on the steering
wheel.
If interrupting the system while stationary,
press on the brake pedal at the same time.
The system is automatically interrupted in the
following situations:▷When the brakes are applied.▷When transmission position D is disen‐
gaged.▷When DTC Dynamic Traction Control is
activated or DSC is deactivated.▷When DSC is actively controlling stability.▷If the safety belt and the driver's door are
opened when the vehicle is standing still.▷If the system has not detected objects for
an extended period, e.g., on a road with
very little traffic without road edge line
markings.▷If the detection range of the radar is dis‐
rupted, for example, by dirt or heavy fog.
Maintaining/storing the speed
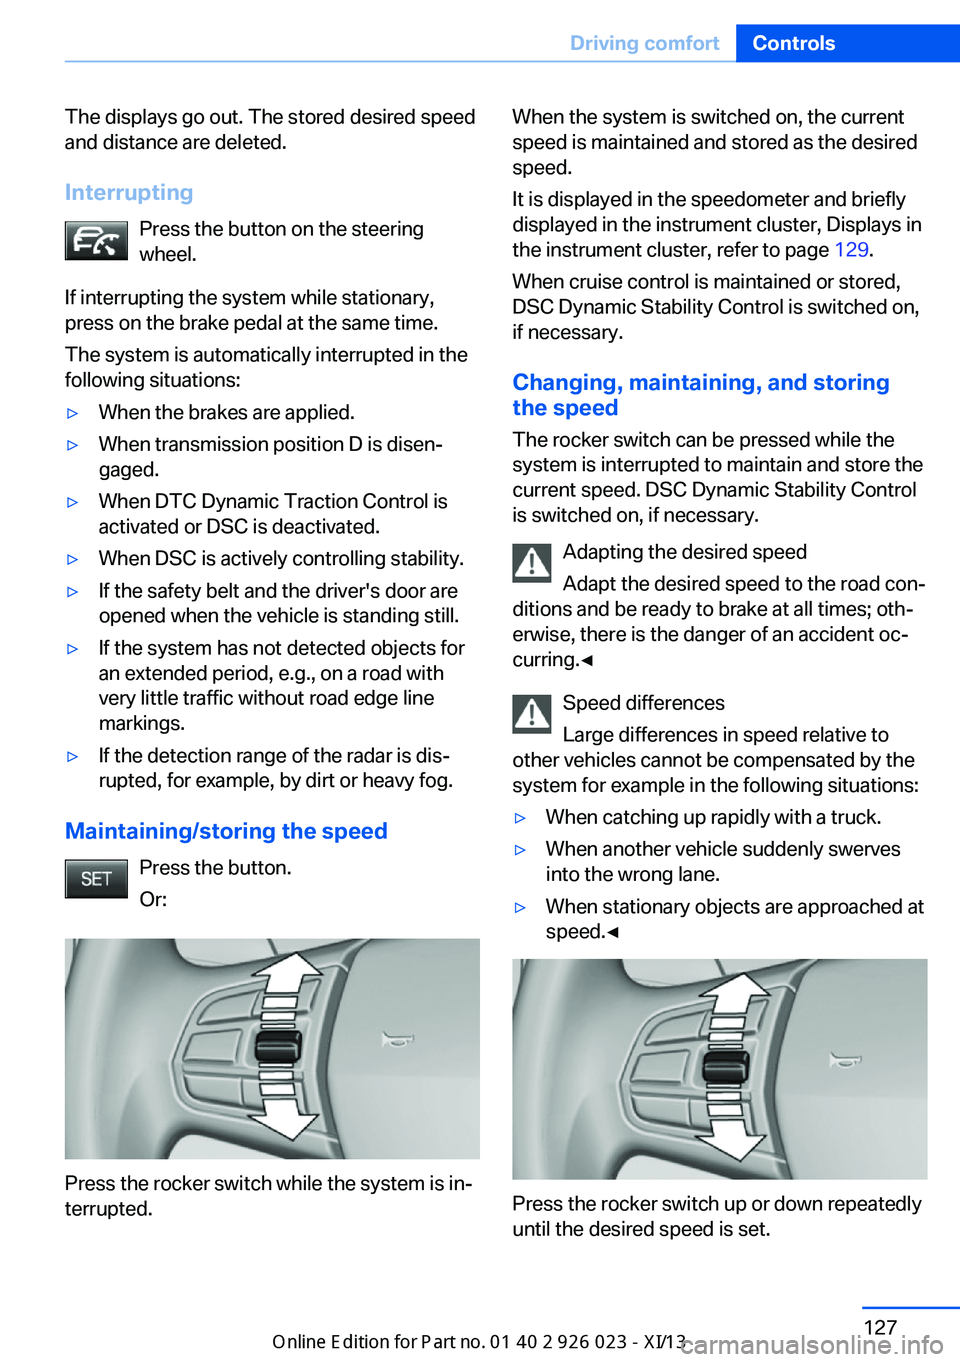
Press the button.
Or:
Press the rocker switch while the system is in‐
terrupted.
When the system is switched on, the current
speed is maintained and stored as the desired
speed.
It is displayed in the speedometer and briefly
displayed in the instrument cluster, Displays in
the instrument cluster, refer to page 129.
When cruise control is maintained or stored,
DSC Dynamic Stability Control is switched on,
if necessary.
Changing, maintaining, and storing
the speed
The rocker switch can be pressed while the
system is interrupted to maintain and store the
current speed. DSC Dynamic Stability Control
is switched on, if necessary.
Adapting the desired speed
Adapt the desired speed to the road con‐
ditions and be ready to brake at all times; oth‐
erwise, there is the danger of an accident oc‐
curring.◀
Speed differences
Large differences in speed relative to
other vehicles cannot be compensated by the
system for example in the following situations:▷When catching up rapidly with a truck.▷When another vehicle suddenly swerves
into the wrong lane.▷When stationary objects are approached at
speed.◀
Press the rocker switch up or down repeatedly
until the desired speed is set.
Seite 127Driving comfortControls127
Online Edition for Part no. 01 40 2 909 877 - VI/13
Page 168 of 247
Through-loading systemThe concept The cargo area can be enlarged by folding
down the rear seat backrest.
The rear seat backrest is divided into two parts at a ratio of 60 to 40.
The sides can be folded down separately or to‐
gether.
Hints Danger of pinching
Before folding down the rear seat back‐
rests, ensure that the area of movement of the
backrests is clear. Ensure that no one is lo‐
cated in or reaches into the area of movement
of the rear seat backrests. Otherwise, injury or
damage may result.◀
Lock the rear seat backrests in positionBefore mounting child restraint fixing
systems, place the seat backrest as far as pos‐
sible at an angle at which the child seat is rest‐
ing firmly against the backrest and all back‐
rests can be locked securely in place.
Otherwise, the child seat will not be as stable
as it should be, and there is increased danger
of injury due to unexpected movement of the
seat backrest.◀
Preventing indentations
When folding down the rear seats, en‐
sure that the safety belt buckles are located in
the recesses provided form them in the seat.
Otherwise they can create indentations in the
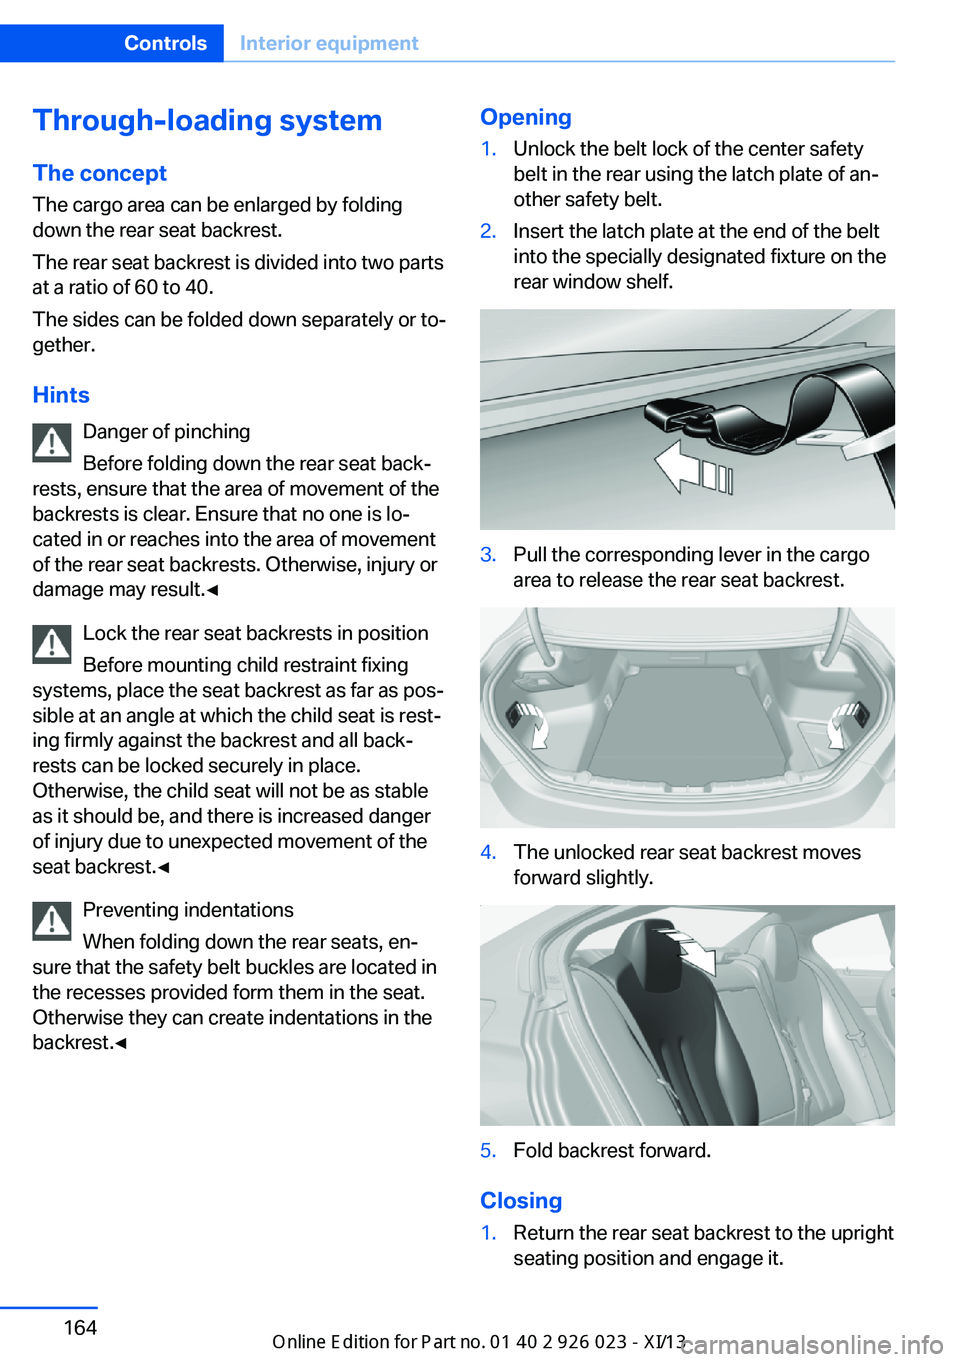
backrest.◀Opening1.Unlock the belt lock of the center safety
belt in the rear using the latch plate of an‐
other safety belt.2.Insert the latch plate at the end of the belt
into the specially designated fixture on the
rear window shelf.3.Pull the corresponding lever in the cargo
area to release the rear seat backrest.4.The unlocked rear seat backrest moves
forward slightly.5.Fold backrest forward.
Closing
1.Return the rear seat backrest to the upright
seating position and engage it.Seite 164ControlsInterior equipment164
Online Edition for Part no. 01 40 2 909 877 - VI/13
Page 169 of 247
Ensure that the lock is securely en‐
gaged
Make sure that the lock engages properly
when folding back, otherwise transported
cargo could enter the passenger compart‐
ment during braking or evasive maneuvers
and endanger the vehicle occupants.◀2.Release the belt tongue from the fixture on
the rear window shelf.3.Insert the belt tongue in the belt lock of the
center safety belt. Make sure you hear the
latch plate engage.
To secure cargo, refer to page 178, with nets
or draw straps, the cargo area is fitted with
lashing eyes.
Ski bag
Capacity
The ski bag can be used to transport up to four
pairs of skis with a length of up to 6 ft/2.10 m
or, depending on the binding, up to two snow‐
boards with a length of up to 5 ft/1.60 m.
Preparing and loading the ski bag
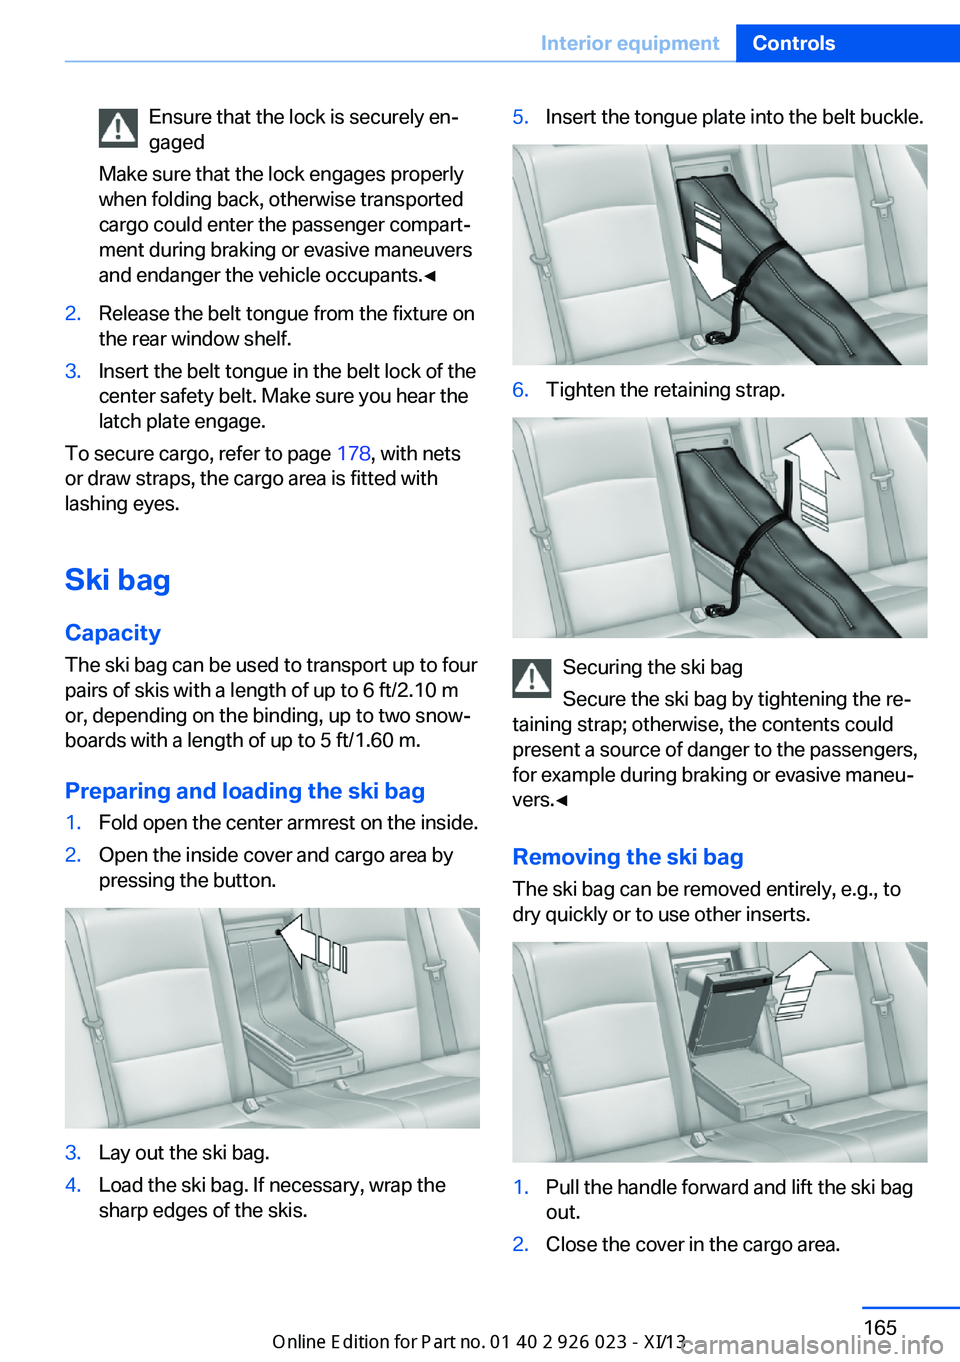
1.Fold open the center armrest on the inside.2.Open the inside cover and cargo area by
pressing the button.3.Lay out the ski bag.4.Load the ski bag. If necessary, wrap the
sharp edges of the skis.5.Insert the tongue plate into the belt buckle.6.Tighten the retaining strap.
Securing the ski bag
Secure the ski bag by tightening the re‐
taining strap; otherwise, the contents could
present a source of danger to the passengers,
for example during braking or evasive maneu‐
vers.◀
Removing the ski bag The ski bag can be removed entirely, e.g., to
dry quickly or to use other inserts.
1.Pull the handle forward and lift the ski bag
out.2.Close the cover in the cargo area.Seite 165Interior equipmentControls165
Online Edition for Part no. 01 40 2 909 877 - VI/13
Page 182 of 247
Stowing cargo▷Cover sharp edges and corners on the
cargo.▷Heavy cargo: stow as far forward as possi‐
ble, directly behind and at the bottom of
the rear passenger seat backrests.▷Very heavy cargo: when the rear seat is not
occupied, secure each of the outer safety
belts in the opposite buckle.▷If necessary, fold down the rear backrests
to stow cargo.▷Do not stack cargo above the top edge of
the backrests.
Securing cargo
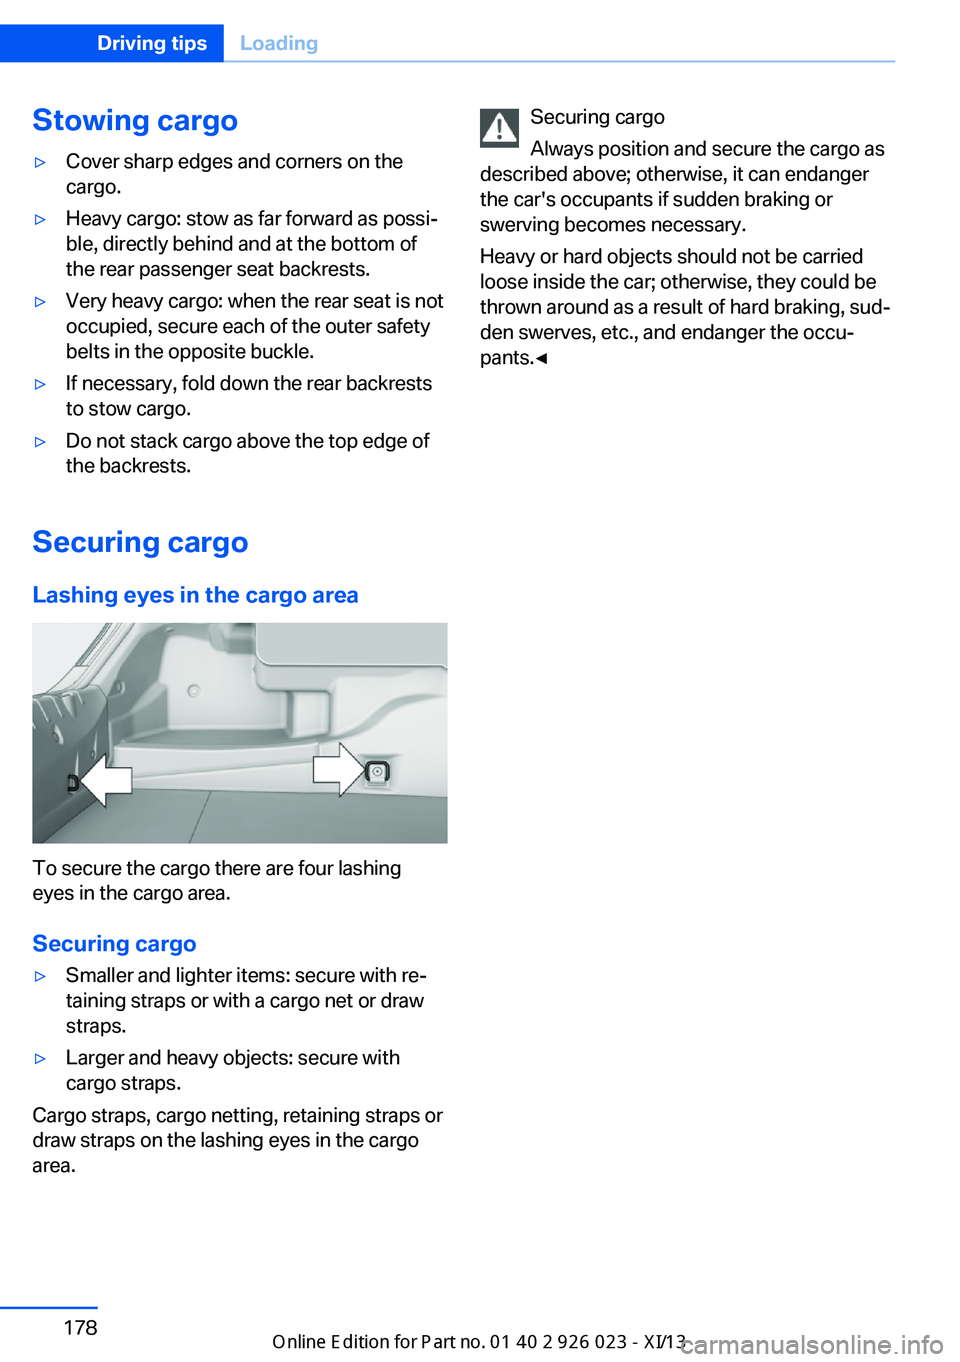
Lashing eyes in the cargo area
To secure the cargo there are four lashing
eyes in the cargo area.
Securing cargo
▷Smaller and lighter items: secure with re‐
taining straps or with a cargo net or draw
straps.▷Larger and heavy objects: secure with
cargo straps.
Cargo straps, cargo netting, retaining straps or
draw straps on the lashing eyes in the cargo
area.
Securing cargo
Always position and secure the cargo as
described above; otherwise, it can endanger
the car's occupants if sudden braking or
swerving becomes necessary.
Heavy or hard objects should not be carried
loose inside the car; otherwise, they could be
thrown around as a result of hard braking, sud‐
den swerves, etc., and endanger the occu‐
pants.◀Seite 178Driving tipsLoading178
Online Edition for Part no. 01 40 2 909 877 - VI/13
Page 227 of 247
Use leather care products; otherwise, dirt and
grease will gradually break down the protective
layer of the leather surface.
Suitable care products are available from the
service center.
Upholstery material care Vacuum regularly with a vacuum cleaner.
If they are very dirty, e.g., beverage stains, use
a soft sponge or microfiber cloth with a suita‐
ble interior cleaner.
Clean the upholstery down to the seams using
large sweeping motions. Avoid rubbing the
material vigorously.
Damage from Velcro® fasteners
Open Velcro® fasteners on pants or
other articles of clothing can damage the seat
covers. Ensure that any Velcro® fasteners are
closed.◀
Caring for special components
Light-alloy wheels When cleaning the vehicle, use only neutral
wheel cleaners having a pH value from 5 to 9.
Do not use abrasive cleaning agents or steam
jets above 140 ℉/60 ℃. Follow the manufac‐
turer's instructions.
Aggressive, acidic or alkaline cleaning agents
can destroy the protective layer of adjacent
components, such as the brake disk.
Chrome surfaces Carefully clean components such as the radia‐
tor grille or door handles with an ample supply of water, possibly with shampoo added, partic‐
ularly when they have been exposed to road
salt.
Rubber components Aside from water, treat only with rubber
cleansers.When cleaning rubber seals, do not use any
silicon-containing car care products in order to
avoid damage or reduced noise damping.
Fine wood parts Clean fine wood facing and fine wood compo‐
nents only with a moist rag. Then dry with a
soft cloth.
Plastic components
These include:▷Imitation leather surfaces.▷Headliner.▷Lamp lenses.▷Instrument cluster cover.▷Matte black spray-coated components.▷Painted parts in the interior.
Clean with a microfiber cloth.
Lightly dampen the cloth with water.
Do not soak the headliner.
Do not use cleansers that contain alcohol
or solvents
Do not use cleansers that contain alcohol or
solvents, such as lacquer thinners, heavy-duty
grease removers, fuel, or such; this could lead
to surface damage.◀
Safety belts
Dirty belt straps impede the reeling action and
thus have a negative impact on safety.
Chemical cleaning
Do not clean chemically; this can destroy
the webbing.◀
Use only a mild soapy solution, with the safety
belts clipped into their buckles.
Do not allow the reels to retract the safety
belts until they are dry.
Seite 223CareMobility223
Online Edition for Part no. 01 40 2 909 877 - VI/13
Page 236 of 247

Everything from A to Z
IndexA ABS, Antilock Brake Sys‐ tem 117
ACC, Active Cruise Control with Stop & Go 125
Activated-charcoal filter 155
Active Blind Spot Detec‐ tion 113
Active Cruise Control with Stop & Go, ACC 125
Active Protection 114
Active roll stabilization, see Dynamic Drive 120
Active seat, front 47
Active seat ventilation, front 48
Active Steering, integral 120
Adaptive brake assistant 117
Adaptive brake lights, refer to Brake force display 114
Adaptive drive 120
Adaptive light control 88
Additives, oil 206
Adjusting, steering wheel 53
Adjustments, seats/head re‐ straints 45
After washing vehicle 222
Airbags 92
Airbags, indicator/warning light 93
Air circulation, refer to Recir‐ culated-air mode 154
Air distribution, manual 153
Air drying, refer to Cooling function 154
Air flow, automatic climate control 153
Air pressure, tires 191
Air vents, refer to Ventila‐ tion 157 Alarm system 40
Alarm, unintentional 41
All around the center con‐ sole 14
All around the interior rear‐ view mirror 15
All around the steering wheel 12
All-season tires, refer to Win‐ ter tires 200
All-wheel-drive 119
Alternating-code hand-held transmitter 161
Alternative oil types 206
Ambient light 90
Antifreeze, washer fluid 67
Antilock Brake System, ABS 117
Anti-slip control, refer to DSC 117
Approved engine oils 206
Armrest, refer to Front center armrest 168
Armrest, refer to Rear center armrest 169
Arrival time 84
Ashtray 162
Ashtray, rear 163
Assistance, Roadside Assis‐ tance 217
Assistance when driving off 117
Attentiveness assistant 115
AUTO H button, refer to Au‐ tomatic Hold 63
AUTO intensity 153
Automatic car wash 221
Automatic Cruise Control with Stop & Go 125
Automatic Curb Monitor 52 Automatic deactivation, front
passenger airbags 94
Automatic headlamp con‐ trol 88
Automatic Hold 63
Automatic locking 39
Automatic recirculated-air control 154
Automatic Soft Closing, doors 36
Automatic transmission with Steptronic 68
AUTO program, automatic cli‐ mate control 153
AUTO program, intensity 153
Auto Start/Stop function 60
Average fuel consumption 84
Average speed 84
Axle loads, weights 229
B Backrest curvature, refer to Lumbar support 46
Backrest, seats 45
Backrest, width 46
Backup camera 139
Band-aids, refer to First aid kit 217
Bar for tow-starting/ towing 219
Battery replacement, remote control for parked-car heat‐
ing/ventilation 159
Battery replacement, vehicle battery 214
Battery replacement, vehicle remote control 30
Battery, vehicle 214
Belts, safety belts 48 Seite 232ReferenceEverything from A to Z232
Online Edition for Part no. 01 40 2 909 877 - VI/13
Page 243 of 247

RSC Run Flat System Com‐ponent, refer to Run-flat
tires 201
Rubber components, care 223
Run-flat tires 201
S Safe braking 175
Safety 7
Safety belt reminder for driv‐ er's seat and front passen‐
ger seat 49
Safety belts 48
Safety belts, care 223
Safety Package, refer to Ac‐ tive Protection 114
Safety switch, windows 42
Safety systems, airbags 92
Saving fuel 179
Screen, refer to Control Dis‐ play 16
Screwdriver 210
Screw thread for tow fit‐ ting 220
Seat belts, refer to Safety belts 48
Seat heating, front 47
Seat heating, rear 48
Seating position for chil‐ dren 54
Seat, mirror, and steering wheel memory 51
Seats 45
Seat ventilation, front 48
Selection list in instrument cluster 83
Selector lever, automatic transmission 68
Sensors, care 224
Service and warranty 7
Service requirements, Condi‐ tion Based Service
CBS 208 Service requirements, dis‐
play 80
Service, Roadside Assis‐ tance 217
Services, ConnectedDrive
Settings, locking/unlock‐ ing 39
Settings on Control Dis‐ play 85
Settings, storing for seat, mir‐ rors, steering wheel 51
Shifting, automatic transmis‐ sion 68
Shift Lights 70
Shift paddles on steering wheel 70
Shoulder support 47
Side airbags 92
Side View 143
Signaling, horn 12
Signals when unlocking 39
Sitting safely 45
Size 228
Ski bag 165
Smallest turning circle 229
Smoker's package 162
Snow chains 201
Socket 163
Socket, OBD Onboard Diag‐ nostics 209
SOS button 216
Spare fuse 214
Speaker lighting 91
Specified engine oil types 206
Speed, average 84
Speed limit detection, on‐ board computer 84
Speed limiter, display 81
Speed Limit Information 81
Speed limit in the com‐ puter 84
Split screen 20
SPORT+ - program, Dynamic Driving Control 122 Sport automatic transmis‐
sion 70
SPORT program, driving dy‐ namics 123
Sport program, transmis‐ sion 69
Stability control systems 117
Start/stop, automatic func‐ tion 60
Start/Stop button 58
Start function during malfunc‐ tion 31
Starting the engine 59
Status display, tires 95
Status information, iDrive 19
Status of Owner's Manual 6
Steering, Integral Active Steering 120
Steering wheel, adjusting 53
Steering wheel heating 53
Steering wheel memory 51
Steptronic, automatic trans‐ mission 68
Stopping the engine 59
Storage compartments 167
Storage compartments, loca‐ tions 167
Storage, tires 201
Storing the vehicle 224
Summer tires, tread 199
Supplementary text mes‐ sage 77
Surround View 139
Suspension settings 121
Switch for Dynamic Driving Control 121
Switch, refer to Cockpit 12
Symbols 6
SYNC program, automatic cli‐ mate control 154
T
Tachometer 78
Tail and brake lamps 212
Tailgate 36 Seite 239Everything from A to ZReference239
Online Edition for Part no. 01 40 2 909 877 - VI/13