2013 BMW 550I XDRIVE high beam
[x] Cancel search: high beamPage 98 of 246
on automatically when you switch on the front
fog lamps.
Instrument lighting
Adjusting The parking lamps or low beams
must be switched on to adjust the
brightness.
Adjust the brightness using the
thumbwheel.
Interior lamps
General information
The interior lamps, footwell lamps, entry lamps
and courtesy lamps are controlled automati‐
cally.
The brightness of some of these lamps is influ‐
enced by the thumbwheel for the instrument
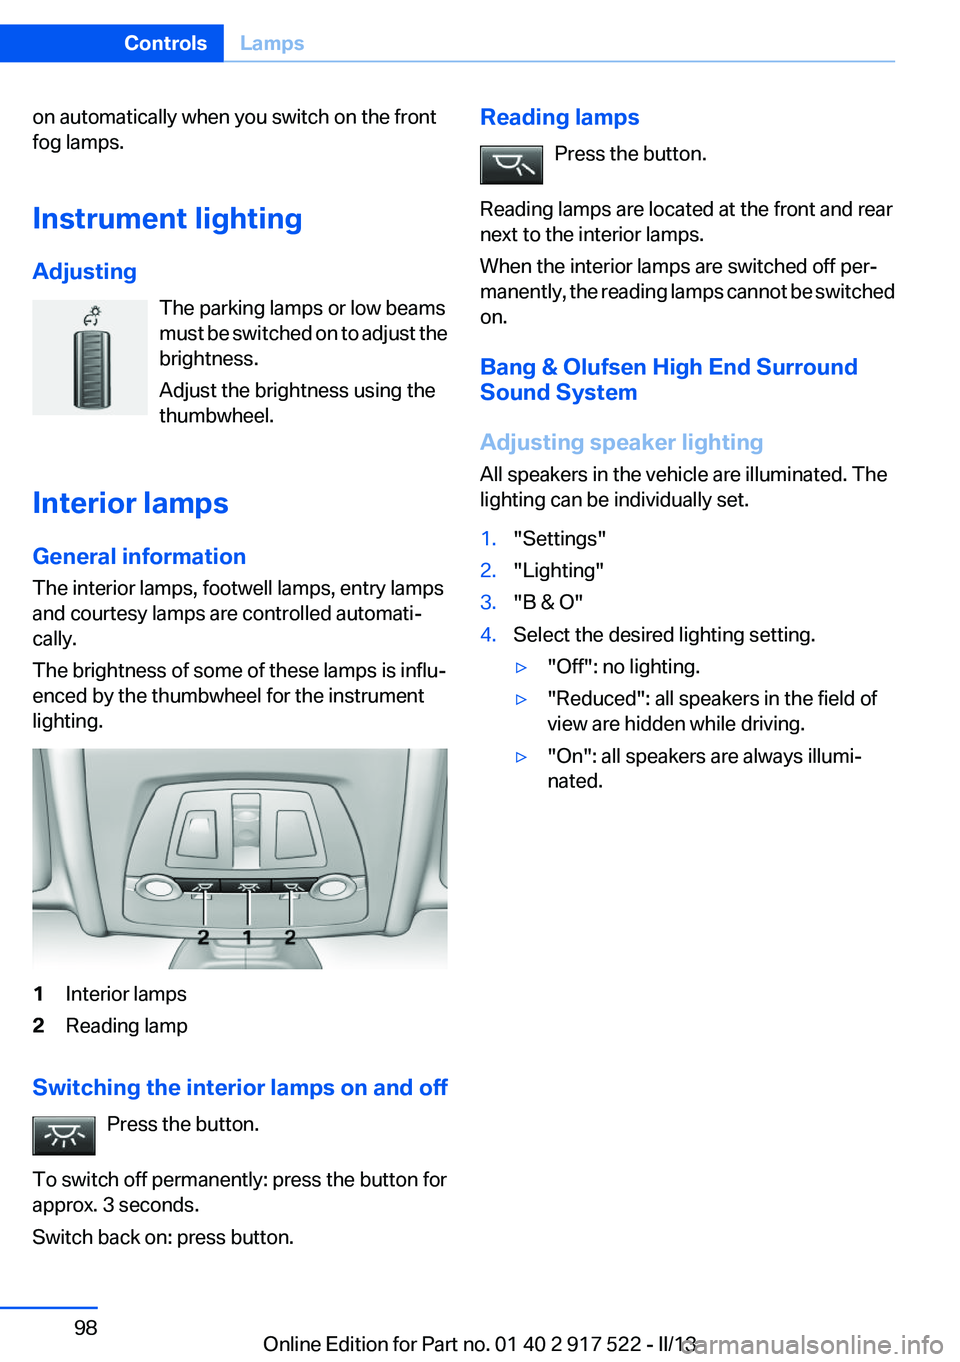
lighting.1Interior lamps2Reading lamp
Switching the interior lamps on and off
Press the button.
To switch off permanently: press the button for
approx. 3 seconds.
Switch back on: press button.
Reading lamps
Press the button.
Reading lamps are located at the front and rear
next to the interior lamps.
When the interior lamps are switched off per‐
manently, the reading lamps cannot be switched
on.
Bang & Olufsen High End Surround
Sound System
Adjusting speaker lighting
All speakers in the vehicle are illuminated. The
lighting can be individually set.1."Settings"2."Lighting"3."B & O"4.Select the desired lighting setting.▷"Off": no lighting.▷"Reduced": all speakers in the field of
view are hidden while driving.▷"On": all speakers are always illumi‐
nated.Seite 98ControlsLamps98
Online Edition for Part no. 01 40 2 917 522 - II/13
Page 213 of 246
the service center if you are unfamiliar with them
or they are not described here.
You can obtain a selection of replacement bulbs
at the service center.
Danger of burns
Only change bulbs when they are cool;
otherwise, there is the danger of getting
burned.◀
Working on the lighting system
When working on the lighting system, you
should always switch off the lights affected to
prevent short circuits.
To avoid possible injury or equipment damage
when replacing bulbs, observe any instructions
provided by the bulb manufacturer.◀
Do not perform work/bulb replacement on
xenon headlamps
Have any work on the xenon lighting system, in‐
cluding bulb replacement, performed only by a
service center. Due to the high voltage present
in the system, there is the danger of fatal injuries
if work is carried out improperly.◀
Do not touch the bulbs
Do not touch the glass of new bulbs with
your bare hands, as even minute amounts of
contamination will burn into the bulb's surface
and reduce its service life.
Use a clean tissue, cloth or something similar, or
hold the bulb by its base.◀
Light-emitting diodes (LEDs)
Light-emitting diodes installed behind a cover
serve as the light source for controls, display el‐
ements and other equipment.
These light-emitting diodes, which are related
to conventional lasers, are officially designated
as Class 1 light-emitting diodes.Do not remove the covers
Do not remove the covers, and never stare
into the unfiltered light for several hours; other‐
wise, irritation of the retina could result.◀
Headlamp glass
Condensation can form on the inside of the ex‐
ternal lamps in cool or humid weather. When
driving with the light switched on, the conden‐
sation evaporates after a short time. The head‐
lamp glasses do not need to be changed.
If the headlamps do not dim despite driving with
the light switched on, increasing humidity forms,
e. g. water droplets in the light, have the service
center check this.
Front lamps, bulb replacement
At a glance
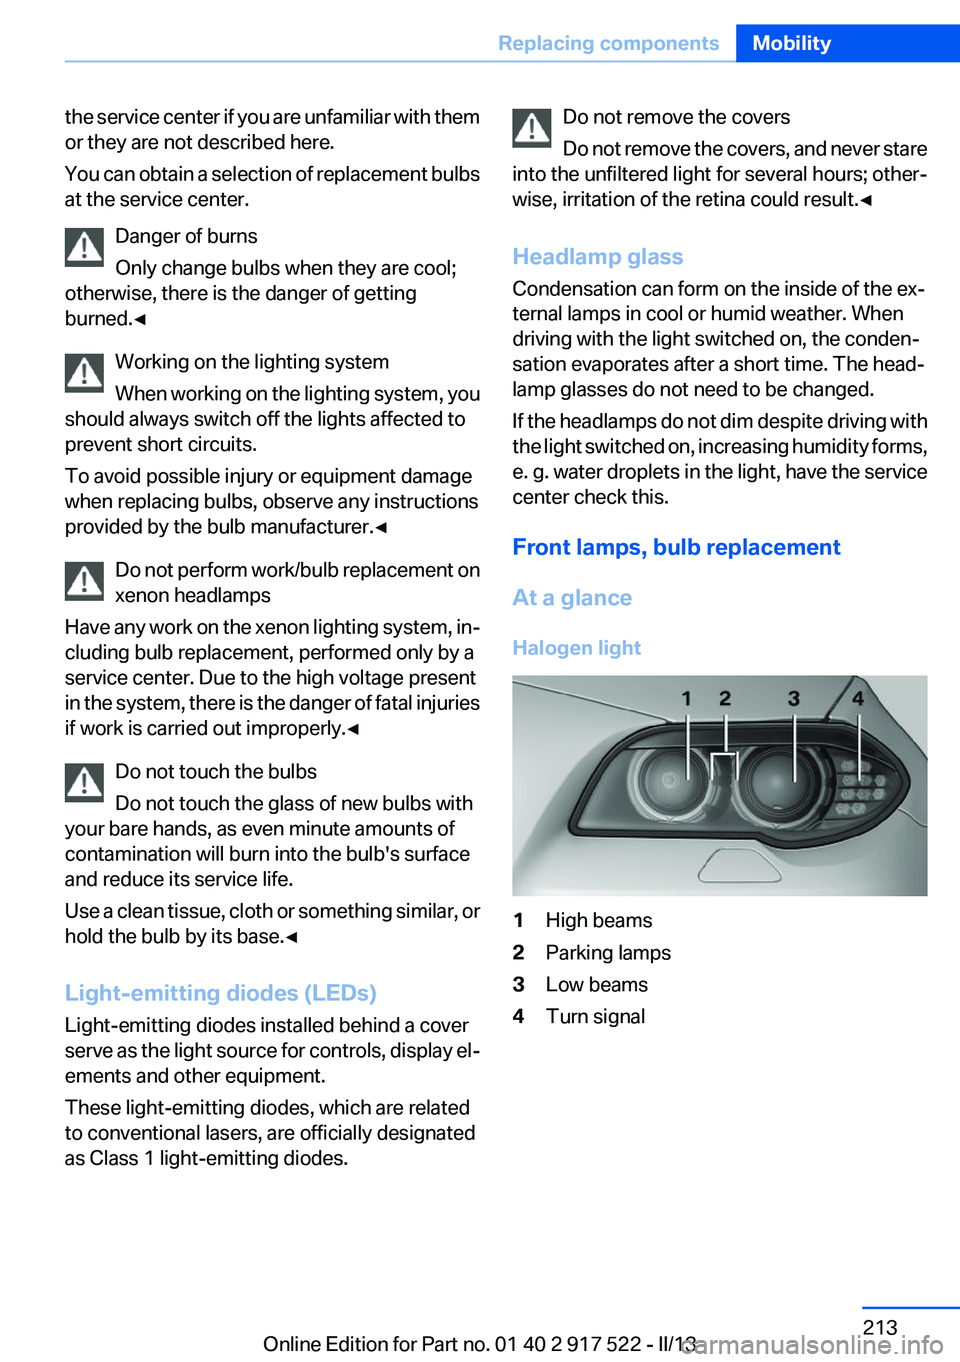
Halogen light1High beams2Parking lamps3Low beams4Turn signalSeite 213Replacing componentsMobility213
Online Edition for Part no. 01 40 2 917 522 - II/13
Page 214 of 246
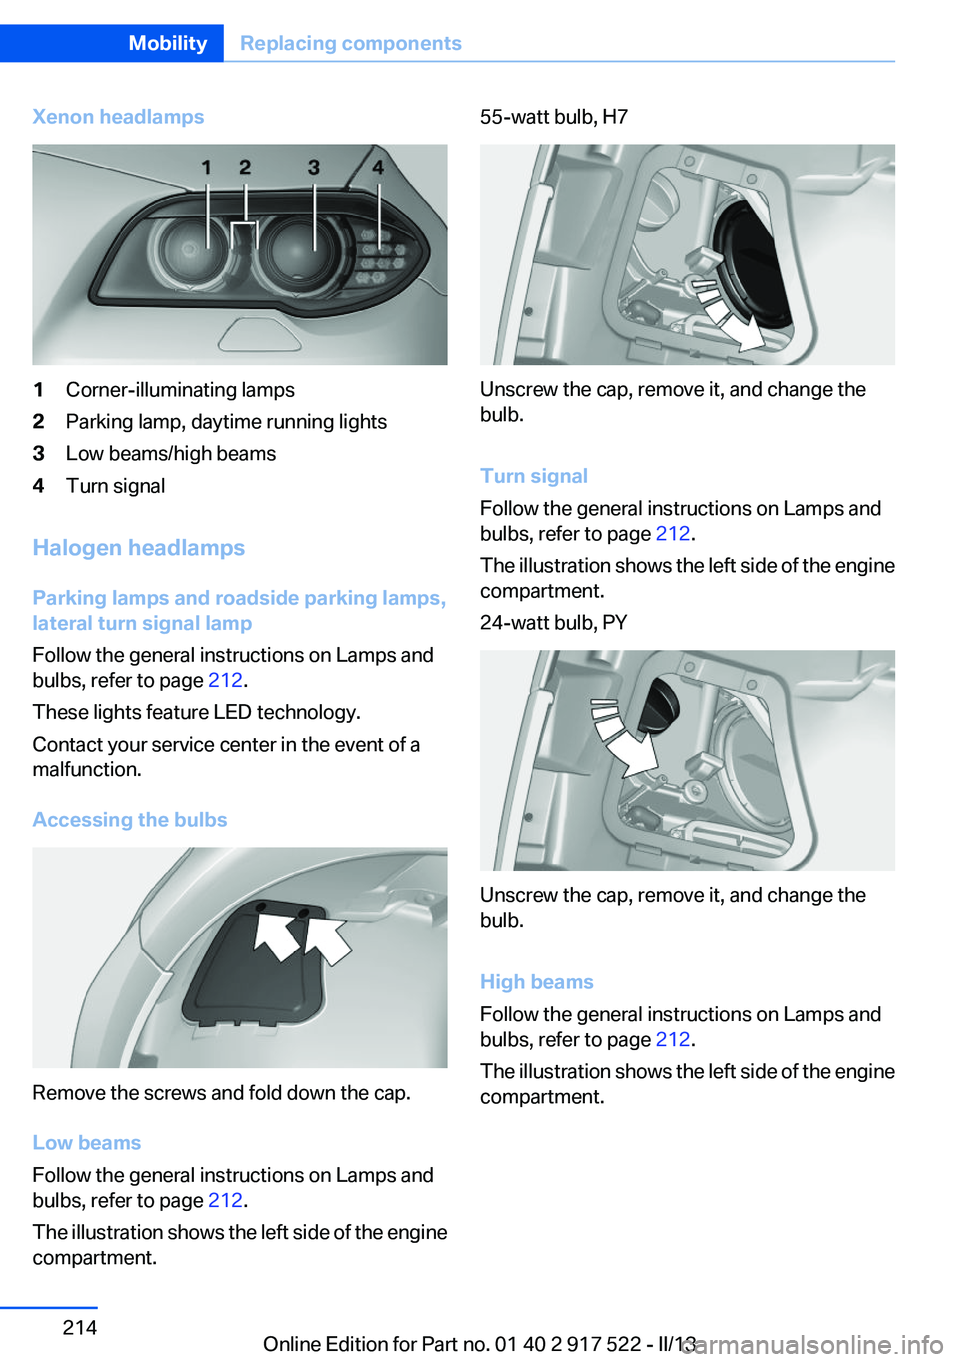
Xenon headlamps1Corner-illuminating lamps2Parking lamp, daytime running lights3Low beams/high beams4Turn signal
Halogen headlamps
Parking lamps and roadside parking lamps,
lateral turn signal lamp
Follow the general instructions on Lamps and
bulbs, refer to page 212.
These lights feature LED technology.
Contact your service center in the event of a
malfunction.
Accessing the bulbs
Remove the screws and fold down the cap.
Low beams
Follow the general instructions on Lamps and
bulbs, refer to page 212.
The illustration shows the left side of the engine
compartment.
55-watt bulb, H7
Unscrew the cap, remove it, and change the
bulb.
Turn signal
Follow the general instructions on Lamps and
bulbs, refer to page 212.
The illustration shows the left side of the engine
compartment.
24-watt bulb, PY
Unscrew the cap, remove it, and change the
bulb.
High beams
Follow the general instructions on Lamps and
bulbs, refer to page 212.
The illustration shows the left side of the engine
compartment.
Seite 214MobilityReplacing components214
Online Edition for Part no. 01 40 2 917 522 - II/13
Page 239 of 246
External start 221
External temperature dis‐ play 84
External temperature warn‐ ing 84
Eyes for securing cargo 176
F
Failure message, refer to Check Control 81
False alarm, refer to Uninten‐ tional alarm 43
Fan, refer to Air flow 149
Fault displays, refer to Check Control 81
Filler neck for engine oil 207
Fine wood, care 228
First aid kit 221
Fitting for towing, refer to Tow fitting 224
Flat tire, changing wheels 218
Flat Tire Monitor FTM 105
Flat tire, Tire Pressure Monitor TPM 102
Flat tire, warning lamp 103, 106
Flooding 173
Floor carpet, care 228
Floor mats, care 228
Fold down the rear seat back‐ rest, see Though-loading
system 160
Fold-out position, windshield wipers 71
Foot brake 173
Front airbags 99
Front fog lamps 97
Front fog lamps, front, bulb re‐ placement 216
Front lamps 213
Front passenger airbags, au‐ tomatic deactivation 101
Front passenger airbags, indi‐ cator lamp 101
FTM Flat Tire Monitor 105 Fuel cap 186
Fuel consumption, current 85
Fuel consumption, refer to Average fuel consump‐
tion 89
Fuel filler flap 186
Fuel gauge 84
Fuel quality 188
Fuel, tank capacity 235
Fuse 219
G
Garage door opener, refer to Integrated universal remote
control 155
Gasoline 188
Gasoline quality 188
Gear change, automatic trans‐ mission 73
Gear shift indicator 86
General driving notes 172
Glass sunroof, powered 45
Glove compartment 164
Gross vehicle weight, ap‐ proved 233
H
Handbrake, refer to Parking brake 66
Hand-held transmitter, alter‐ nating code 156
Hazard warning flashers 220
HDC Hill Descent Control 121
Head airbags 99
Headlamp control, auto‐ matic 95
Headlamp courtesy delay fea‐ ture 95
Headlamp courtesy delay fea‐ ture via remote control 35
Headlamp flasher 69
Headlamp glass 213
Headlamps 213
Headlamps, care 227 Headlamp washer system 69
Headliner 15
Head restraints 47
Head restraints, front 52
Head restraints, rear 53
Head-Up Display 146
Head-up Display, care 229
Heavy cargo, stowing 176
Height, vehicle 232
High-beam Assistant 96
High beams 69
High beams/low beams, refer to High-beam Assistant 96
Hill Descent Control HDC 121
Hills 174
Hill start assistant, refer to Drive-off assistant 119
Hints 6
Holder for beverages 166
Homepage 6
Hood 204
Horn 12
Hotel function, trunk lid 39
Hot exhaust system 173
HUD Head-Up Display 146
Hydroplaning 173
I
Ice warning, refer to External temperature warning 84
Icy roads, refer to External temperature warning 84
Identification marks, tires 198
Identification number, refer to Important features in the en‐
gine compartment 204
iDrive 16
Ignition key, refer to Remote control 30
Ignition off 62
Ignition on 62
Indication of a flat tire 103 , 106
Individual air distribution 149 Seite 239Everything from A to ZReference239
Online Edition for Part no. 01 40 2 917 522 - II/13
Page 240 of 246
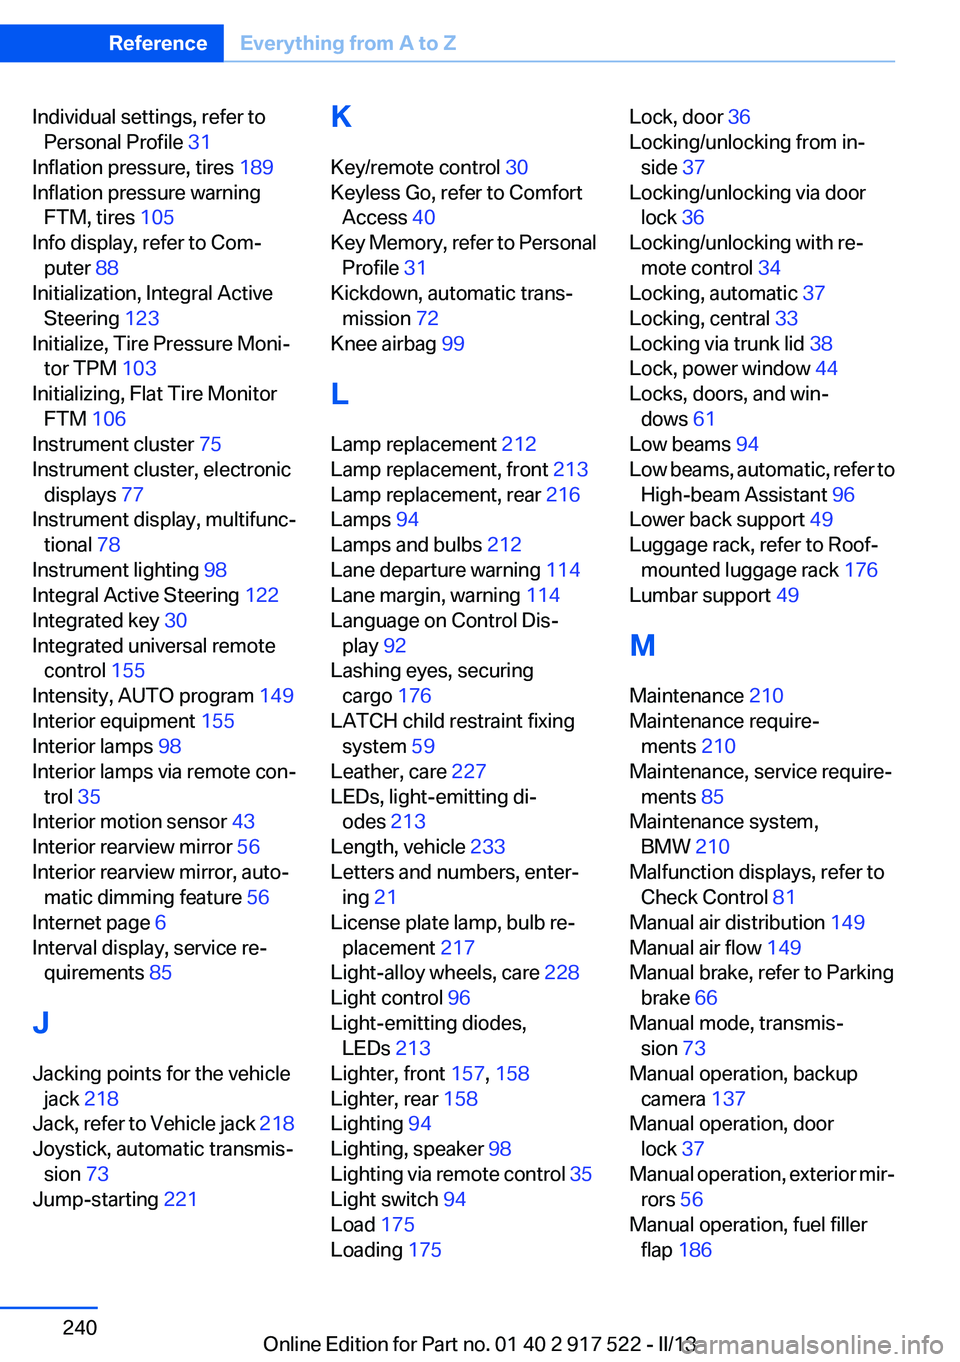
Individual settings, refer toPersonal Profile 31
Inflation pressure, tires 189
Inflation pressure warning FTM, tires 105
Info display, refer to Com‐ puter 88
Initialization, Integral Active Steering 123
Initialize, Tire Pressure Moni‐ tor TPM 103
Initializing, Flat Tire Monitor FTM 106
Instrument cluster 75
Instrument cluster, electronic displays 77
Instrument display, multifunc‐ tional 78
Instrument lighting 98
Integral Active Steering 122
Integrated key 30
Integrated universal remote control 155
Intensity, AUTO program 149
Interior equipment 155
Interior lamps 98
Interior lamps via remote con‐ trol 35
Interior motion sensor 43
Interior rearview mirror 56
Interior rearview mirror, auto‐ matic dimming feature 56
Internet page 6
Interval display, service re‐ quirements 85
J
Jacking points for the vehicle jack 218
Jack, refer to Vehicle jack 218
Joystick, automatic transmis‐ sion 73
Jump-starting 221 K
Key/remote control 30
Keyless Go, refer to Comfort Access 40
Key Memory, refer to Personal Profile 31
Kickdown, automatic trans‐ mission 72
Knee airbag 99
L
Lamp replacement 212
Lamp replacement, front 213
Lamp replacement, rear 216
Lamps 94
Lamps and bulbs 212
Lane departure warning 114
Lane margin, warning 114
Language on Control Dis‐ play 92
Lashing eyes, securing cargo 176
LATCH child restraint fixing system 59
Leather, care 227
LEDs, light-emitting di‐ odes 213
Length, vehicle 233
Letters and numbers, enter‐ ing 21
License plate lamp, bulb re‐ placement 217
Light-alloy wheels, care 228
Light control 96
Light-emitting diodes, LEDs 213
Lighter, front 157, 158
Lighter, rear 158
Lighting 94
Lighting, speaker 98
Lighting via remote control 35
Light switch 94
Load 175
Loading 175 Lock, door 36
Locking/unlocking from in‐ side 37
Locking/unlocking via door lock 36
Locking/unlocking with re‐ mote control 34
Locking, automatic 37
Locking, central 33
Locking via trunk lid 38
Lock, power window 44
Locks, doors, and win‐ dows 61
Low beams 94
Low beams, automatic, refer to High-beam Assistant 96
Lower back support 49
Luggage rack, refer to Roof- mounted luggage rack 176
Lumbar support 49
M
Maintenance 210
Maintenance require‐ ments 210
Maintenance, service require‐ ments 85
Maintenance system, BMW 210
Malfunction displays, refer to Check Control 81
Manual air distribution 149
Manual air flow 149
Manual brake, refer to Parking brake 66
Manual mode, transmis‐ sion 73
Manual operation, backup camera 137
Manual operation, door lock 37
Manual operation, exterior mir‐ rors 56
Manual operation, fuel filler flap 186 Seite 240ReferenceEverything from A to Z240
Online Edition for Part no. 01 40 2 917 522 - II/13