2013 BMW 550I service
[x] Cancel search: servicePage 215 of 246

55-watt bulb, H71.Fold open the cover in the engine compart‐
ment.2.Unscrew the cap and remove it.3.Unscrew the bulb holder counterclockwise.4.Remove the bulb and replace it.5.Insert the new bulb and attach the cover in
the reverse order.
Xenon headlamps
Hints
Because of the long life of these bulbs, the like‐
lihood of failure is very low. Switching the lamps
on and off frequently shortens their life.
If a xenon bulb fails, switch on the front fog lamps
and continue the trip with great care. Comply
with local regulations.
Do not perform work/bulb replacement on
xenon headlamps
Have any work on the xenon lighting system, in‐
cluding bulb replacement, performed only by a
service center. Due to the high voltage present
in the system, there is the danger of fatal injuries
if work is carried out improperly.◀
For checking and adjusting headlamp aim,
please contact your BMW center.
Parking lamps and roadside parking lamps,
turn signal lamp
Follow the general instructions on lamps and
bulbs, refer to page 212.
These lights feature LED technology.
Contact your service center in the event of a
malfunction.
Corner-illuminating lamps
Follow the general instructions on lamps and
bulbs, refer to page 212.
The illustration shows the left side of the engine
compartment.Seite 215Replacing componentsMobility215
Online Edition for Part no. 01 40 2 917 522 - II/13
Page 217 of 246

5Outside brake lamp6Rear reflector
Turn signal, outer brake, tail, and
license plate lamps
Follow the general instructions on lamps and
bulbs, refer to page 212.
These lights feature LED technology.
Contact your service center in the event of a
malfunction.
Lamps in the trunk lid
Access to the lamps
1.Remove the three screws using the screw
driver from the onboard vehicle tool kit.2.Fold away the cover.
Inside brake lamp
Follow the general instructions on lamps and
bulbs, refer to page 212.
21-watt bulb, H21W
The illustration shows the position of the bulb in
the installed bulb holder.
Squeeze the clips together and remove the bulb
holder.
Press the bulb into the bulb holder, turn coun‐
terclockwise and remove.
Reversing lamp
Follow the general instructions on lamps and
bulbs, refer to page 212.
16-watt bulb, W16W
The illustration shows the position of the bulb in
the installed bulb holder.
Seite 217Replacing componentsMobility217
Online Edition for Part no. 01 40 2 917 522 - II/13
Page 218 of 246

Squeeze the clips together and remove the bulb
holder.
Pull out the bulb and replace it.
Changing wheels
Notes
The vehicle equipment does not include a spare
tire.
When using run-flat tires or tire sealants, a tire
does not need to be changed immediately in the
event of pressure loss due to a flat tire.
The tools for changing wheels are available as
accessories from your service center.
Jacking points for the vehicle jack
The jacking points for the vehicle jack are lo‐
cated in the positions shown.
Vehicle battery
Maintenance
The battery is maintenance-free, i.e., the elec‐
trolyte will last for the life of the battery.
Your service center will be glad to advise you on
questions regarding the battery.
Battery replacement Use approved vehicle batteries only
Only use vehicle batteries that have been
approved for your vehicle by the manufacturer;
otherwise, the vehicle could be damaged and
systems or functions may not be fully availa‐
ble.◀
After a battery replacement, have the battery
registered on the vehicle by your service center
to ensure that all comfort functions are fully
available and that any Check Control messages
are no longer displayed.
Charging the battery
Note Do not plug chargers into the socket
Do not connect battery chargers to the
factory-installed sockets in the vehicle as this
may damage the battery.◀
General information
Make sure that the battery is always sufficiently
charged to guarantee that the battery remains
usable for its full service life.
The battery may need to be charged in the fol‐
lowing cases:▷When making frequent short-distance
drives.▷If the vehicle is not used for prolonged peri‐
ods, longer than a month.Seite 218MobilityReplacing components218
Online Edition for Part no. 01 40 2 917 522 - II/13
Page 219 of 246

Starting aid terminals
In the vehicle, only charge the battery via the
starting aid terminals, refer to page 222, in the
engine compartment with the engine off.
Power failure
After a temporary power loss, some equipment
needs to be reinitialized.
Individual settings need to be reprogrammed:▷Seat, mirror, and steering wheel memory:
store the positions again.▷Time: update.▷Date: update.▷Radio station: save again.▷Navigation system: wait for the operability of
the navigation.
Disposing of old batteries
Have old batteries disposed of by your
service center or bring them to a recy‐
cling center.
Maintain the battery in an upright position for
transport and storage. Secure the battery so
that it does not tip over during transport.
Fuses
Notes Replacing fuses
Never attempt to repair a blown fuse and
do not replace a defective fuse with a substitute
of another color or amperage rating; this could
lead to a circuit overload, ultimately resulting in
a fire in the vehicle.◀
Plastic tweezers and information on the fuse
types and locations are stored in the fuse box in
the cargo area.
In the glove compartment
Push the handle up, arrow 1, and open the lid,
arrow 2.
In the cargo area
Open the cover on the right side trim.
Information on the fuse types and locations is
found on a separate sheet.
Seite 219Replacing componentsMobility219
Online Edition for Part no. 01 40 2 917 522 - II/13
Page 220 of 246

Breakdown assistanceVehicle equipment
All standard, country-specific and optional
equipment that is offered in the model series is
described in this chapter. Therefore, equipment
is also described that is not available in a vehicle,
e. g., because of the selected optional equip‐
ment or country variant. This also applies for
safety-related functions and systems.
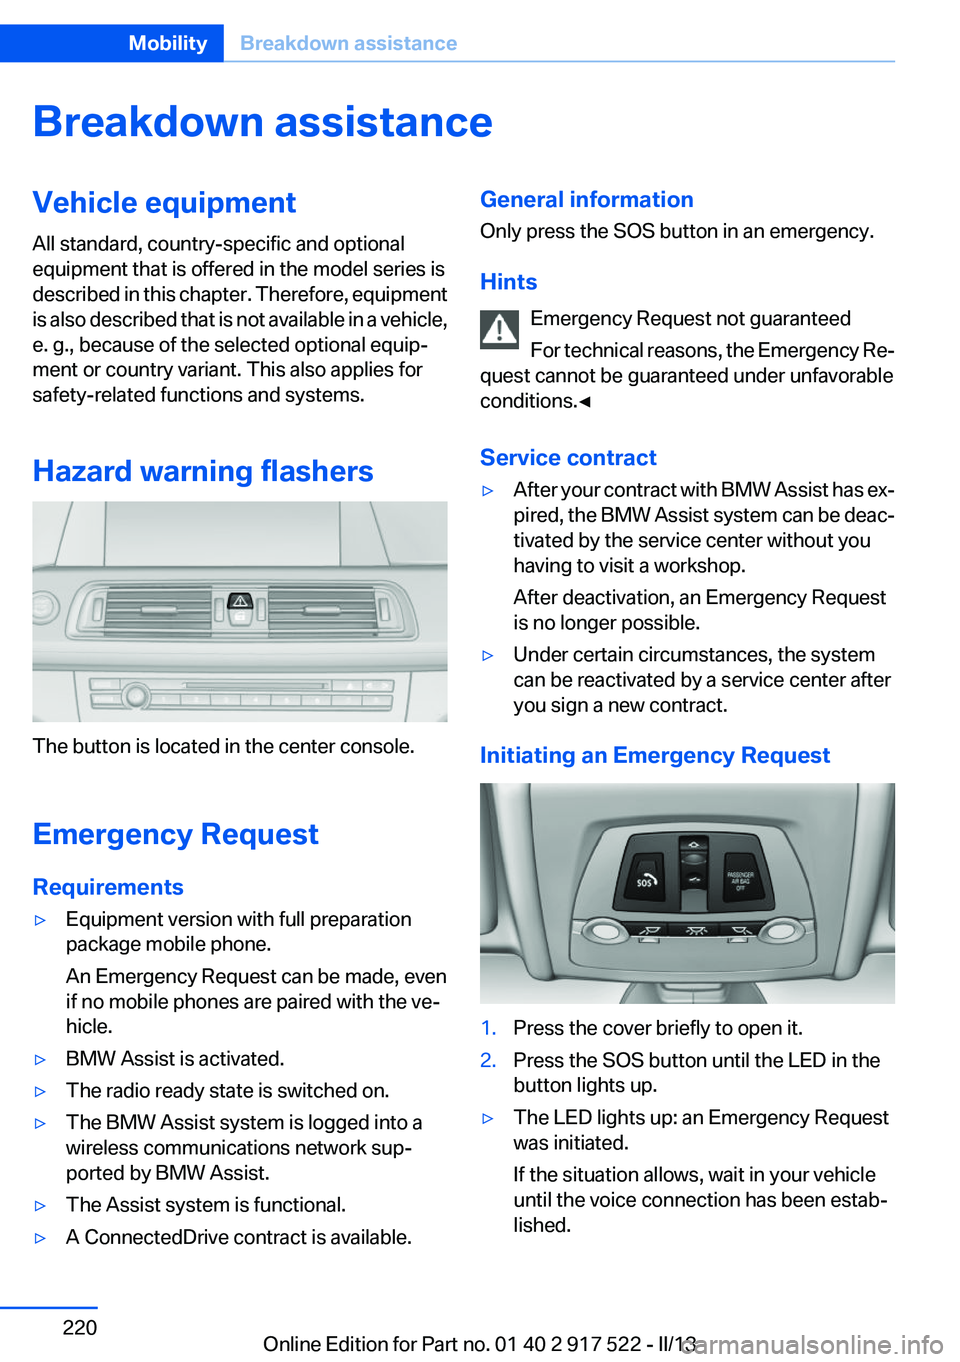
Hazard warning flashers
The button is located in the center console.
Emergency Request
Requirements
▷Equipment version with full preparation
package mobile phone.
An Emergency Request can be made, even
if no mobile phones are paired with the ve‐
hicle.▷BMW Assist is activated.▷The radio ready state is switched on.▷The BMW Assist system is logged into a
wireless communications network sup‐
ported by BMW Assist.▷The Assist system is functional.▷A ConnectedDrive contract is available.General information
Only press the SOS button in an emergency.
Hints Emergency Request not guaranteed
For technical reasons, the Emergency Re‐
quest cannot be guaranteed under unfavorable
conditions.◀
Service contract▷After your contract with BMW Assist has ex‐
pired, the BMW Assist system can be deac‐
tivated by the service center without you
having to visit a workshop.
After deactivation, an Emergency Request
is no longer possible.▷Under certain circumstances, the system
can be reactivated by a service center after
you sign a new contract.
Initiating an Emergency Request
1.Press the cover briefly to open it.2.Press the SOS button until the LED in the
button lights up.▷The LED lights up: an Emergency Request
was initiated.
If the situation allows, wait in your vehicle
until the voice connection has been estab‐
lished.Seite 220MobilityBreakdown assistance220
Online Edition for Part no. 01 40 2 917 522 - II/13
Page 221 of 246

▷The LED flashes when a connection to the
BMW Response Center has been estab‐
lished.
When the emergency request is received at
the BMW Response Center, the BMW Re‐
sponse Center contacts you and takes fur‐
ther steps to help you.
Even if you are unable to respond, the BMW
Response Center can take further steps to
help you under certain circumstances.
For this purpose, data that are used to de‐
termine the necessary rescue measures,
such as the current position of the vehicle if
it can be established, are transmitted to the
BMW Response Center.▷If the LED is flashing but the BMW Response
Center cannot be heard on the hands-free
system, the hands-free system may be mal‐
functioning. However, the BMW Response
Center may still be able to hear you.
Initiating an Emergency Request
automatically
Under certain conditions, an Emergency Re‐
quest is automatically initiated immediately after
a severe accident. Automatic Collision Notifica‐
tion is not affected by pressing the SOS button.
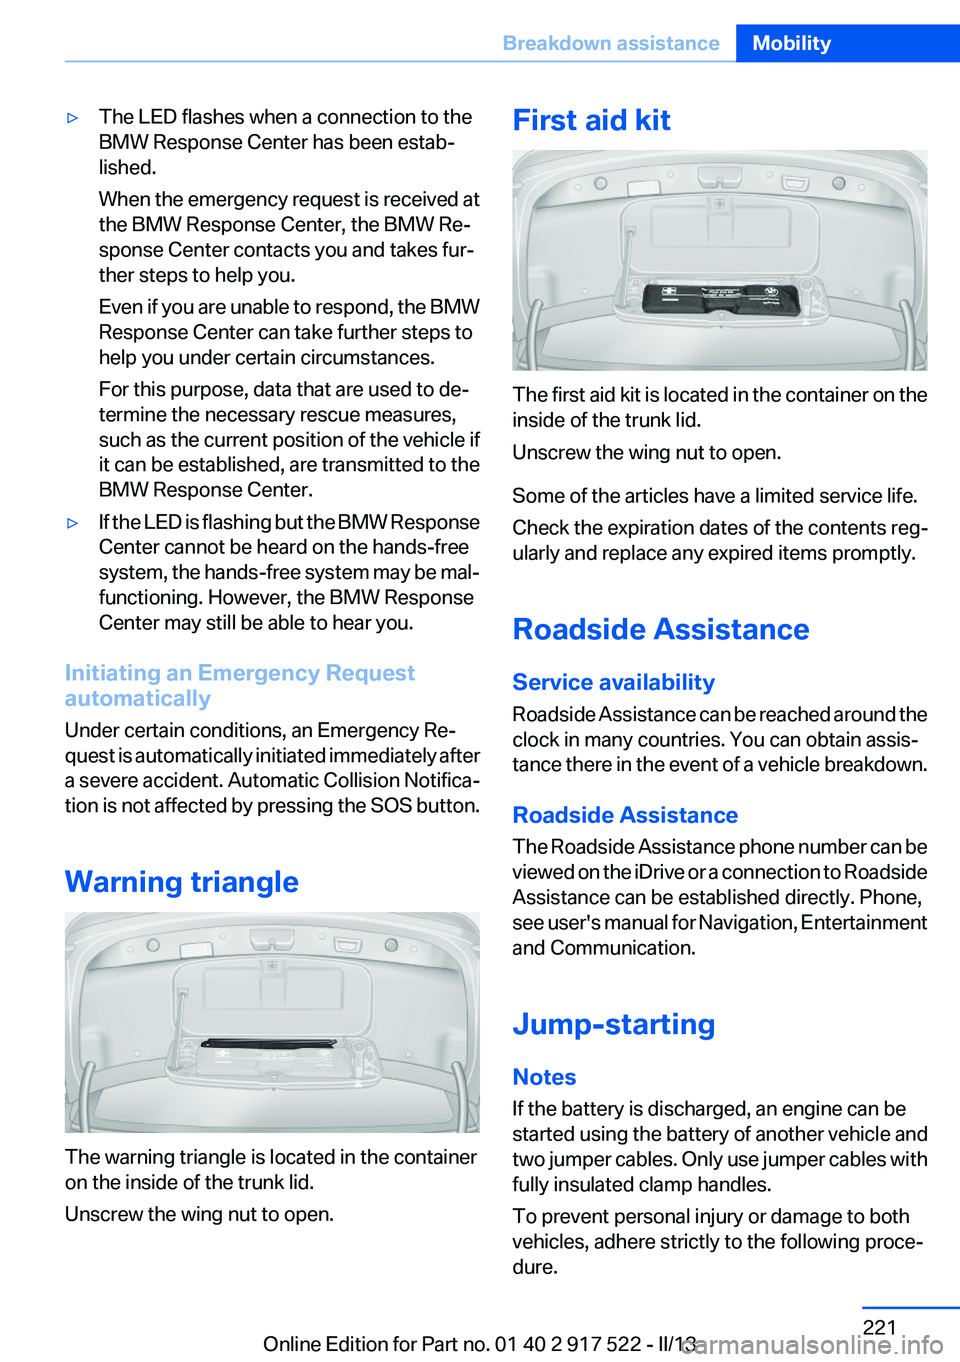
Warning triangle
The warning triangle is located in the container
on the inside of the trunk lid.
Unscrew the wing nut to open.
First aid kit
The first aid kit is located in the container on the
inside of the trunk lid.
Unscrew the wing nut to open.
Some of the articles have a limited service life.
Check the expiration dates of the contents reg‐
ularly and replace any expired items promptly.
Roadside Assistance
Service availability
Roadside Assistance can be reached around the
clock in many countries. You can obtain assis‐
tance there in the event of a vehicle breakdown.
Roadside Assistance
The Roadside Assistance phone number can be
viewed on the iDrive or a connection to Roadside
Assistance can be established directly. Phone,
see user's manual for Navigation, Entertainment
and Communication.
Jump-starting
Notes
If the battery is discharged, an engine can be
started using the battery of another vehicle and
two jumper cables. Only use jumper cables with
fully insulated clamp handles.
To prevent personal injury or damage to both
vehicles, adhere strictly to the following proce‐
dure.
Seite 221Breakdown assistanceMobility221
Online Edition for Part no. 01 40 2 917 522 - II/13
Page 223 of 246

3.Let both engines run for several minutes.4.Disconnect the jumper cables in the reverse
order.
Check the battery and recharge if necessary.
Tow-starting and towing
Automatic transmission: transporting
your vehicle
Note
Your vehicle is not permitted to be towed.
Therefore, contact a service center in the event
of a breakdown.
Do not have the vehicle towed
Have your vehicle transported on a loading
platform only; otherwise, damage may occur.◀
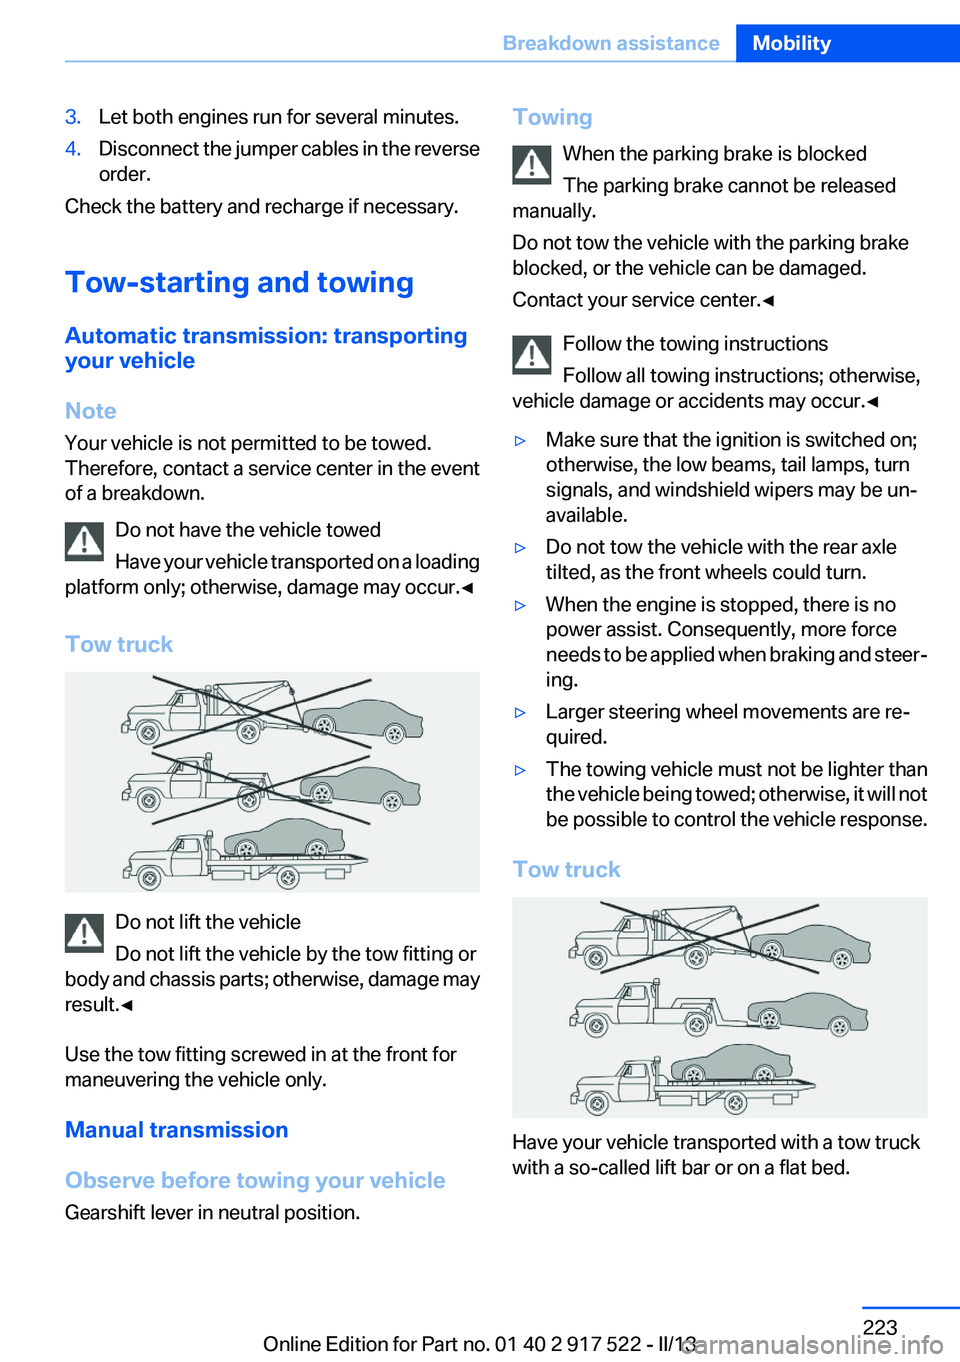
Tow truck
Do not lift the vehicle
Do not lift the vehicle by the tow fitting or
body and chassis parts; otherwise, damage may
result.◀
Use the tow fitting screwed in at the front for
maneuvering the vehicle only.
Manual transmission
Observe before towing your vehicle
Gearshift lever in neutral position.
Towing
When the parking brake is blocked
The parking brake cannot be released
manually.
Do not tow the vehicle with the parking brake
blocked, or the vehicle can be damaged.
Contact your service center.◀
Follow the towing instructions
Follow all towing instructions; otherwise,
vehicle damage or accidents may occur.◀▷Make sure that the ignition is switched on;
otherwise, the low beams, tail lamps, turn
signals, and windshield wipers may be un‐
available.▷Do not tow the vehicle with the rear axle
tilted, as the front wheels could turn.▷When the engine is stopped, there is no
power assist. Consequently, more force
needs to be applied when braking and steer‐
ing.▷Larger steering wheel movements are re‐
quired.▷The towing vehicle must not be lighter than
the vehicle being towed; otherwise, it will not
be possible to control the vehicle response.
Tow truck
Have your vehicle transported with a tow truck
with a so-called lift bar or on a flat bed.
Seite 223Breakdown assistanceMobility223
Online Edition for Part no. 01 40 2 917 522 - II/13
Page 228 of 246

Clean light-colored leather more frequently be‐
cause soiling on such surfaces is substantially
more visible.
Use leather care products; otherwise, dirt and
grease will gradually break down the protective
layer of the leather surface.
Suitable care products are available from the
service center.
Upholstery material care
Vacuum regularly with a vacuum cleaner.
If they are very dirty, e.g., beverage stains, use a
soft sponge or microfiber cloth with a suitable
interior cleaner.
Clean the upholstery down to the seams using
large sweeping motions. Avoid rubbing the ma‐
terial vigorously.
Damage from Velcro® fasteners
Open Velcro® fasteners on pants or other
articles of clothing can damage the seat covers.
Ensure that any Velcro® fasteners are closed. ◀
Caring for special components
Light-alloy wheels
Use wheel cleaner, particularly during the winter
months. Do not use aggressive, acidic, strongly
alkaline or abrasive cleaners, or steam jets
above 140 ℉/60 ℃; follow the manufacturer's
instructions.
Chrome surfaces
Carefully clean components such as the radiator
grille or door handles with an ample supply of
water, possibly with shampoo added, particu‐
larly when they have been exposed to road salt.
Rubber components
Aside from water, treat only with rubber cleans‐
ers.
When cleaning rubber seals, do not use any sil‐
icon-containing car care products in order to
avoid damage or reduced noise damping.Fine wood parts
Clean fine wood facing and fine wood compo‐
nents only with a moist rag. Then dry with a soft
cloth.
Plastic components
These include:▷Imitation leather surfaces.▷Headliner.▷Lamp lenses.▷Instrument cluster cover.▷Matte black spray-coated components.▷Painted parts in the interior.
Clean with a microfiber cloth.
Lightly dampen the cloth with water.
Do not soak the headliner.
Do not use cleansers that contain alcohol
or solvents
Do not use cleansers that contain alcohol or sol‐
vents, such as lacquer thinners, heavy-duty
grease removers, fuel, or such; this could lead to
surface damage.◀
Safety belts
Dirty belt straps impede the reeling action and
thus have a negative impact on safety.
Chemical cleaning
Do not clean chemically; this can destroy
the webbing.◀
Use only a mild soapy solution, with the safety
belts clipped into their buckles.
Do not allow the reels to retract the safety belts
until they are dry.
Carpets and floor mats No objects in the area around the pedals
Keep floor mats, carpets, and any other
objects out of the area of motion of the pedals;
otherwise, the function of the pedals could be
impeded while driving
Seite 228MobilityCare228
Online Edition for Part no. 01 40 2 917 522 - II/13